Posted in Model Building Tips

Elcano Ship Model Instructions (IV): Finish Building the Spanish Training Ship with Our Latest Video Tutorials!

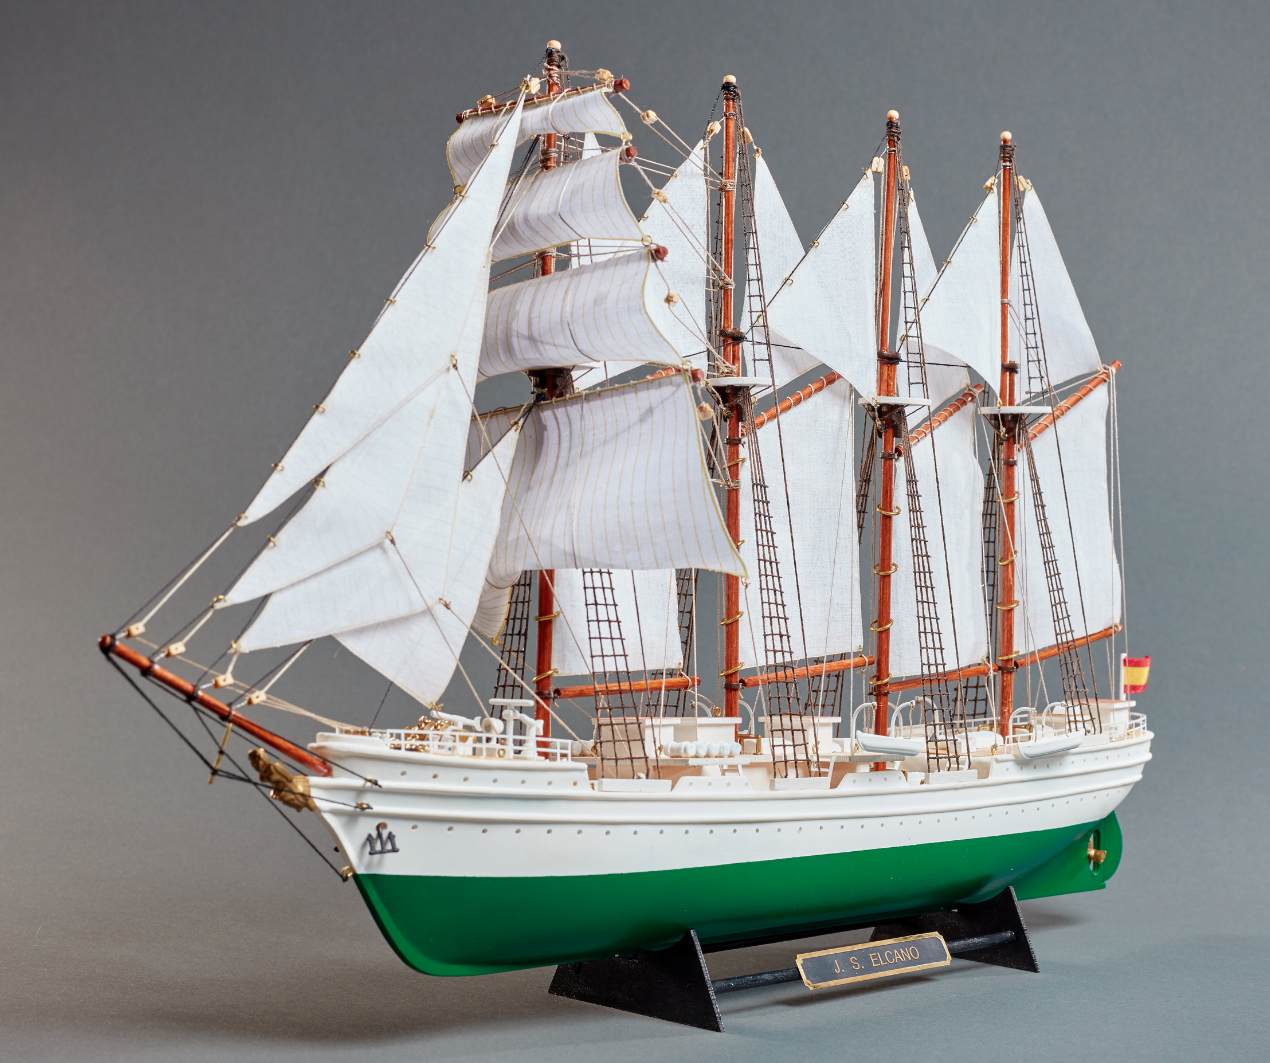
We dive into the last part of the Elcano ship model instructions for its assembly. With these video tutorials made by our modelers, we put the finishing touch to the set up of the Spanish school ship model Juan Sebastián Elcano / Chilean Esmeralda (22260) at 1:250 scale. As we mentioned before, it is a faithful miniature replica excellent for beginners on the hobby of naval modeling.

ELCANO SHIP MODEL INSTRUCTIONS: SAILS (PART III – A)

We continue with ‘Sails – Part III’, which is Step 21 of the instructions for assembling the Elcano ship model (22260).

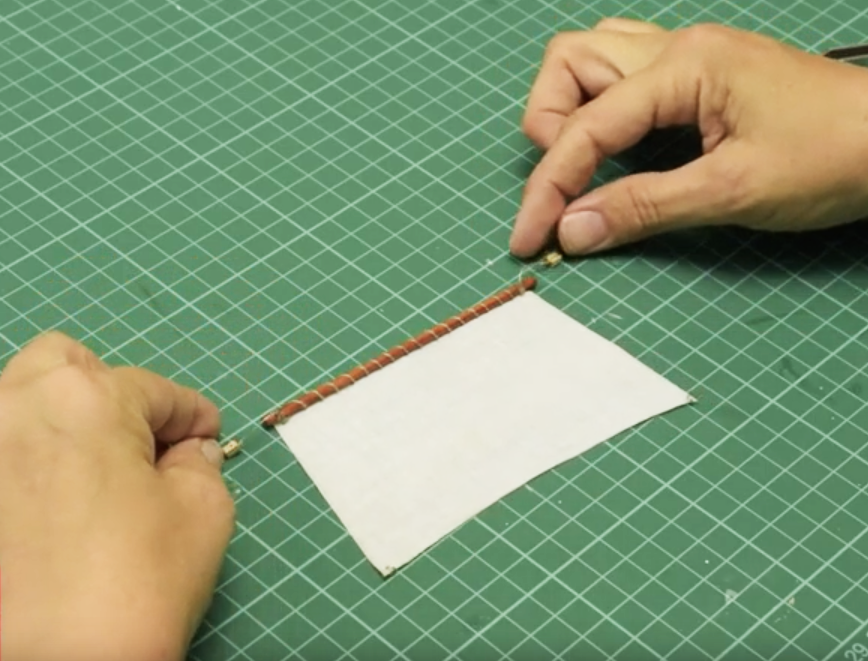
Arrange one unit of parts S7, S8, S9 and S10, that is, more sails. Take part S7, and sew it with a needle cotton threadpart CT1– around the stick part Y1, from top to bottom. When you finish sewing, help yourself with some Straight Fastening Tweezers (27020) to tie the knot on the stick.

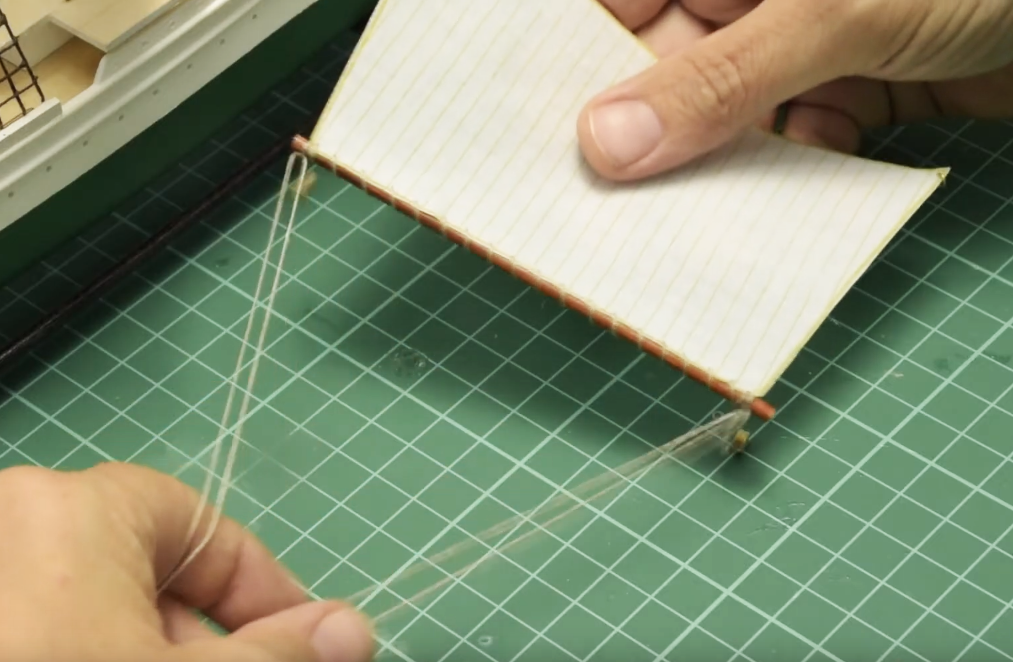
Now, with a cutter, drill two small holes in the two opposite corners of the stick. Insert the two BR1 parts -two rings- into these. Take a part BL and thread -part CT1-. Put the thread through the hole and around part BL. Tie a knot at the end with the help of the aforementioned tweezers. The thread should be fully stretched through the hole and around the part BL. Apply Dense Cyanoacrylate for Porous Materials on the knot and allow to dry.

Next, you will have excess thread on both sides of the knot. First, completely cut one of the threads, while the other leave a few centimeters long. Don’t cut it all the way. Second, also using the tweezers, tie that thread with the BL part to the left side of the stick and tie the knot with cyano. Third, if there is excess thread, remove it with a cutter. Repeat all these actions on the other end of the stick with another BL part.

The result should be this:

Elcano Ship Model Instructions for its Assembly (22260). Artesanía Latina.

ELCANO SHIP MODEL INSTRUCTIONS: SAILS (PART III – B)

Then go through the entire process again with the other SAILS. For the sail part S8, you will need one Y2 part, two BR1 parts and two BL parts. For the part S9, one Y3 part, two BR1 parts and two BL parts. And for the S10, one part Y4, two parts BR1 and four parts BL. Take again the sail part S7 and thread part CT1. At one end of the stick, tie a knot with plenty of thread left over from both sides. Apply cyano and let dry. Repeat the process on the other end of the stick.

Elcano Ship Model Instructions for its Assembly (22260). Artesanía Latina.

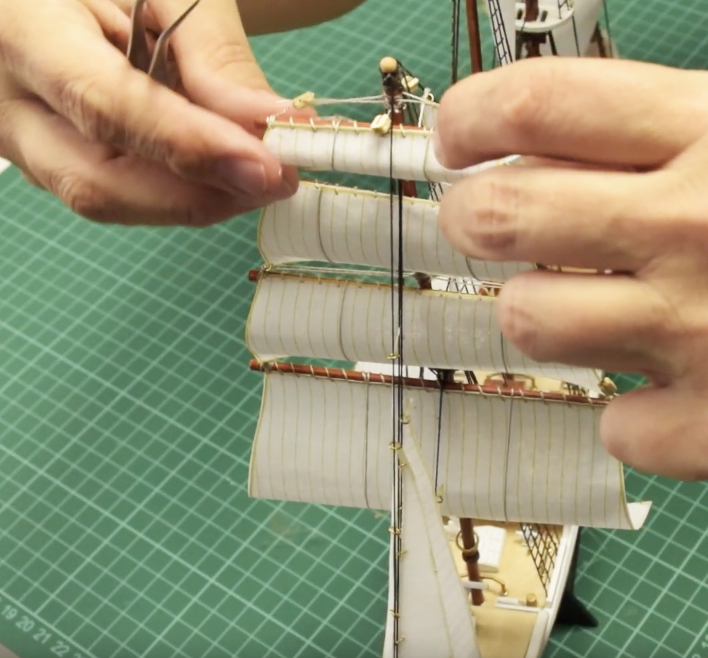
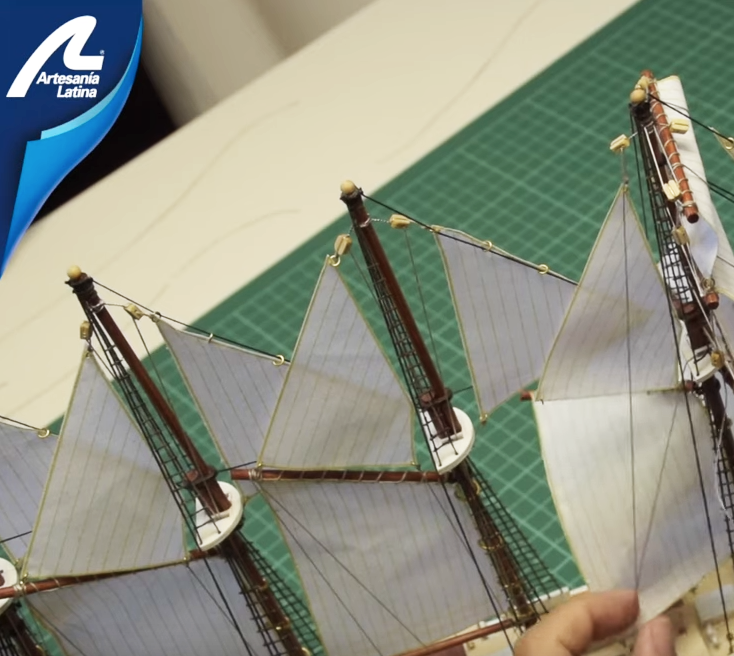
Take the S7 sail. Use a Curved Fastening Tweezers (27021) to pass the thread -part CT1- with a needle above the mast top, as seen on the video. The goal is the sail can be already hanging on its mast. Make the knots as shown, apply a little of cyano and cut the excess thread with the Thread Snips (27060). The sail already stays in place.

Repeat the process with the S8 sail. Once hung, it has to be attached to the S7 sail with thread. Tie them by means of the two BR1 parts that are on the sail. Passing the CT1 thread through the BR1 ring and, right after, tie it to the end of the stick. Repeat the process also for the other end of the pole with the other BR1 ring.

Do the same with the S9 sail, but this time tying it to the S8 sail. And finally, with the S10 sail, knotting it to the S9. This should be the final look with all the sails in place.

Elcano Ship Model Instructions for its Assembly (22260). Artesanía Latina.

ELCANO SHIP MODEL INSTRUCTIONS: SAILS (PART IV – A)

Well, it’s time for the next task. Step 22 of the assembly instructions for the ship model Elcano (22260). This one is about ‘Sails – Part IV’.

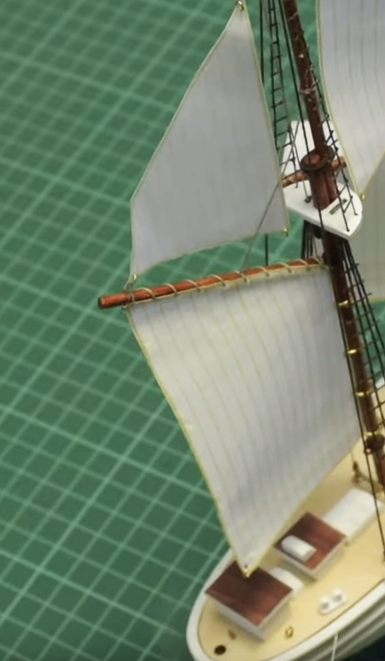
Take the four sails parts S11. Now take one and, using a utility knife, drill three holes in each of the three corners of the sail. Then, insert one of the three parts BR1 -rings- into each hole. Open each part BR1 with two Needle Nose Pliers (27213) and insert the ring through the sail. After inserting it, close it again using the aforementioned pliers. As we have discussed, repeat the process with the other three sails.

Again, take a sail part S11. Insert thread through the BR1 ring found on the most pointed part of the sail, at the top and tie a knot. Cut the excess of one of the ends of the thread and pass the other end through the mast. Then bring the thread to the hull, tighten it, tie it off and glue it with cyano. Watch the video for it.

Now, thread CT1 through the outermost ring BR1. Begin to tie a knot and leave a hole to insert it into the bottom sail pole. Insert into the stick and close the knot. Do the same with more thread through the remaining BR1 ring, the third one, the one closest to the mast. In this sense, the sail part S11 will be attached to the lower sail.

Elcano Ship Model Instructions for its Assembly (22260). Artesanía Latina.

ELCANO MODEL SHIP INSTRUCTIONS: SAILS (PART IV – B)

Below that bottom sail, place a PCL part. Bend the wire that has the stick on it and attach it to the mast. Use the pliers to twist the wire around the mast.

Take CT1 thread and pass it through the eye of the BR1 part of that lower sail to make a knot and pass it through the PCL stick. The sail will be attached to the mast. Remember to apply cyano to all the knots you make.

Thread CT1 through the ring on the hull and tie it to the stick so that it is taut. The rest of the thread, pass it through the mast top and tie it to the deck. Take a look at the video to run this process, which you will need to repeat for the other three sails.

Elcano Ship Model Instructions for its Assembly (22260). Artesanía Latina.

ELCANO SHIP MODEL INSTRUCTIONS: SAILS (PART V)

Step 23 of Elcano ship model instructions (22260) for the assembly of Spanish school ship, is about the ‘Sails – Part V’. You need to pay close attention to the video so that you can build the rest of the sails.

JUAN SEBASTIAN ELCANO MODEL SHIP: DECKS (PART III – A)

We continue with Step 24 of the Elcano ship model instructions for its assembly. This is about ‘Decks – Part III’.

Take two M8 parts and glue them parallel to the foredeck as shown on the video. Next, take ten units of the part DM4. With the help of cyano and grip pliers, take five of these and glue each one next to the other on the deck area shown. Then turn the boat 180º and do the same for the other five on the other side of the deck.

Once this task is done, take a Stainless Steel Ruler 150 mm (27069). Use it to mark with a pencil on the edge of the hull two points with an equidistance of 18 mm. From each of these two points, with the ruler, measure and mark two points 6 mm inside the deck. Drill with a small hand drill at the two points marked on the deck.

Take an M6 part. Apply a drop of cyano and insert it with tweezers into one of the two holes made. Repeat the process with another M6 part and insert it into the other deck hole.

JUAN SEBASTIAN ELCANO MODEL SHIP: DECKS (PART III – B)

It is time to use thread part CT2 for the placement of part P2, previously painted with Off-White Acrylic Paint (27702). First, thread the thread through the two holes in part P2. Second, take the other end of the thread and feed it through an M6 part. Do the same with the other end. When you are inserting the two ends of the thread into each M6 part, insert them from the outside to the inside.

Next, make a knot in each of the two inserted ends so that the part P2 does not come loose. Apply a little cyano to each one. Repeat the process on the opposite side of the boat.

Elcano Ship Model Instructions for its Assembly (22260). Artesanía Latina.

JUAN SEBASTIÁN ELCANO ASSEMBLY: HANDRAILS AND PROPELLER

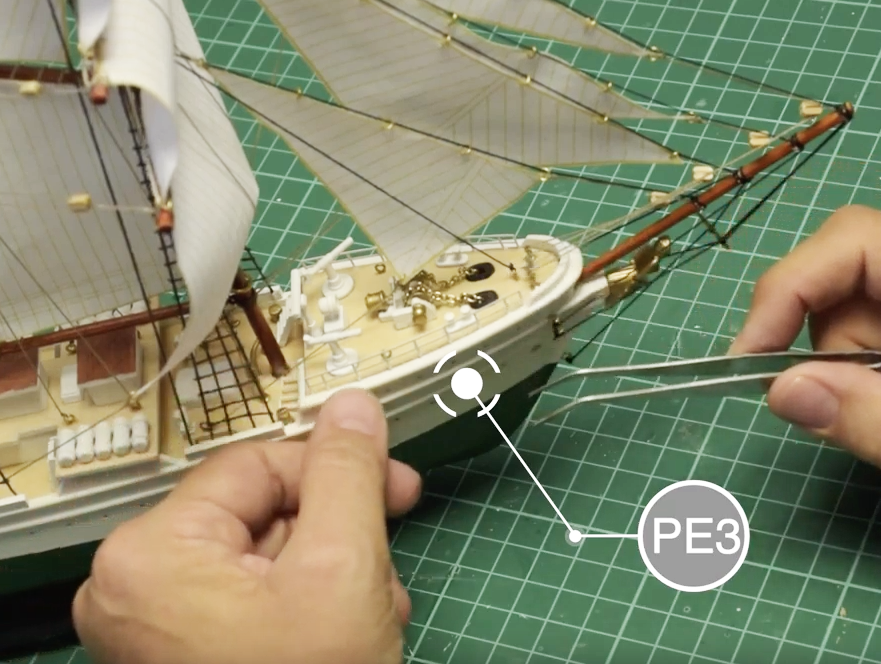
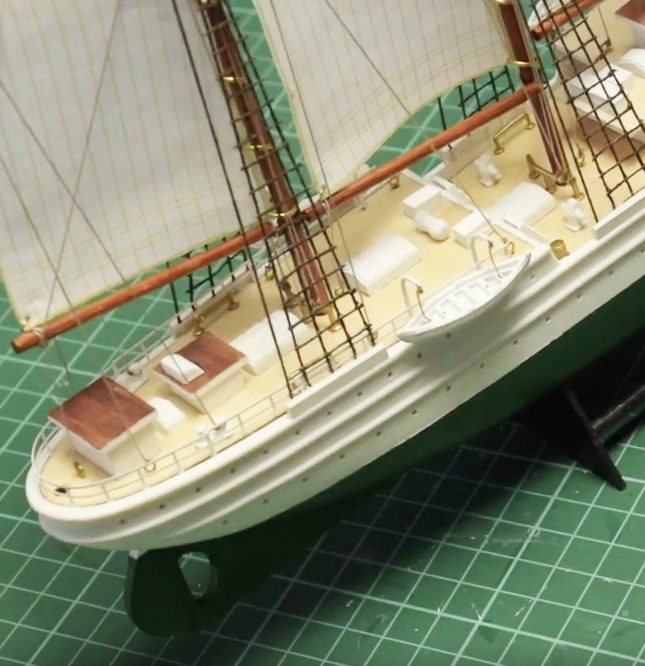
The ‘Handrails and Propeller’ is Step 25 of the video tutorial for building the model of the Elcano ship. Take two PE3 parts, previously painted with off-white paint. Apply cyano to each of the tips of the base that will be inserted. Place each of the two PE3 parts on the edge of the hull and the deck with the help of a Curved Fastening Tweezers (27021). There are two in the bow.

Elcano Ship Model Instructions for its Assembly (22260). Artesanía Latina.

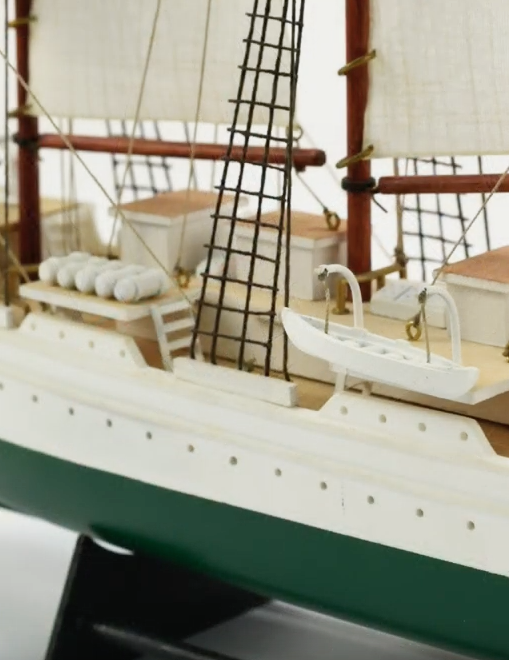
Then, take a PE4 part, also previously painted with off-white colour. Bend it with your hands so that it takes on the curved shape of the stern. Once you have the shape, apply cyano to each of the corners and glue the part with both hands to the edge of the deck. Take another PE4 part and tack it right next to the one you placed earlier. Put it behind the lifeboat. Repeat the process on the other side of the hull.

Elcano Ship Model Instructions for its Assembly (22260). Artesanía Latina.

Finally, the part M11 -propeller- enters the scene. Apply cyano to the tip to be inserted and place it with your hands and a pair of tweezers on the hull.

JUAN SEBASTIÁN ELCANO ASSEMBLY: LAST DETAILS TO FINISH (PART I)

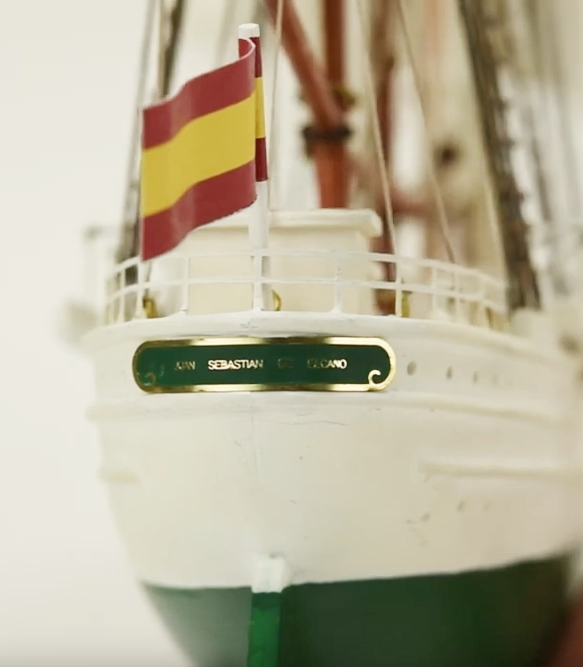
We continue with the final step of the Elcano ship model instructions for its assembly with the ‘Last Details’, which is Step 26. Arrange a unit of the part WD3 with a diameter of 2×35 mm, previously painted off-white. Later, take the part FL1 -Spanish flag- and with the help of a cutter, remove the sticker protector.

Place the center of the sticker -it has a stripe drawn- on the stick and close the sticker with your hands and the handle of a scalpel cutter until both sides of the flag stick together. Stick it in the hole in the aft deck provided for it.

It is the turn of the part PE5 Elcano / PE6 Esmeralda -metal sheet with the name of the ship-. First, paint it with Hull Green Colour (27751). Then, sand the entire edge of the sheet with a utility cutter until you can see the metal of the sheet. Apply cyano and glue it to the stern of the boat, just below the flag.

JUAN SEBASTIÁN ELCANO ASSEMBLY: LAST DETAILS TO FINISH (PART II)

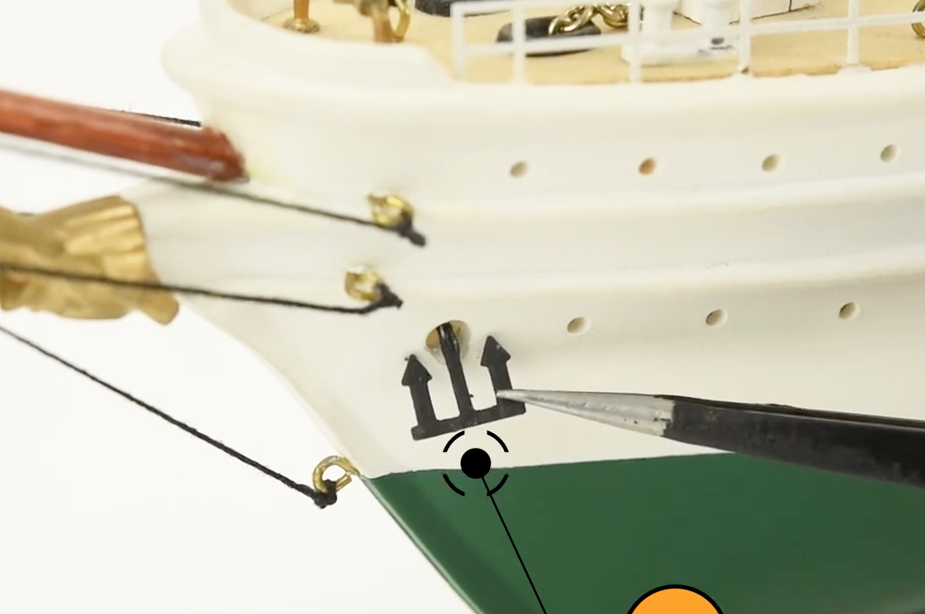
Now, take the two parts M17 -anchors-, previously painted with Off-Black Colour (27703). Place them into the two holes provided for this with the help of tweezers and a few drops of cyano. Finally, there is the part PE7 / PE8 -name of the ship for the base-. Also paint it with off-black colour, sand the edges with a cutter until you see the metal part and, with cyano, glue it to the exhibition base.

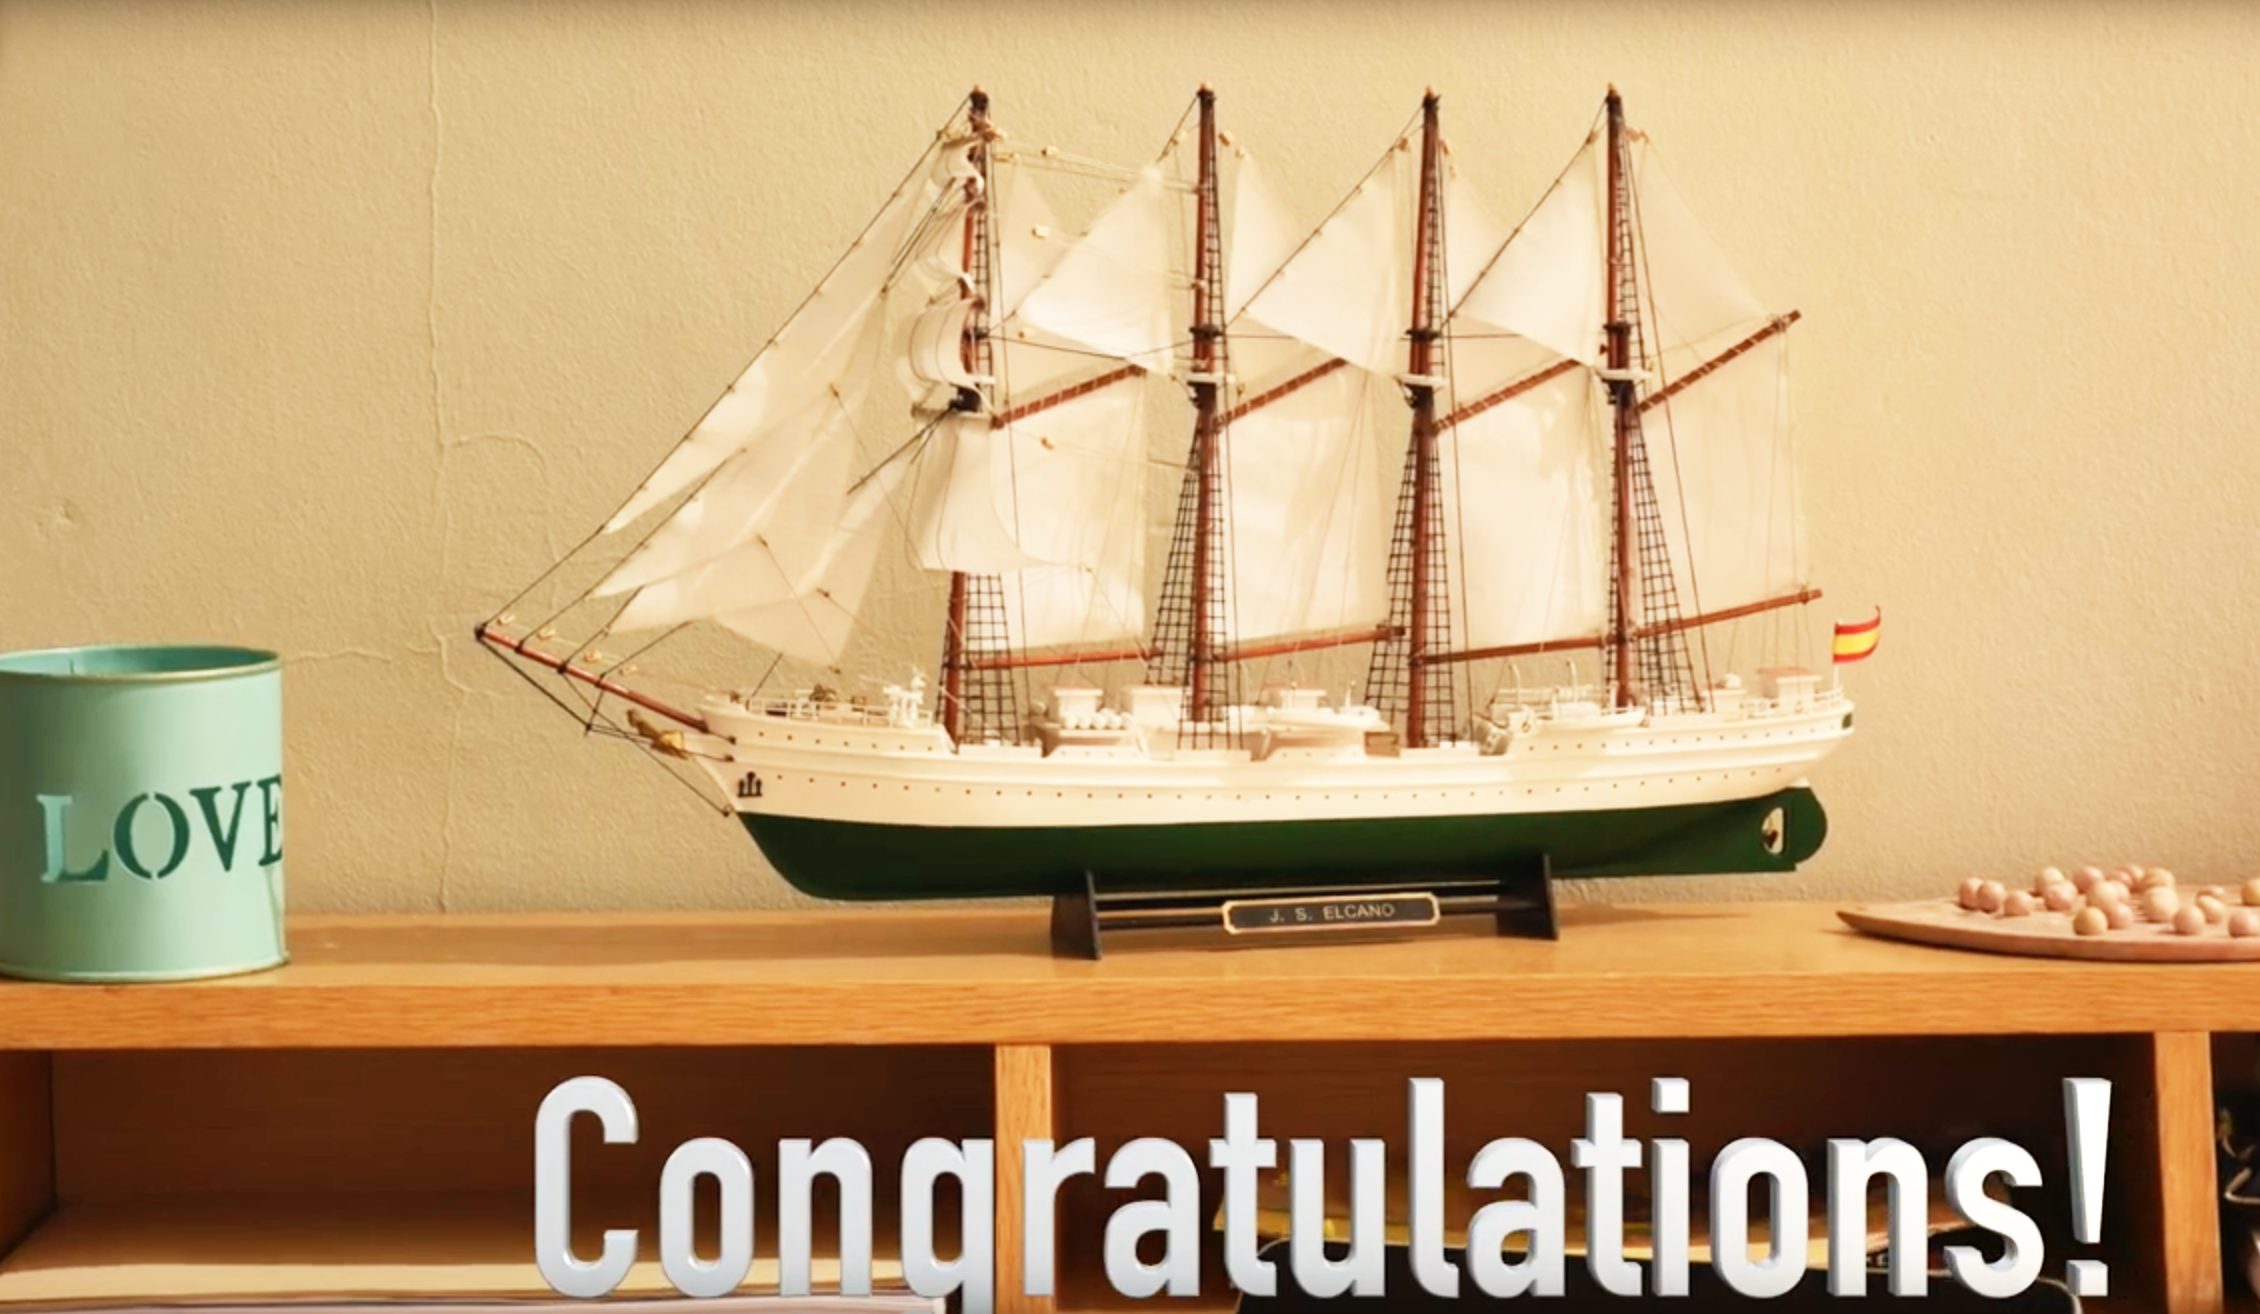
You have just finished building the wonderful model of the training ship Juan Sebastián Elcano / Esmeralda (22260)! Congratulations!
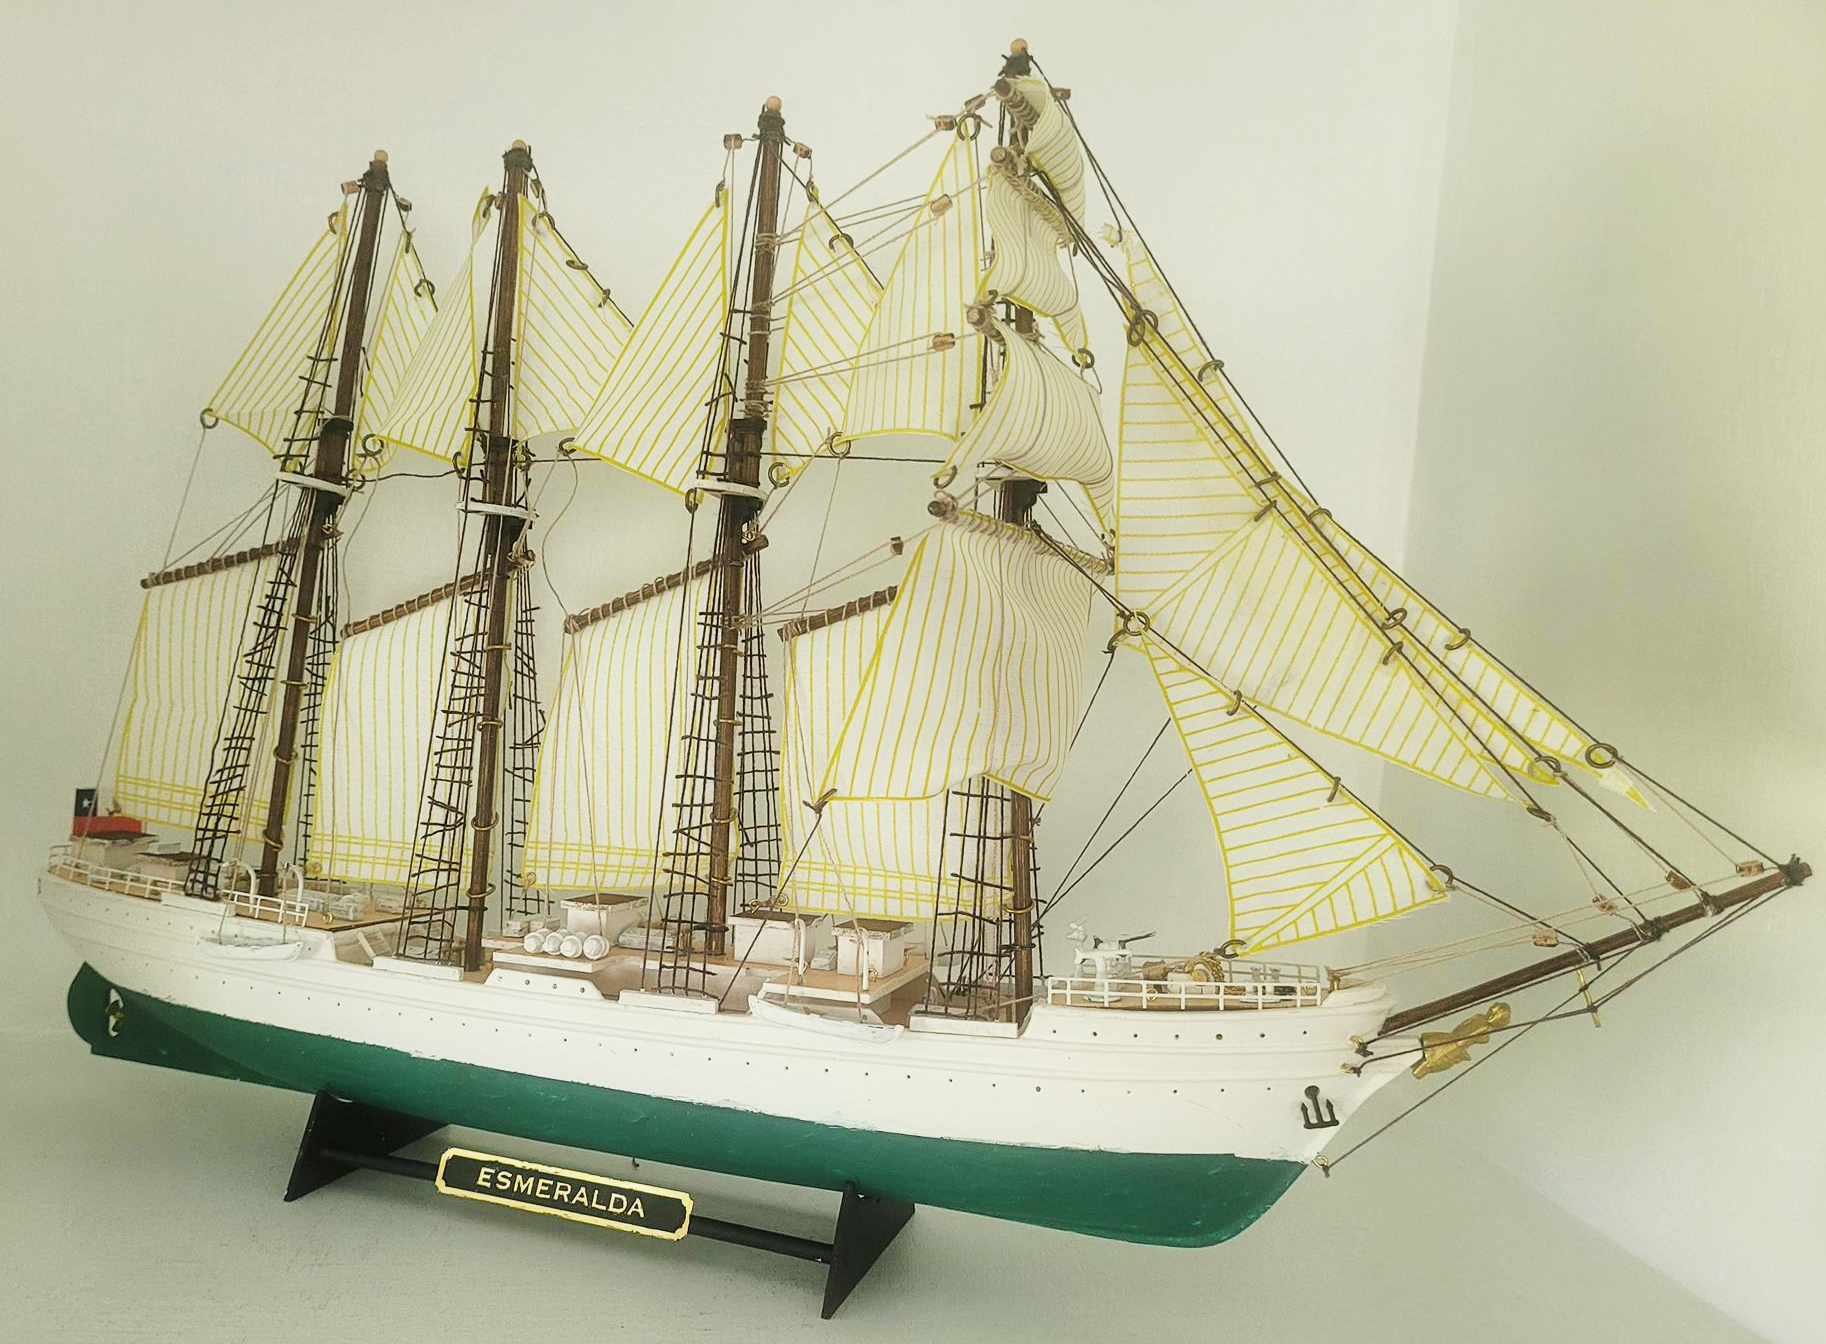
Model Ship Elcano / Esmeralda Built by our modeling friend Girish Khandagale.

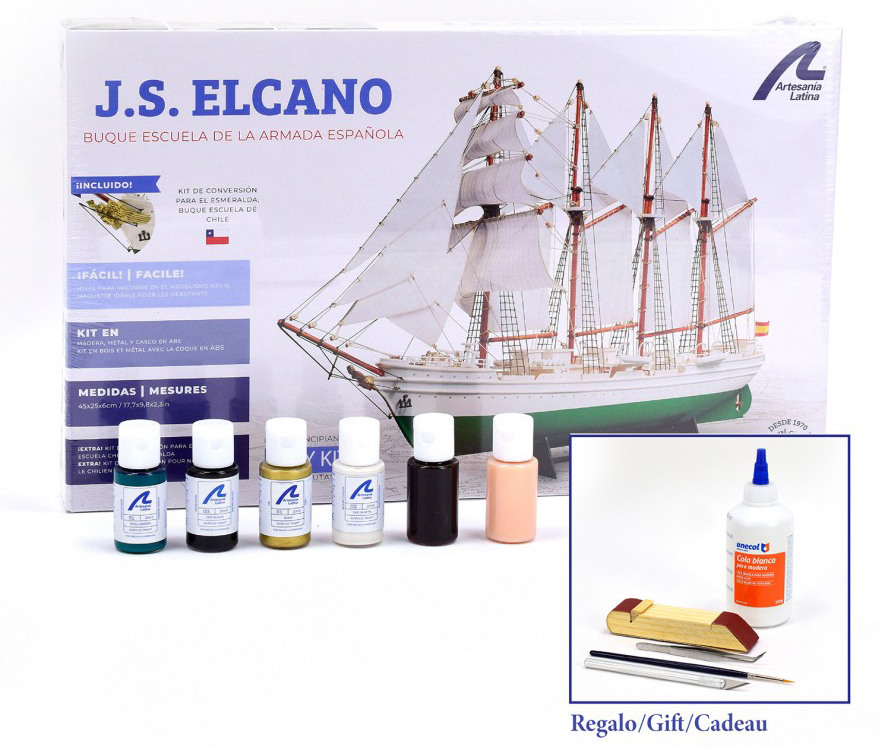
We remind you that you can also purchase the Elcano Gift Pack (22260L), which includes the kit with the schooner sailboat, its paints and some tools. It has a lower price than if the products are purchased separately. Elcano Gift Pack with the Model, its Paints and some Tools (22260L) by Artesanía Latina.
Read the third part of the post…

Posted in Modeling Tools & Accessories

Modeling and Crafts Glues: White Glue and Cyanoacrylate for Porous Materials

There are many occasions when our modelers friends ask us what adhesives and glues for modeling and crafts to use. Even more, when they are assembling one of our model boats and model planes made of wood. Well, the time has come in this blog post to talk about it. If you want your parts are completely united with the best results, there is no doubt, the glues made by Artesanía Latina are at the forefront.

Next, we indicate you which are the glues for modeling and crafts that you can obtain on our website, pay attention.

GLUES FOR MODELING AND CRAFTS: WHITE GLUE

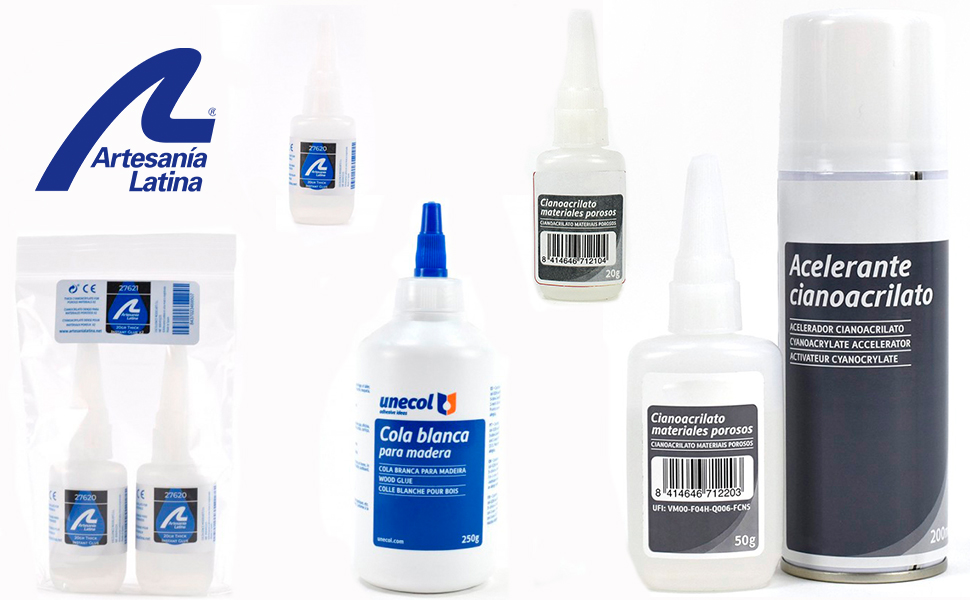
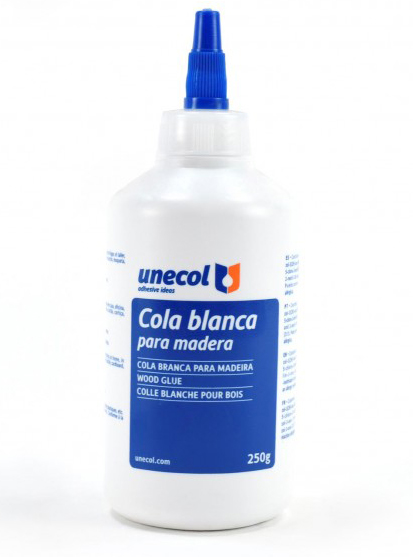
The first option you have is white glue for wood and porous materials (27602). Presented in a 250 gr bottle, it is one of the so-called easy-to-apply vinyl adhesives. It dries quickly -by having a short drying time- and you can use it on porous materials such as wood, cardboard, carpet, cork, fabrics and tablex. Its texture is creamy.

Glues for Modeling and Crafts: White Glue for Wood and Porous Materials (27602) made by Artesanía Latina.

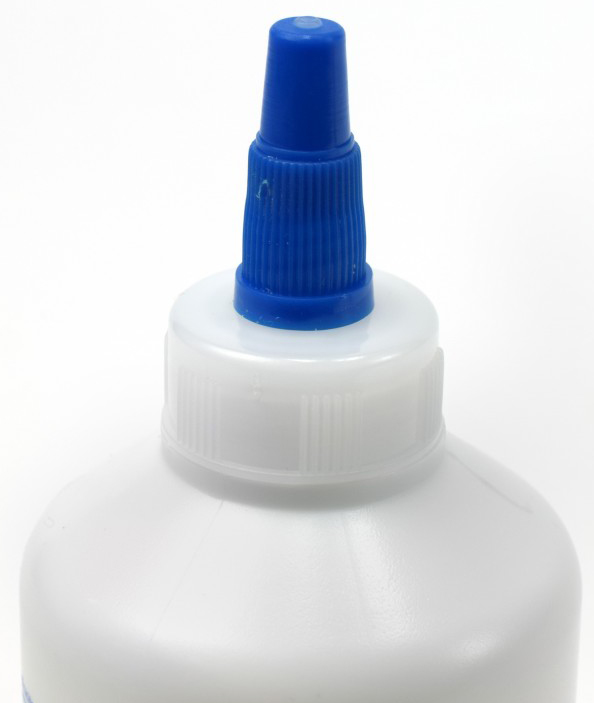
It comes with a nozzle for easy opening and closing, thus avoiding any type of spillage or the white glue for wood from drying out. Also, if you have traces of this adhesive on your skin, don’t worry, it is not inconvenient for the skin. And if the glue smells too much, neither, because Artesanía Latina’s white vinyl glue does not release toxic fumes.

White Glue for Wood and Porous Materials (27602) made by Artesanía Latina.

As for its uses, it can be used, as we discussed, when you are building models made of wood and making crafts such as sewing and fashion, cork and rubber creations, and an endless number of other tasks and hobbies. In this sense, we recommend that if you apply the glue with a brush, keep it moist in water.

GLUES FOR MODELING AND CRAFTS: CYANOACRYLATE FOR POROUS MATERIALS 50 GR. AND SPRAY ACCELERATOR

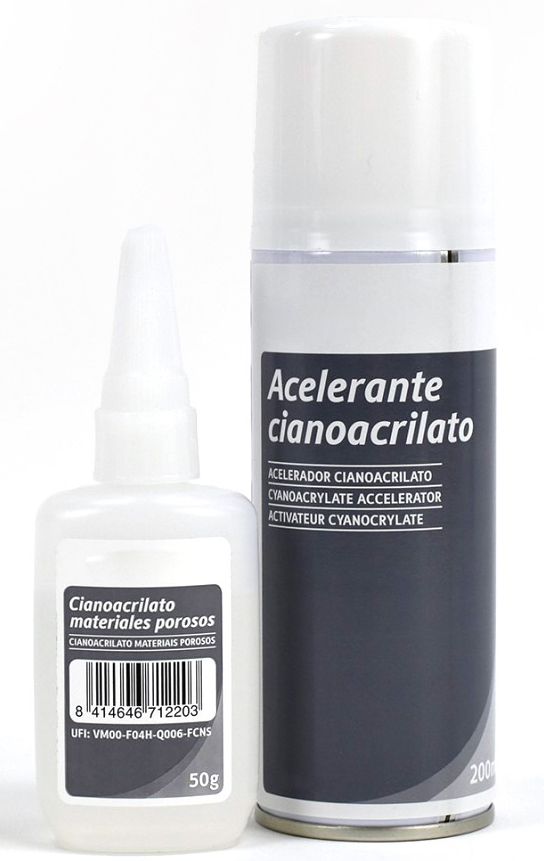
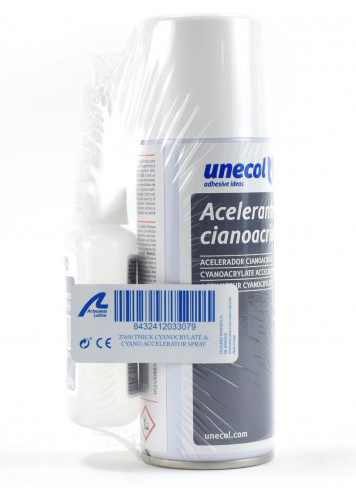
Another of the fantastic glues for modeling and crafts. When you require even faster drying than white glue, this is your option. The set with the dense cyanoacrylate bottle and its 50 gr. of product and with the cyanoacrylate accelerator spray of 200 ml (27602) by Artesanía Latina. The adherence you will obtain is maximum and instantaneous!

Glues for Modeling and Crafts. Set of Cyanoacrylate for Porous Materials and Accelerator Spray (27650) made by Artesanía Latina.

It is perfect for gluing wood and other porous materials such as cardboard, carpet, cork, fabrics and tablex. The dense cyanoacrylate has a nozzle for easy opening and closing, thus preventing any type of spillage or that the cyanoacrylate itself dries up. And a cannula for its measured and precise application. It is also important to note that our cyanoacrylate does not have solvents.

Being a dense cyanoacrylate and slower drying compared to other cyanoacrylates, the accelerator is essential as it makes the glue dry more quickly. Before using it in your activity, we recommend that you test it.

1. Put a drop of dense cyanoacrylate on the two parts to be glued.

2. Next, apply the cyano accelerator spray to one of the two parts to be joined and wait for the product to evaporate.

3. At that instant, put the two parts together. Be careful because as soon as you stick them they will not be able to detach from each other.

Set of Cyanoacrylate for Porous Materials and Accelerator Spray (27650) made by Artesanía Latina.Store and protect the dense cyanoacrylate bottle for better conservation in a place out of direct sunlight, dry and with a cool temperature. Wash your hands repeatedly with lukewarm water in case they get stuck with the product.

CYANOACRYLATE FOR POROUS MATERIALS 20 GR.

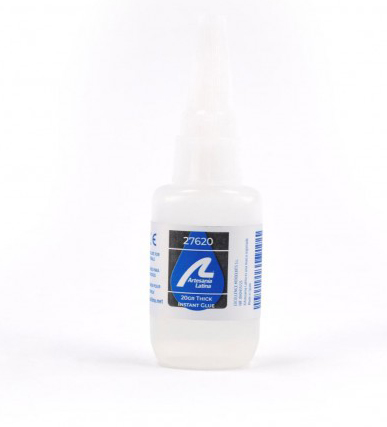
Another novelty in terms of glues for modeling and crafts is the bottle of dense cyanoacrylate 20 gr. (27620) by Artesanía Latina. This is an easy-to-apply glue and is used to achieve instant joining of parts. Ideal for gluing wood and other porous materials such as cardboard, carpet, cork, fabrics and tablex. The jar has a spout for easy opening and closing, thus avoiding spills or drying of the product.

Glues for Modeling and Crafts: Cyanoacrilate for Porous Materials 20 gr. (27620) made by Artesanía Latina.

SET OF 20 GR. JARS WITH CYANOACRILATE FOR POROUS MATERIALS (x2)

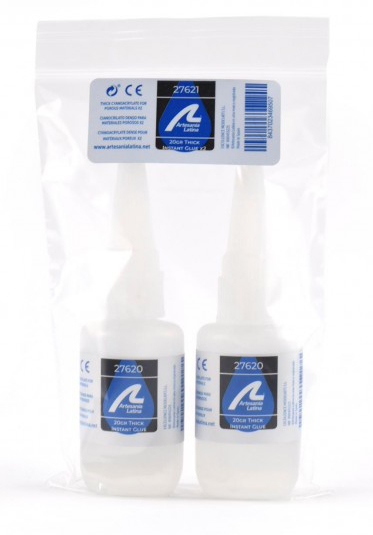
New! In 2023, we have created this pack thinking about our customer friends who use adhesives a lot for modeling and crafts tasks. The set with 2 bottles of cyanoacrylate dense (27621) of 20 gr. each one -40 gr in total- made by Artesanía Latina brings this magnificent glue that is easy to apply for instant union of pieces. Glues for Modeling and Crafts: Set of 2 Jars with Cyanoacrylate for Porous Materials (27621) de Artesanía Latina.

GLUES FOR MODELING AND CRAFTS: GLUE APPLICATORS

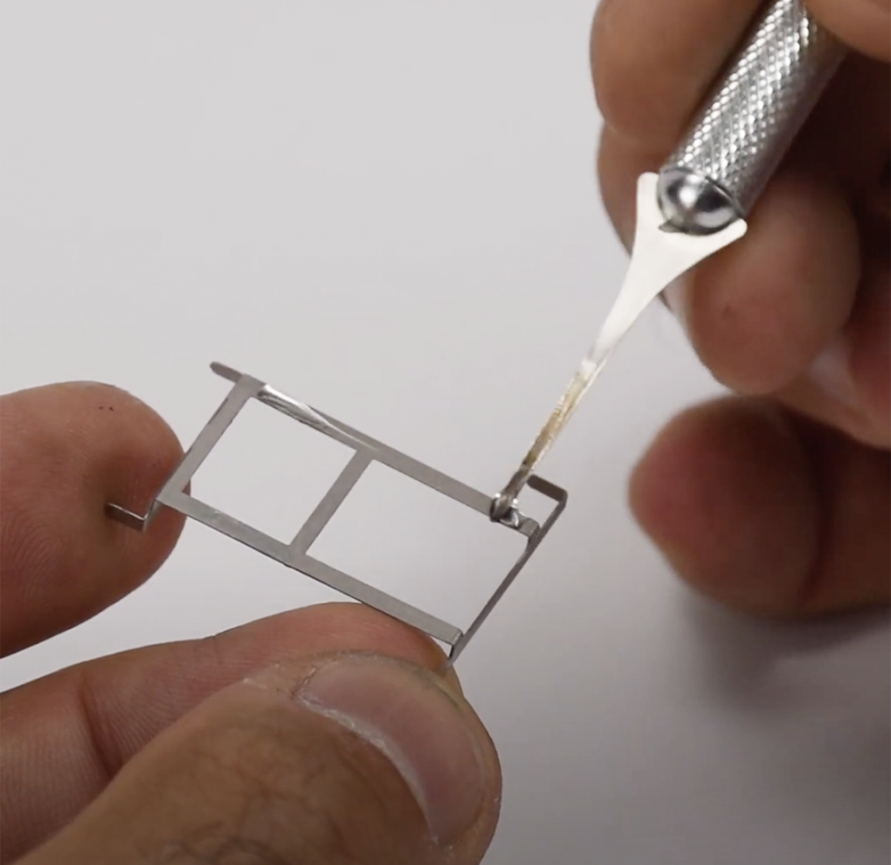
Do you need maximum precision when you are applying the glue? Don’t want to get your fingertip dirty? We have the best product to achieve these two objectives. Our glue applicators! These are included in the set of micro saws, scriber and applicators (27302). Glue applicators are really essential.

Glues for Modeling and Crafts: Glue Applicators (27302) made by Artesanía Latina.

Under this text, we also show you on video how to use the applicators and we show you the rest of the very useful tools that come in the set.

Posted in Naval & Aviation History

Soleil Royal History: the French Warship of King Louis XIV in the 17th Century

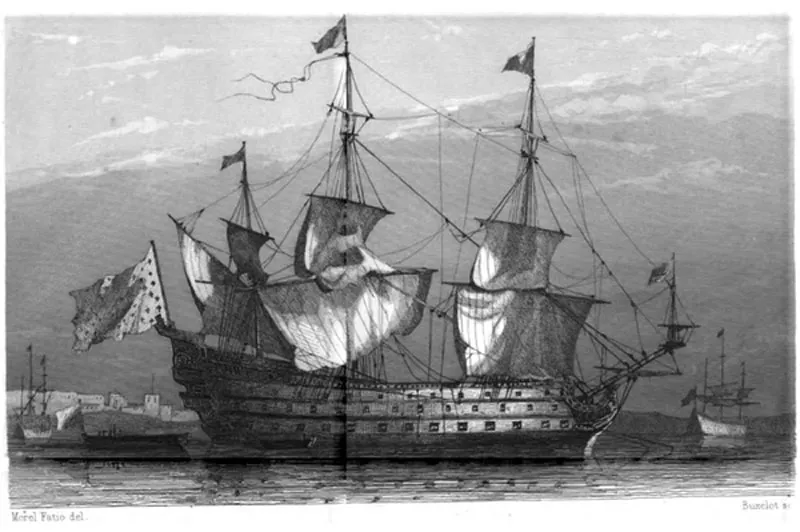
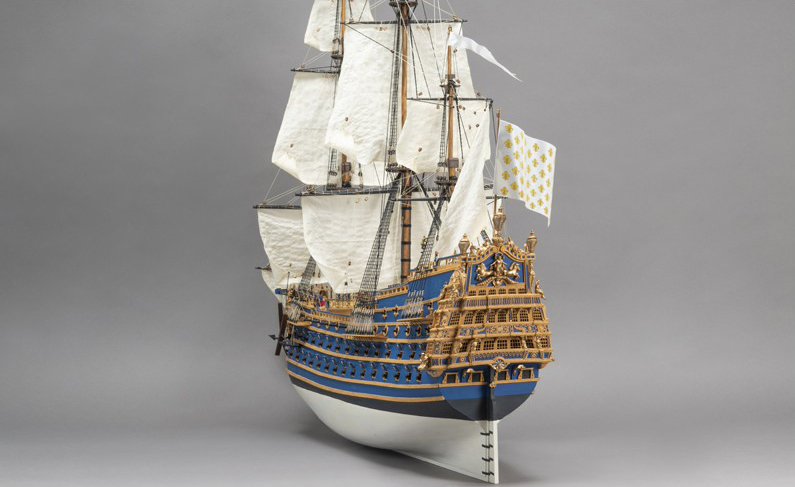
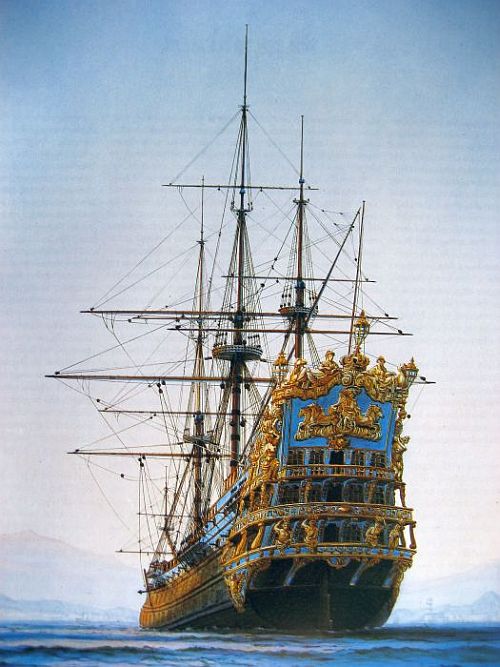
It is, for sure, one of the largest and most powerful warships of the Baroque. Without a doubt, it is also the most beautiful decorated of the boats of the time, it was sublime. We are talking about the French warship that was part of the Navy of King Louis XIV during the 17th century. We are writing this post to learn about the history of the Soleil Royal, the Gallic ship of the line with 104 guns arranged in a battery on three levels, flagship of Admiral Tourville. The emblem of the ‘Soleil’ had been chosen by the French monarch as his personal symbol.

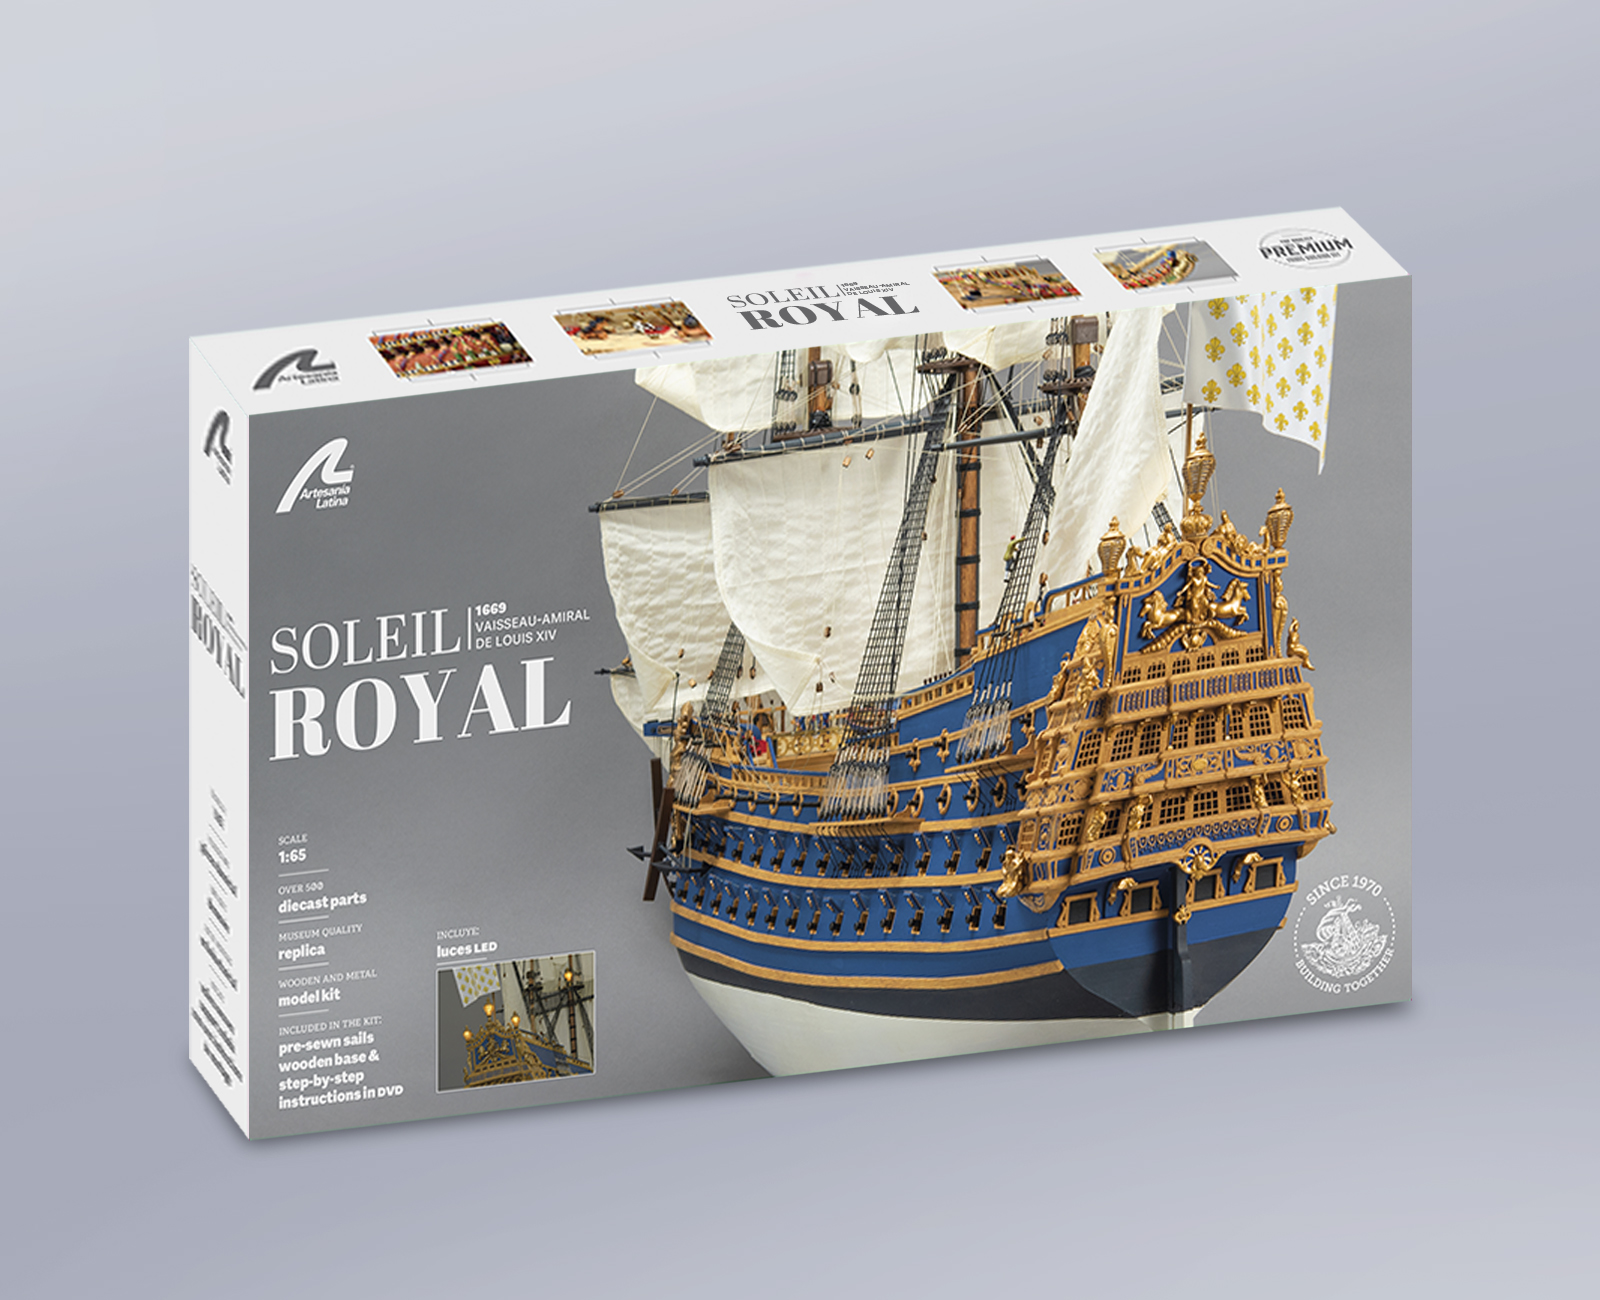
Wooden Ship Model Kit. French Warship Soleil Royal 1:72 (22904) by Artesanía Latina.

The history of the Soleil Royal begins with its construction in Brest (France) between 1668 and 1670. Who was in charge of carrying it out? The engineer Laurent Hubac, who takes two years to finish. It is launched in 1669, but unfortunately it lays unused in the port of Brest for years. At first, Soleil Royal does not enters into combat at all.

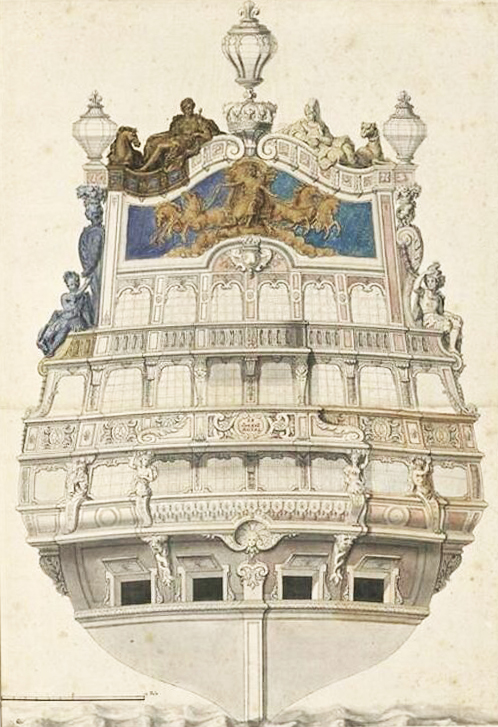
As we have already mentioned, its decoration is spectacular. The person in charge of this is Antoine Coysevox, a sculptor who creates all the decorations on the ship, including those on the gun embrasures. This plastic artist from the court of Louis XIV is also responsible for the impressive and still existing ornaments of the Palace of Versailles.

Print of the Soleil Royal from the Louvre Museum.
BERAIN Jean I, Musée du Louvre, Département des Arts graphiques, INV 23718, Recto.

SOLEIL ROYAL HISTORY: NINE YEARS’ WAR

The history of the Soleil Royal continues, does not stop. Subsequently, the Soleil Royal is commissioned with 112 guns and 1,200 men on board when the Nine Years’ War in 1688. Also, called War of the Great Alliance, War of the Palatinate and War of the League of Augsburg.

The King decides at first to send all his ships prepared to sail and for battle. However, seeing himself in inferior conditions, he also orders to send the useful ships, even if they are moored to the dock, as is the case of our Soleil Royal. So this vessel departs from the port of Brest on June 22, 1690.

Then, Tourville commands the French ship, a highly respected officer in the Navy. The Soleil Royal remains waiting for a favorable wind to go to the Isle of Wight. There, the English fleet remains anchored after sending two French ships on a reconnaissance mission. On July 10, 1690, the Battle of Béveziers (Beachy Head) broke out with the surprise factor of the French attacking the Anglo-Saxons. After its victory, France seizes control of the English Channel.

The role in history of the Soleil Royal is fundamental as the flagship of the Escadre du Ponant (Squadron of the West) leading the French naval formation on the squad center. It is said that it is a good sailboat, it sails optimally, and its firepower is lethal.

THE FRENCH WARSHIP AT THE BATTLE OF BARFLEUR

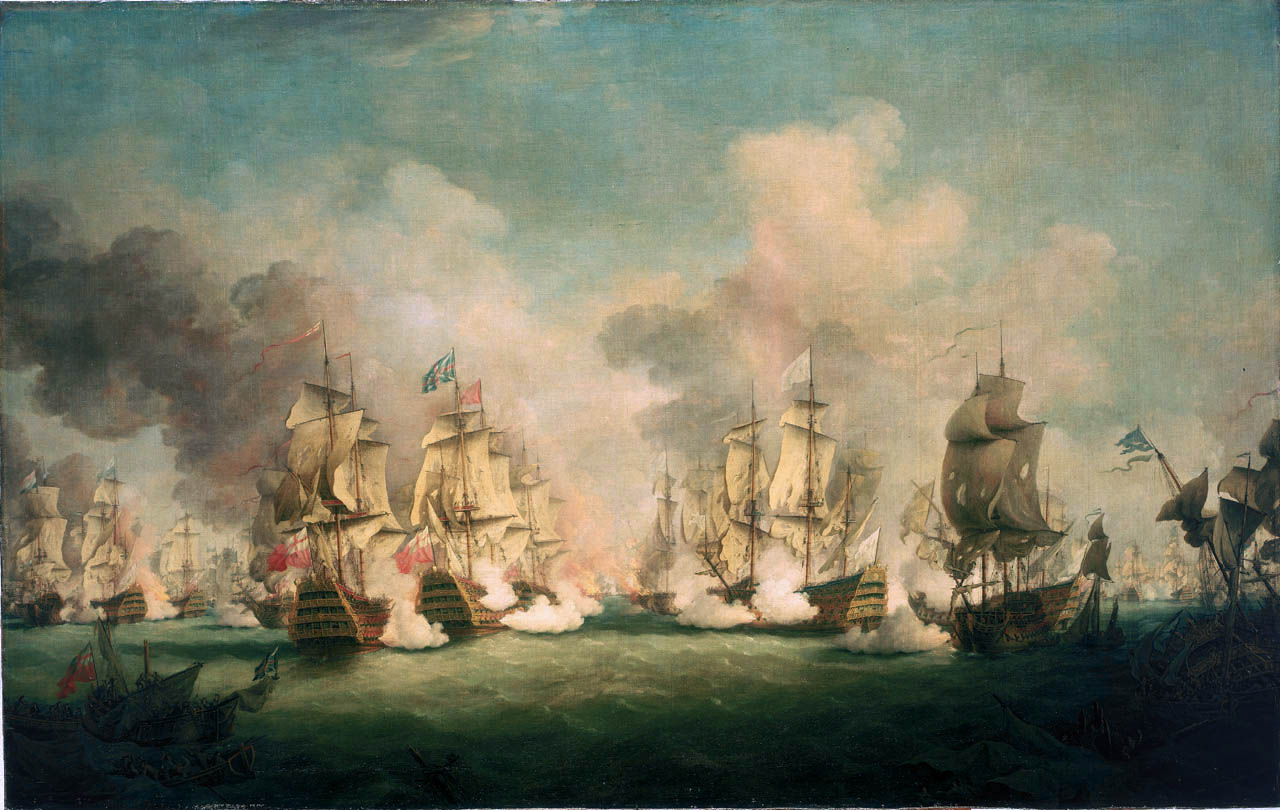
Once its naval warfare began, the Soleil Royal became a French war emblem. Now with 104 guns, the French ship leaves the port of Brest on May 12, 1692 leading a fleet with 44 more ships. It may seem that there are many. However, on May 29, the French ships encountered the incredible Anglo-Dutch naval force. 97 powerful warships await the French in the Battle of Barfleur.

Soleil Royal History. Battle of Barfleur.

The crossfire starts! The Soleil Royal and its companions, being vastly outnumbered, decide to attack the enemies. After an arduous fight, it is forced to flee because of the serious damage suffered. Its crew is depleted by half and can barely sail. For this reason, the Soleil Royal and the ships Triomphant and Admirable are forced to anchor in Cherbourg to be repaired. They cannot reach the port of Brest, further away than the one mentioned.

END OF THE SOLEIL ROYAL AT THE BATTLE OF CHERBOURG

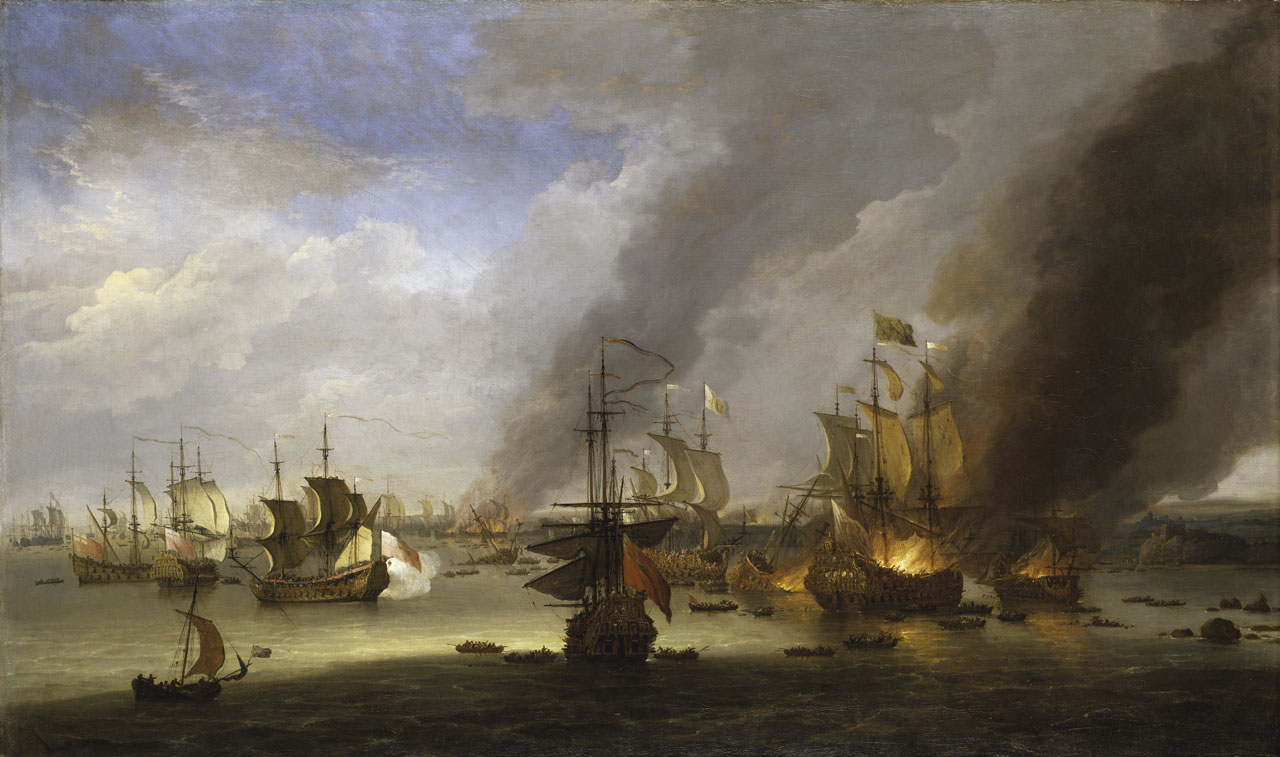
The history of the Soleil Royal ends at the Battle of Cherbourg. While docked at the Pointe du Hommet, the French warship is attacked by 17 ships which it repels with its artillery fire. The problem is that the stern of the ship catches fire and spreads the rest on the ship of the line.

Soleil Royal History. Battle of Cherbourg.

With the help of the population of Cherbourg, only one survivor can be rescued from the around 883 – or even more – crew. The end of the history of the Soleil Royal, it remains near the arsenal of the port. Of course, its legacy continues throughout the seas and world naval history. A detailed 1:40 scale model from 1839 of the hull and sculptures of the Soleil Royal is currently on display at the Musée National de la Marine in Paris.

For our part, from Artesanía Latina, we are pleased to bring you this beautiful and faithful miniature replica in wood at 1:72 scale of the Soleil Royal (22904) that you can build with your own hands. For more in-depth information, there is another post on our blog that talks exclusively about the model. If you are an expert modeller and need a challenge at your level and with such beauty… Our Soleil Royal model is for you!

Wooden Ship Model Kit. French Warship Soleil Royal 1:72 (22904) by Artesanía Latina.