
The assembly of a wooden ship model rigging, we mean, the sails and the strings that knock the ship into shape. If a modeler assembles the rigging of any type of ship, she/he can surely do it on whatever a sailboat, a vessel, a caravel, a galleon or an online ship with any kind of rigging.
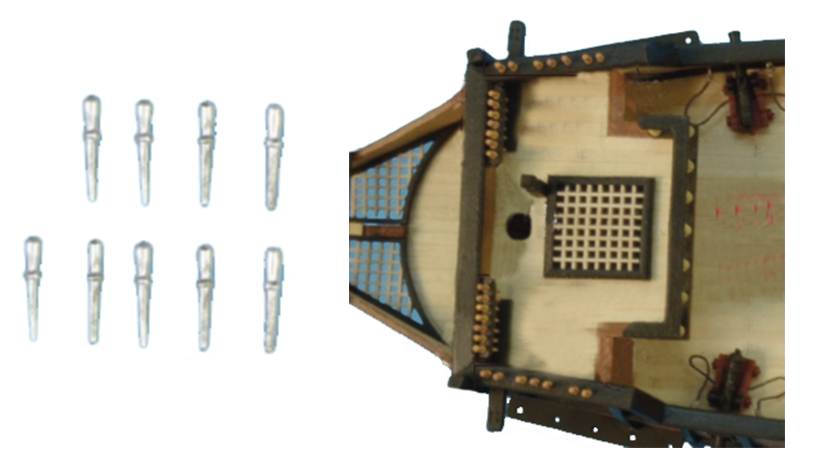
From this moment, we explain what are the steps, in order, that any fan of naval modeling should take when she/he is building the aforementioned rigging of the scale model. The first step, fundamental for the grip of the rigging rope, is the installation of the pink-racks, the fairleads and the chain-wales.

Once these three elements have been placed, the modeler must proceed to pierce the pink-racks in order to implant the belaying pins in them. Of course, we recommend to paint them in the desired color before inserting them.
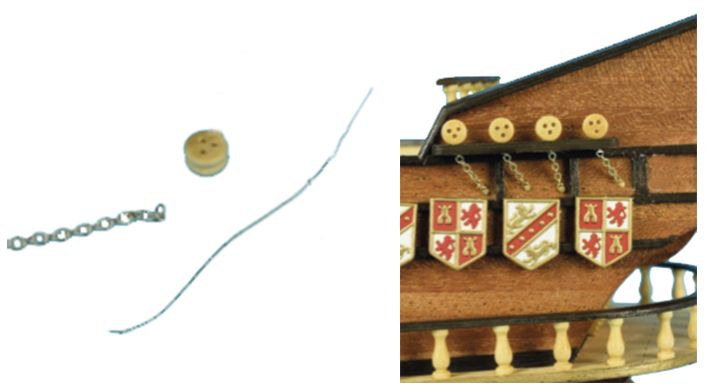
Next, place the dead eyes in the chain-wales for the wooden ship model rigging. These will hold the shroud, which is the tensioning cable that passes through the top so that the mast is straight, and the lanyard, which will keep the shroud in balance with tension.
HOW TO ASSEMBLY THE MASTS
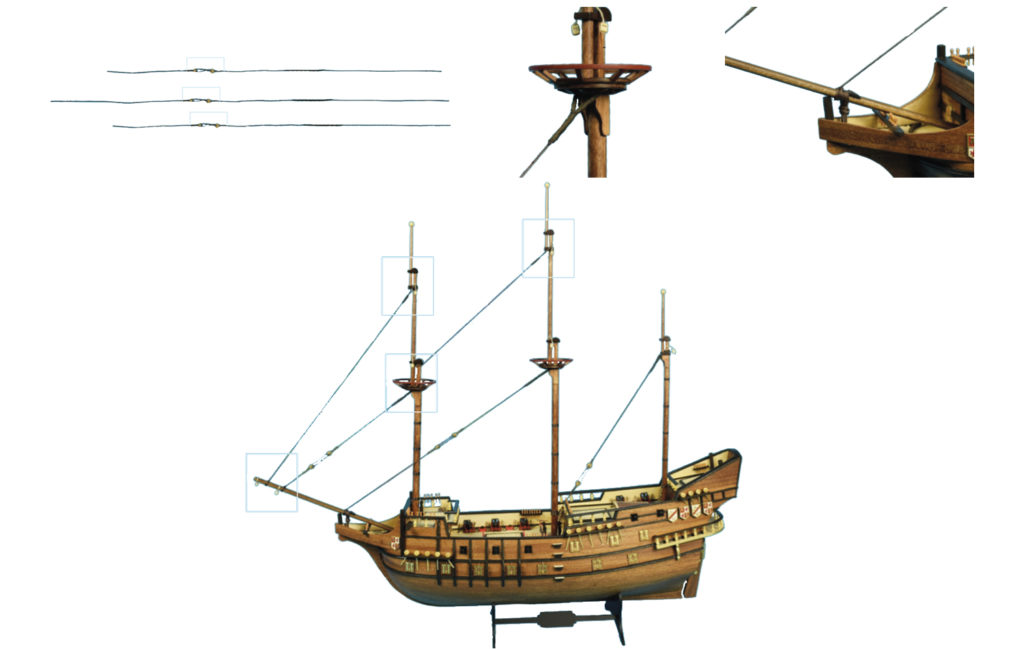
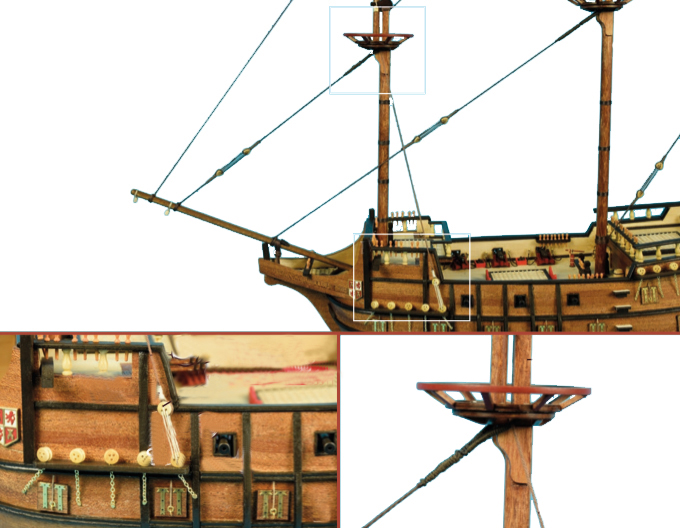
The next step is the masts assembly. You should proceed to assemble all the wooden ship model masts – don´t forget the bowsprit – and put their respective tops.

Later, start preparing the yards, the booms and the gaff rig mast.

Once they are all built, place the masts on the boat. Artesania Latina facilitates the work thanks to the holes through which to introduce the masts so that there is no doubt.

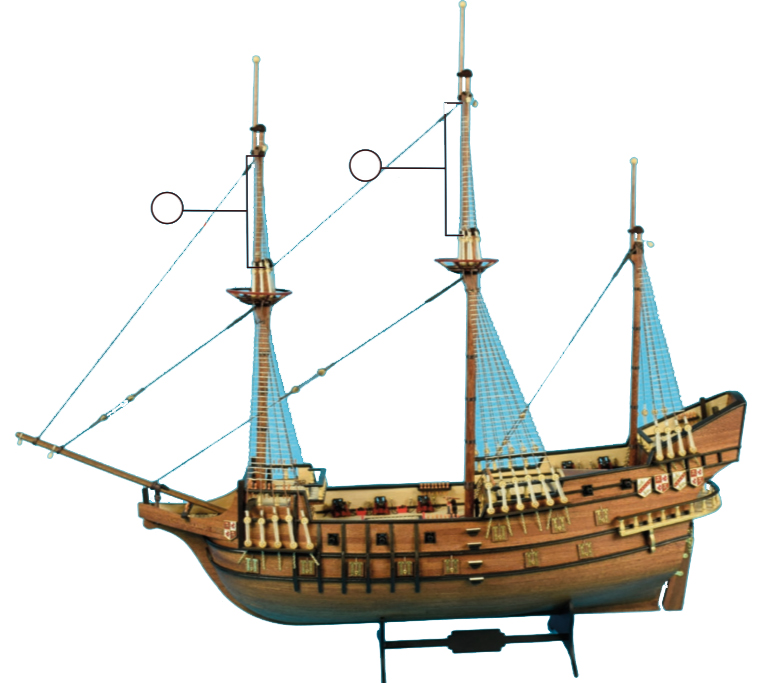
From now, we must begin to tie, balance and tighten the different masts. To do this, we start with the foremast and the main mast, tied with the stays from under the top to the bowsprit (almost horizontal spur that comes out of the bow), and with the mizzen mast, also with stays are up to the base of the main mast. Then, two stays come from the upper crosstree of the foremast and main mast, the first to the bowsprit and the second to the foremast.
CONSTRUCTION OF SHIP MODEL RIGGING: SHROUDS
The next assembly action of any naval modeling kit is the placement of the shrouds, for which, first, you must also build the dead eyes with their lanyards and their chain-plates, these ones are hooked to the hull. As a tip, we can recommend that they should be installed one by one, alternating them on each side of the ship model. If the modeler does not do it this way, the mast could lose its perfect vertical position.
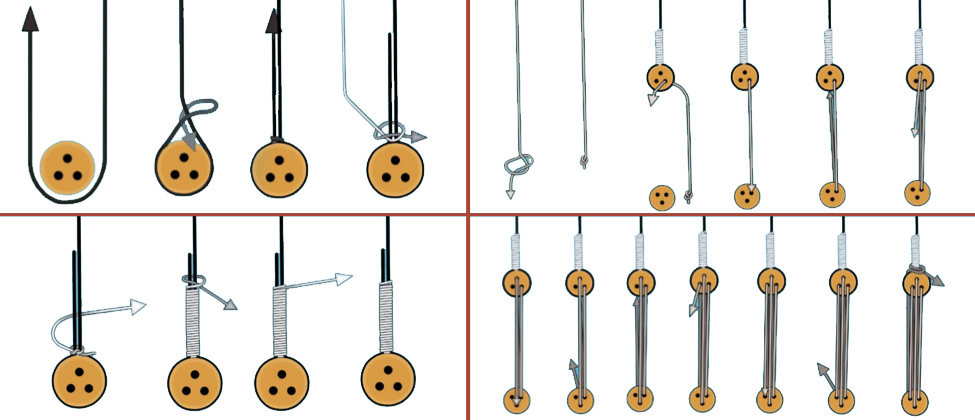

Once this action is done, the modeler must assemble the strings of the so-called ratlines, the horizontal strings perpendicular to the shrouds. We recommend the use of two clamps, one on the left side and one on the right side of the shrouds group, in order to be able to accurately put the aforementioned ratlines.

It is the moment when the shrouds are installed, in this case the upper ones, and their corresponding ratlines.
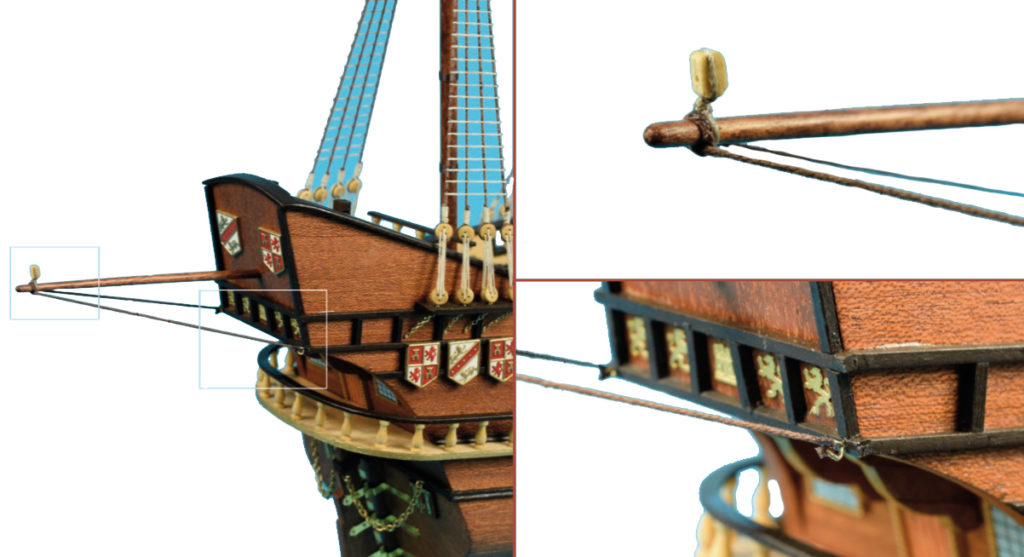
Next, the jib-boom should be placed (if the wooden ship model had it) with its two strings so that it is completely fixed. Of course, all the rigging screws of the boat and the bowsprit standing rigging, as it has been done with the jib-boom.
HOW TO BUILD THE RUNNING RIGGING ON A SHIP MODEL
At this point on the assembly process, the modeler would have finished all the so-called standing rigging, and now she/he would have to put all the running rigging with all its yards and sails. Then, the mizzen mast latin sail would be the first to be placed.

It is the turn of the spritsail, which is located on the bowsprit.

To give way, just later, to the stay sail and the fore top sail.

Of course, it’s time for the main sail and the main top sail.

The last step to finish the ship model rigging and, specifically, the running rigging is the installation of the bowlines on the bow, that is, the ends or moorings of the mentioned area. They were used in square sailboats to withstand the leeches of the bow sails when sailing towards windward.
You can consult all the rigging accessories for wooden model ships here.
I am trying to install the Spanker gaff on the 22810 HMS Bounty, but instructions are not adequate. Are there more detailed instructions or photos?