Let’s go with the third part of the post if you want to build Juan Sebastian Elcano model ship with more video tutorials recorded by our modelers during its assembly. The model of the Spanish training ship Juan Sebastian Elcano / Chilean Esmeralda (22260) at 1:250 scale is ideal for your first experience on the naval modeling. Now, we remind you that you can also purchase the Elcano Gift Pack (22260L), which includes the kit with the brigantine schooner sailboat, its paints and some tools. It has a lower price than if the products are purchased separately. That being said… Let’s continue assembling this historic model with a pre-fabricated hull!
 by Artesanía Latina.")
BUILD JUAN SEBASTIAN ELCANO: MASTS (PART II – A)
On Step 16, we continue to explain some of the most difficult phases when you are going to build Juan Senastian Elcano model ship: ‘Mats – Part II’. Take the eight PCL parts and one BW1 part -wire- and put them on your work table. Next, cut a small piece of wire (BW1) with a Professional Straight Cutting Pliers (27210). With a hand drill, make a 0.5 mm hole on the upper part of the stick (PCL) and apply our Cyanoacrylate for Porous Materials (27620), for sale separately, where the hole is. Insert the wire into it and bend it 90 degrees. With the help of a Stainless Steel Ruler (27069) and the aforementioned pliers, measure 0.7 mm and cut off the excess as seen on the video. Repeat the process with the remaining PCL parts.
Take the four parts S1 -sails- and arrange them on your workshop. With the help of a sewing needle, use the thread –part CT1– to sew part S1 -sail- to part PCL -mast-. Thread through the corner of the sail and around the stick as well with some Straight Fastening Tweezers (27020) and the previous drill. Continue sewing the sail with the needle and thread along the length of the mast. Knot at the end of the neck, apply cyano and cut the excess thread as shown on the video.
ASSEMBLY ELCANO MODEL SHIP: MASTS (PART II – B)
Well, it’s time for the next task. Look for one BR1 part and four BR2 parts, all rings. With a utility cutter, poke a small hole in the outer corner of the sail. Open part BR1 with two Needle Nose Pliers (27213) and insert the ring through the sail. After inserting it, close it again using the aforementioned pliers. Now, do this whole process again with the four BR2 parts on the opposite horizontal side of the sail -with respect to the placement of the BR1 part-, just as seen on the video. Repeat with the remaining three sails. It should look like this:
 by Artesanía Latina. Click here for more info.")
ASSEMBLY ELCANO MODEL SHIP: MASTS (PART II – C)
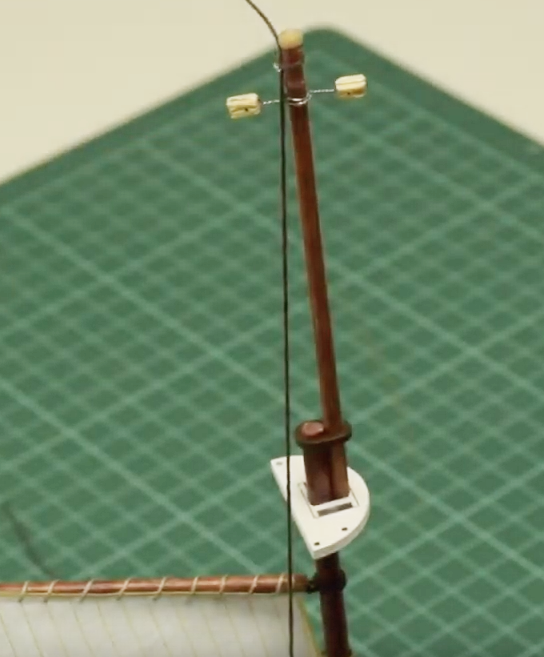
Once the previous stage to build Juan Sebastian Elcano model ship has been completed, take one of those sails and introduce the mast created on the previous post through the large rings. Then, take the wire of the mast with the sail that you had bent to 90ºand insert it into the hollow part provided for it, below the top. Thus the upper part of the sail remains fixed to the mast. On the lower area of the mast, take an M18 part and insert it. Apply cyano to adhere it and remove excess glue with paper. The final result should be this -repeat the process with the other three sails-:
 by Artesanía Latina. Click here for more info.")
Jar of cyano on hand! On the four holes of the deck to place the masts, apply adhesive and insert them. Use the steel rule to calculate the vertical 109 mm and to check the distance between masts. Also, it can help you position the masts while the cyan dries. The end… For now!
 by Artesanía Latina. Click here for more info.")
BUILD JUAN SEBASTIAN ELCANO MODEL SHIP: SHROUDS (PART I)
Step 17 when a modeler wants to build Juan Sebastian Elcano Model (22260), the Spanish training ship, talks about the ‘Shrouds’. Extract with a cutter and paint with off-white colour (27702) the eight WS1 parts. Grab one of these. With a pencil and a ruler, mark five equidistant points on the part. Put cyano on the part CT2 of 200 mm and glue it on the first marked point using Straight Fastening Tweezers (27020).
Repeat the process with the other three CT2 parts. On the last position marked with pencil, do the same thing with a 300 mm CT2 part. In total, there should be five threads attached to part WS1. Cut the excess of thread on one side of part WS1 with Thread Snips (27060). and paint off-white the glued part of the five threads with a brush.
Repeat this task again with the other seven WS1 part to get this:
 by Artesanía Latina. Click here for more info.")
It is time to glue those eight resulting parts. Take one and put cyano on the bottom. Glue the part to the edge of the hull, but be careful. The area where the threads are glued must look at the deck, that is, the part of the threads that are glued must not face the outside of the boat, but the inside. Repeat the process with the other seven parts so that it looks like this:
 by Artesanía Latina. Click here for more info.")
BUILD JUAN SEBASTIAN ELCANO MODEL SHIP: SHROUDS (PART II)
Take the longest thread -300 mm- from each of the parts and tie it around the tip of the nearest mast. Using a flat-grip plier, tie it securely by tying it into a knot and pulling the string so it is tight. Apply ciano to the knot made with the thread at the end of the mast and remove the excess of thread with Thread Snips (27060). Remember to repeat another three times this step on the other three mats.
Now do the same with the rest of the short threads -200 mm– but gluing them to the lower/interior part of the four tops. And finally, glue all the CT2 threads perpendicular to the already installed vertical threads. In this way, it will be ongrid mode. To do this, with patience, you must cut the threads with precision according to the height that you adhere them horizontally. And… Wow! Let’s have shrouds.

BUILD JUAN SEBASTIAN ELCANO MODEL SHIP: FIGUREHEAD & BOWSPRIT
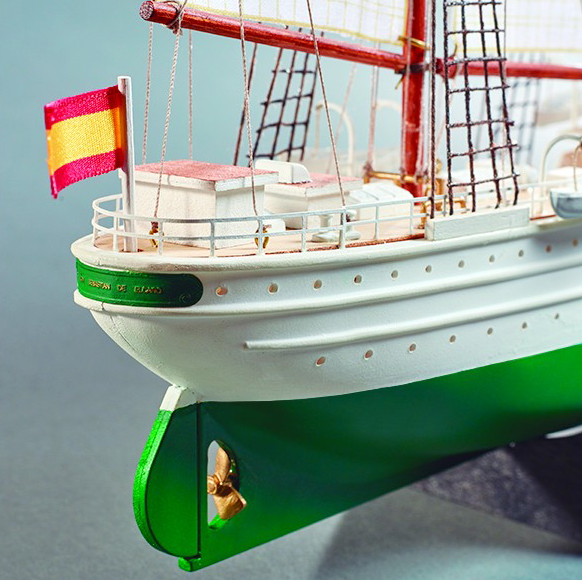
We continue with Step 18 of Build Juan Sebastian Elcano model sailboat (22260). This is about the ‘Figurehead and Bowsprit’. Paint gold colour (27761) the part M19. Apply cyano to the inner bottom of the figurehead and stick it to the tip of the hull’s bow with your hands. Remember that if you want to place the Chilean emblem of the training ship Esmeralda, you must do the same with the part M20.
Then take the BSP part. With a ruler and pencil, mark the half of the part. Mark well with a cutter. With a manual drill and a 1 mm diameter bit, drill on the previously indicated place. Take a BW2 part and cut a 16 mm piece with Professional Straight Cutting Pliers (27210).
Take a BL part and surround the BSP part with your two wires. Help yourself with a Needle Nose Pliers (27213) for turning both ends of the wires around stick, tying the part to it. Get rid of excess wire once knotted to the stick. Repeat this process three more times on the BSP part. From the top point to where the hole is on the center of the stick. It is the turn of the part BW2, apply cyano in the centered hole made before and insert the part BW2.
By hand, fold down all four BL parts, apply cyano to the bottom end of the stick, and glue on the designated area. We already have bowsprit too!
 by Artesanía Latina. Click here for more info.")
MINIATURE REPLICA JUAN SEBASTIAN ELCANO SHIP: SAILS (PART I)
The ‘Sails – Part I’ is Step 19 of the video tutorial to build Juan Sebastian Elcano model ship. Take three parts S2, that is, three sails. Repeat the process you did on the ‘Masts – Part II’ section. In this case, the six parts are BR1 -small rings-. Place one part BR1 in one corner of the sail and the other five longitudinally and equidistantly on the other side.
Drill with a 0.75 mm hand drill the 4 masts at the height shown on the video. Pass thread -part CT2– through the five rings of the sail. Tie the sail with its thread to the top of the mast you are working on. Once the knot is done, apply cyano to it. Thread the other end of the sail string through the hole you just made on the next mast. Pull the thread until the thread and the sail is taut. Knot and cyano. Remove the rest of the thread with Thread Snips (27060). Repeat with the other two remaining sails.
Go back to the first sail placed, take more thread -part CT2-. Tie it to the first mast, above the top, at the height of the horizontal peak of the sail. Once tied, take it up to the second mast and knot it at the same height. Now the same thread, bring it closer to the third mast, and lastly to the fourth one. Help yourself to do this with Curved Fastening Tweezers (27021). Finally, put cyano on the fourth neck knot and cut the excess thread with our Thread Snips (27060).
 by Artesanía Latina. Click here for more info.")
MINIATURE REPLICA JUAN SEBASTIAN ELCANO SHIP: SAILS (PART II)
We continue with ‘Sails – Part II’, which is Step 20 of the construction of the model of the famous Spanish school ship (22260). Arrange a unit of parts S3, S4, S5 and S6, that is, sails. Take part S3, put nine rings -part BR1- on the longest side, and one on the corner. Then, take thread -CT2- and tie it at the end of the mast. Pass the line through the nine rings, tighten and knot it and glue it to the nose of the bowsprit previously installed. Repeat the same process with part S4, but with seven rings on the side and one on the corner. Remove excess string from the bowsprit of both sails. And the same with parts S5 and S6.
Next, more thread, this time, tie it to the point of the bowsprit, pass it through the metal -underneath the mast- and by the ring in the middle of the prow of the hull -the second-. Tie it there. Do the same with a second thread: knot it at the height of the rope of the third sail on the bowsprit, passes it through the upper ring and tie it. In all cases, remove the excess thread once tied. Repeat this process on the other side of the boat, so that the thread also enters through those rings. Finally, a third thread that will go through the lower ring on both sides of the bow.
 by Artesanía Latina. Click here for more info.")
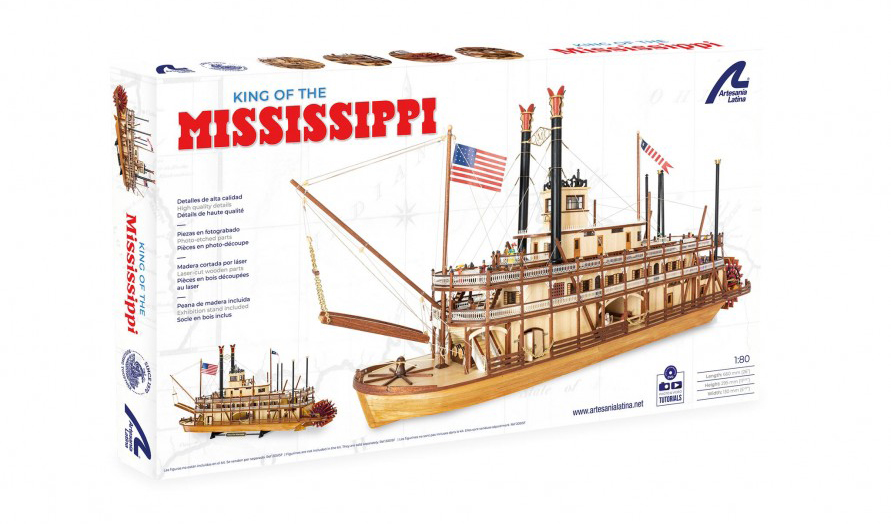
 by Artesania Latina (20515). Click here for more info about the perfect paddle steamer model kit.")
 by Artesania Latina (20515). Click here for more info about the perfect paddle steamer model kit.")
 by Artesania Latina (20515). Click here for more info about the perfect paddle steamer model kit.")
 by Artesania Latina (20515). Click here for more info about the perfect paddle steamer model kit.")
.")
.")
.")