Posted in Model Building Tips

Elcano Ship Model Instructions (IV): Finish Building the Spanish Training Ship with Our Latest Video Tutorials!

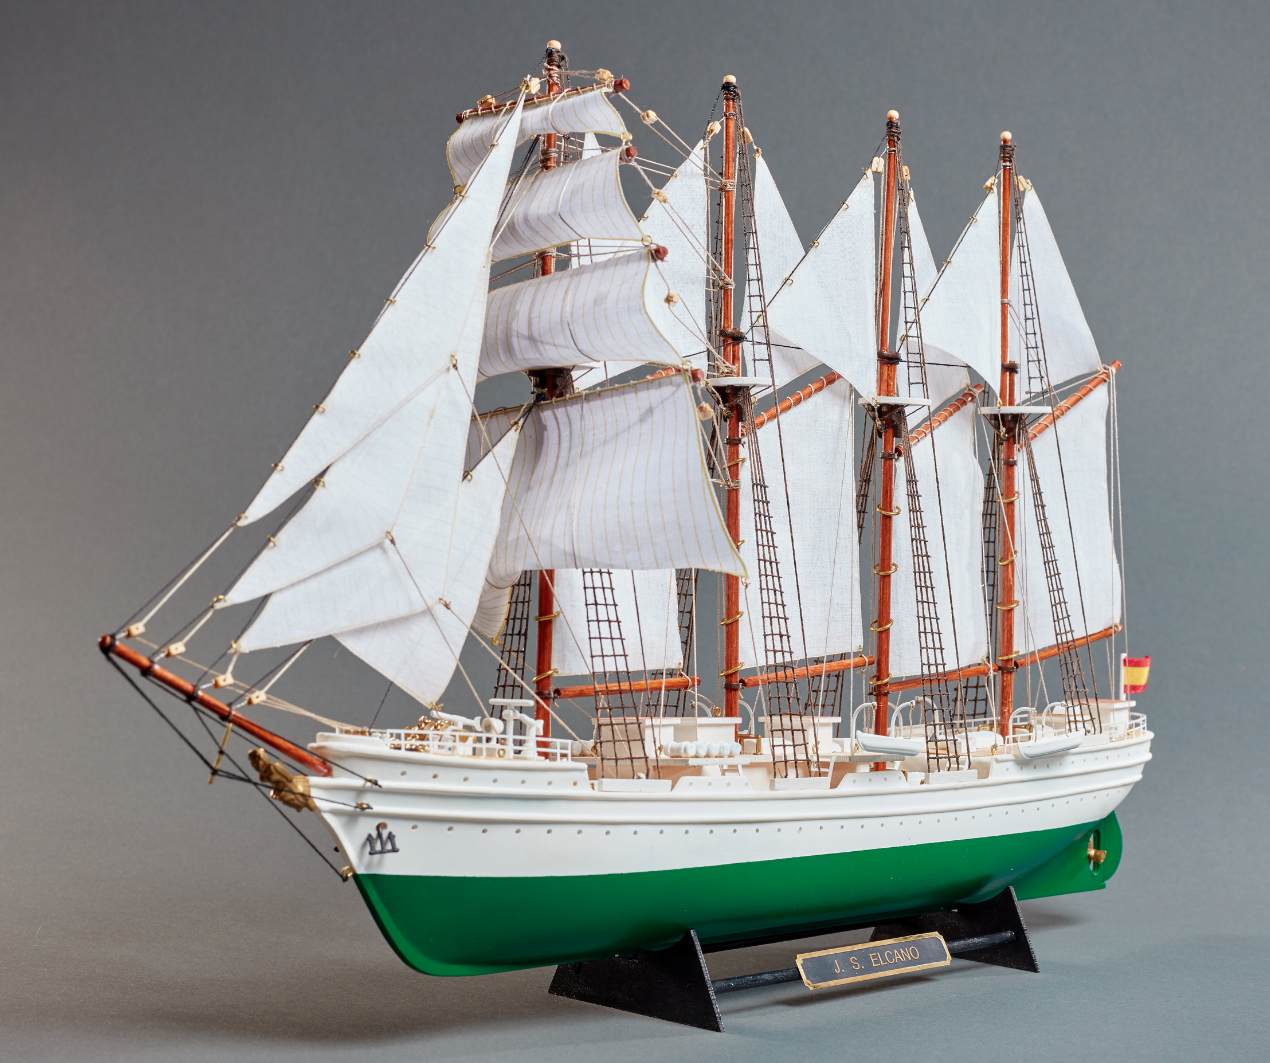
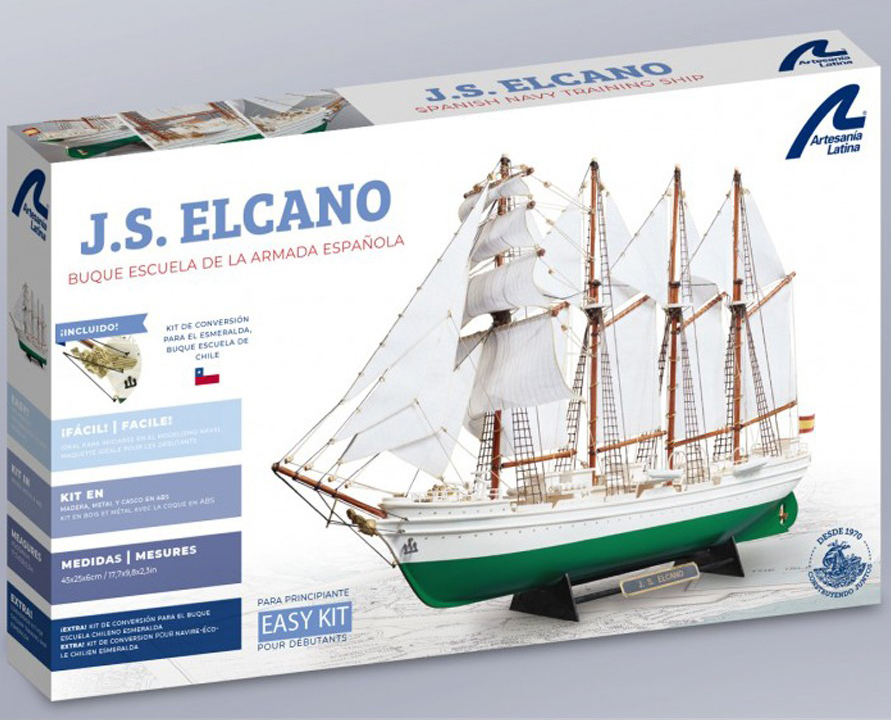
We dive into the last part of the Elcano ship model instructions for its assembly. With these video tutorials made by our modelers, we put the finishing touch to the set up of the Spanish school ship model Juan Sebastián Elcano / Chilean Esmeralda (22260) at 1:250 scale. As we mentioned before, it is a faithful miniature replica excellent for beginners on the hobby of naval modeling.

ELCANO SHIP MODEL INSTRUCTIONS: SAILS (PART III – A)

We continue with ‘Sails – Part III’, which is Step 21 of the instructions for assembling the Elcano ship model (22260).

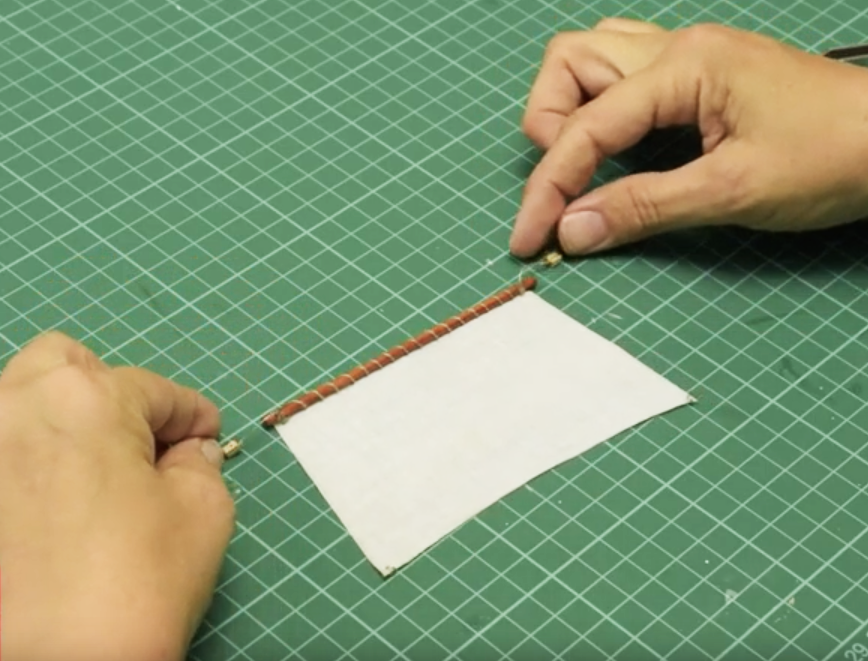
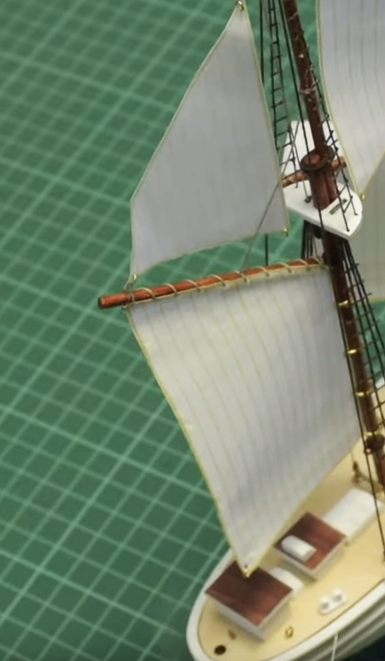
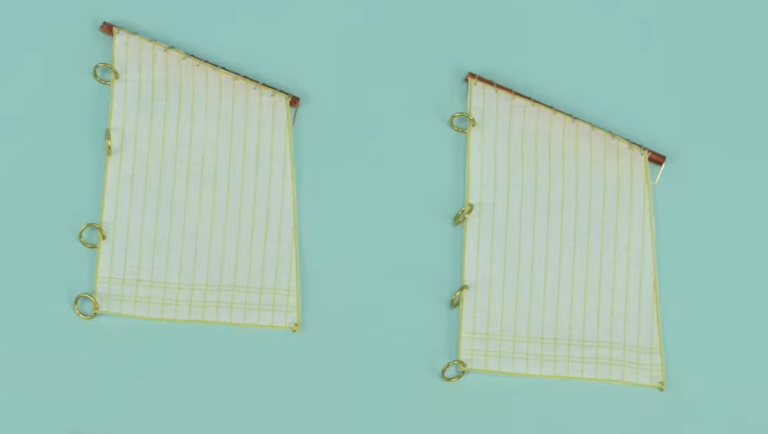
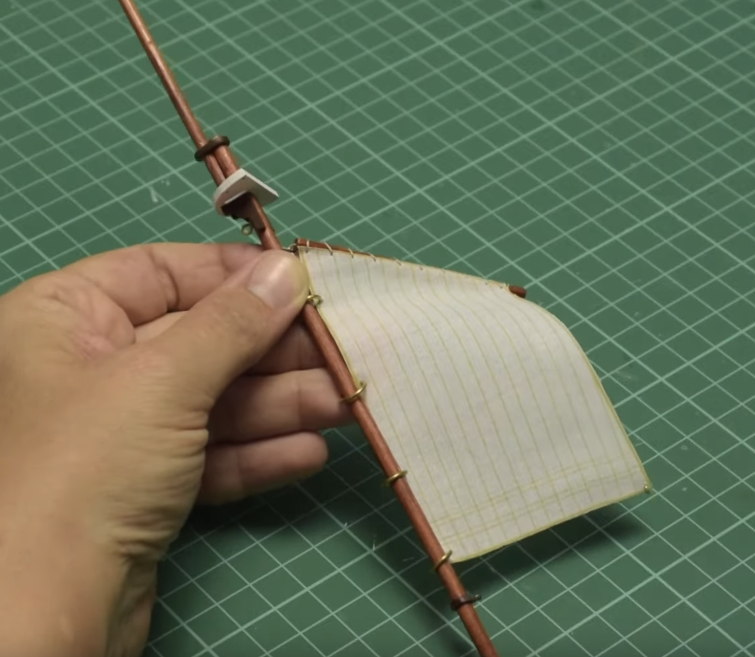
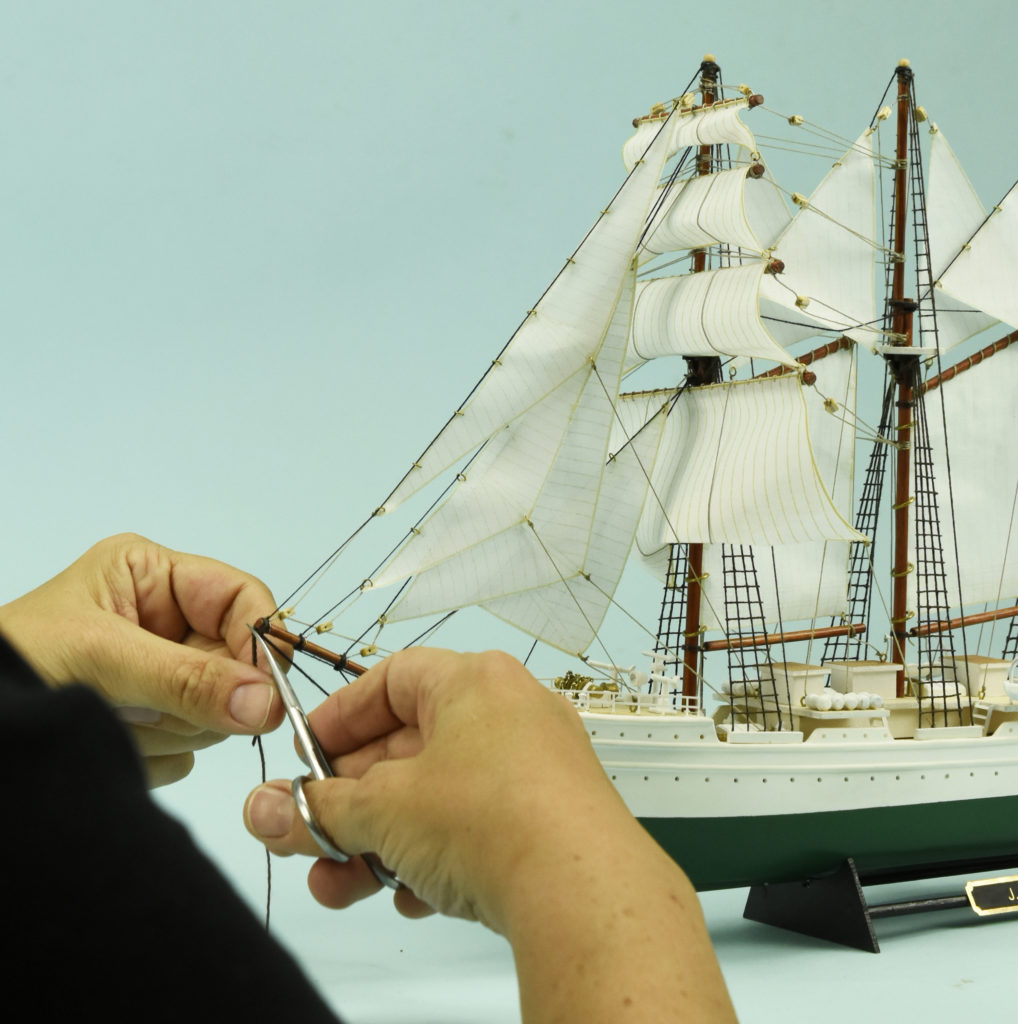
Arrange one unit of parts S7, S8, S9 and S10, that is, more sails. Take part S7, and sew it with a needle cotton threadpart CT1– around the stick part Y1, from top to bottom. When you finish sewing, help yourself with some Straight Fastening Tweezers (27020) to tie the knot on the stick.

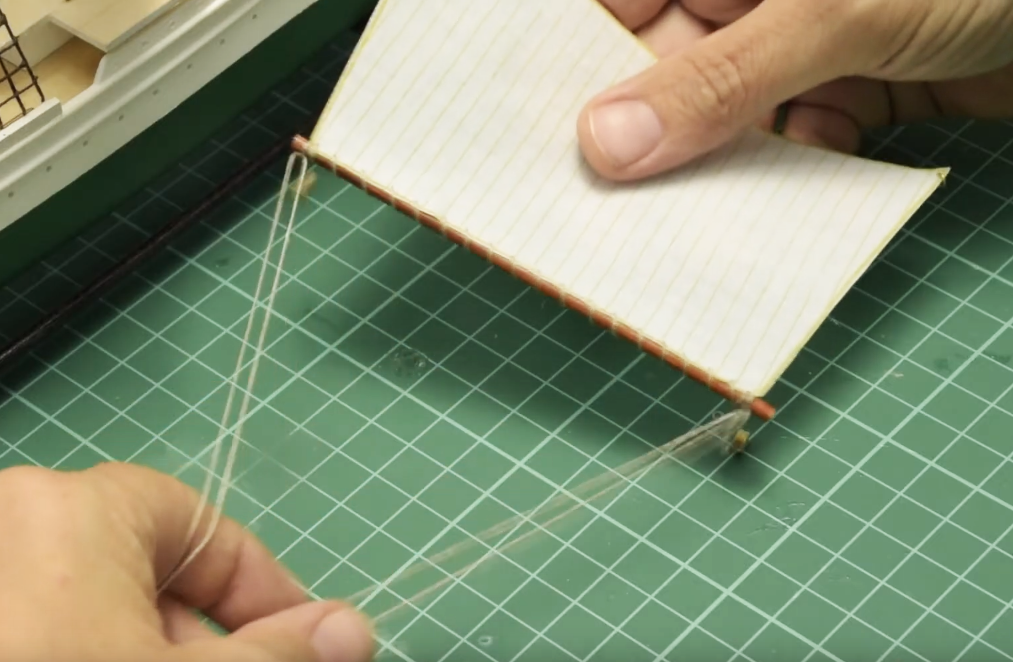
Now, with a cutter, drill two small holes in the two opposite corners of the stick. Insert the two BR1 parts -two rings- into these. Take a part BL and thread -part CT1-. Put the thread through the hole and around part BL. Tie a knot at the end with the help of the aforementioned tweezers. The thread should be fully stretched through the hole and around the part BL. Apply Dense Cyanoacrylate for Porous Materials on the knot and allow to dry.

Next, you will have excess thread on both sides of the knot. First, completely cut one of the threads, while the other leave a few centimeters long. Don’t cut it all the way. Second, also using the tweezers, tie that thread with the BL part to the left side of the stick and tie the knot with cyano. Third, if there is excess thread, remove it with a cutter. Repeat all these actions on the other end of the stick with another BL part.

The result should be this:

Elcano Ship Model Instructions for its Assembly (22260). Artesanía Latina.

ELCANO SHIP MODEL INSTRUCTIONS: SAILS (PART III – B)

Then go through the entire process again with the other SAILS. For the sail part S8, you will need one Y2 part, two BR1 parts and two BL parts. For the part S9, one Y3 part, two BR1 parts and two BL parts. And for the S10, one part Y4, two parts BR1 and four parts BL. Take again the sail part S7 and thread part CT1. At one end of the stick, tie a knot with plenty of thread left over from both sides. Apply cyano and let dry. Repeat the process on the other end of the stick.

Elcano Ship Model Instructions for its Assembly (22260). Artesanía Latina.

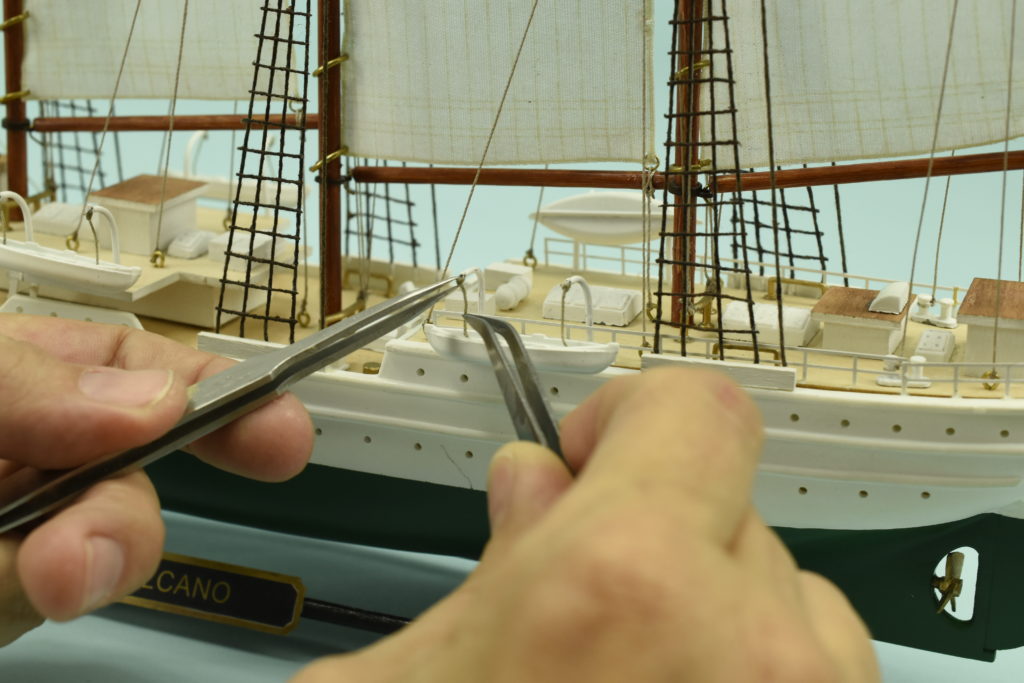
Take the S7 sail. Use a Curved Fastening Tweezers (27021) to pass the thread -part CT1- with a needle above the mast top, as seen on the video. The goal is the sail can be already hanging on its mast. Make the knots as shown, apply a little of cyano and cut the excess thread with the Thread Snips (27060). The sail already stays in place.

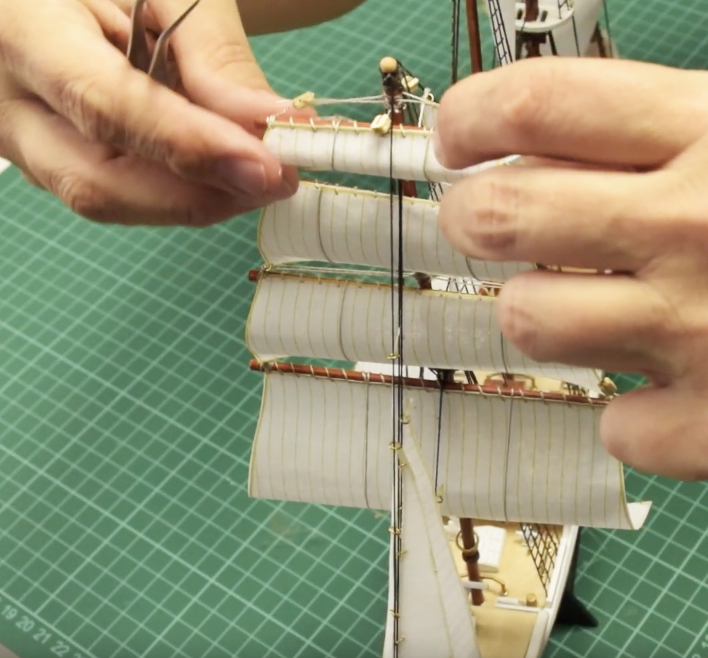
Repeat the process with the S8 sail. Once hung, it has to be attached to the S7 sail with thread. Tie them by means of the two BR1 parts that are on the sail. Passing the CT1 thread through the BR1 ring and, right after, tie it to the end of the stick. Repeat the process also for the other end of the pole with the other BR1 ring.

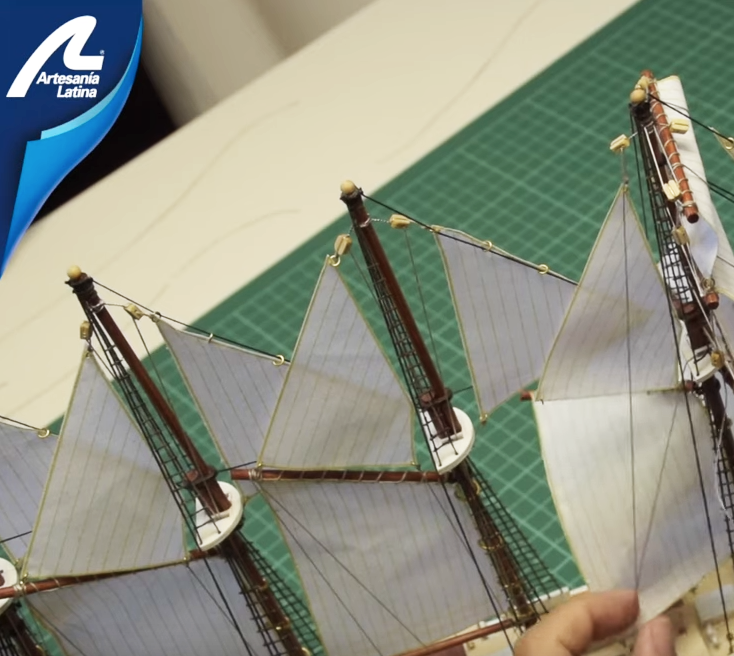
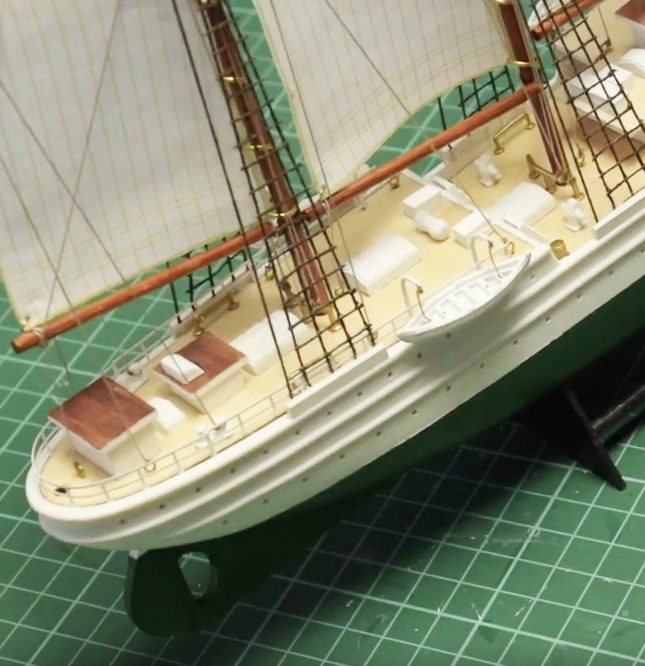
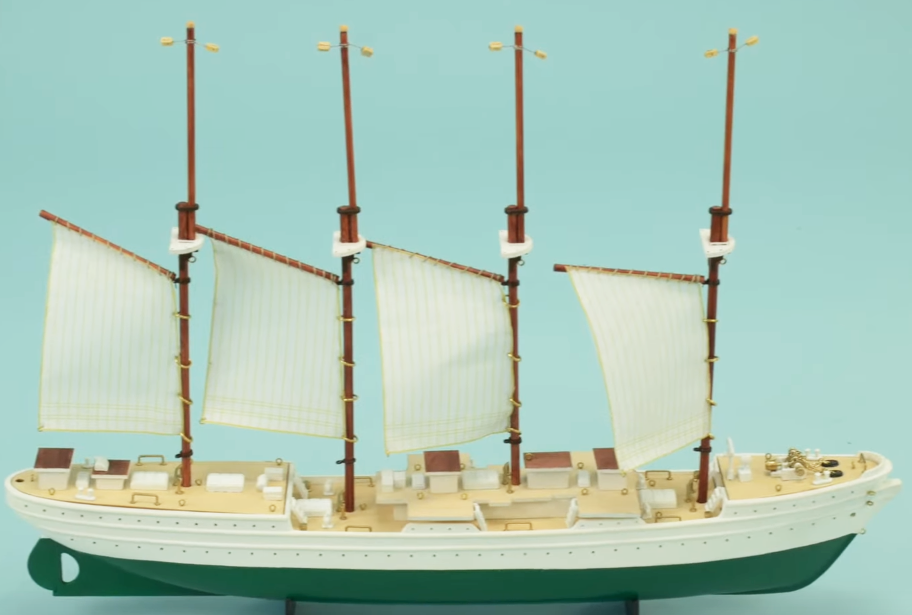
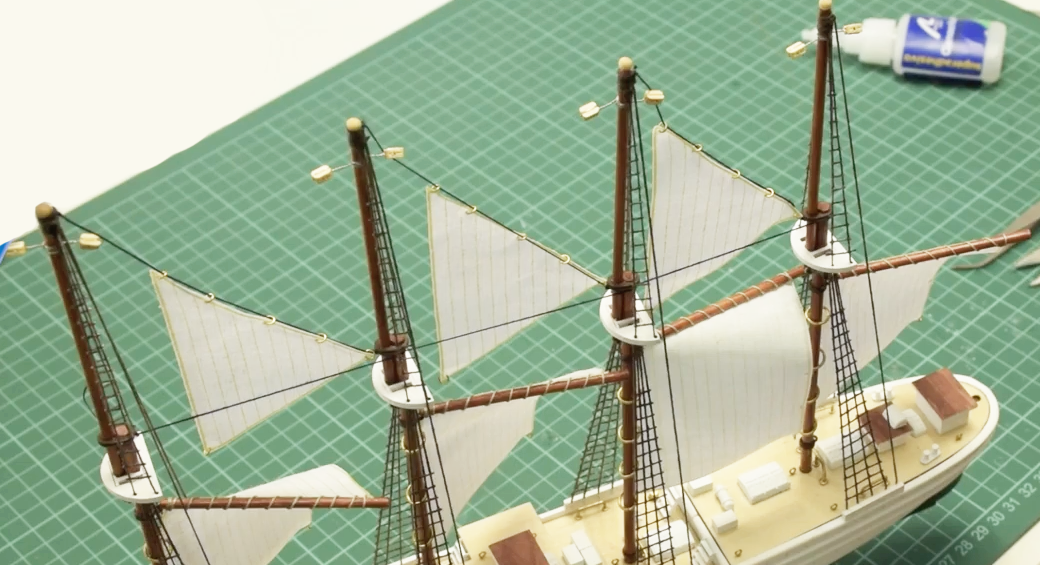
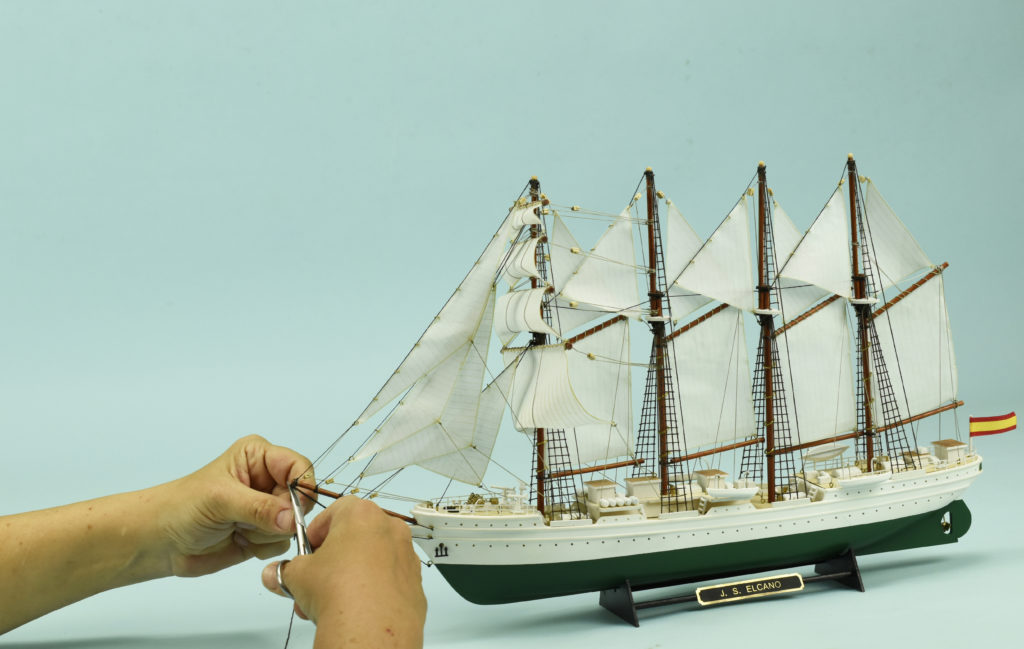
Do the same with the S9 sail, but this time tying it to the S8 sail. And finally, with the S10 sail, knotting it to the S9. This should be the final look with all the sails in place.

Elcano Ship Model Instructions for its Assembly (22260). Artesanía Latina.

ELCANO SHIP MODEL INSTRUCTIONS: SAILS (PART IV – A)

Well, it’s time for the next task. Step 22 of the assembly instructions for the ship model Elcano (22260). This one is about ‘Sails – Part IV’.

Take the four sails parts S11. Now take one and, using a utility knife, drill three holes in each of the three corners of the sail. Then, insert one of the three parts BR1 -rings- into each hole. Open each part BR1 with two Needle Nose Pliers (27213) and insert the ring through the sail. After inserting it, close it again using the aforementioned pliers. As we have discussed, repeat the process with the other three sails.

Again, take a sail part S11. Insert thread through the BR1 ring found on the most pointed part of the sail, at the top and tie a knot. Cut the excess of one of the ends of the thread and pass the other end through the mast. Then bring the thread to the hull, tighten it, tie it off and glue it with cyano. Watch the video for it.

Now, thread CT1 through the outermost ring BR1. Begin to tie a knot and leave a hole to insert it into the bottom sail pole. Insert into the stick and close the knot. Do the same with more thread through the remaining BR1 ring, the third one, the one closest to the mast. In this sense, the sail part S11 will be attached to the lower sail.

Elcano Ship Model Instructions for its Assembly (22260). Artesanía Latina.

ELCANO MODEL SHIP INSTRUCTIONS: SAILS (PART IV – B)

Below that bottom sail, place a PCL part. Bend the wire that has the stick on it and attach it to the mast. Use the pliers to twist the wire around the mast.

Take CT1 thread and pass it through the eye of the BR1 part of that lower sail to make a knot and pass it through the PCL stick. The sail will be attached to the mast. Remember to apply cyano to all the knots you make.

Thread CT1 through the ring on the hull and tie it to the stick so that it is taut. The rest of the thread, pass it through the mast top and tie it to the deck. Take a look at the video to run this process, which you will need to repeat for the other three sails.

Elcano Ship Model Instructions for its Assembly (22260). Artesanía Latina.

ELCANO SHIP MODEL INSTRUCTIONS: SAILS (PART V)

Step 23 of Elcano ship model instructions (22260) for the assembly of Spanish school ship, is about the ‘Sails – Part V’. You need to pay close attention to the video so that you can build the rest of the sails.

JUAN SEBASTIAN ELCANO MODEL SHIP: DECKS (PART III – A)

We continue with Step 24 of the Elcano ship model instructions for its assembly. This is about ‘Decks – Part III’.

Take two M8 parts and glue them parallel to the foredeck as shown on the video. Next, take ten units of the part DM4. With the help of cyano and grip pliers, take five of these and glue each one next to the other on the deck area shown. Then turn the boat 180º and do the same for the other five on the other side of the deck.

Once this task is done, take a Stainless Steel Ruler 150 mm (27069). Use it to mark with a pencil on the edge of the hull two points with an equidistance of 18 mm. From each of these two points, with the ruler, measure and mark two points 6 mm inside the deck. Drill with a small hand drill at the two points marked on the deck.

Take an M6 part. Apply a drop of cyano and insert it with tweezers into one of the two holes made. Repeat the process with another M6 part and insert it into the other deck hole.

JUAN SEBASTIAN ELCANO MODEL SHIP: DECKS (PART III – B)

It is time to use thread part CT2 for the placement of part P2, previously painted with Off-White Acrylic Paint (27702). First, thread the thread through the two holes in part P2. Second, take the other end of the thread and feed it through an M6 part. Do the same with the other end. When you are inserting the two ends of the thread into each M6 part, insert them from the outside to the inside.

Next, make a knot in each of the two inserted ends so that the part P2 does not come loose. Apply a little cyano to each one. Repeat the process on the opposite side of the boat.

Elcano Ship Model Instructions for its Assembly (22260). Artesanía Latina.

JUAN SEBASTIÁN ELCANO ASSEMBLY: HANDRAILS AND PROPELLER

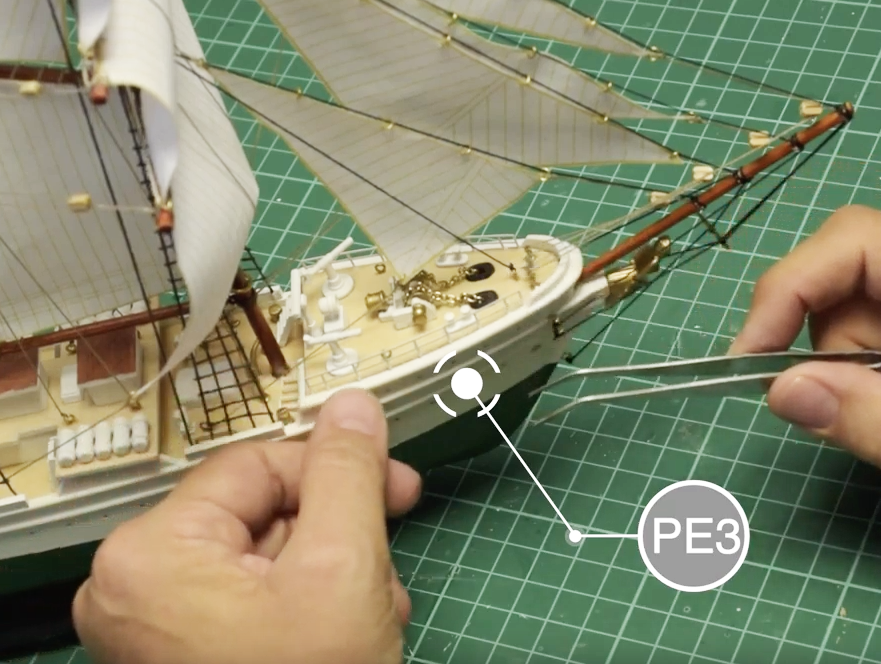
The ‘Handrails and Propeller’ is Step 25 of the video tutorial for building the model of the Elcano ship. Take two PE3 parts, previously painted with off-white paint. Apply cyano to each of the tips of the base that will be inserted. Place each of the two PE3 parts on the edge of the hull and the deck with the help of a Curved Fastening Tweezers (27021). There are two in the bow.

Elcano Ship Model Instructions for its Assembly (22260). Artesanía Latina.

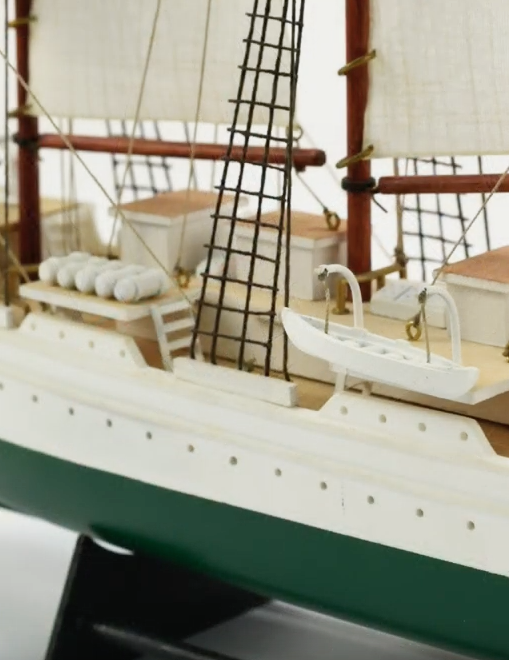
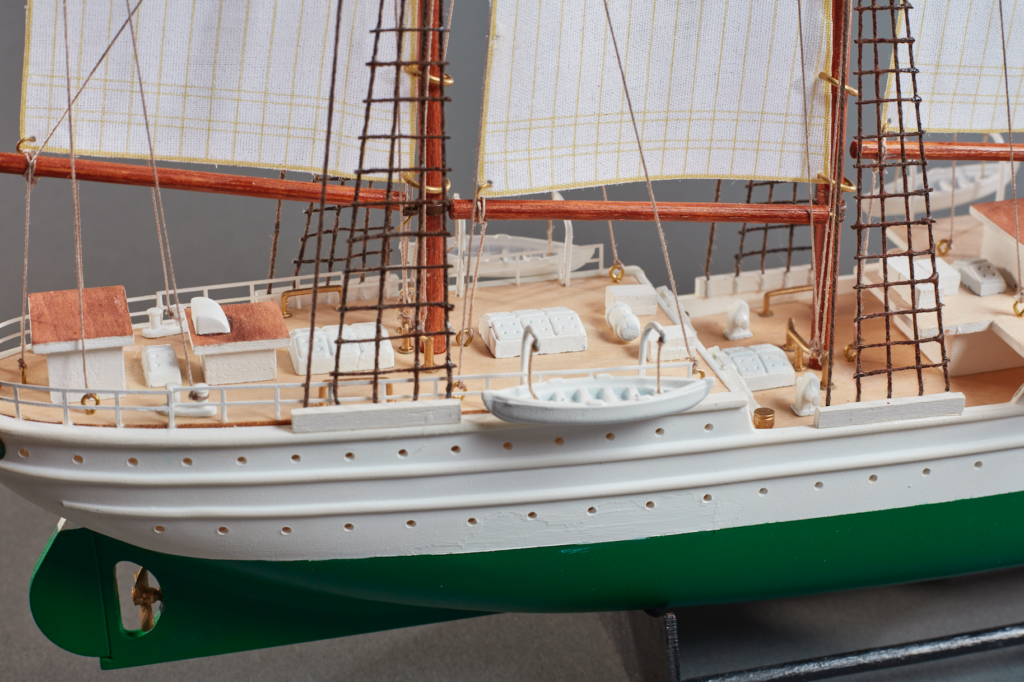
Then, take a PE4 part, also previously painted with off-white colour. Bend it with your hands so that it takes on the curved shape of the stern. Once you have the shape, apply cyano to each of the corners and glue the part with both hands to the edge of the deck. Take another PE4 part and tack it right next to the one you placed earlier. Put it behind the lifeboat. Repeat the process on the other side of the hull.

Elcano Ship Model Instructions for its Assembly (22260). Artesanía Latina.

Finally, the part M11 -propeller- enters the scene. Apply cyano to the tip to be inserted and place it with your hands and a pair of tweezers on the hull.

JUAN SEBASTIÁN ELCANO ASSEMBLY: LAST DETAILS TO FINISH (PART I)

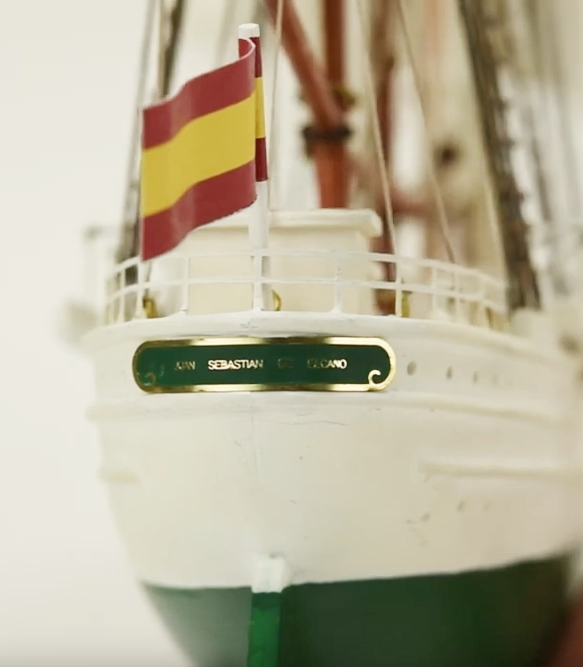
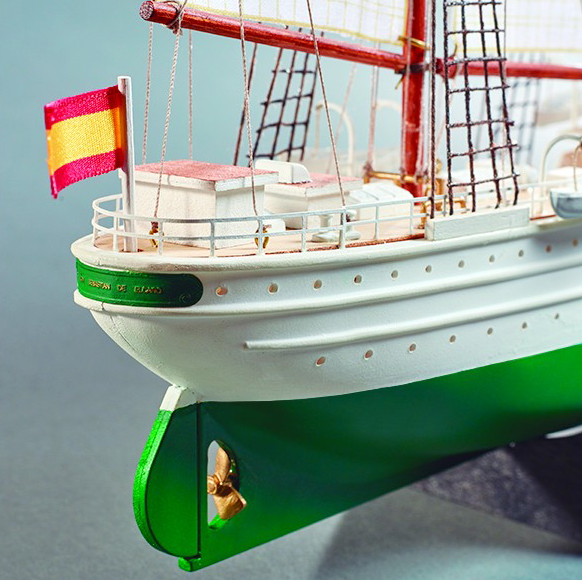
We continue with the final step of the Elcano ship model instructions for its assembly with the ‘Last Details’, which is Step 26. Arrange a unit of the part WD3 with a diameter of 2×35 mm, previously painted off-white. Later, take the part FL1 -Spanish flag- and with the help of a cutter, remove the sticker protector.

Place the center of the sticker -it has a stripe drawn- on the stick and close the sticker with your hands and the handle of a scalpel cutter until both sides of the flag stick together. Stick it in the hole in the aft deck provided for it.

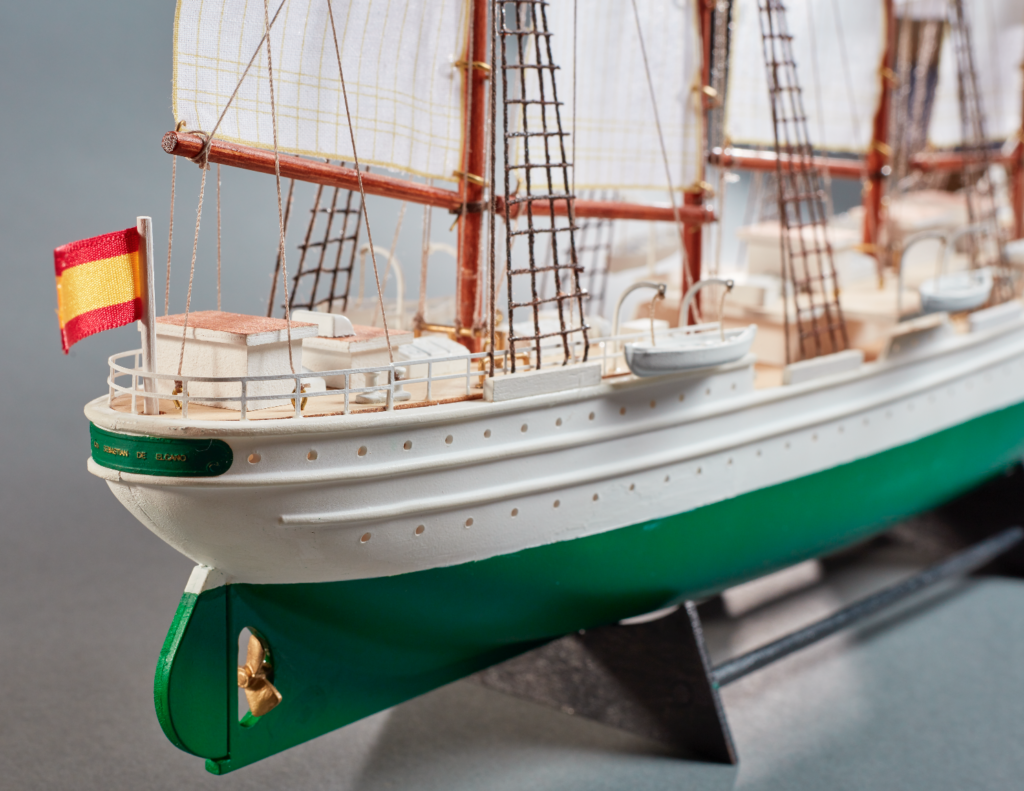
It is the turn of the part PE5 Elcano / PE6 Esmeralda -metal sheet with the name of the ship-. First, paint it with Hull Green Colour (27751). Then, sand the entire edge of the sheet with a utility cutter until you can see the metal of the sheet. Apply cyano and glue it to the stern of the boat, just below the flag.

JUAN SEBASTIÁN ELCANO ASSEMBLY: LAST DETAILS TO FINISH (PART II)

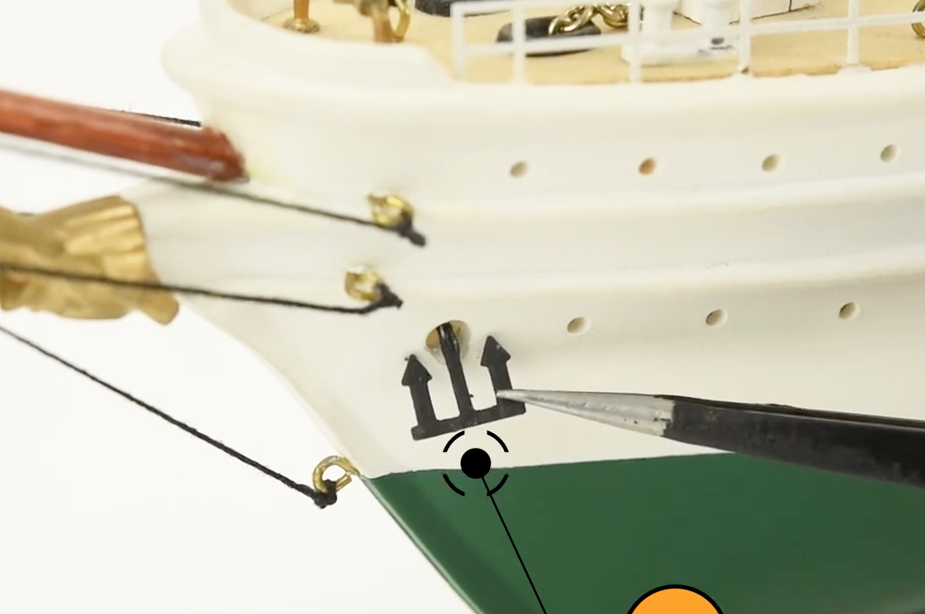
Now, take the two parts M17 -anchors-, previously painted with Off-Black Colour (27703). Place them into the two holes provided for this with the help of tweezers and a few drops of cyano. Finally, there is the part PE7 / PE8 -name of the ship for the base-. Also paint it with off-black colour, sand the edges with a cutter until you see the metal part and, with cyano, glue it to the exhibition base.

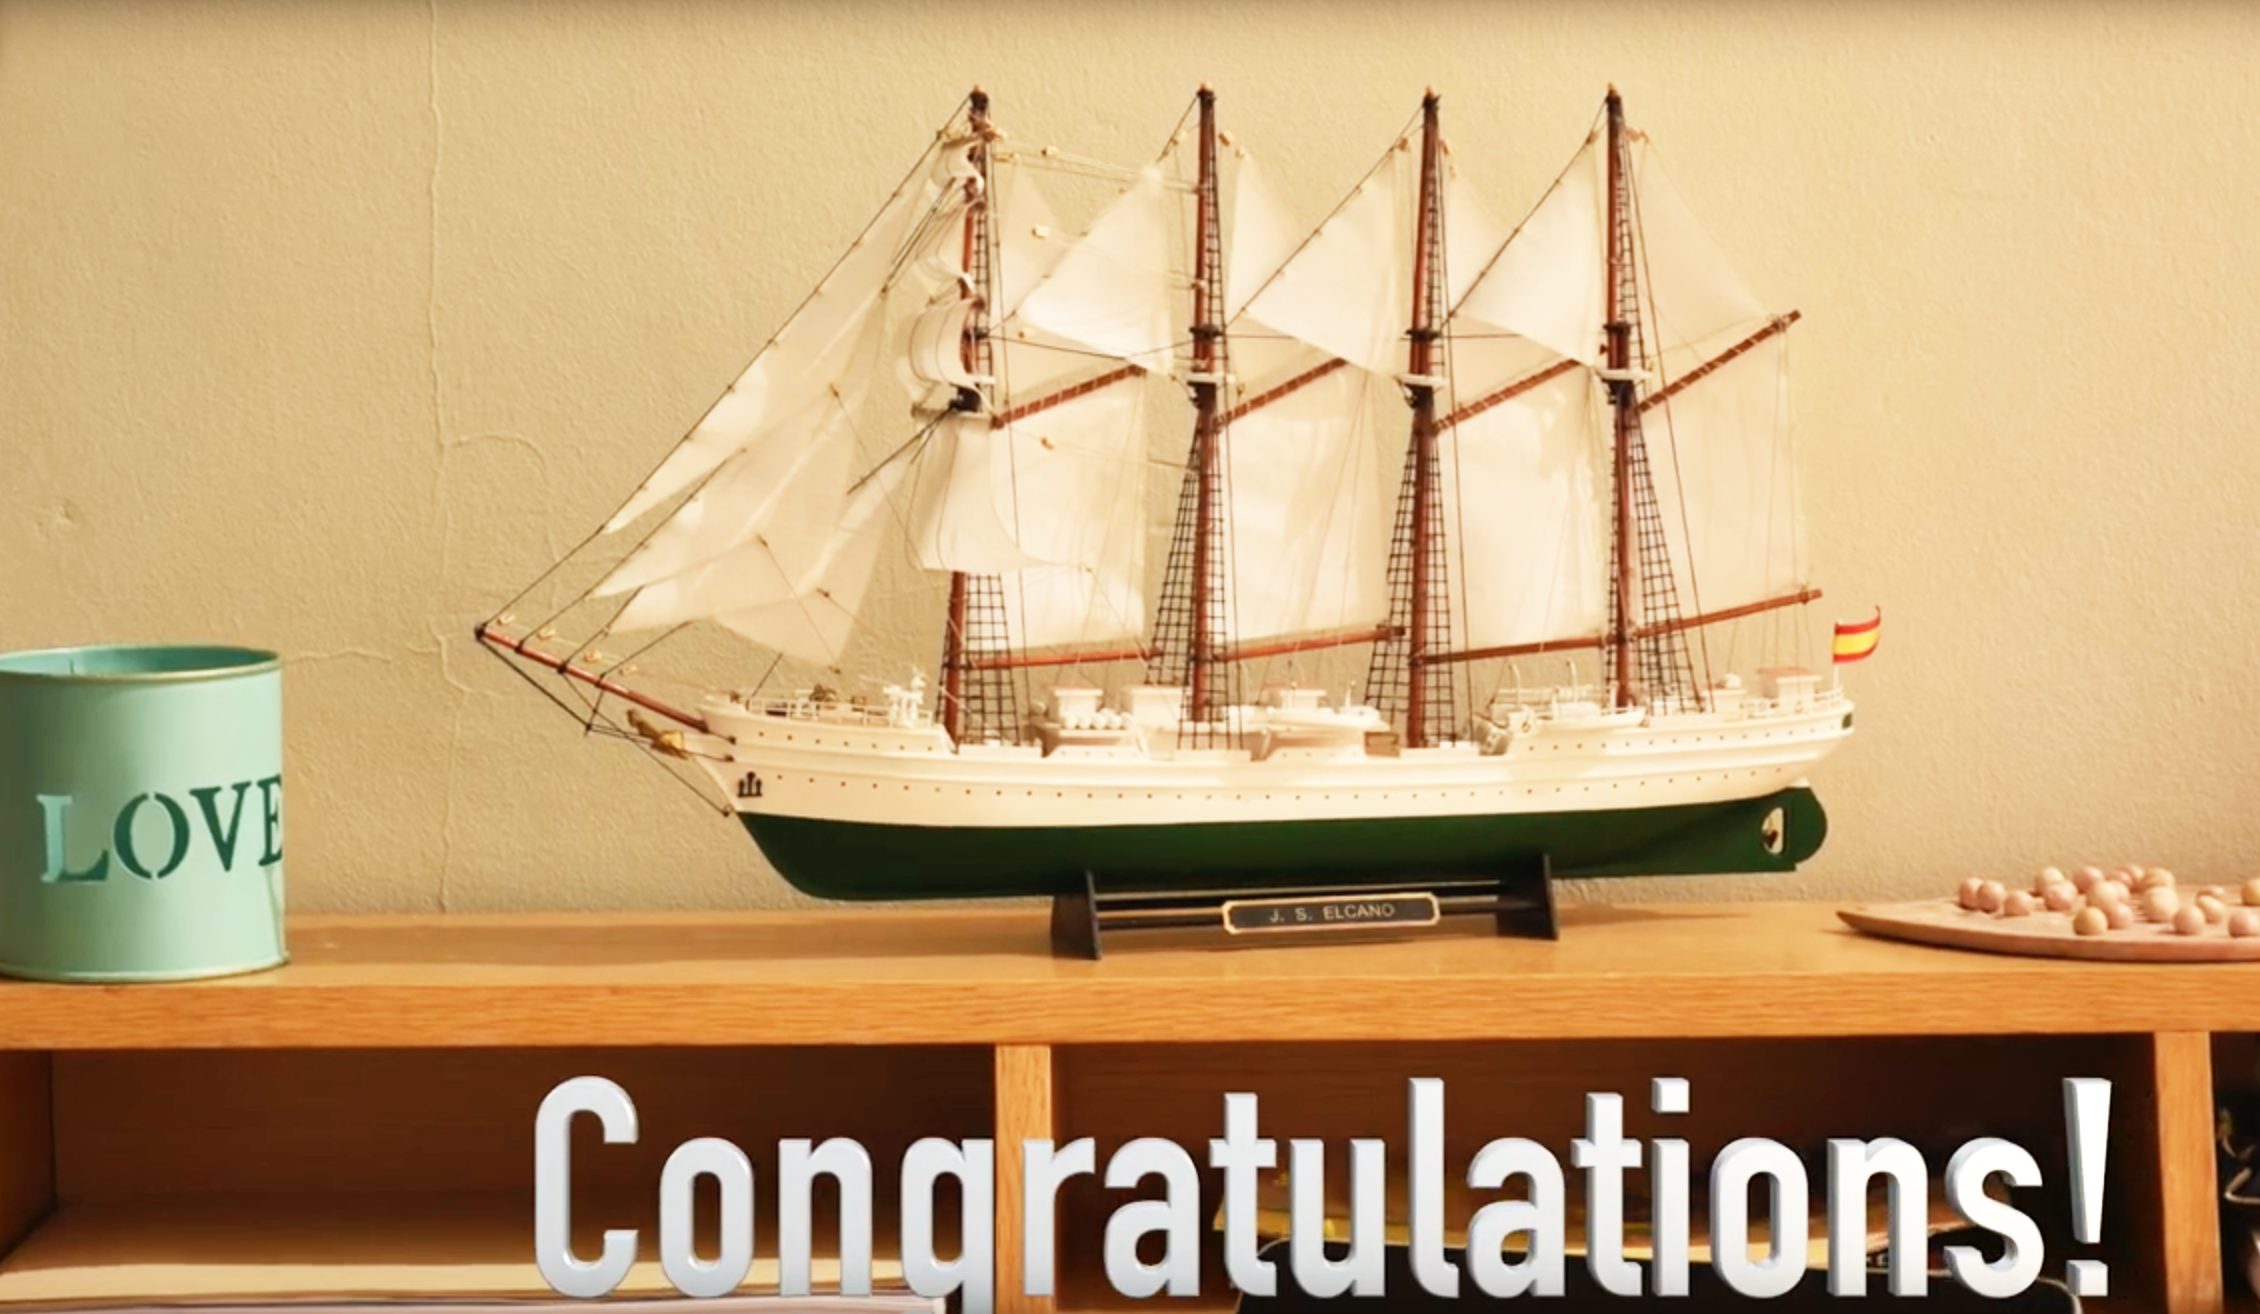
You have just finished building the wonderful model of the training ship Juan Sebastián Elcano / Esmeralda (22260)! Congratulations!
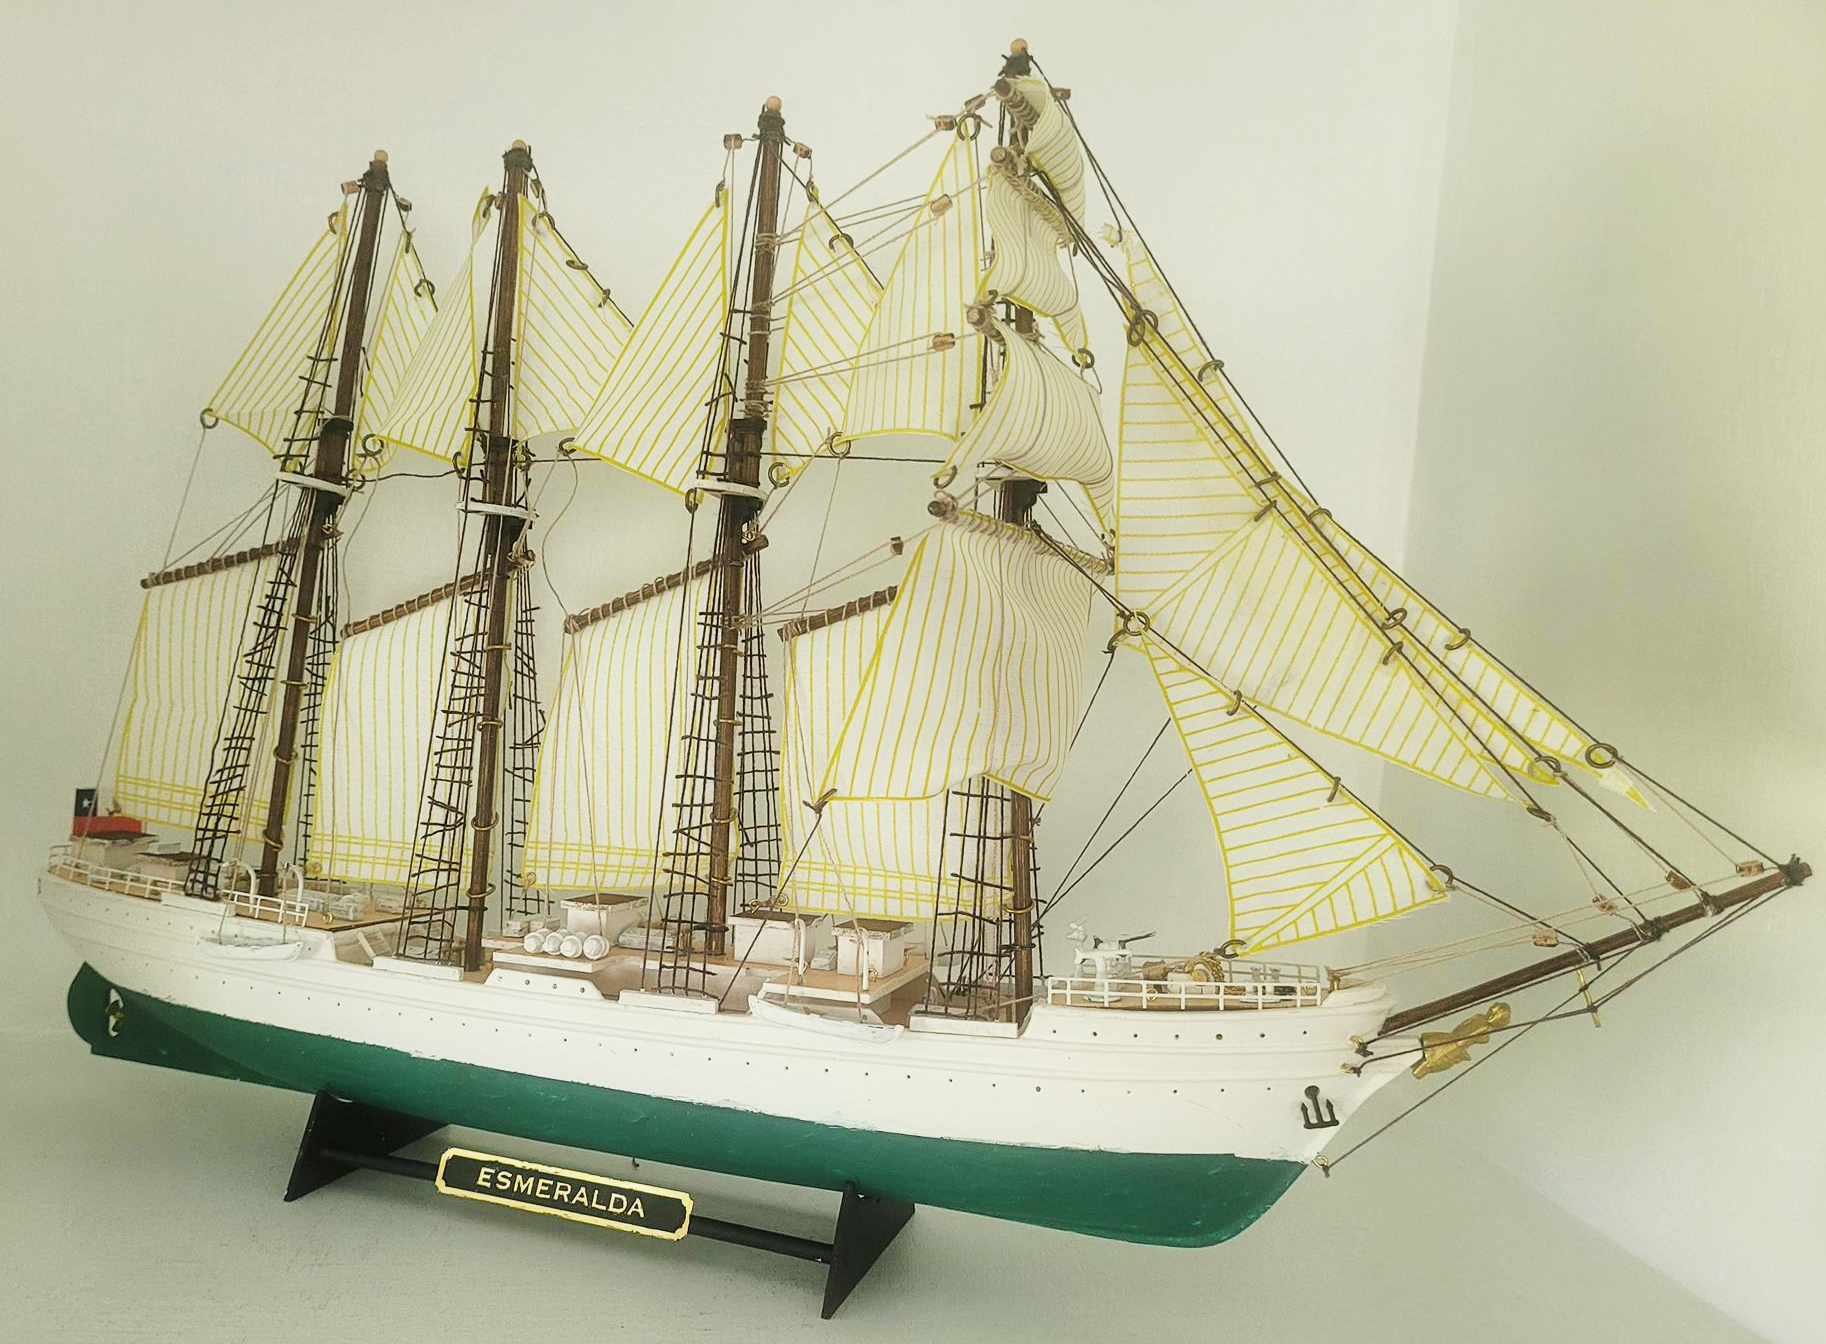
Model Ship Elcano / Esmeralda Built by our modeling friend Girish Khandagale.

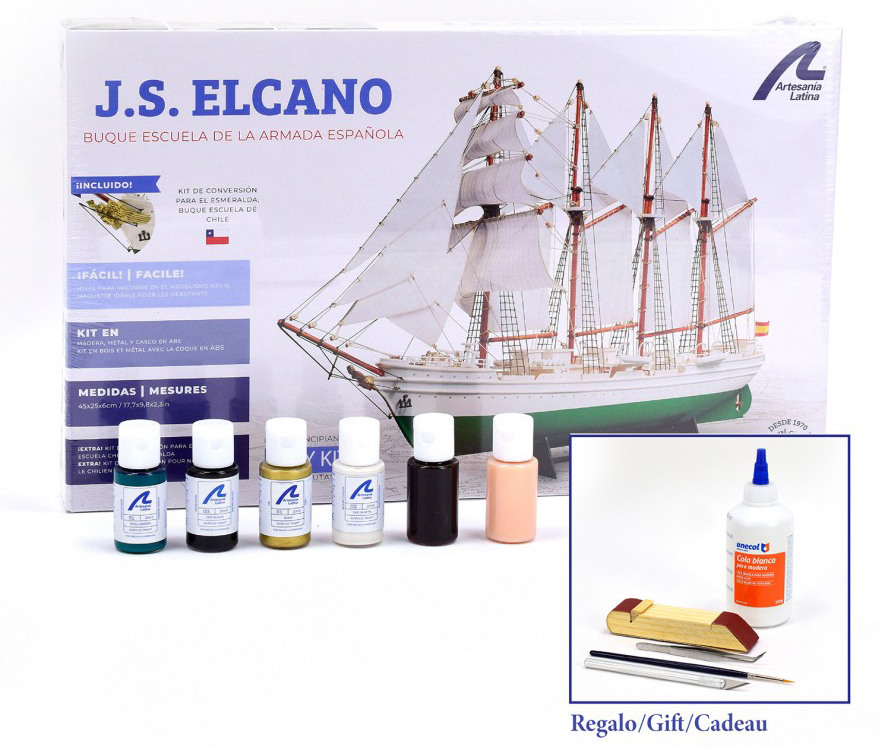
We remind you that you can also purchase the Elcano Gift Pack (22260L), which includes the kit with the schooner sailboat, its paints and some tools. It has a lower price than if the products are purchased separately. Elcano Gift Pack with the Model, its Paints and some Tools (22260L) by Artesanía Latina.
Read the third part of the post…

Posted in Model Building Tips

Build Juan Sebastian Elcano (III): Our Modelers Teach You How to Assemble the Spanish Training Ship

Let’s go with the third part of the post if you want to build Juan Sebastian Elcano model ship with more video tutorials recorded by our modelers during its assembly. The model of the Spanish training ship Juan Sebastian Elcano / Chilean Esmeralda (22260) at 1:250 scale is ideal for your first experience on the naval modeling. Now, we remind you that you can also purchase the Elcano Gift Pack (22260L), which includes the kit with the brigantine schooner sailboat, its paints and some tools. It has a lower price than if the products are purchased separately. That being said… Let’s continue assembling this historic model with a pre-fabricated hull!

Gift Pack with Ship Model, Paints and Tools: Training Ship J.S. Elcano / Esmeralda (22260L) by Artesanía Latina.

BUILD JUAN SEBASTIAN ELCANO: MASTS (PART II – A)

On Step 16, we continue to explain some of the most difficult phases when you are going to build Juan Senastian Elcano model ship: ‘Mats – Part II’. Take the eight PCL parts and one BW1 part -wire- and put them on your work table. Next, cut a small piece of wire (BW1) with a Professional Straight Cutting Pliers (27212). With a hand drill, make a 0.5 mm hole on the upper part of the stick (PCL) and apply our Cyanoacrylate for Porous Materials (27620), for sale separately, where the hole is. Insert the wire into it and bend it 90 degrees. With the help of a Stainless Steel Ruler (27069) and the aforementioned pliers, measure 0.7 mm and cut off the excess as seen on the video. Repeat the process with the remaining PCL parts.

Take the four parts S1 -sails- and arrange them on your workshop. With the help of a sewing needle, use the thread –part CT1– to sew part S1 -sail- to part PCL -mast-. Thread through the corner of the sail and around the stick as well with some Straight Fastening Tweezers (27020) and the previous drill. Continue sewing the sail with the needle and thread along the length of the mast. Knot at the end of the neck, apply cyano and cut the excess thread as shown on the video.

ASSEMBLY ELCANO MODEL SHIP: MASTS (PART II – B)

Well, it’s time for the next task. Look for one BR1 part and four BR2 parts, all rings. With a utility cutter, poke a small hole in the outer corner of the sail. Open part BR1 with two Needle Nose Pliers (27213) and insert the ring through the sail. After inserting it, close it again using the aforementioned pliers. Now, do this whole process again with the four BR2 parts on the opposite horizontal side of the sail -with respect to the placement of the BR1 part-, just as seen on the video. Repeat with the remaining three sails. It should look like this:

Build Juan Sebastian Elcano Model Ship (22260) by Artesanía Latina.

ASSEMBLY ELCANO MODEL SHIP: MASTS (PART II – C)

Once the previous stage to build Juan Sebastian Elcano model ship has been completed, take one of those sails and introduce the mast created on the previous post through the large rings. Then, take the wire of the mast with the sail that you had bent to 90ºand insert it into the hollow part provided for it, below the top. Thus the upper part of the sail remains fixed to the mast. On the lower area of the mast, take an M18 part and insert it. Apply cyano to adhere it and remove excess glue with paper. The final result should be this -repeat the process with the other three sails-:

Build Juan Sebastian Elcano Model Ship (22260) by Artesanía Latina.

Jar of cyano on hand! On the four holes of the deck to place the masts, apply adhesive and insert them. Use the steel rule to calculate the vertical 109 mm and to check the distance between masts. Also, it can help you position the masts while the cyan dries. The end… For now!

Build Juan Sebastian Elcano Model Ship (22260) by Artesanía Latina.

BUILD JUAN SEBASTIAN ELCANO MODEL SHIP: SHROUDS (PART I)

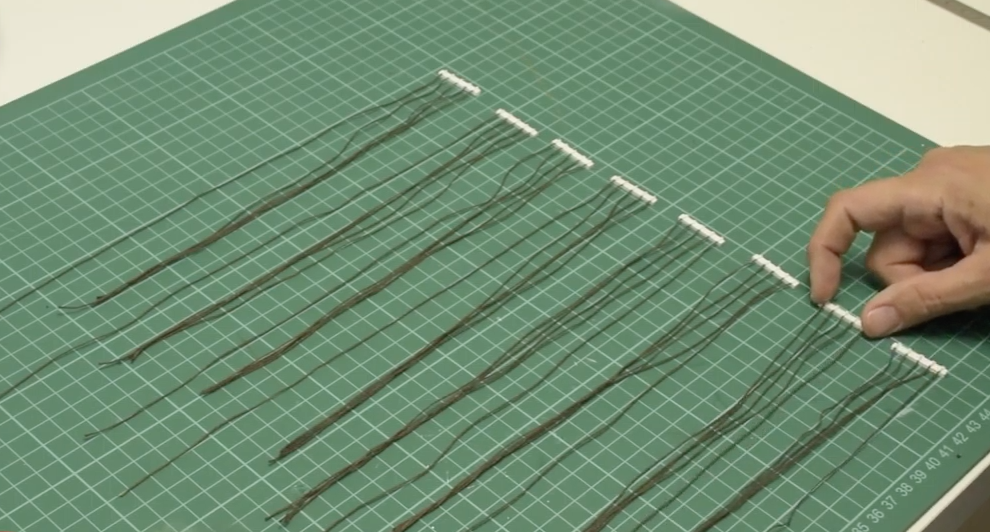
Step 17 when a modeler wants to build Juan Sebastian Elcano Model (22260), the Spanish training ship, talks about the ‘Shrouds’. Extract with a cutter and paint with off-white colour (27702) the eight WS1 parts. Grab one of these. With a pencil and a ruler, mark five equidistant points on the part. Put cyano on the part CT2 of 200 mm and glue it on the first marked point using Straight Fastening Tweezers (27020).

Repeat the process with the other three CT2 parts. On the last position marked with pencil, do the same thing with a 300 mm CT2 part. In total, there should be five threads attached to part WS1. Cut the excess of thread on one side of part WS1 with Thread Snips (27060). and paint off-white the glued part of the five threads with a brush.

Repeat this task again with the other seven WS1 part to get this:

Build Juan Sebastian Elcano Model Ship (22260) by Artesanía Latina.

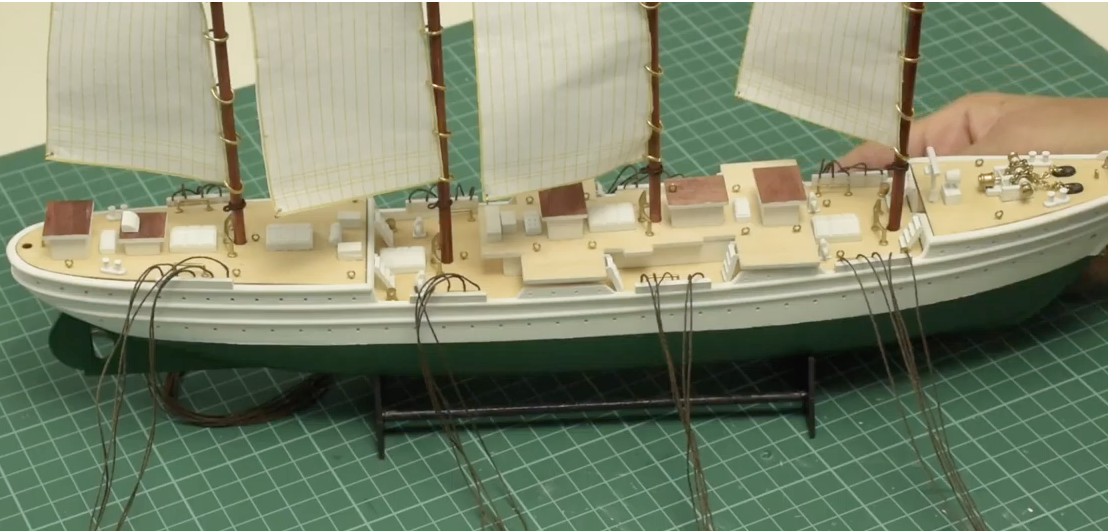
It is time to glue those eight resulting parts. Take one and put cyano on the bottom. Glue the part to the edge of the hull, but be careful. The area where the threads are glued must look at the deck, that is, the part of the threads that are glued must not face the outside of the boat, but the inside. Repeat the process with the other seven parts so that it looks like this:

Build Juan Sebastian Elcano Model Ship (22260) by Artesanía Latina.

BUILD JUAN SEBASTIAN ELCANO MODEL SHIP: SHROUDS (PART II)

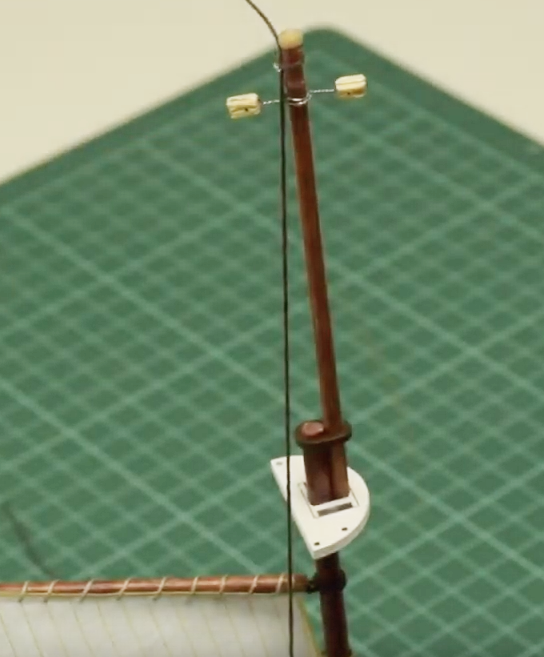
Take the longest thread -300 mm- from each of the parts and tie it around the tip of the nearest mast. Using a flat-grip plier, tie it securely by tying it into a knot and pulling the string so it is tight. Apply ciano to the knot made with the thread at the end of the mast and remove the excess of thread with Thread Snips (27060). Remember to repeat another three times this step on the other three mats.

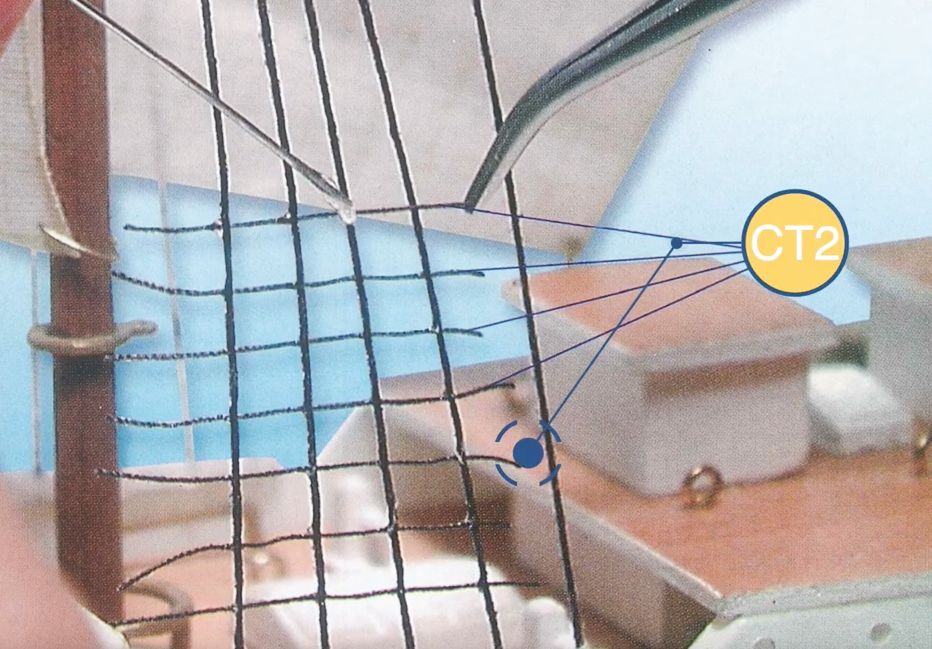
Now do the same with the rest of the short threads -200 mm– but gluing them to the lower/interior part of the four tops. And finally, glue all the CT2 threads perpendicular to the already installed vertical threads. In this way, it will be ongrid mode. To do this, with patience, you must cut the threads with precision according to the height that you adhere them horizontally. And… Wow! Let’s have shrouds.

BUILD JUAN SEBASTIAN ELCANO MODEL SHIP: FIGUREHEAD & BOWSPRIT

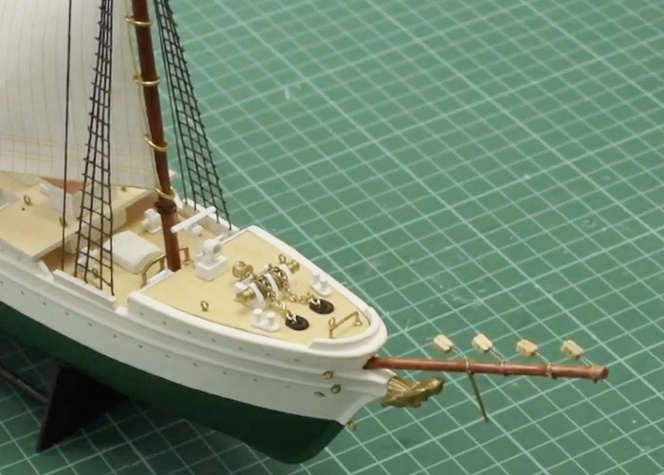
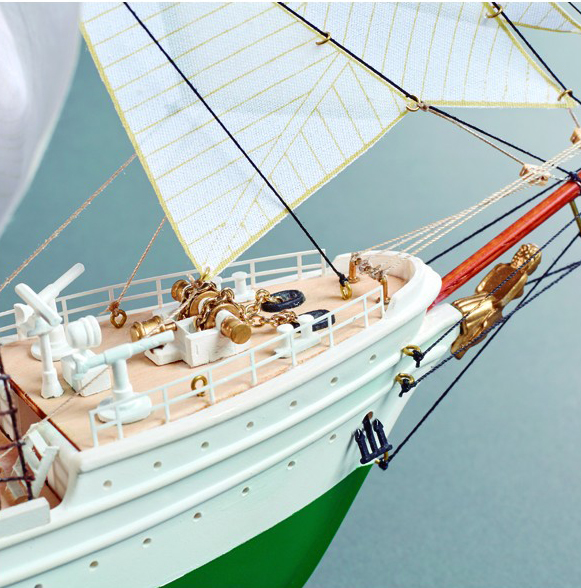
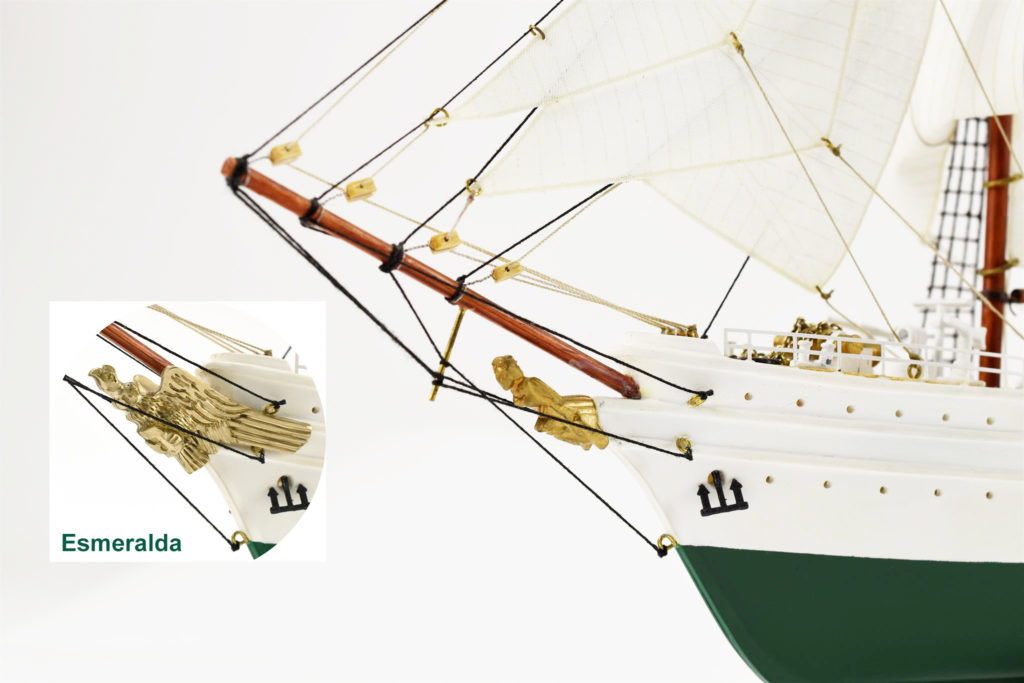
We continue with Step 18 of Build Juan Sebastian Elcano model sailboat (22260). This is about the ‘Figurehead and Bowsprit’. Paint gold colour (27761) the part M19. Apply cyano to the inner bottom of the figurehead and stick it to the tip of the hull’s bow with your hands. Remember that if you want to place the Chilean emblem of the training ship Esmeralda, you must do the same with the part M20.

Then take the BSP part. With a ruler and pencil, mark the half of the part. Mark well with a cutter. With a manual drill and a 1 mm diameter bit, drill on the previously indicated place. Take a BW2 part and cut a 16 mm piece with Professional Straight Cutting Pliers (27212).

Take a BL part and surround the BSP part with your two wires. Help yourself with a Needle Nose Pliers (27213) for turning both ends of the wires around stick, tying the part to it. Get rid of excess wire once knotted to the stick. Repeat this process three more times on the BSP part. From the top point to where the hole is on the center of the stick. It is the turn of the part BW2, apply cyano in the centered hole made before and insert the part BW2.

By hand, fold down all four BL parts, apply cyano to the bottom end of the stick, and glue on the designated area. We already have bowsprit too!

Build Juan Sebastian Elcano Model Ship (22260) by Artesanía Latina.

MINIATURE REPLICA JUAN SEBASTIAN ELCANO SHIP: SAILS (PART I)

The ‘Sails – Part I’ is Step 19 of the video tutorial to build Juan Sebastian Elcano model ship. Take three parts S2, that is, three sails. Repeat the process you did on the ‘Masts – Part II’ section. In this case, the six parts are BR1 -small rings-. Place one part BR1 in one corner of the sail and the other five longitudinally and equidistantly on the other side.

Drill with a 0.75 mm hand drill the 4 masts at the height shown on the video. Pass thread -part CT2– through the five rings of the sail. Tie the sail with its thread to the top of the mast you are working on. Once the knot is done, apply cyano to it. Thread the other end of the sail string through the hole you just made on the next mast. Pull the thread until the thread and the sail is taut. Knot and cyano. Remove the rest of the thread with Thread Snips (27060). Repeat with the other two remaining sails.

Go back to the first sail placed, take more thread -part CT2-. Tie it to the first mast, above the top, at the height of the horizontal peak of the sail. Once tied, take it up to the second mast and knot it at the same height. Now the same thread, bring it closer to the third mast, and lastly to the fourth one. Help yourself to do this with Curved Fastening Tweezers (27021). Finally, put cyano on the fourth neck knot and cut the excess thread with our Thread Snips (27060).

Build Juan Sebastian Elcano Model Ship (22260) by Artesanía Latina.

MINIATURE REPLICA JUAN SEBASTIAN ELCANO SHIP: SAILS (PART II)

We continue with ‘Sails – Part II’, which is Step 20 of the construction of the model of the famous Spanish school ship (22260). Arrange a unit of parts S3, S4, S5 and S6, that is, sails. Take part S3, put nine rings -part BR1- on the longest side, and one on the corner. Then, take thread -CT2- and tie it at the end of the mast. Pass the line through the nine rings, tighten and knot it and glue it to the nose of the bowsprit previously installed. Repeat the same process with part S4, but with seven rings on the side and one on the corner. Remove excess string from the bowsprit of both sails. And the same with parts S5 and S6.

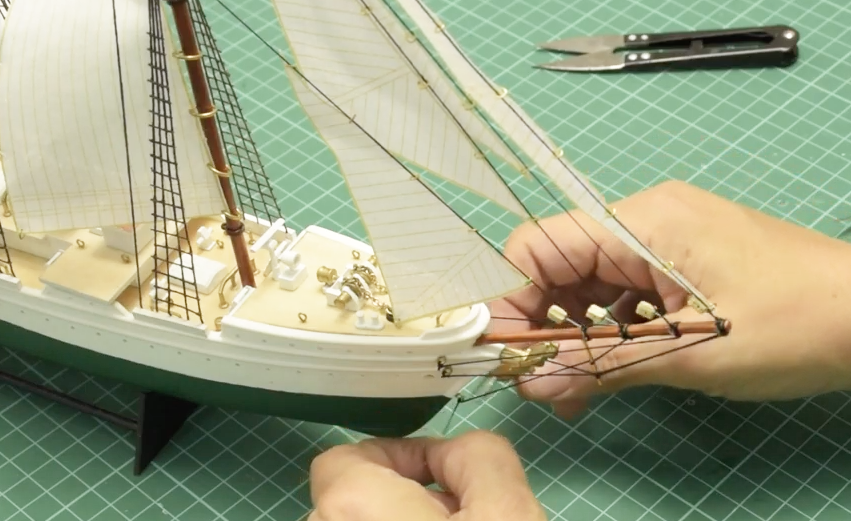
Next, more thread, this time, tie it to the point of the bowsprit, pass it through the metal -underneath the mast- and by the ring in the middle of the prow of the hull -the second-. Tie it there. Do the same with a second thread: knot it at the height of the rope of the third sail on the bowsprit, passes it through the upper ring and tie it. In all cases, remove the excess thread once tied. Repeat this process on the other side of the boat, so that the thread also enters through those rings. Finally, a third thread that will go through the lower ring on both sides of the bow.

Build Juan Sebastian Elcano Model Ship (22260) by Artesanía Latina.

Read the second part of the post…

Read the fourth and last part of the post…

Posted in Model Building Tips

Elcano Model Set Up (II): Assemble with Our Videos the Faithful Replica in Miniature of the Spanish Training Ship

We are back to show you the second part of Elcano model set up with other video tutorials made by our professional modelers. This faithful 1:250 scale miniature replica of the Spanish training ship Juan Sebastian Elcano / Chilean Esmeralda (22260) is aimed at beginners modelers.

Elcano Model Set Up: Video tutorials. Second part.

ELCANO MODEL SET UP : UPPER DECK

We continue to accompany our modelers friends during Elcano model set up with Step 9, dedicated to the ‘Upper Deck’. Take the parts 5 and MD3 of the deck shown on the image. Next, apply our Cyanoacrylate for Porous Materials (27650), sold separately, around the edge of the top of the part MD3. Take part 5 and paste it on top of the MD3 as shown on the video.

Once the adhesive is dry, take a small flat brush and a jar of White Primer Filler (27701), sold separately. Paint these and carefully, paint the sides of the two joined parts. Drill with a 4 mm hand drill the central area to make a hole.
Then, paint all the parts M15 and start cyanoacrylate gluing each of the parts M15 and DM2 with off-white acrylic paint (27702). We remind you that you can purchase the complete Juan Sebastian Elcano Acrylic Paints Set (277PACK17). Once all the parts have been painted, glue them with parts 7, the two previously joined parts as seen on the video. Adhere also, without prior painting, the part M10.

Make eight small holes on the places indicated on the video. Using some Straight Fastening Tweezers (27020), place the eight parts M2. Lastly, cut the lower excess of these parts with a Professional Straight Cutting Pliers (27212). Finally, take another part M2 and put it on the roof of the middle cabin on the upper deck.

ELCANO MODEL SET UP: LIFERAFTS

Step 10 of Elcano model set up, the Spanish brigantine sailing ship, deals with the ‘Liferafts’. Take the part WD1 -4 mm in diameter and 10 mm long- and proceed to sand it down.

Put some cyano on two BR3 parts, which are sort of washers. Insert them into each of the both sides of the part WD1 with the help of a pair of tweezers. Finally, paint the joined part with off-white acrylic paint (27702). The end result is a DM4 part. Repeat the process eleven times.

ELCANO TRAINING SHIP MODEL: DECKS (PART II)

We continue on Step 11 of the Elcano model set up, the Spanish school ship. This is about ‘Decks – Part II -‘. Gather two parts M7, three piarts M2, one part M4, another M5 and one M9. Paint them with color off-white  and stick them with cyan on the places provided for it on the video, specifically, on the foredeck .

Subsequently, take the two parts MBC – 30 mm long – and adhere them as shown. It is time for another collection: the one of two parts M9, two parts M12, two parts M21, one part M3, one part M10, two parts PE2 and two parts M2. Paint them in white and glue them as you have done a few moments ago, but in the consecutive part of the deck.

Again, repeat the process on the central part of the deck with four parts PE2 and two parts M9. Do the same on the fourth part of the deck with two parts M12, two parts M9, one part M2, one M3, another M10, two parts PE2 and two parts M21.

On the stern deck, do it with seven parts M2, two parts M7, another two M9 and two parts 7. To which you must add, two parts M3, another part M2, one M10, one M15, one M16, a part DM1, another DM2 and a last DM4. See on the video the beautiful final result of the placement of all the details.

JUAN SEBASTIAN ELCANO MODEL SHIP ASSEMBLY: BOW

The ‘Bow’ is Step 12 of the video tutorial for the assembly of Elcano trainingship. Take a drill of 0,75 mm and drill it five times on the forward hull, where our professional modeler indicates.

Using pliers, hold the eyebolts (parts M2) to be attached and apply a bit of cyanoacrylate at each one before inserting them into position horizontal in the holes.

ELCANO MODEL SHIP SET UP: TOPS

We continue on ‘Tops’, which is Step 13 of the assembly of the reduced model of the famous Spanish school ship Juan Sebastian Elcano (22260). Lay out one part 13 and one part WD1. With a file, sand the inner center area of part 13 as seen on the video until you can insert part WD1 through it. Take the part WD1 and paint with off-white and a flat brush the part 13 -use a pair of tweezers to hold the part while you do it-.

Next, remove the eight part 12 from your plank of wood. Sand the sides of all the parts before painting them burnt umber colour (27743). Let them dry.

ELCANO MODEL SET UP: BLOCKS

Let’s go with the video tutorial of Step 14, in which we will work on the ‘Blocks’. Using a scalpel cutter, remove all twenty-four parts BL from your wooden plate. Sand them on all sides, emphasizing the central part with relief.

Take a manual drill with a 0.75 mm bit and drill through the part BL from one end to the other. Repeat the process with the remaining twenty-three blocks.

ELCANO MODEL SET UP: MASTS (PART I – A)

Step 15 of the video tutorials in which our modelers teach the assembly of the model of Elcano / Esmeralda boat refers to ‘Masts – Part I’. Take two parts WD1, which have a diameter of 4 mm and five parts WD2, which are 3 mm.

You must cut and take four parts MA1 -diameter 4 mm and length 149 mm-, four parts MA2 -diameter 3 mm and length 91 mm-, eight parts PCL -diameter 3 mm and length 63 mm- and a part BSP -diameter 3 mm and length 90 mm-. Repeat the process with a part Y1 -diameter 3 mm and length 105 mm-, a Y2 -3 and 93 mm-, a Y3 -3 and 72 mm- and a Y4 -3 and 61 mm-. Varnish all the mentioned parts with water-based stain for sapele wood (27690-20), included in the indicated Juan Sebastián Elcano Acrylic Paints Set (277PACK17).

Then, cut a part of wire (SW part) with the Professional Flat-Cutting Pliers (27212), give it a U-shape and insert a block (part BL) into it through the hole made before. Surround the block with the wire through the slit, turn it until it is fixed with a Professional Needle Nose Pliers (27213). Do the same with another three blocks.

JUAN SEBASTIÁN ELCANO MASTS (PART I – B)

Take a part MA1 and a part 13 -before worked- and introduce the 13 through the hole from the middle of the MA1. Apply cyan near the end of the stick, and lay part 13 on top until dry, 15mm from the end of the stick. Use our Stainless Steel Rule 15 cms (27069) for it. Put, again, cyano, but this time on the final part of the mast and join a part 14 to it -previously painted-, put it on the tip of the mast.

After drying, insert a part MA2 through the other hole on part 14. Apply cyano so that it sticks to the part MA1 and to part 13 as seen on the video. Also put adhesive on part 12 and attach it to part 13. Repeat this last step with another part 12. Now, insert the part M18 -previously painted- through the lower part of the mast, calculate with the 15 mm rule, put cyano on the mast and glue it there. Drill a hole with a 0.75 mm hand drill on the mast, glue an M2 part -eyebolt- and insert it into the hole with the help of pliers.

ELCANO MODEL SET UP: MASTS (PART I – C)

Next, take a part BL -block with wire- and wind the wire with your hands and the flat-grip pliers to the top of the mast. Cut the excess wire. Repeat the process with another, placing it at the same height. Put glue on the two wires attached to the pole so that the blocks do not move. It is time for the part WB. Attach it to the top of the mast, above the two blocks. The modeler must do this task again until four masts are finished.

On the next post, we will continue showing our modelers friends how to continue building the model in wood and plastic of the Spanish training ship Juan Sebastian Elcano (22260). In the meantime, start building it now with us!

Elcano Model Set Up. Model Ship Kit Spanish Training Ship (22260).

Read the first part of the post…

Read the third part of the post…

Posted in Model Building Tips

Elcano Model Ship Assembly (I): Build with Us the Spanish Training Ship Model for Beginners

We are going to teach our modelers friends the assembly of the model ship Juan Sebastián Elcano (22260), the Spanish training ship that It is named after the browser that went around the world for the first time. Without forgetting Francisco de Magallanes, of course. We have decided that the best way to help the beginners modelers to assemble this faithful miniature replica is through video tutorials created by us. Thus, we accompany them during the construction process of this 1:250 scale model in wood and plastic, which can also be the Chilean training ship, Esmeralda. Decorate it however you like.

Elcano Model Ship Assembly: Spanish Training Ship Juan Sebastián Elcano 1:250 (22260) by Artesanía Latina.

So, we begin the process of Elcano model ship assembly with the first thing to do when you have any naval modeling kit on your hands. Check its contents using the parts list. Normally, we include a few more parts than stipulated in case the modeler suffers a mishap with one during assembly. A part breaks, it is lost, the dog eats it, it inherits from a relative or, for example, the house floods. There are many reasons that we read from our loyal customers for more than fifty years. Pay attention to the video below.

We recommend that you specify if all the parts are inside the box. In the event that this model is missing something, which we do not believe is the case, do not hesitate to contact us to request it here: Spare Parts Service.

LET’S BUILD TOGETHER THE FIRST THING: EXHIBITION BASE

Now, let’s get down to business with Step 1 of the video tutorial. Let’s build the ‘Exhibition Base’ in wood to display the naval model of Juan Sebastián Elcano once assembled. By the way, when you finish it it will be 17.91” (455 mm) length, 10.03” (255 mm) height and 4.33” (110 mm) width. Take two 150mm length wooden round dowels (WD1) and remove the two base pieces (4) from the wooden plank.

Next, apply our cyanoacrylate for porous materials (27650), sold separately, on one end of the dowel. Insert it into one of the two holes on one of the sides that make up the base. So that everything is balanced, we recommend that you use our Micro Square, present in Micro Rules Set (27325), which is also sold separately. Repeat the process with the other dowel, inserting it into the other hole in the same base piece. All that remains is to apply adhesive to the other two ends of the round dowels and place the other part of the base into the two small holes. Make sure everything is straight and stable.
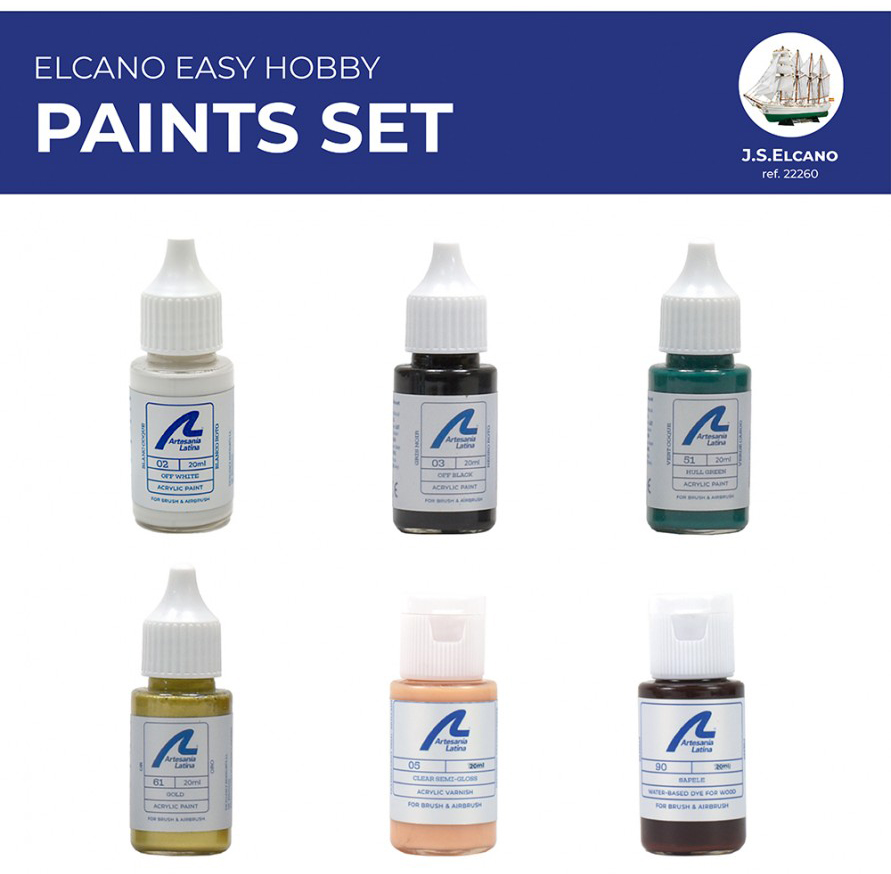
Let it dry for a few minutes to give it… The final touch! Paint it with brush. With what paints? You wonder. No problem. Artesanía Latina has created a Specific Acrylic Paints Pack (277PACK17) for the scale model of Juan Sebastián Elcano / Esmeralda. Add them to your shopping cart!

Elcano Model Ship Assembly: Paints Set for School Boat Model Juan Sebastian Elcano (277PACK17) by Artesanía Latina.

THE HULL OF JUAN SEBASTIÁN ELCANO

Step 2 of assembly of the model ship Elcano passes through its prefabricated ‘Hull’ made of plastic. We intend to make the initiation to this wonderful hobby of any modeler easier. Removed the headaches of building a hull out of wooden parts. For all these reasons, it is ideal for people who wish to assemble their first scale naval reproduction. Take the two parts that make up the hull and put cyanoacrylate on all the edges and lace areas of one of the parts of the helmet, so that none remain without glue. Carefully join them with precision and light pressure so that there is a single piece. The hull is already assembled!

Use a brush to apply a layer of white filler primer (27701) to make everything even, sold separately. The next task is to draw the waterline on the hull. On the video we show an artisan way of drawing it, however… We have another magnificent solution! Our new Waterline Marker (27649), do not hesitate to purchase it for your naval modeling workstation (27648).
It’s time to finish the hull. Paste japanese masking tape above the waterline drawn in order to paint the lower part of the hull, which remains submerged. Take the little jar of hull green paint and paint it with a brush, as we did, or with airbrush, however you like. Let it dry and after a few hours apply a second layer. Finally, remove the tape carefully and with a cutter remove any excess paint.

ELCANO MODEL SHIP ASSEMBLY: DECKS (FIRST PART)

From now on we are immersed in Step 3 of the assembly of the model of the ship that bears the name of the famous Juan Sebastián Elcano, the beautiful brigantine schooner sailboat. Touch the first part of their ‘Decks’. Take the parts 1, 2 and 3 of the deck that appear in the image. With the help of a pencil and a Micro Center Ruler (27326), mark and make a small hole with a drill 0.75 mm diameter in each of the points indicated on the video. Continue using a brush to paint the three parts with satin varnish, included in the paint pack.

Take part 2 of the deck and paint the two M1 elliptical parts with off black paint. Let dry and with some straight fastening tweezers (27020) apply cyano to each of the ellipticals and carefully adhere around each one of the two large holes. Use a rounded file to enlarge the two holes on which you have glued the parts. Remove the remains of sawdust and dust. Another stage of construction finished together!

ELCANO SHIP MODEL ASSEMBLY: DECK PLACEMENT

In Step 4 of the assembly of the model ship Juan Sebastián Elcano, let’s quickly see the ‘Deck Placement’ with which we have just worked. Take the three parts that make it up. Apply around the contour of part 1 -the one that goes in the center- cyanoacrylate and fix this by pressing it carefully. Then, do the same with part 2, the foredeck to which you have glued the two elliptical pieces, and with part 3, the stern.

Finally, take all the M2 parts from the kit, that is, the golden eyebolts. Put cyanoacrylate in each of these and insert them with a tweezers into each of the small custom-made holes on the deck you made on the previous step.

BUILD THE CABINS OF ELCANO MODEL SHIP

Step 5 of the assembly of the model of the Spanish training ship Juan Sebastián Elcano / Chilean Esmeralda refers to the construction of the ‘Cabins’. Place the part MD1 and the 4 units of the part MD2 on your work table, which by the way you can protect with any of our cutting mats. Paint all these parts with off white paint, leaving one side of each of these unpainted in order to for the adhesive to work. Then, remove from the plate one part 8 and 4 units of part 6. Apply cyano to the unpainted side of each part. Take part 8 and glue it on top of MD1, repeat the process with the 4 units of part 6 over the many others of the MD2.

Once glued, paint with off white the part of the 5 units that has adhered, since it was unpainted. Wait for it to dry. To finish, paint with sapele water-based wood stain the top of each cabin, which you previously glued and painted white. We remind you that all the paints, stains and varnishes that we use can be found in the Juan Sebastián Elcano Acrylic Paints Set (277PACK17), for sale separately.
JUAN SEBASTIÁN ELCANO DECK ELEMENTS

Using a cutter, extract the 10 units of part 7. We are on the video tutorial, Step 6, which deals with the ‘Deck Elements’. For now, easy for any fan who wants to get started in naval modeling, right? Let’s continue… Take two of those parts, and glue them together with cyano. Repeat the process with the rest of parts until, after gluing them, you are left with 5 units of part 7. Now, collect the following parts and arrange them on your work table. 5 units of the part M3, 1 unit of the part M4, 1 unit of the part M5, 8 units of the part M6, 4 units of the part M7, 2 units of the part M8 and 8 units of the part WS1 25 mm, in addition to the 5 units of part 7 that you already had.

Take those parts and glue them with a tiny dot of adhesive to a part of wood -so you don’t stain your work surface- and paint them off white. Proceed in the same way but with gold-colored paint with the 9 units of the part M9, the 4 units of the part M10, the unit of the part M11 and the 6 units of the part M12.

ELCANO MODEL SHIP ASSEMBLY: CAPSTAN

We focus on the ‘Capstan’, Step 7 for the assembly of the Elcano ship model made by Artesanía Latina. Remove from the kit the 2 units of part 9 and parts 10, 11 and PE1. Glue all of them with cyanoacrylate in the way shown on the video, pay attention to it. Use a brush to paint the glued part with off white color. Right after, do the same with gold color to paint the 2 units of the part M12, the unit of the part M13 and the 2 units of the part M14.

Once all the parts are dry, start gluing the metallic gold ones onto the white wooden part with some tweezers, stick to how it is done in the tutorial. Be patient with this step as precision and calm are required.

BUILD THE STAIRS OF ELCANO MODEL SHIP

We momentarily conclude this post for the assembly of the model of the Elcano ship with Step 8, ‘Stairs’. Get the part PE2 (6 units). With a Professional Needle Nose Pliers (27213) proceed to bender perpendicularly and very carefully the internal rungs. Also, bend the handrails -the sides of the part- inwards until there is a noticeable stair shape. Paint the staircase off white. Repeat the process 5 more times.

In the next post we will continue building together this magnificent model for beginners of the Spanish training ship Juan Sebastián Elcano (22260). Meanwhile, you can read more about this model in its specific blog post, watch its presentation on the video below and order it to assemble it now because it cannot be expected before so much desire. Start building it!

Read the second part of this post…

Posted in Ship Models

Juan Sebastian Elcano Model: the Spanish Training Ship Sails the Seas for Beginners thanks to its 1/250 New Modeling Kit

We have redesigned and manufactured it again to delight lovers of naval modeling, especially for those who want to start in this wonderful hobby. Why? Because the renewed wooden and high quality ABS plastic ship model of the Spanish school vessel called Juan Sebastian Elcano is, in this way, the easiest to assemble of the entire market, so it is the perfect scale model for any beginner modeler to start over 14 years old. The new Elcano will provide you with a new mounting experience. Also the possibility of building either the aforementioned model or its Chilean brother Esmeralda. They are two of the novelties of the modeling kit!

Wooden Ship Modeling Kit. New Spanish Training Ship Model Juan Sebastian Elcano and Esmeralda 1/250 (22260).

It is a replica of the famous brigantine-schooner, whose name comes from the Spanish explorer who as captain gave the first round the world in 1552, having to replace Fernando de Magallanes. The ship modeling kit of the new Juan Sebastian Elcano model, designed by Artesania Latina, contains high-quality birch wood cut with laser and an one-part helmet made of ABS plastic for a less arduous assembly. Also, pre-cut sails to be cut and placed, cotton threads and many details in metal and photo-etched. We cannot forget a magnificent gift: a wooden base so that the scale model is perfectly exposed. With the name plates and the national flags of both Elcano and Esmeralda!

Wooden Ship Modeling Kit. New Spanish Training Ship Model Juan Sebastian Elcano and Esmeralda 1/250 (22260).

Discover all the contents of the wooden naval modeling kit of the Elcano and Esmeralda school ship by watching the video below. Take a look with us!

VERY DETAILED VIDEO INSTRUCTIONS: HELP FOR BEGINNERS MODELERS

To achieve this assembly goal, the modeling kit of the Spanish school ship also has new video instructions. The naval modeler can look at a simple step-by-step building process. With a large number of details so that the assembly of each thread, each block and each rigging is clearly explained without difficult texts full of technical words.

Wooden Ship Modeling Kit. New Spanish Training Ship Model Juan Sebastian Elcano and Esmeralda 1/250 (22260).

Our Artesania Latina’s modeler says that “this scale model is built quickly, if you work eight hours a day it will be finished in two or three weeks, if you pay less attention, in just over a month”. This manifestation makes clear that it is an ideal miniature for those who want to start in naval modeling.

MODELER SENSATIONS AFTER JUAN SEBASTIAN ELCANO MODEL SHIP BUILDING

The ship modeler in charge of Juan Sebastian Elcano model project states that “it is very simple to build because the monohull is already assembled, and even brings all the bull eyes already made” to which Rodriguez adds that “the only thing that you must do is to paint in white the whole helmet, and then draw the waterline in order to paint in green the lower part of the helmet, being of course important the placement of the propeller and the anchor, then paint them too “.

Wooden Ship Modeling Kit. New Spanish Training Ship Model Juan Sebastian Elcano and Esmeralda 1/250 (22260).

Artesania Latina’s friends will enjoy a lot when they have Juan Sebastian Elcano’s and Esmeralda naval modeling kit on their hands, but according to our modeler, they will have fun on the rigging building process: “It is very entertaining to assemble because you have to create a beautiful swarm of threads with object to keep the sails and the five masts upright and balanced in their exact positions, besides that previously the poles must be measured, cut, dyed and varnished, however, the modeler do not suffer during their placement thanks to a very well explained instructions”, the professional of this hobby says.

Speaking about the school ship rigging majesty, you can see on the image below the large number of sails in its five masts and its beautiful arrangement, for which “it has been necessary a multitude of threads, and a required, conscientious and very funny work of ‘surgery’, especially, with the transversal threads”, the modeler is showing us delighted. If you want extra help, you have specific Micro Tools for Rigging, for sale separately.
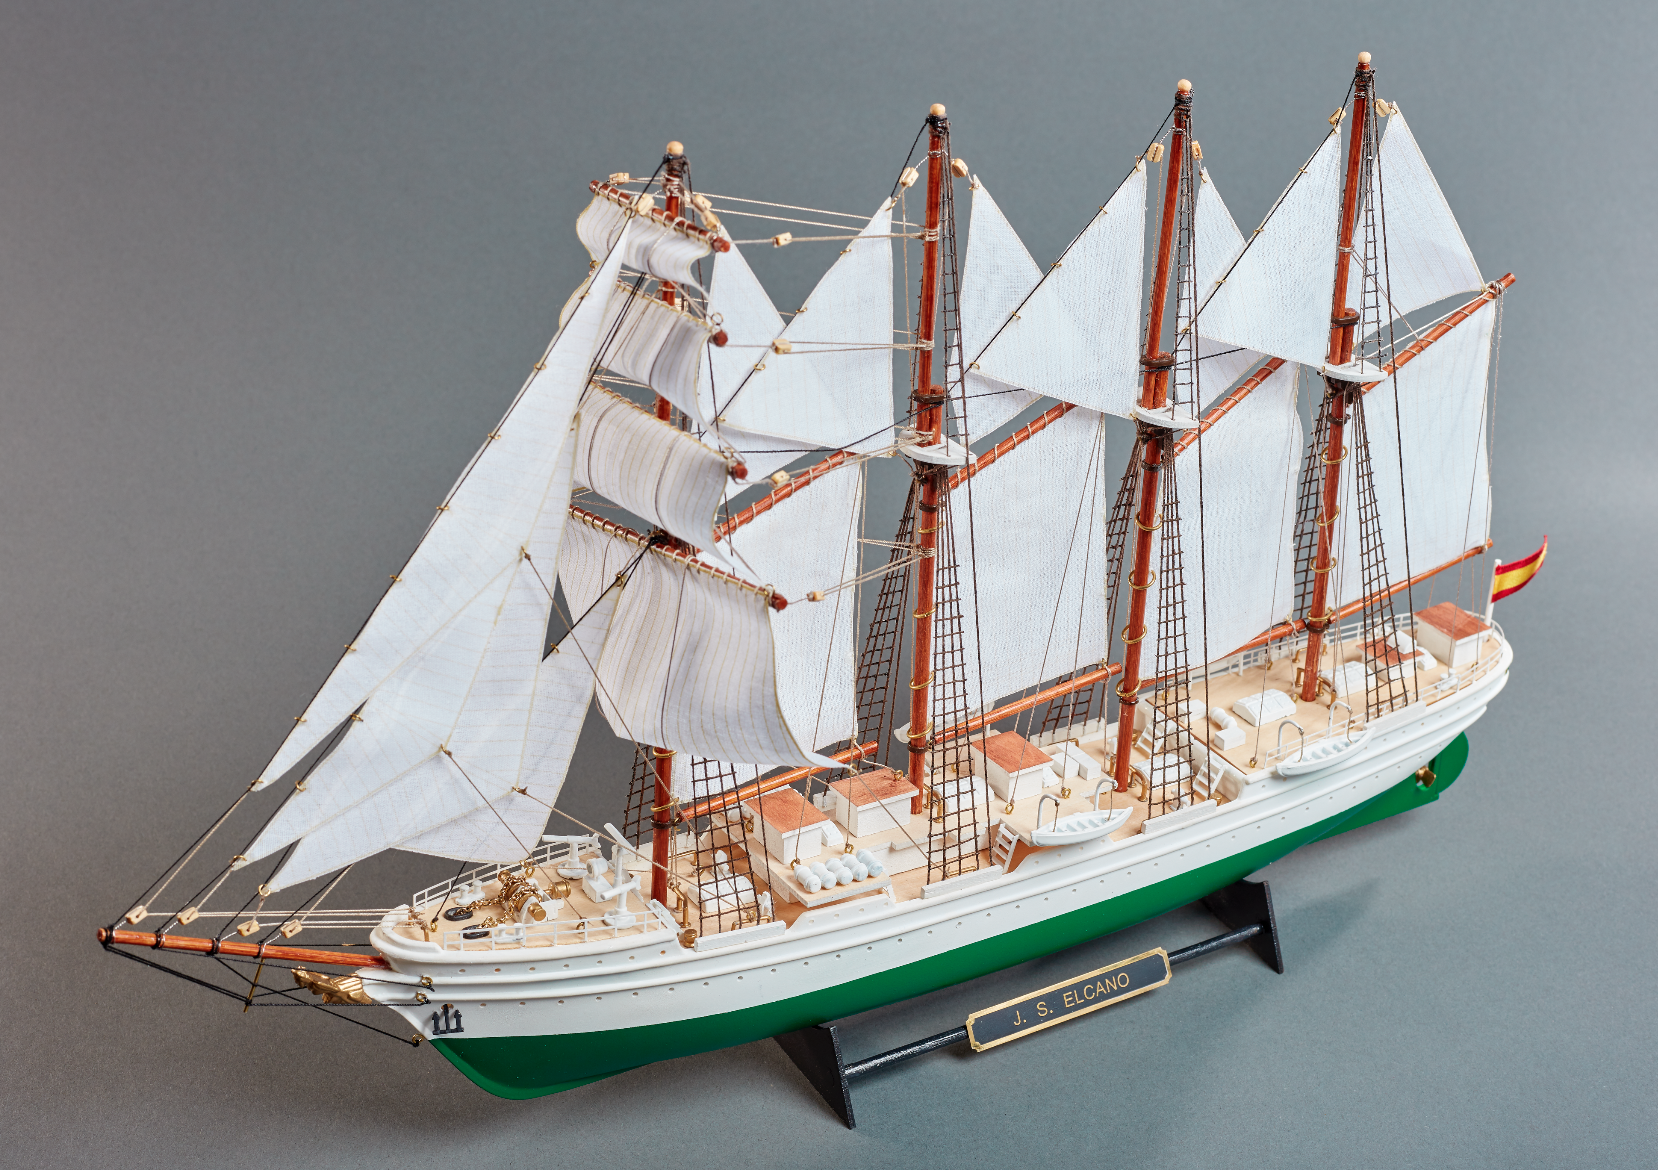
Wooden Ship Modeling Kit. New Spanish Training Ship Model Juan Sebastian Elcano and Esmeralda 1/250 (22260).

MORE PHOTO-ETCHED DETAILS: FANTASTIC ELCANO AND EMERALD FIGUREHEADS

The modeler points out that “several of the decorative elements on the deck of the Juan Sebastian Elcano model have been improved, as is the case of the stairs, the handrails, the anchors, the folded rescue boats and, apart, the exhibition base plate”.

These details are “more realistic and can be manipulated – the modeler continues – because they are manufactured in photo-etched, except lifeboats, which are now turned wood, while in the previous Juan Sebastian Elcano scale model all these were manufactured in die-cast, so the appearance was much coarser and less trustworthy”, the professional says. Elcano and Esmeralda figureheadsare wonderful“, she exclaims.

Wooden Ship Modeling Kit. New Spanish Training Ship Model Juan Sebastian Elcano and Esmeralda 1/250 (22260).

For more information about the wooden and plastic Juan Sebastian Elcano model (22260), please click here.

HISTORIA DEL BUQUE ESCUELA JUAN SEBASTIÁN ELCANO

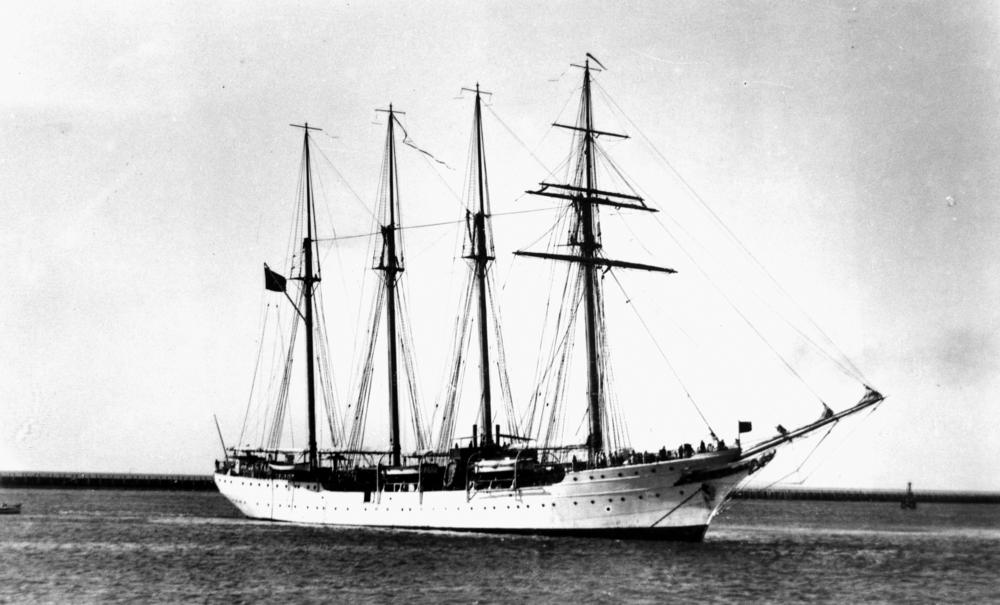
In March 5th, 1927, dictator Miguel Primo de Rivera’s daughter, Carmen Primo de Rivera, launched Juan Sebastian Elcano school ship in Cadiz. Although the first name the boat received was Minerva, which is the goddess that appears in the figurehead, by Royal Decree in 1925, was renamed with its current name, after the owner of the shipyards, Horacio Echevarria, urged to Primo de Rivera to tell the monarch Alfonso XIII that he wanted it.

As a curiosity, its first trip was from Cadiz to Malaga with the king on board the ship. Then moved to Seville, through the Guadalquivir river, where an Ibero-American Exposition was held. It also passed through the Canary Islands and then went to Guipuzcoa, where it received the combat flag. In this trial period that lasted until 1928, always in Spanish waters, Juan Sebastian Elcano traveled 5,769 nautical miles in 57 trips, at an average speed of 4.2 knots.

Just after, it undertook its first instruction cruise around the world in the opposite direction that Elcano did in the past, starting from Cadiz on August 1st 1928, where it returned on May 29th 1929. Two midshipmen have provided more packaging and history to this vessel: King Juan Carlos I, in 1958; and his son and current monarch of the Kingdom of Spain, Felipe VI, in 1987.

FEATURES OF JUAN SEBASTIAN ELCANO TRAINING SHIP

Juan Sebastian Elcano vessel (and its Chilean brother Esmeralda) has the following measures: 4,452’’ in length and 3,704’’ without the bowsprit; 515.7’’ of breadth; 341.7’’ of depth; and 275.6’’ of draught and 1,917’’ of air draught. In this sense, its structure is distributed in four essential areas that are the Quarter Deck, the Forecastle, the Waist and the Poop. The back main mast, whose name is Asturias, is located on the Quarter Deck, a place where all the most relevant events tend to take place.

The two 1.45” (37 mm) cannons used for the salutes are on the Forecastle zone, where the bowsprit with the figurehead and where the workings are executed, without forgetting that just below are the lower decks, toilets and lockers. On the Waist we can meet the main front mast, called Almansa, and the foremast, called Blanca. What has been arranged in this part? The bridge, the radio and meteorological stations, the kitchen, the dining rooms, the operating room, the sick bay and the defeat rooms.

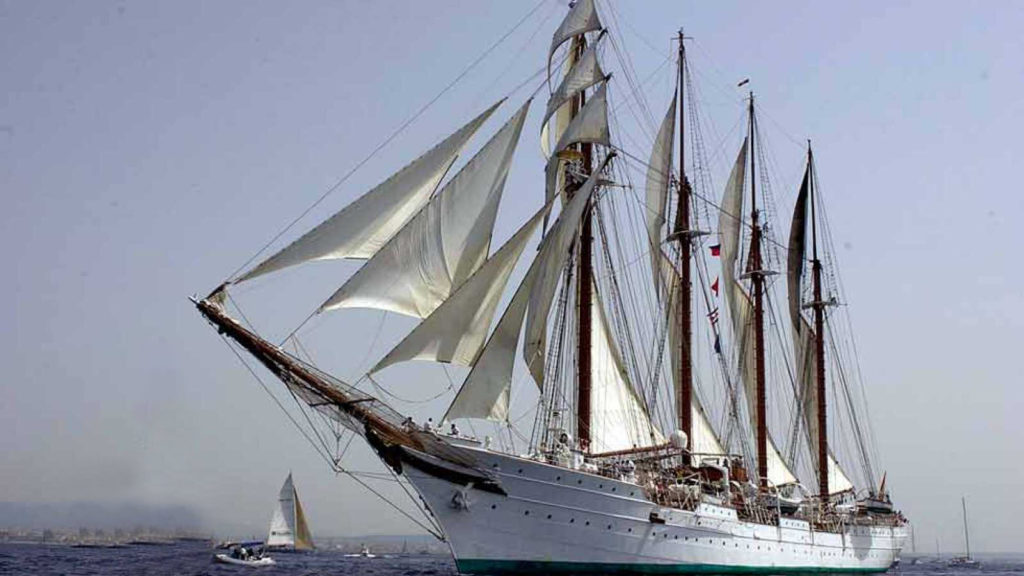
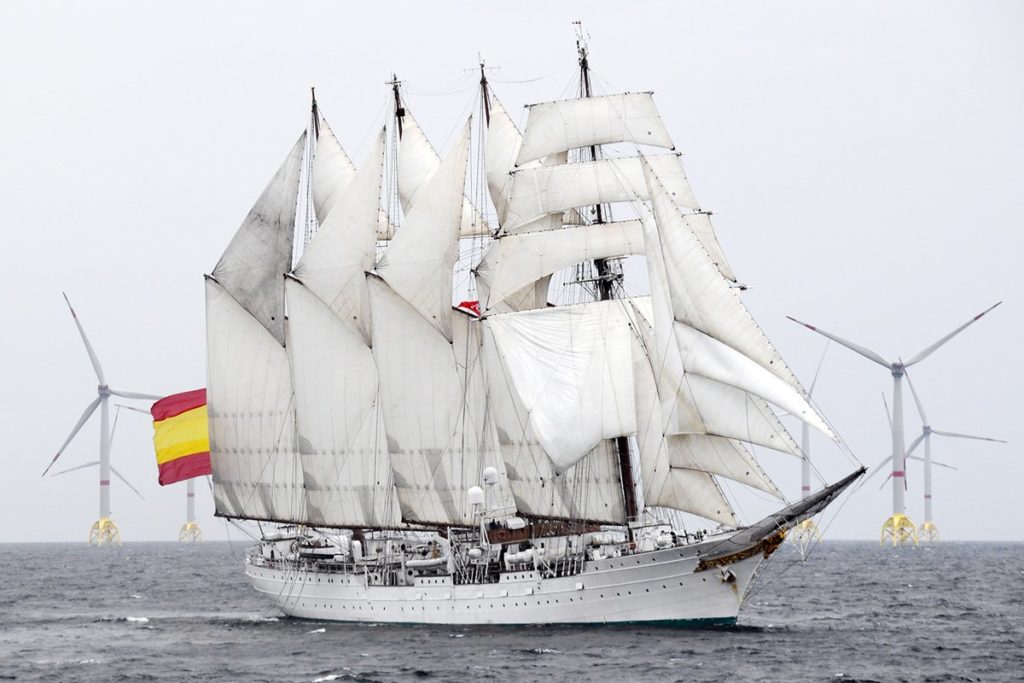
Speaking of its propulsion, Elcano has a total of 20 sails, covering a gigantic area of 3,151 square meters, however, it also has a diesel engine to be able to navigate with a power of 2,070 cv approximately, reaching speeds of up to 16.5 knots.

About its armament, Juan Sebastian Elcano school ship possesses 2 cannons of 37 millimeters, 2 Browning machine guns of 12.7 mm and 2 MG-1 machine guns of 7.62 mm. Its crew is composed of 197 people, of which 24 are officers; 22, non-commissioned officers; 146, sailors; and 5 civilians. In addition, it has capacity for up to 78 midshipmen.

JUAN SEBASTIAN ELCANO MODEL: IDEAL FOR NOVICE MODELERS

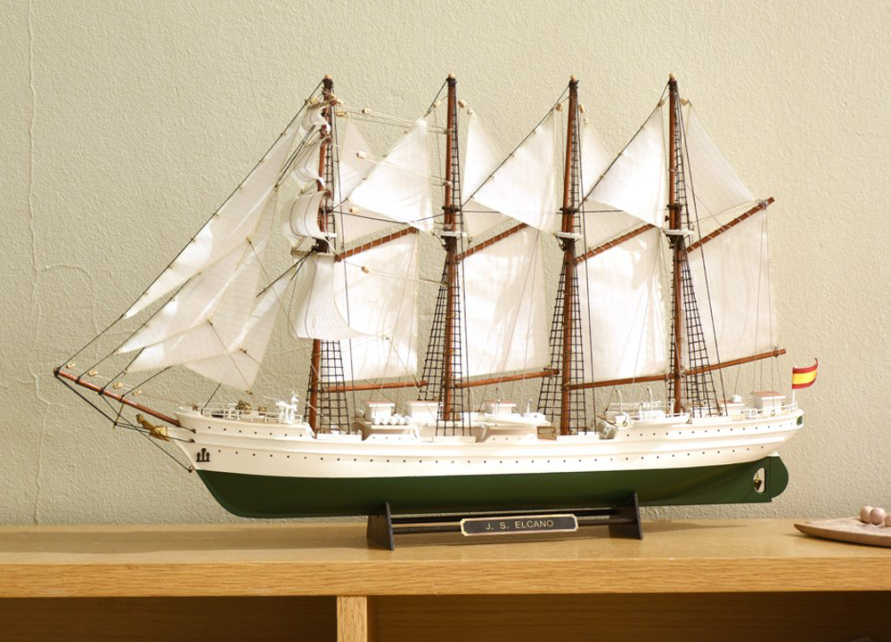
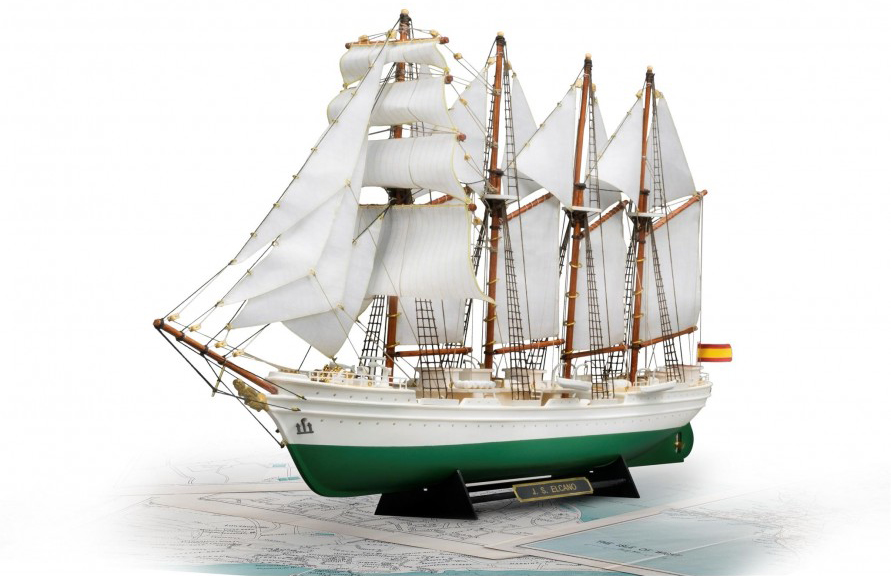
Juan Sebastian Elcano model school ship (22260) is, in short, the faithful miniature naval replica that any novice modeler should build. Once assembled, it has these measurements: Length 17.91” (455 mm) x Height 10.03” (255 mm) x Width 4.33” (110 mm).

Wooden Ship Modeling Kit. New Spanish Training Ship Model Juan Sebastian Elcano and Esmeralda 1/250 (22260).

On the video below, we present it in all its glory after being built.

Give the final touch to the scale model of Elcano and Esmeralda painting it with its Set of Paints, for sale separately. Perfect finishes!
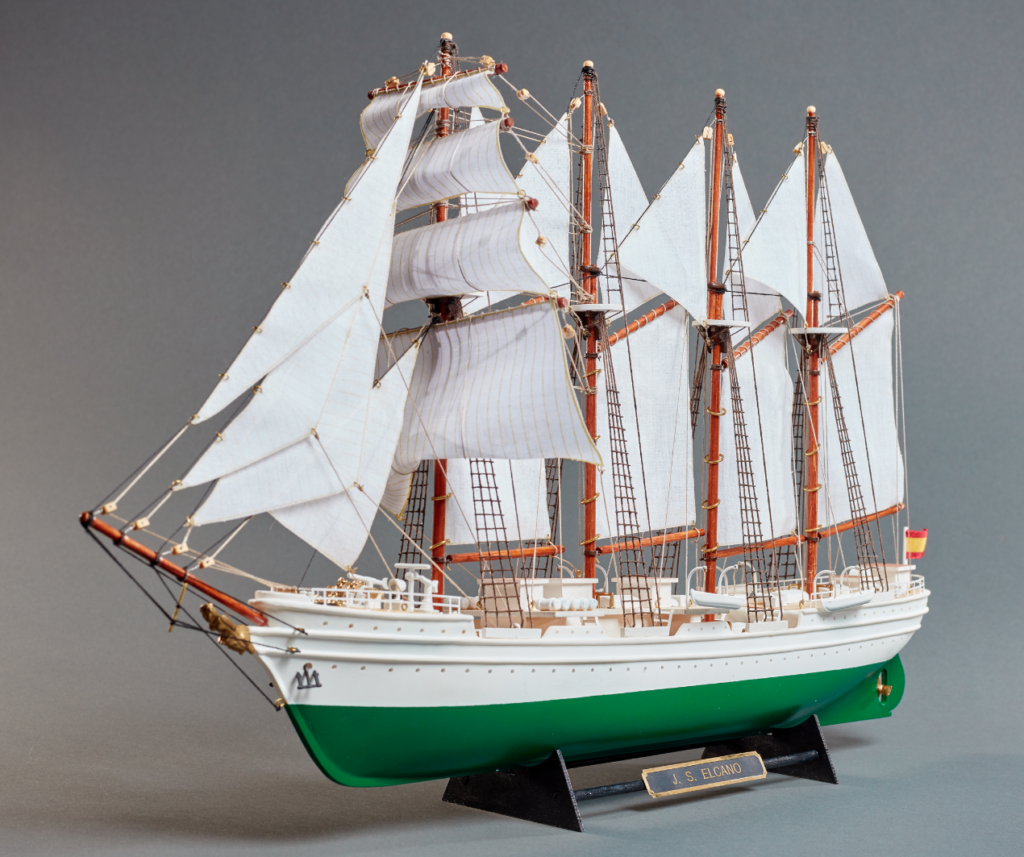
Set of Paints New Spanish Training Ship Model Juan Sebastian Elcano and Esmeralda 1/250 (22260).In conclusion, with this fantastic naval modeling kit … You will have enormously fun and motivating times! Do not hesitate to give it to a family member or friend on these approaching dates. Or give yourself a gift! Start the path of naval modeling with us! Now you can also get the Juan Sebastián Elcano Gift Pack (22260-L). This fantastic product includes the model ship, the paints and the tools to help the modeler build it. At a cheaper price than if you buy everything separately. Take advantage of this opportunity!
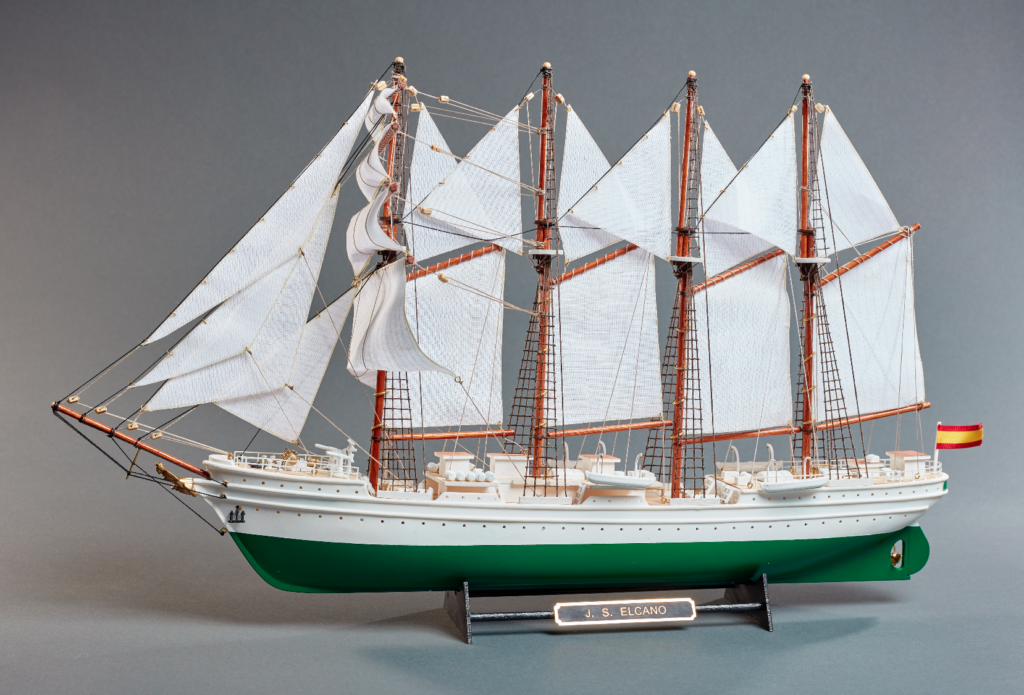
Gift Pack of Juan Sebastián Elcano: ship model, paints and tools (22260-L) made by Artesania Latina.

Posted in Ship Models

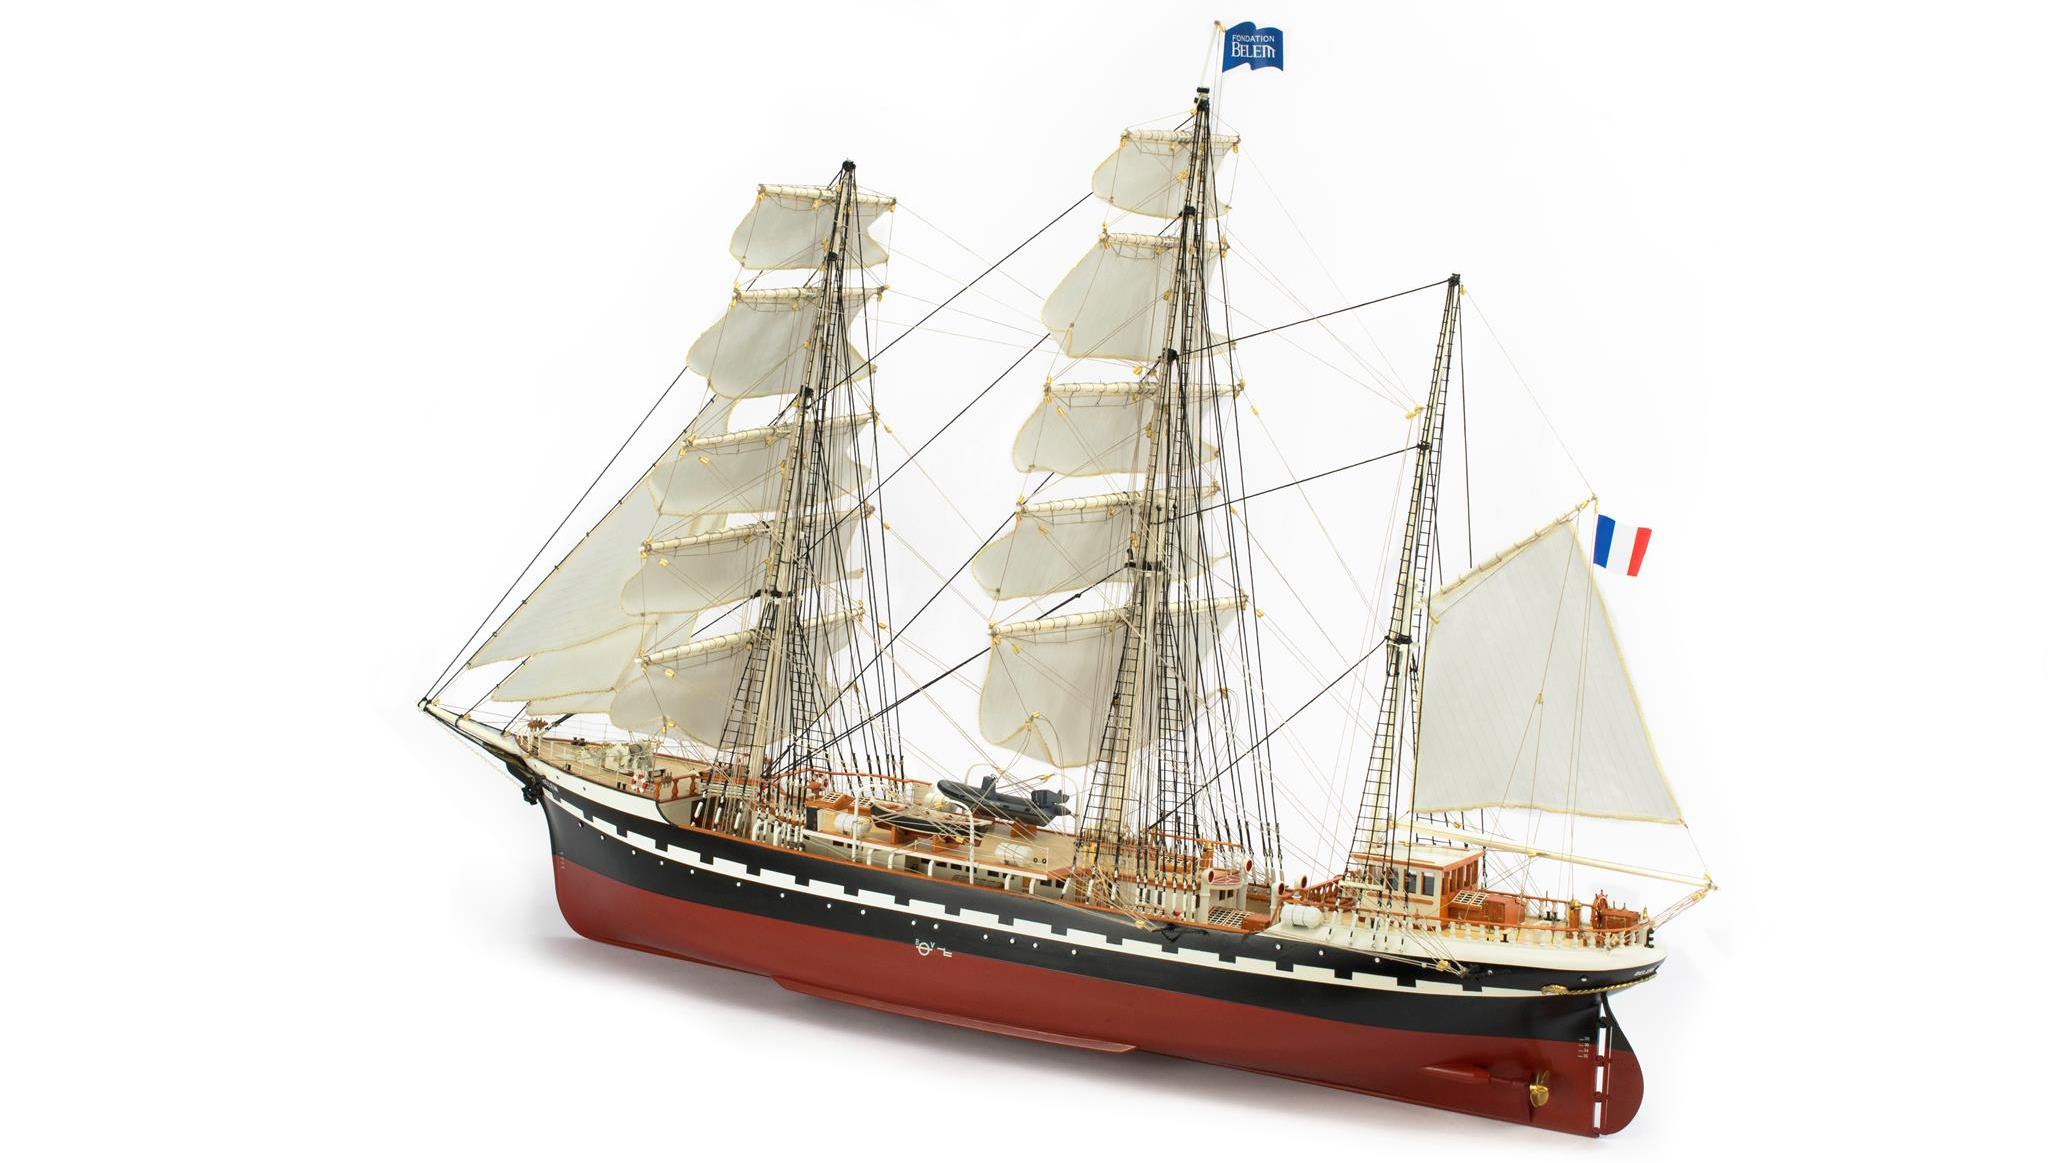
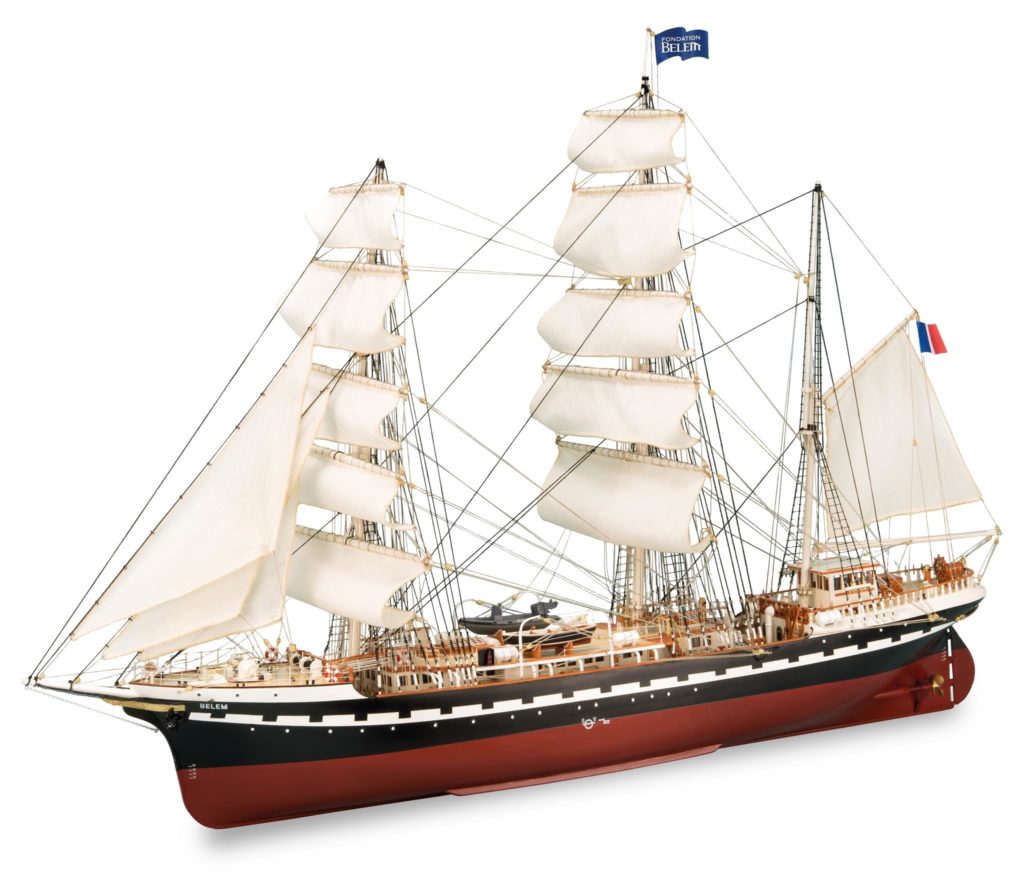
Belem Training Ship Model. 1:75 Faithful Wooden Replica of the French Boat

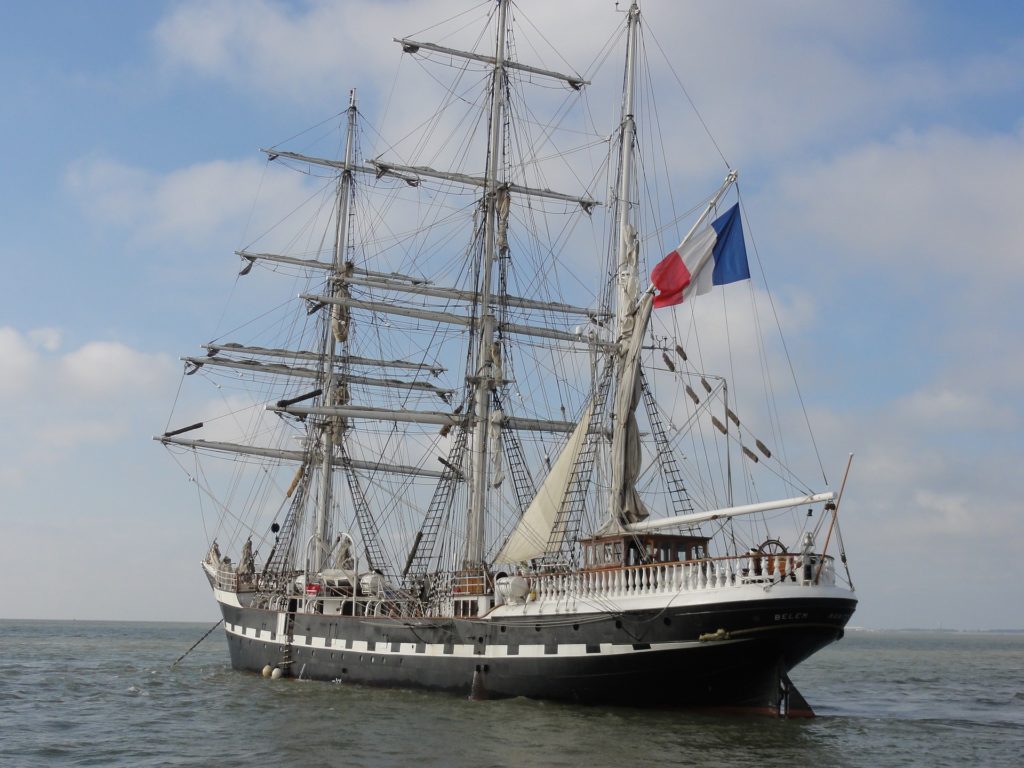
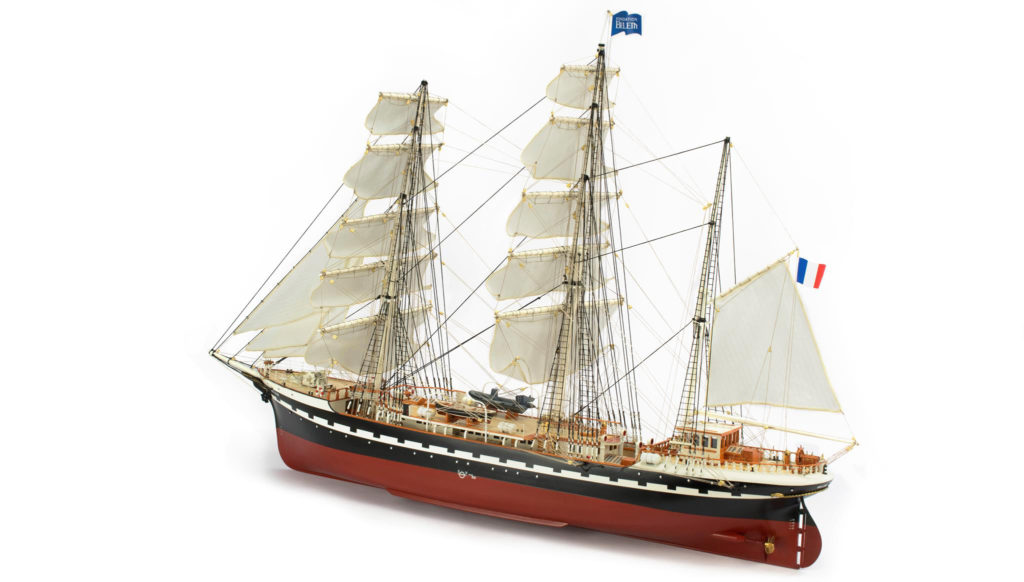
Artesania Latina’s modelers have created a spectacular wooden ship model. It is a faithful miniature wooden replica of the oldest three-masted sailing ship on the planet, which still sails the seas today: the Belem Training Ship Model at 1:75 scale.

The great French ship, destined to the learning of the new Gallic sailors, is beauty. It is also majesty and the history of world navigation. 125 years of history endorse it as a world nautical reference.
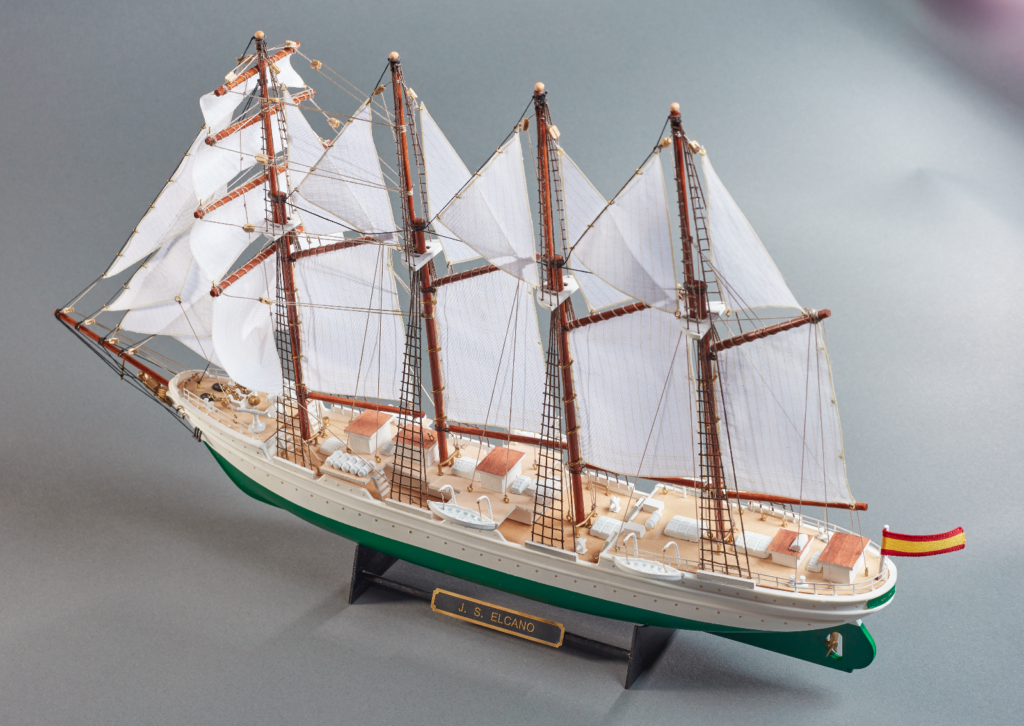
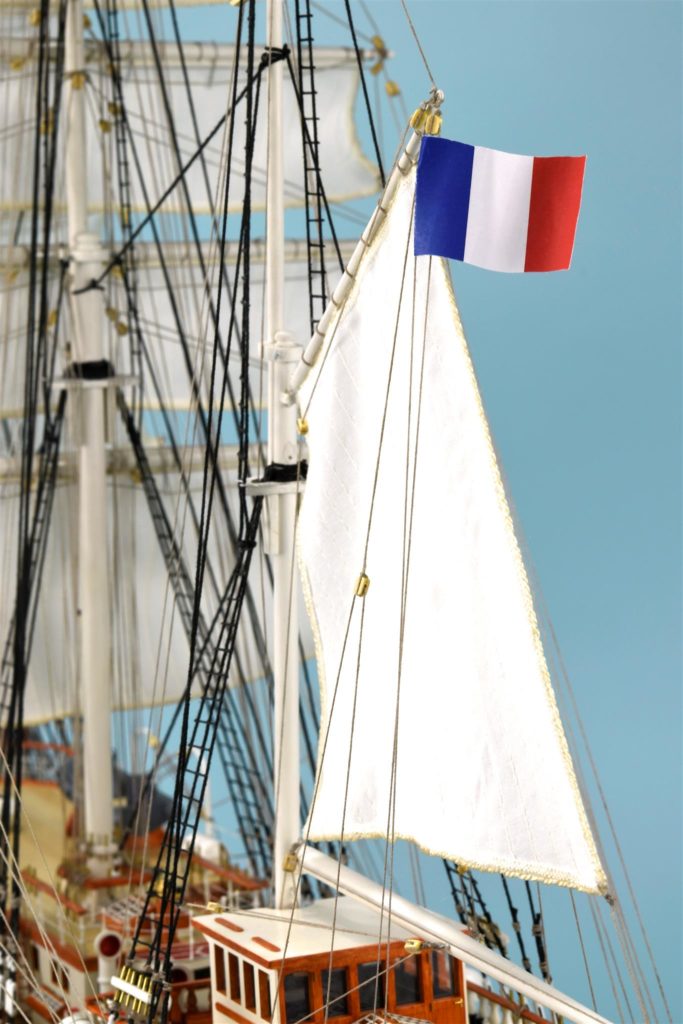
For just over a year, our model makers have put all their effort and knowledge into naval modeling so that the Belem training ship model from France is identical to the original boat. That is why the Belem Foundation has formally accredited the design and commercialization of the scale model of the French ship.

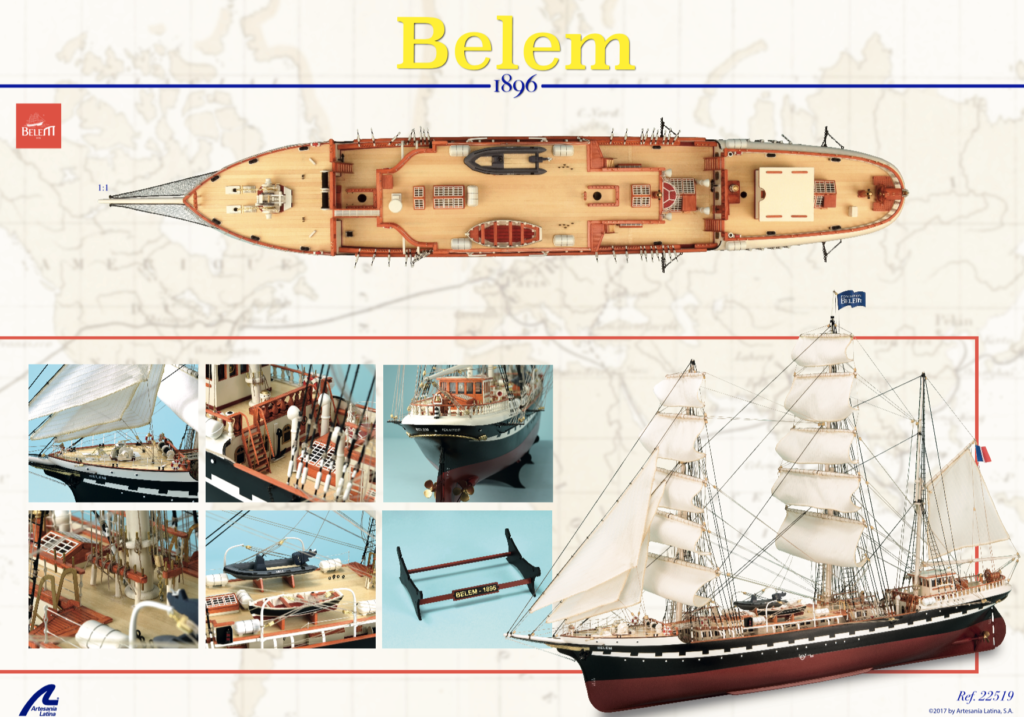
Naval modeling. Belem Training Ship Model 1/75 Scale (22519).

BELEM TRAINING SHIP MODEL FOR ADVANCED MODELERS

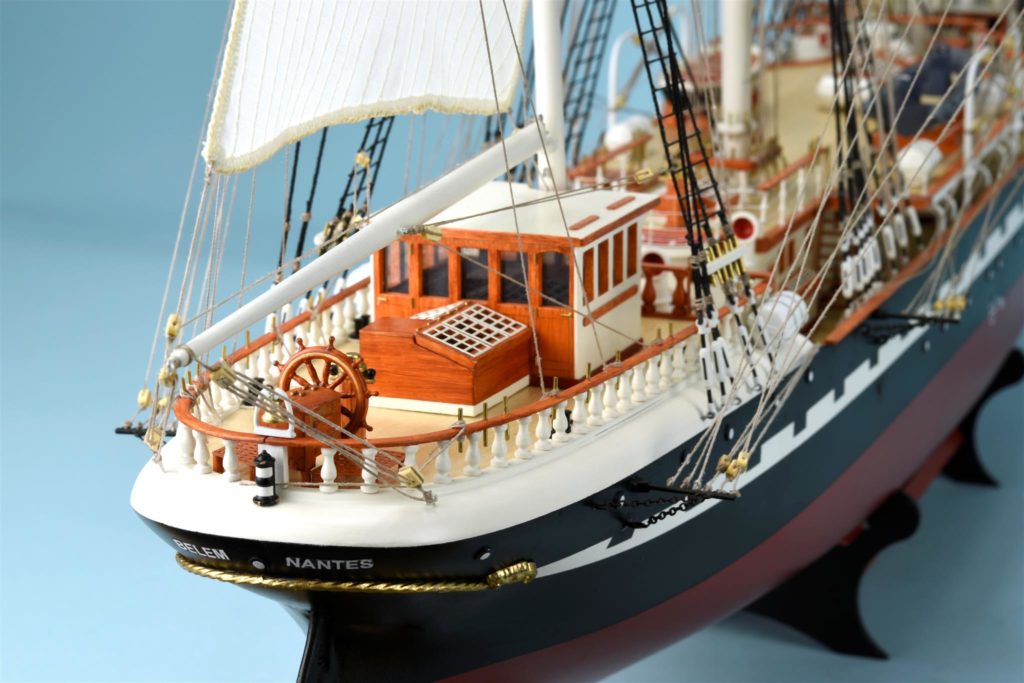
The level of detail work is astonishingly high on this 1/75 scale modeling kit. In this sense, the Belem wooden scale model is aimed at advanced level modelers, the one before the expert. The level of difficulty in its assembly and in the knowledge of the necessary tools for this is located at 3 of the 4 existing.

The objective of Artesania Latina with this fantastic wooden reproduction is that our faithful friends modellers from all over the world enjoy its construction. It has more than 1,300 pieces in wood and metal.

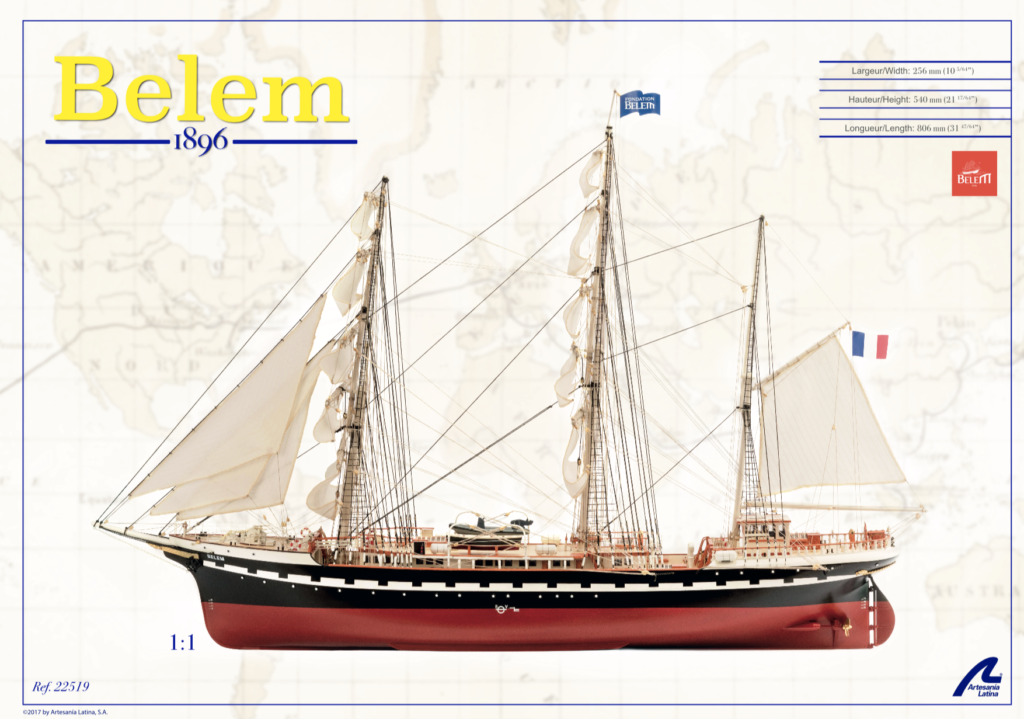
When the modeler finishes assembling the model kit for this boat, the wooden model measures 31.73” (806 mm) length, 10.07” (256 mm) width and 21.25” (540 mm) height. That is, it can preside over any room given its large size and beauty.

Naval modeling. Belem Training Ship Model 1/75 Scale (22519).

CONTENTS OF BELEM TRAINING SHIP MODELING KIT

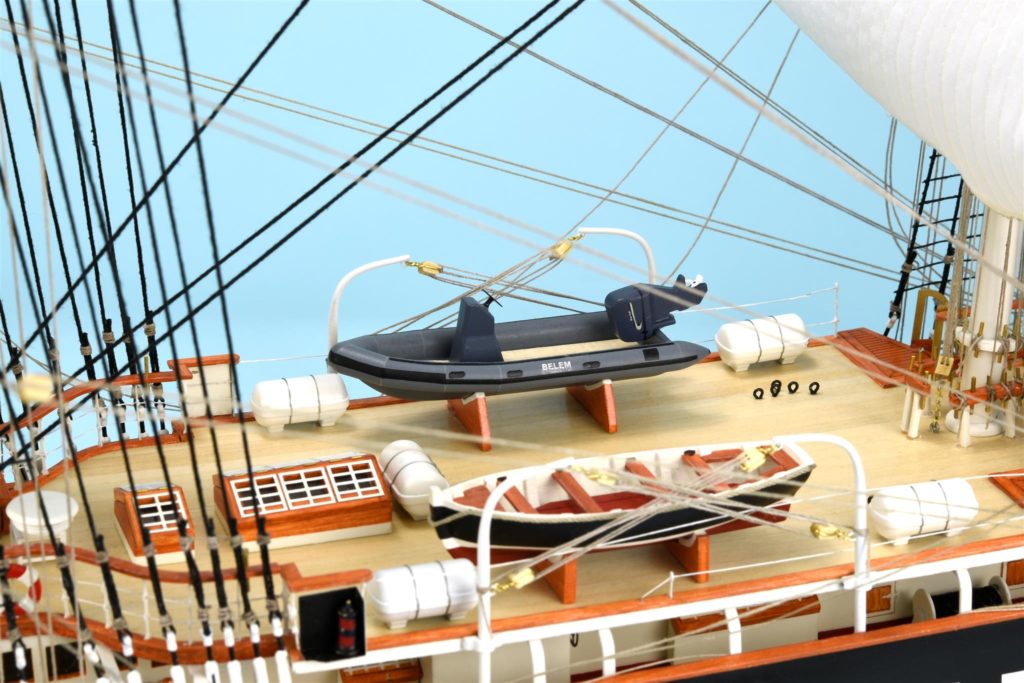
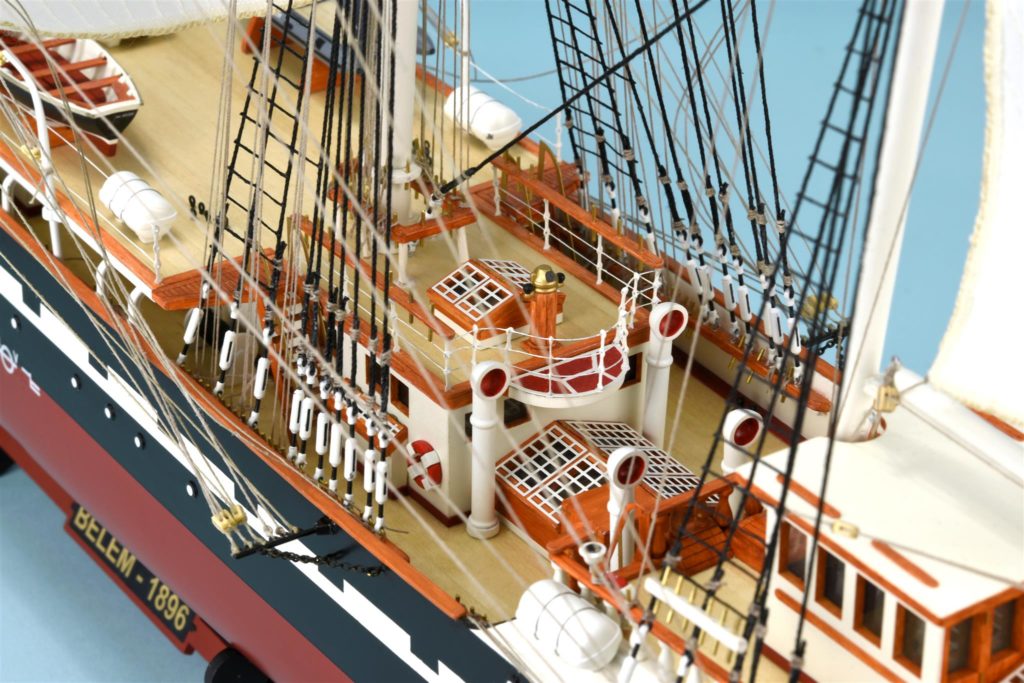
Among the contents, the presence of laser cut board to different thicknesses, slats and rods of birch wood, linden veneer, chemical cuttings in steel and in brass and cast parts stand out.

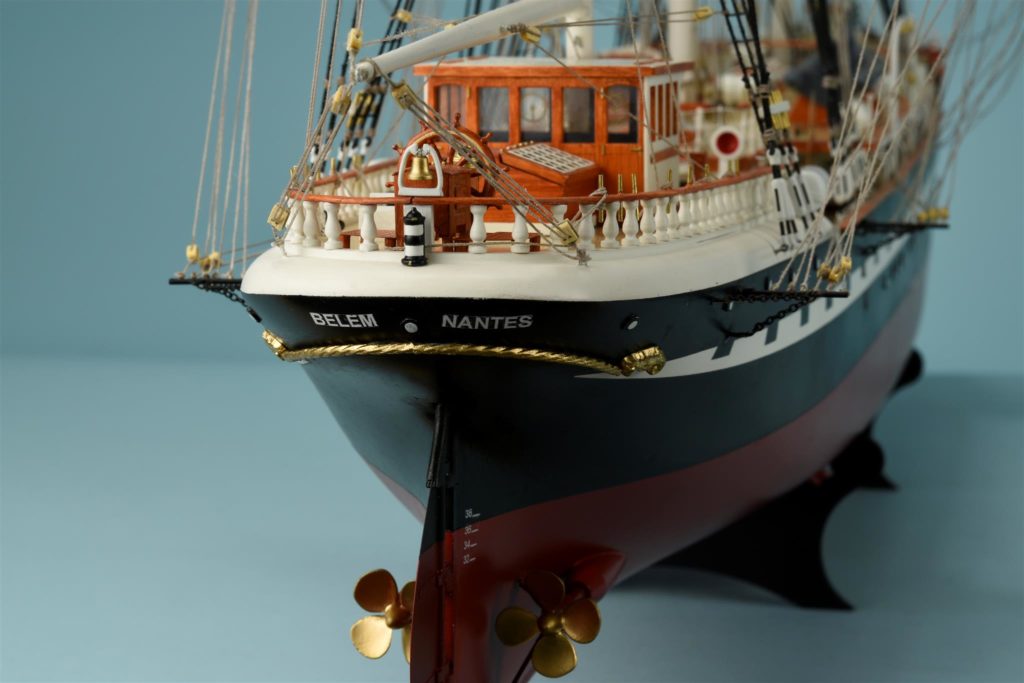
In addition, to emphasize the realism of the Belem training ship model, decals are included for the details of the hull such as the depth marks or the name of the ship itself. Also, cotton cloth sails identical to the originals and ready to be placed and cotton thread for the rigging.
Naval modeling. Belem Training Ship Model 1/75 Scale (22519).

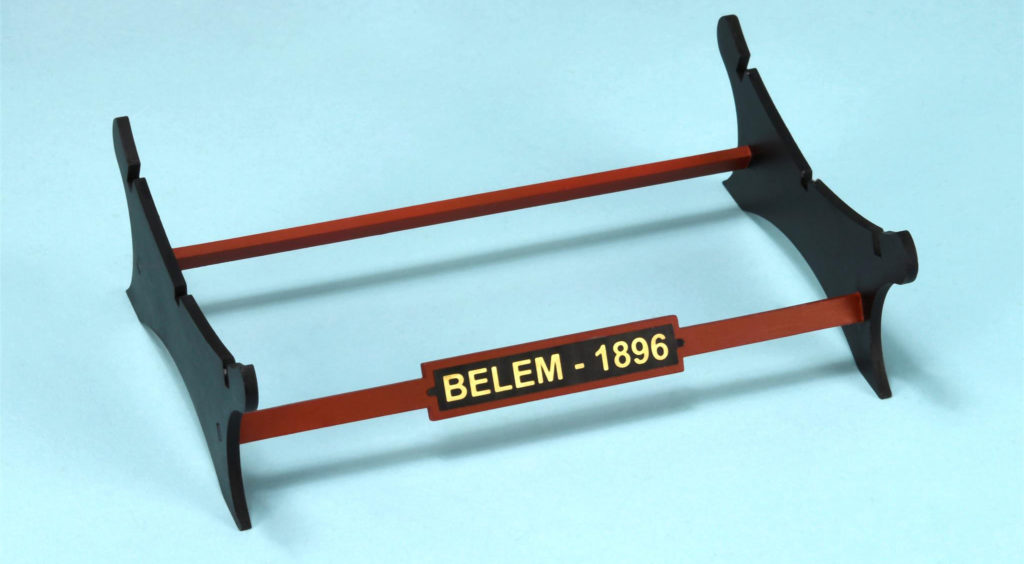
To all this is added a very important gift for the exhibition of this naval scale model at home or in the office when the modeler finishes building it. The wooden base is essential.

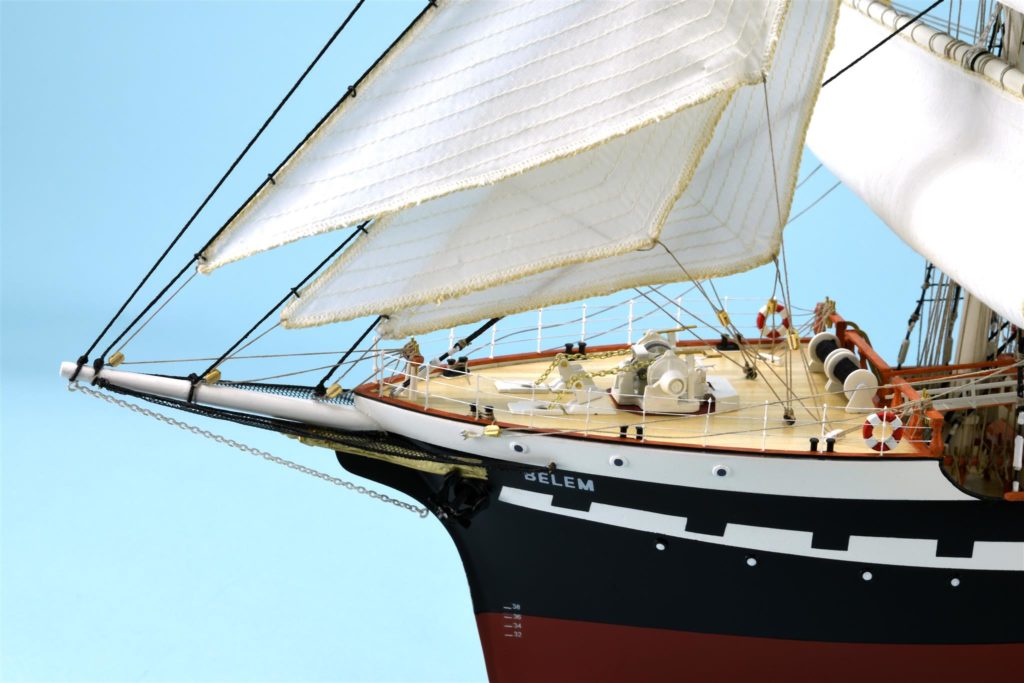
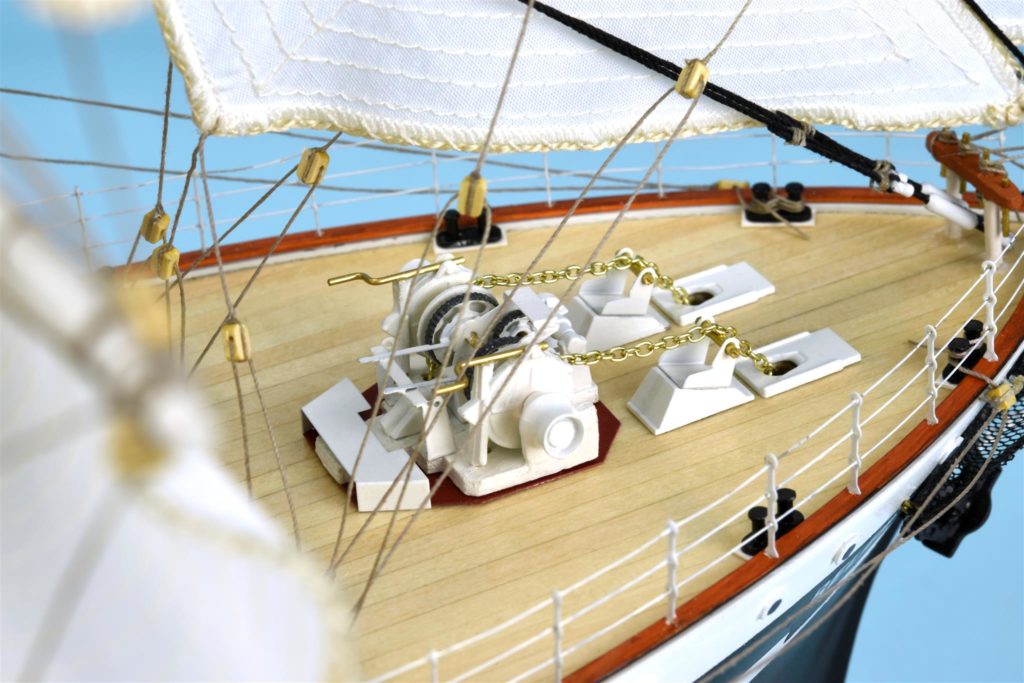
One of the most impressive buildable parts of the Belem training ship model at 1/75 scale is its bow winch. The thirty parts you need to assemble is an accurate reflection of the level of detail in the design of the Gallic scale model.

Naval modeling. Belem Training Ship Model 1/75 Scale (22519).

Here you can see even more precisely the impressive winch of the Belem training ship model.

In this video you can see which are the components of the Belem naval modeling kit with greater precision.

NAVAL MODELING KIT WITH THE BEST DIGITAL INSTRUCTIONS

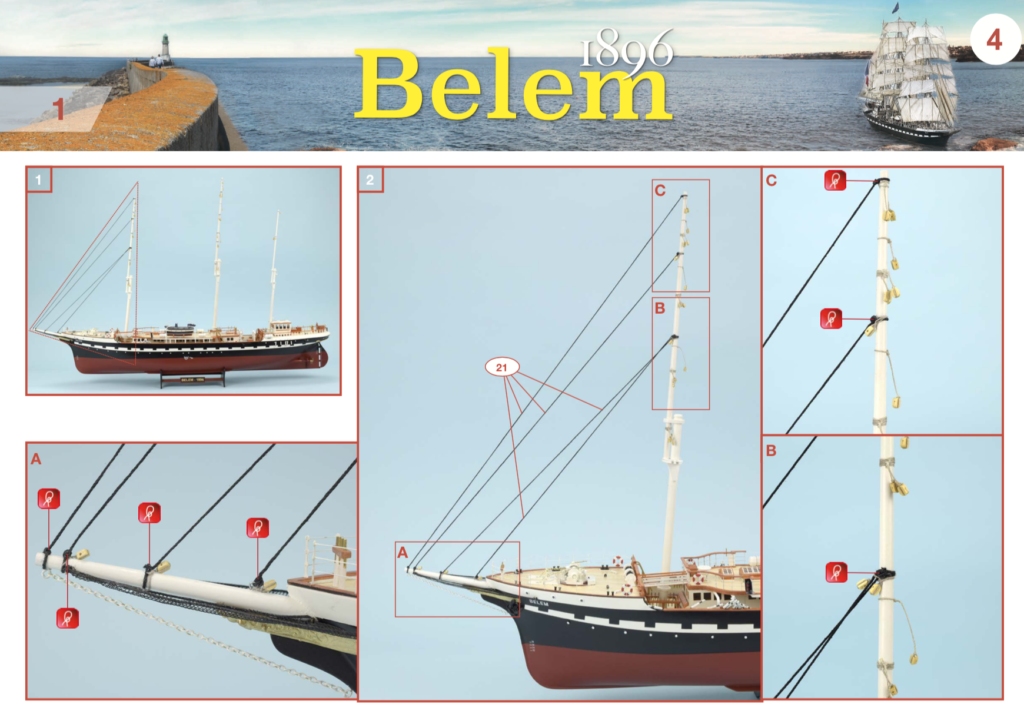
But before exposing it, of course, you have to build the model of the Belem school ship. For this, the Artesania Latina‘s modelers have designed the best step-by-step instructions in color. With around 1,500 images and video tutorials in DVD format!

The DVD also includes a magnificent digital poster of the 1/1 scale model of the French ship.

Naval modeling. Belem Training Ship Model 1/75 Scale (22519).

We care about being up-to-date with digital times. At the same time, we preserve forests in these times when taking care of our planet has become a priority objective for Humanity.

The modeler can easily enlarge digital instructions on his computer or tablet, accurately view even the smallest detail. In this way, we combine modernity with tradition, helping and encouraging new generations of modelers to join this wonderful hobby.

The model maker has a specific set of paints and finishes to paint the boat. It is for sale separately and facilitates the painting of the Belem training ship model at 1/75 scale made of wood.

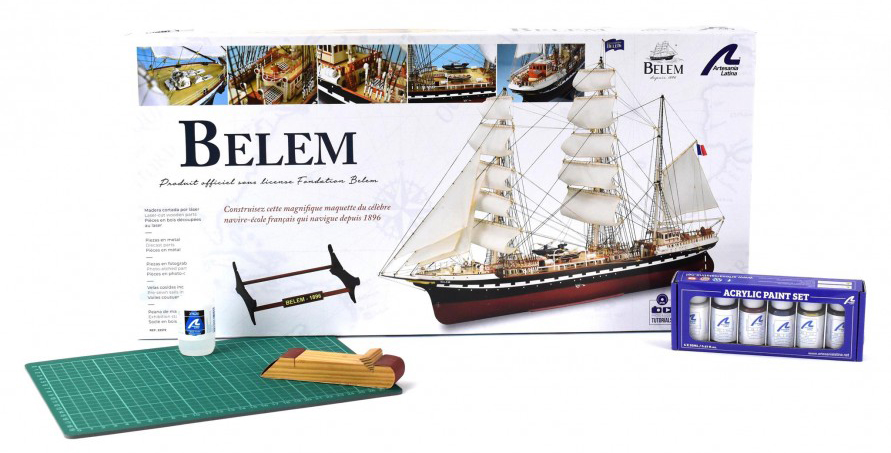
Ship modeling. Paints and Finishes for 1/75 scale Belem Training School Ship Model (22519).You can also purchase the Belem Gift Pack (22519L), which includes the model, its paints and some tools.

Gift Pack of French Training Ship Model Belem (22519) by Artesanía Latina.

Read the post about the history of Belem here…