The metal figurines made by Artesanía Latina provide great realism to the wooden model ships where they are placed. They are the icing on the cake when the modeler has finished assembling any model on a naval scale. Currently, we have a wide assortment with different sets and crews sold individually that will be further expanded in the future. In this sense, many of our modelers friends have asked us on numerous occasions how to paint the figurines of the models. Well then, we are going to explain the process through a video tutorial made by our team of professional modelers.
But, first of all, we must remind you that, if necessary, you have to assemble or glue the two parts with which any of the figurines are formed. To do this, we strongly recommend that you use any of the cyanoacrylates from Artesanía Latina -sold separately- to obtain an optimal result -with the spray accelerator drying is faster-. If you wish, you can apply the glue with one of the two adhesive applicators included in the Set of Micro Saws, Applicators and Scriber (27302), for sale separately.
Let’s start painting the figurines thanks to the fantastic video masterclass of our professionals, for which you have to prepare them first.
HOW TO PAINT FIGURINES FOR MODEL SHIPS: PREPARATION BEFORE PAINTING
We start the explanation of how to paint figurines for model ships. Grab a Round Diamond File (27015-3) to remove mold lines and marks. File the entire profile of the figure, since it is the place where it is inserted and glued to the mold where it is stored.
Now, prepare the surface of any object you don’t need -for example, an unused compact disc or DVD- a quick putty. To do this, mix dense cyanoacrylate with talcum powder. Help yourself, for example, from the applicator to mix both products once they are applied. Apply that mix also with the applicator all over the figurine.
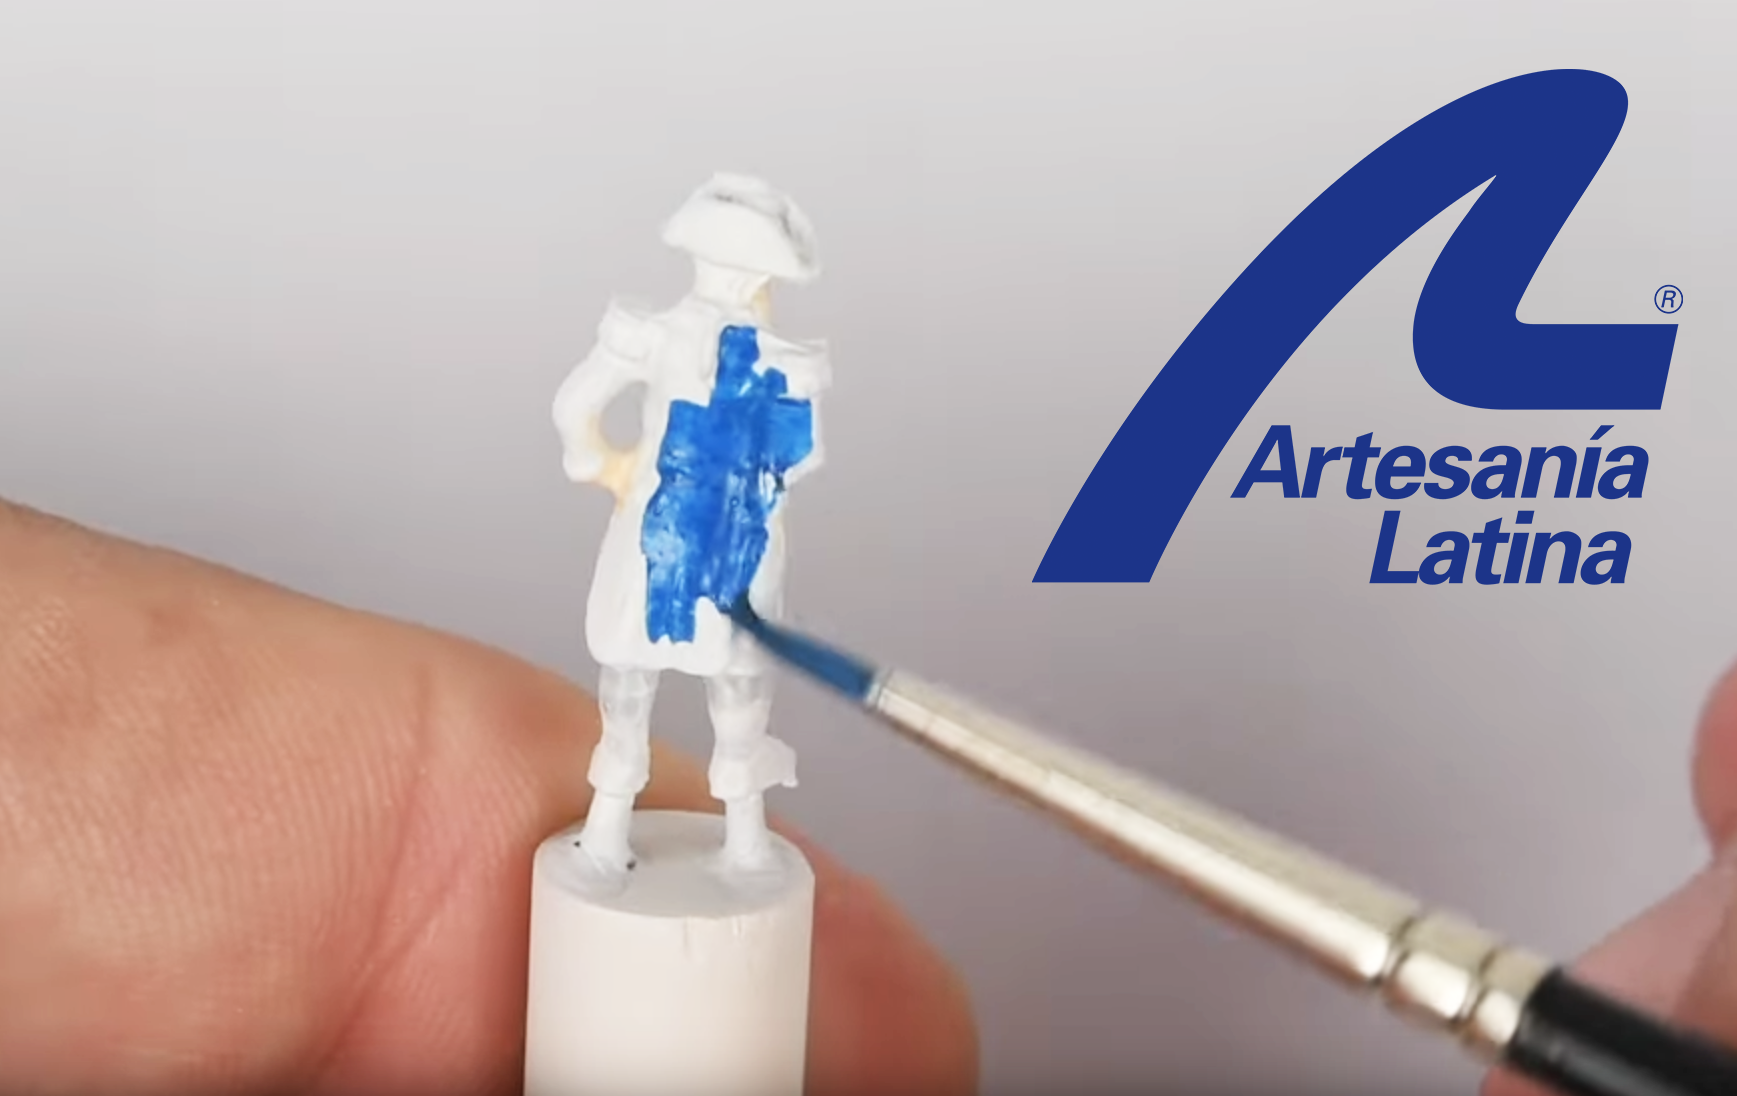
The next step is to create a base thanks to our Support for Painting Scale Model Figures (27640), where you can place the figurine so you don’t touch it while preparing and painting it. Take or create a round and a cylindrical part, both of wood. Put cyano in the center of the round piece and glue the cylindrical piece right in the center of the circle, where the adhesive is. Next, glue, again with cyano, the feet of the figurine to the cylinder.
The last phase of the preparation prior to showing you how to paint figurines for model ships. It is time to apply a lightlayer of white primer (27701) using any of our high quality synthetic hair brushes.
SET OF PAINTS AND SINGLE COLOURS FOR FIGURINES
Before starting with the explanation of the video on how to paint figurines for model ships, we offer you two sets of acrylic paints for figurines -for sale separately-, choose according to your needs. On the one hand, there is the Basic Set (277PACK14), with 6 paint jars of 20 ml. each with the following colors: Off White, Off Black, Royal Blue, Deep Yellow, Vermilion and Basic Skin. On the other, the Advanced Set (277PACK15), with 12 jars: Off White, Off Black, Bright Red, Ice Yellow, Cocoa Brown, Dark Red Leather, Aluminum, Gold, Navy Blue, Bright Green, Basic Skin and Sunny Skin.
Of course, you can also purchase the colors you require from our extensive catalog of singleacrylic paints with over thirty different colors… which ones do you like best?
HOW TO PAINT FIGURINES FOR MODEL SHIPS: PAINTING PROCESS
We will detail in advance how to paint figurines for model ships. First, paint all the visible parts of the character’s skin with a round brush and an basic skin color (27770). Right after, apply a general eyeshadow with a slightly darker tone diluted in water –sunny skin (27771)-.
Now, on a palette or other surface, you must have the color cocoa (27741). Add a bit of diluent (27700) -put it with a syringe to dose- and mix it with it. Remove excess paint and sharpen the tip of the bristles of the brush by painting on a piece of paper. Paint the flesh parts of the character as a hard shadow, also outlining the color. Repeat the process on the lighter parts, first, on the rest of the character as a whole -especially on his clothes-.
The moment has come when you have to paint the clothes with his colors and their details. We recommend that if the character is wearing multiple garments, one on top of the other, paint the outermost layer first. All you have to do is look at the video of our modeler to appreciate the rest of the painting, already to the taste of the fan. Here is the final result.
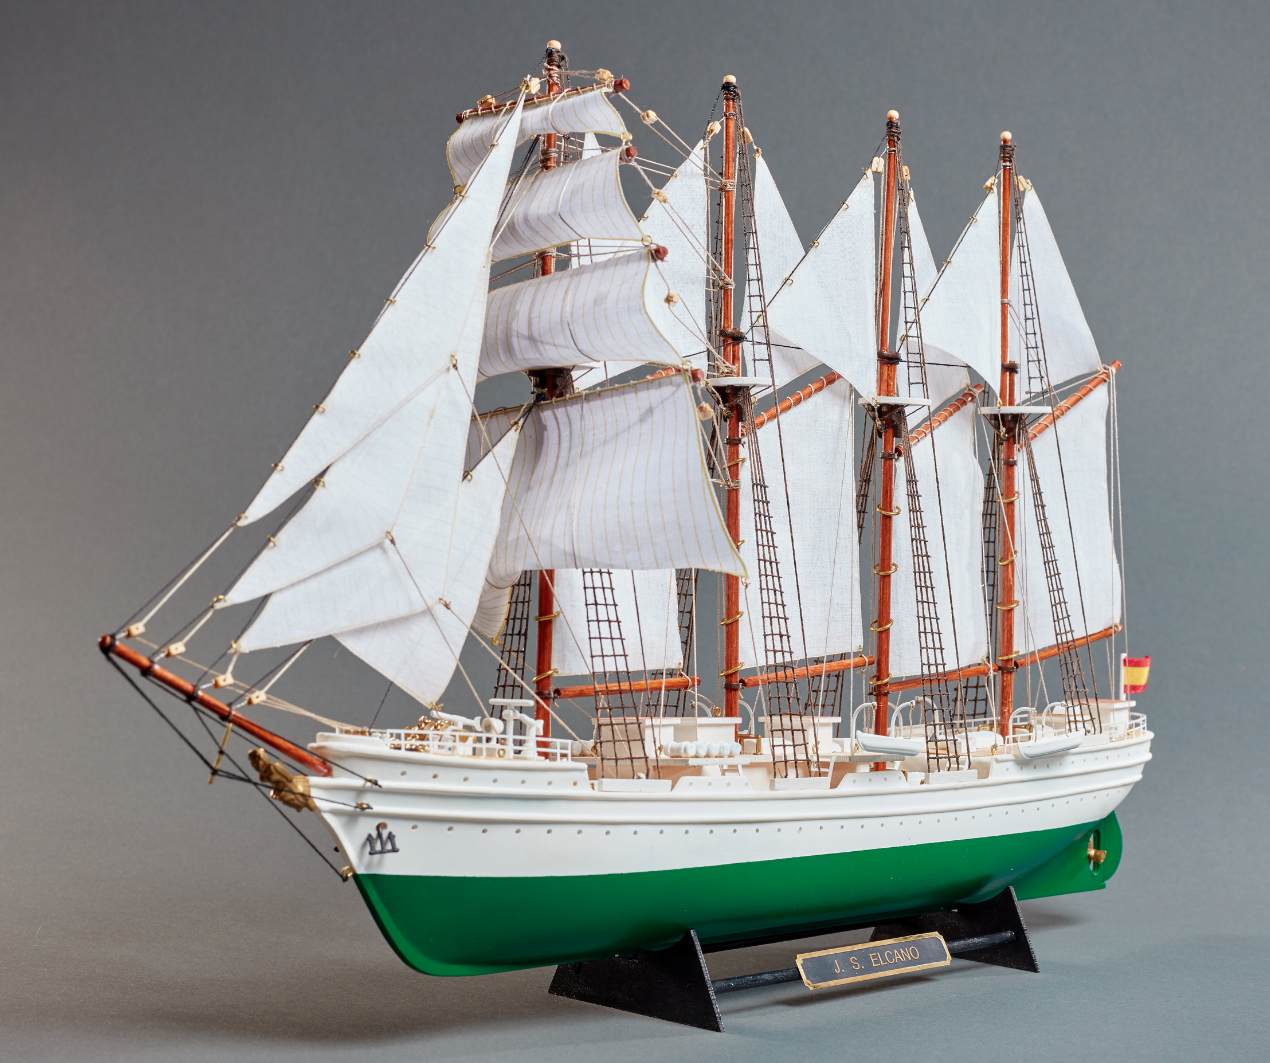
We dive into the last part of the Elcano ship model instructions for its assembly. With these video tutorials made by our modelers, we put the finishing touch to the set up of the Spanish school ship model Juan Sebastián Elcano / Chilean Esmeralda (22260) at 1:250 scale. As we mentioned before, it is a faithful miniature replica excellent for beginners on the hobby of naval modeling.
ELCANO SHIP MODEL INSTRUCTIONS: SAILS (PART III – A)
We continue with ‘Sails – Part III’, which is Step 21 of the instructions for assembling the Elcano ship model (22260).
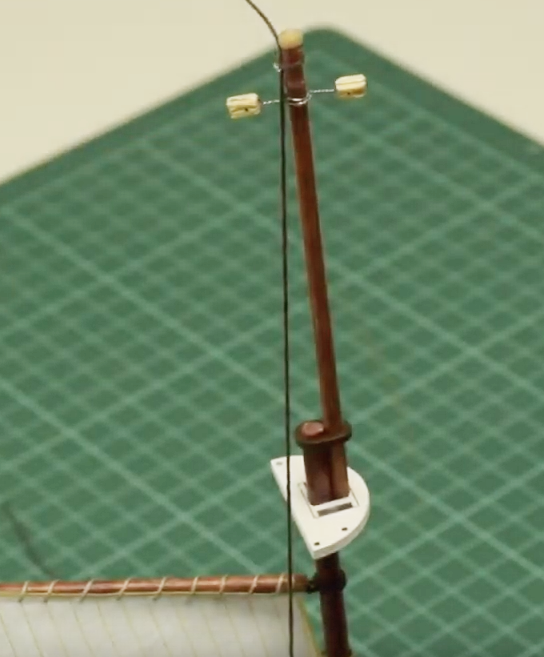
Arrange one unit of parts S7, S8, S9 and S10, that is, more sails. Take part S7, and sew it with a needle cotton thread –part CT1– around the stick part Y1, from top to bottom. When you finish sewing, help yourself with some Straight Fastening Tweezers (27020) to tie the knot on the stick.
Now, with a cutter, drill two small holes in the two opposite corners of the stick. Insert the two BR1 parts -two rings- into these. Take a part BL and thread -part CT1-. Put the thread through the hole and around part BL. Tie a knot at the end with the help of the aforementioned tweezers. The thread should be fully stretched through the hole and around the part BL. Apply Dense Cyanoacrylate for Porous Materials on the knot and allow to dry.
Next, you will have excess thread on both sides of the knot. First, completely cut one of the threads, while the other leave a few centimeters long. Don’t cut it all the way. Second, also using the tweezers, tie that thread with the BL part to the left side of the stick and tie the knot with cyano. Third, if there is excess thread, remove it with a cutter. Repeat all these actions on the other end of the stick with another BL part.
The result should be this:
ELCANO SHIP MODEL INSTRUCTIONS: SAILS (PART III – B)
Then go through the entire process again with the other SAILS. For the sail part S8, you will need one Y2 part, two BR1 parts and two BL parts. For the part S9, one Y3 part, two BR1 parts and two BL parts. And for the S10, one part Y4, two parts BR1 and four parts BL. Take again the sail part S7 and thread part CT1. At one end of the stick, tie a knot with plenty of thread left over from both sides. Apply cyano and let dry. Repeat the process on the other end of the stick.
Take the S7 sail. Use a Curved Fastening Tweezers (27021) to pass the thread -part CT1- with a needle above the mast top, as seen on the video. The goal is the sail can be already hanging on its mast. Make the knots as shown, apply a little of cyano and cut the excess thread with the Thread Snips (27060). The sail already stays in place.
Repeat the process with the S8 sail. Once hung, it has to be attached to the S7 sail with thread. Tie them by means of the two BR1 parts that are on the sail. Passing the CT1 thread through the BR1 ring and, right after, tie it to the end of the stick. Repeat the process also for the other end of the pole with the other BR1 ring.
Do the same with the S9 sail, but this time tying it to the S8 sail. And finally, with the S10 sail, knotting it to the S9. This should be the final look with all the sails in place.
ELCANO SHIP MODEL INSTRUCTIONS: SAILS (PART IV – A)
Well, it’s time for the next task. Step 22 of the assembly instructions for the ship model Elcano (22260). This one is about ‘Sails – Part IV’.
Take the four sails parts S11. Now take one and, using a utility knife, drill three holes in each of the three corners of the sail. Then, insert one of the three parts BR1 -rings- into each hole. Open each part BR1 with two Needle Nose Pliers (27213) and insert the ring through the sail. After inserting it, close it again using the aforementioned pliers. As we have discussed, repeat the process with the other three sails.
Again, take a sail part S11. Insert thread through the BR1 ring found on the most pointed part of the sail, at the top and tie a knot. Cut the excess of one of the ends of the thread and pass the other end through the mast. Then bring the thread to the hull, tighten it, tie it off and glue it with cyano. Watch the video for it.
Now, thread CT1 through the outermost ring BR1. Begin to tie a knot and leave a hole to insert it into the bottom sail pole. Insert into the stick and close the knot. Do the same with more thread through the remaining BR1 ring, the third one, the one closest to the mast. In this sense, the sail part S11 will be attached to the lower sail.
ELCANO MODEL SHIP INSTRUCTIONS: SAILS (PART IV – B)
Below that bottom sail, place a PCL part. Bend the wire that has the stick on it and attach it to the mast. Use the pliers to twist the wire around the mast.
Take CT1 thread and pass it through the eye of the BR1 part of that lower sail to make a knot and pass it through the PCL stick. The sail will be attached to the mast. Remember to apply cyano to all the knots you make.
Thread CT1 through the ring on the hull and tie it to the stick so that it is taut. The rest of the thread, pass it through the mast top and tie it to the deck. Take a look at the video to run this process, which you will need to repeat for the other three sails.
ELCANO SHIP MODEL INSTRUCTIONS: SAILS (PART V)
Step 23 of Elcano ship model instructions (22260) for the assembly of Spanish school ship, is about the ‘Sails – Part V’. You need to pay close attention to the video so that you can build the rest of the sails.
JUAN SEBASTIAN ELCANO MODEL SHIP: DECKS (PART III – A)
We continue with Step 24 of the Elcano ship model instructions for its assembly. This is about ‘Decks – Part III’.
Take two M8 parts and glue them parallel to the foredeck as shown on the video. Next, take ten units of the part DM4. With the help of cyano and grip pliers, take five of these and glue each one next to the other on the deck area shown. Then turn the boat 180º and do the same for the other five on the other side of the deck.
Once this task is done, take a Stainless Steel Ruler 150 mm (27069). Use it to mark with a pencil on the edge of the hull two points with an equidistance of 18 mm. From each of these two points, with the ruler, measure and mark two points 6 mm inside the deck. Drill with a small hand drill at the two points marked on the deck.
Take an M6 part. Apply a drop of cyano and insert it with tweezers into one of the two holes made. Repeat the process with another M6 part and insert it into the other deck hole.
JUAN SEBASTIAN ELCANO MODEL SHIP: DECKS (PART III – B)
It is time to use thread part CT2 for the placement of part P2, previously painted with Off-White Acrylic Paint (27702). First, thread the thread through the two holes in part P2. Second, take the other end of the thread and feed it through an M6 part. Do the same with the other end. When you are inserting the two ends of the thread into each M6 part, insert them from the outside to the inside.
Next, make a knot in each of the two inserted ends so that the part P2 does not come loose. Apply a little cyano to each one. Repeat the process on the opposite side of the boat.
JUAN SEBASTIÁN ELCANO ASSEMBLY: HANDRAILS AND PROPELLER
The ‘Handrails and Propeller’ is Step 25 of the video tutorial for building the model of the Elcano ship. Take two PE3 parts, previously painted with off-white paint. Apply cyano to each of the tips of the base that will be inserted. Place each of the two PE3 parts on the edge of the hull and the deck with the help of a Curved Fastening Tweezers (27021). There are two in the bow.
Then, take a PE4 part, also previously painted with off-white colour. Bend it with your hands so that it takes on the curved shape of the stern. Once you have the shape, apply cyano to each of the corners and glue the part with both hands to the edge of the deck. Take another PE4 part and tack it right next to the one you placed earlier. Put it behind the lifeboat. Repeat the process on the other side of the hull.
Finally, the part M11 -propeller- enters the scene. Apply cyano to the tip to be inserted and place it with your hands and a pair of tweezers on the hull.
JUAN SEBASTIÁN ELCANO ASSEMBLY: LAST DETAILS TO FINISH (PART I)
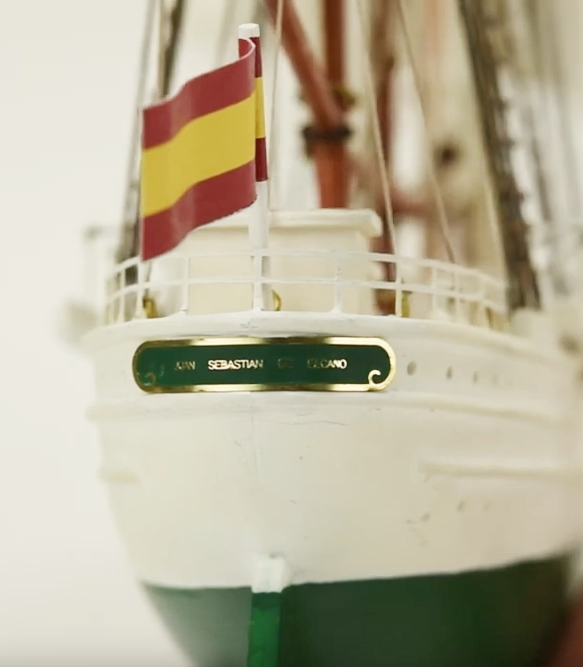
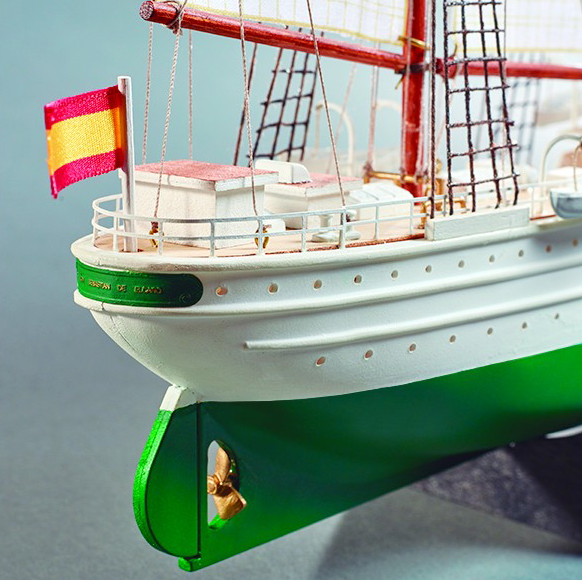
We continue with the final step of the Elcano ship model instructions for its assembly with the ‘Last Details’, which is Step 26. Arrange a unit of the part WD3 with a diameter of 2×35 mm, previously painted off-white. Later, take the part FL1 -Spanish flag- and with the help of a cutter, remove the sticker protector.
Place the center of the sticker -it has a stripe drawn- on the stick and close the sticker with your hands and the handle of a scalpel cutter until both sides of the flag stick together. Stick it in the hole in the aft deck provided for it.
It is the turn of the part PE5 Elcano / PE6 Esmeralda -metal sheet with the name of the ship-. First, paint it with Hull Green Colour (27751). Then, sand the entire edge of the sheet with a utility cutter until you can see the metal of the sheet. Apply cyano and glue it to the stern of the boat, just below the flag.
JUAN SEBASTIÁN ELCANO ASSEMBLY: LAST DETAILS TO FINISH (PART II)
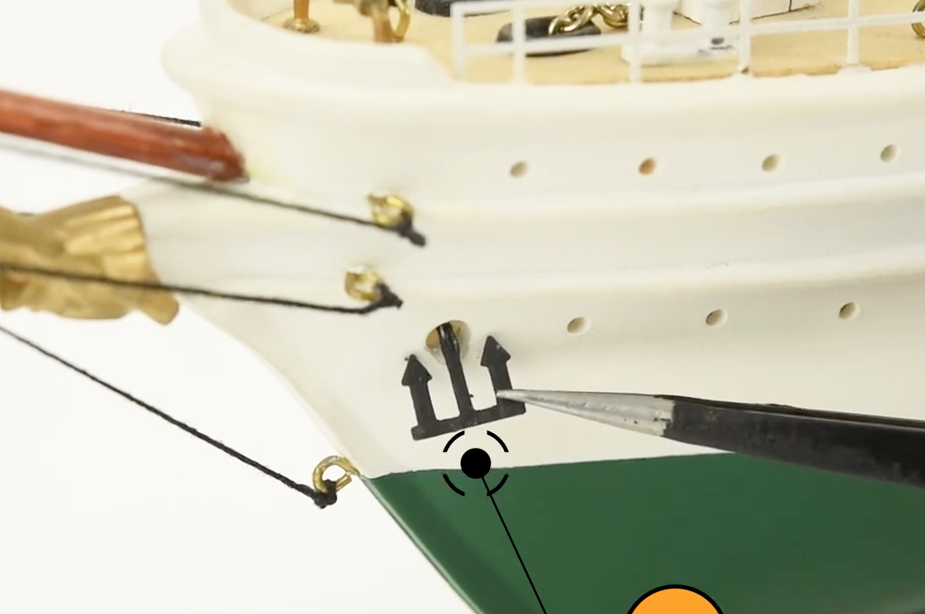
Now, take the two parts M17 -anchors-, previously painted with Off-Black Colour (27703). Place them into the two holes provided for this with the help of tweezers and a few drops of cyano. Finally, there is the part PE7 / PE8 -name of the ship for the base-. Also paint it with off-black colour, sand the edges with a cutter until you see the metal part and, with cyano, glue it to the exhibition base.
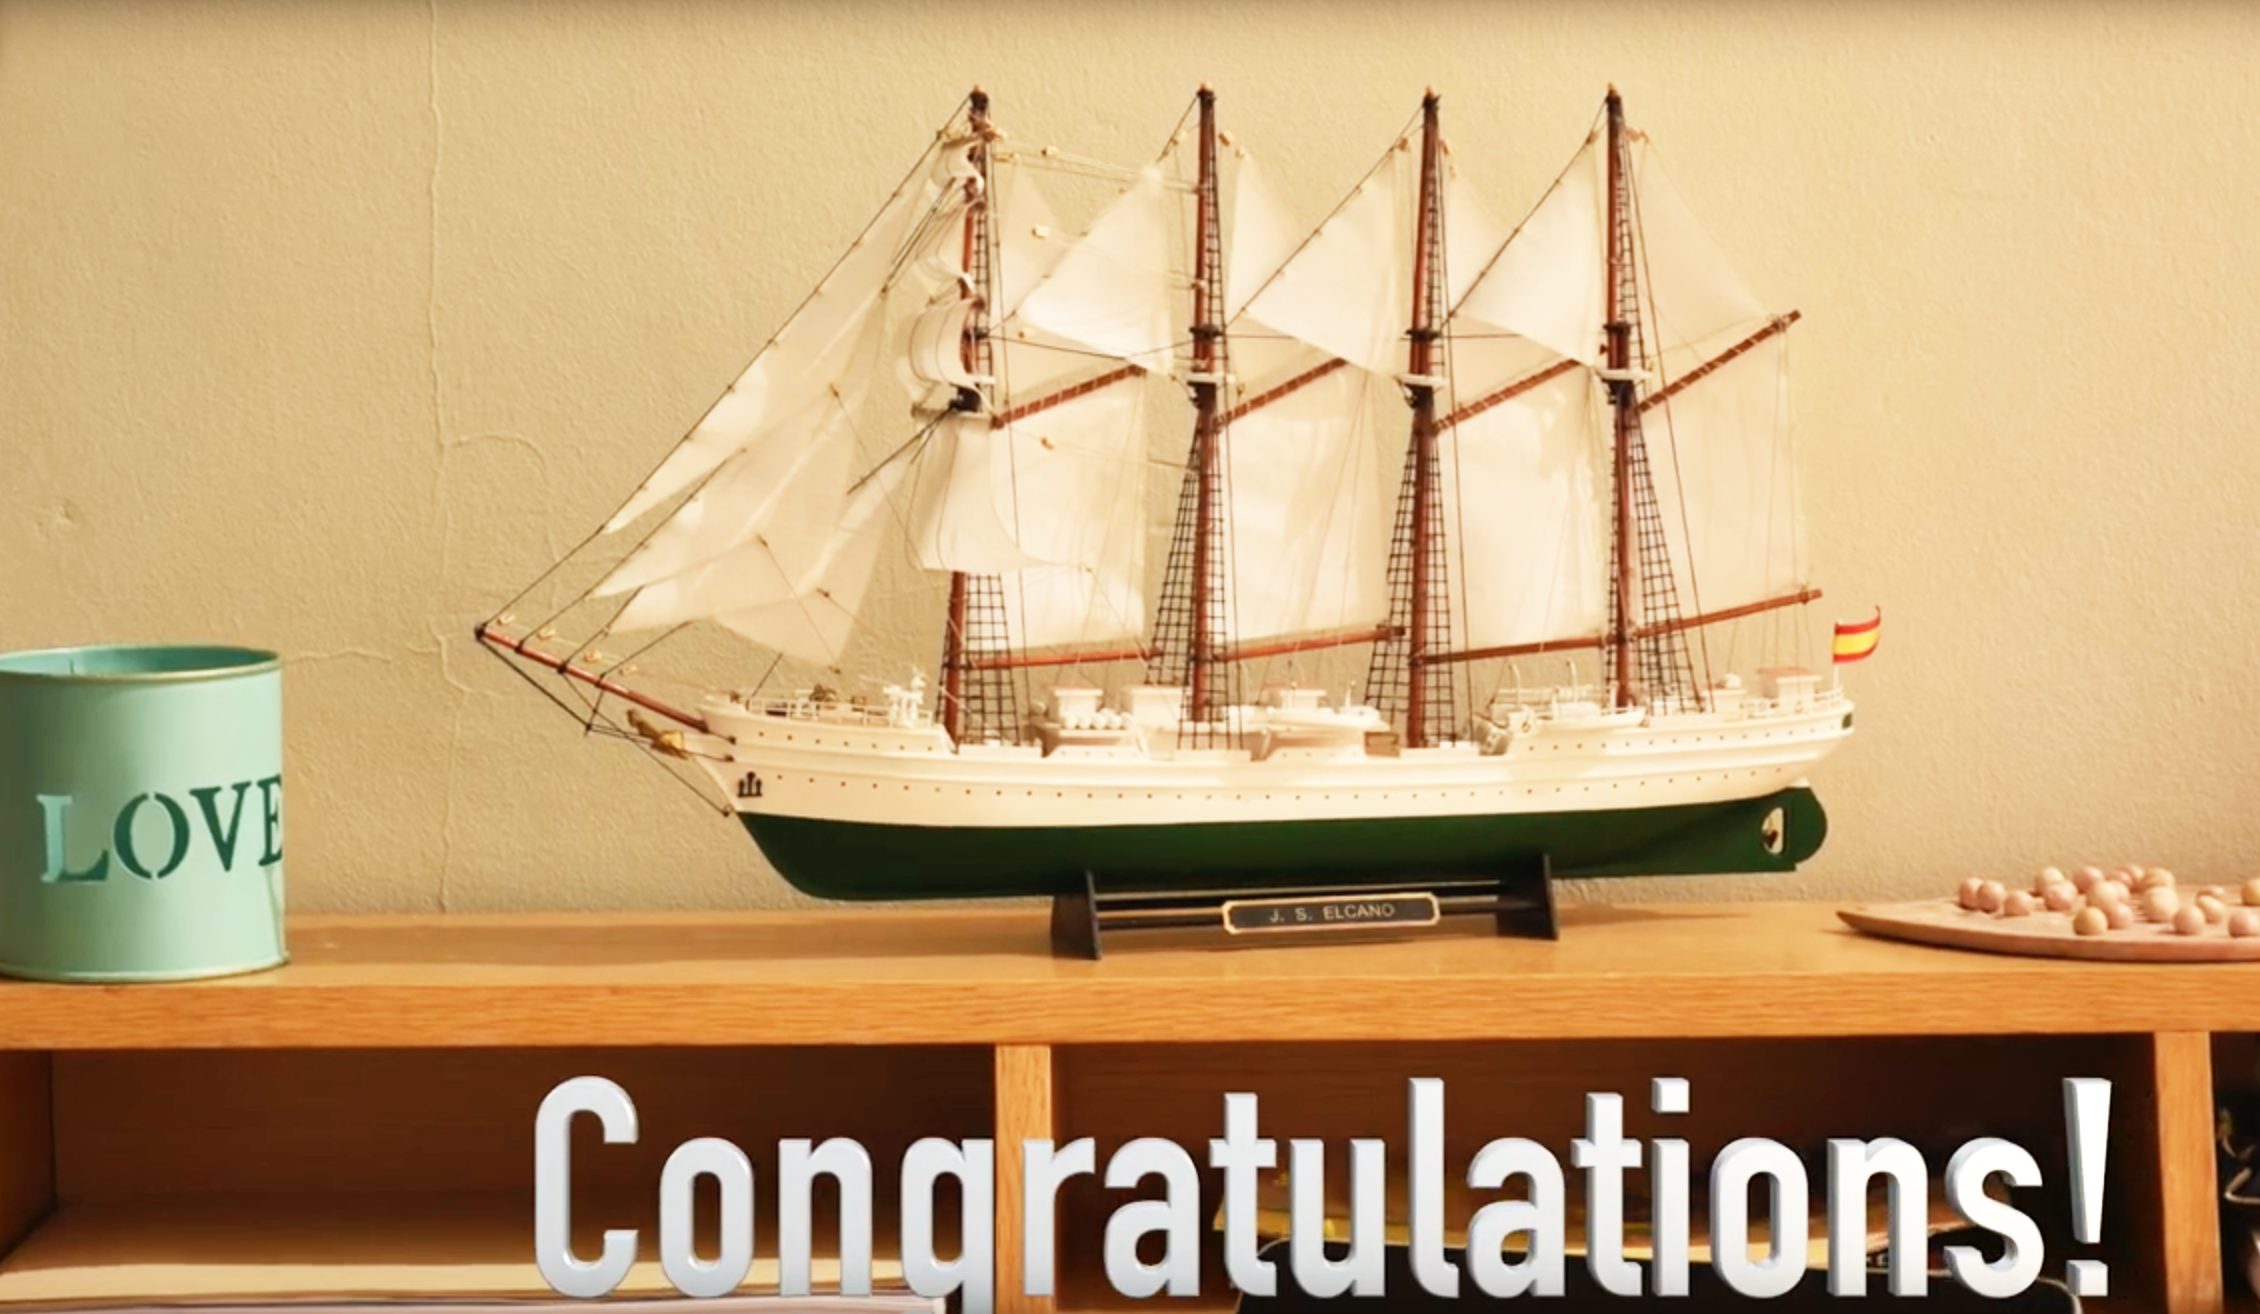
Model Ship Elcano / Esmeralda Built by our modeling friend Girish Khandagale.
We remind you that you can also purchase the Elcano Gift Pack (22260L), which includes the kit with the schooner sailboat, its paints and some tools. It has a lower price than if the products are purchased separately.
Let’s go with the third part of the post if you want to build Juan Sebastian Elcano model ship with more video tutorials recorded by our modelers during its assembly. The model of the Spanish training ship Juan Sebastian Elcano / Chilean Esmeralda (22260) at 1:250 scale is ideal for your first experience on the naval modeling. Now, we remind you that you can also purchase the Elcano Gift Pack (22260L), which includes the kit with the brigantine schooner sailboat, its paints and some tools. It has a lower price than if the products are purchased separately. That being said… Let’s continue assembling this historic model with a pre-fabricated hull!
BUILD JUAN SEBASTIAN ELCANO: MASTS (PART II – A)
On Step 16, we continue to explain some of the most difficult phases when you are going to build Juan Senastian Elcano model ship: ‘Mats – Part II’. Take the eight PCL parts and one BW1 part -wire- and put them on your work table. Next, cut a small piece of wire (BW1) with a Professional Straight Cutting Pliers (27210). With a hand drill, make a 0.5 mm hole on the upper part of the stick (PCL) and apply our Cyanoacrylate for Porous Materials (27620), for sale separately, where the hole is. Insert the wire into it and bend it 90 degrees. With the help of a Stainless Steel Ruler (27069) and the aforementioned pliers, measure 0.7 mm and cut off the excess as seen on the video. Repeat the process with the remaining PCL parts.
Take the four parts S1 -sails- and arrange them on your workshop. With the help of a sewing needle, use the thread –part CT1– to sew part S1 -sail- to part PCL -mast-. Thread through the corner of the sail and around the stick as well with some Straight Fastening Tweezers (27020) and the previous drill. Continue sewing the sail with the needle and thread along the length of the mast. Knot at the end of the neck, apply cyano and cut the excess thread as shown on the video.
ASSEMBLY ELCANO MODEL SHIP: MASTS (PART II – B)
Well, it’s time for the next task. Look for one BR1 part and four BR2 parts, all rings. With a utility cutter, poke a small hole in the outer corner of the sail. Open part BR1 with two Needle Nose Pliers (27213) and insert the ring through the sail. After inserting it, close it again using the aforementioned pliers. Now, do this whole process again with the four BR2 parts on the opposite horizontal side of the sail -with respect to the placement of the BR1 part-, just as seen on the video. Repeat with the remaining three sails. It should look like this:
ASSEMBLY ELCANO MODEL SHIP: MASTS (PART II – C)
Once the previous stage to build Juan Sebastian Elcano model ship has been completed, take one of those sails and introduce the mast created on the previous post through the large rings. Then, take the wire of the mast with the sail that you had bent to 90ºand insert it into the hollow part provided for it, below the top. Thus the upper part of the sail remains fixed to the mast. On the lower area of the mast, take an M18 part and insert it. Apply cyano to adhere it and remove excess glue with paper. The final result should be this -repeat the process with the other three sails-:
Jar of cyano on hand! On the four holes of the deck to place the masts, apply adhesive and insert them. Use the steel rule to calculate the vertical 109 mm and to check the distance between masts. Also, it can help you position the masts while the cyan dries. The end… For now!
BUILD JUAN SEBASTIAN ELCANO MODEL SHIP: SHROUDS (PART I)
Step 17 when a modeler wants to build Juan Sebastian Elcano Model (22260), the Spanish training ship, talks about the ‘Shrouds’. Extract with a cutter and paint with off-white colour (27702) the eight WS1 parts. Grab one of these. With a pencil and a ruler, mark five equidistant points on the part. Put cyano on the part CT2of 200 mm and glue it on the first marked point using Straight Fastening Tweezers (27020).
Repeat the process with the other three CT2 parts. On the last position marked with pencil, do the same thing with a 300 mm CT2 part. In total, there should be five threads attached to part WS1. Cut the excess of thread on one side of part WS1 with Thread Snips (27060). and paint off-white the glued part of the five threads with a brush.
Repeat this task again with the other seven WS1 part to get this:
It is time to glue those eight resulting parts. Take one and put cyano on the bottom. Glue the part to the edge of the hull, but be careful. The area where the threads are glued must look at the deck, that is, the part of the threads that are glued must not face the outside of the boat, but the inside. Repeat the process with the other seven parts so that it looks like this:
BUILD JUAN SEBASTIAN ELCANO MODEL SHIP: SHROUDS (PART II)
Take the longest thread -300 mm- from each of the parts and tie it around the tip of the nearest mast. Using a flat-grip plier, tie it securely by tying it into a knot and pulling the string so it is tight. Apply ciano to the knot made with the thread at the end of the mast and remove the excess of thread with Thread Snips (27060). Remember to repeat another three times this step on the other three mats.
Now do the same with the rest of the short threads -200 mm– but gluing them to the lower/interior part of the four tops. And finally, glue all the CT2 threads perpendicular to the already installed vertical threads. In this way, it will be ongrid mode. To do this, with patience, you must cut the threads with precision according to the height that you adhere them horizontally. And… Wow! Let’s have shrouds.
BUILD JUAN SEBASTIAN ELCANO MODEL SHIP: FIGUREHEAD & BOWSPRIT
We continue with Step 18 of Build Juan Sebastian Elcano model sailboat (22260). This is about the ‘Figurehead and Bowsprit’. Paint gold colour (27761) the part M19. Apply cyano to the inner bottom of the figurehead and stick it to the tip of the hull’s bow with your hands. Remember that if you want to place the Chilean emblem of the training ship Esmeralda, you must do the same with the part M20.
Then take the BSP part. With a ruler and pencil, mark the half of the part. Mark well with a cutter. With a manual drill and a 1 mm diameter bit, drill on the previously indicated place. Take a BW2 part and cut a 16 mm piece with Professional Straight Cutting Pliers (27210).
Take a BL part and surround the BSP part with your two wires. Help yourself with a Needle Nose Pliers (27213) for turning both ends of the wires around stick, tying the part to it. Get rid of excess wire once knotted to the stick. Repeat this process three more times on the BSP part. From the top point to where the hole is on the center of the stick. It is the turn of the part BW2, apply cyano in the centered hole made before and insert the part BW2.
By hand, fold down all four BL parts, apply cyano to the bottom end of the stick, and glue on the designated area. We already have bowsprit too!
MINIATURE REPLICA JUAN SEBASTIAN ELCANO SHIP: SAILS (PART I)
The ‘Sails – Part I’ is Step 19 of the video tutorial to build Juan Sebastian Elcano model ship. Take three parts S2, that is, three sails. Repeat the process you did on the ‘Masts – Part II’ section. In this case, the six parts are BR1 -small rings-. Place one part BR1 in one corner of the sail and the other five longitudinally and equidistantly on the other side.
Drill with a 0.75 mm hand drill the 4 masts at the height shown on the video. Pass thread -part CT2– through the five rings of the sail. Tie the sail with its thread to the top of the mast you are working on. Once the knot is done, apply cyano to it. Thread the other end of the sail string through the hole you just made on the next mast. Pull the thread until the thread and the sail is taut. Knot and cyano. Remove the rest of the thread with Thread Snips (27060). Repeat with the other two remaining sails.
Go back to the first sail placed, take more thread -part CT2-. Tie it to the first mast, above the top, at the height of the horizontal peak of the sail. Once tied, take it up to the second mast and knot it at the same height. Now the same thread, bring it closer to the third mast, and lastly to the fourth one. Help yourself to do this with Curved Fastening Tweezers (27021). Finally, put cyano on the fourth neck knot and cut the excess thread with our Thread Snips (27060).
MINIATURE REPLICA JUAN SEBASTIAN ELCANO SHIP: SAILS (PART II)
We continue with ‘Sails – Part II’, which is Step 20 of the construction of the model of the famous Spanish school ship (22260). Arrange a unit of parts S3, S4, S5 and S6, that is, sails. Take part S3, put nine rings -part BR1- on the longest side, and one on the corner. Then, take thread -CT2- and tie it at the end of the mast. Pass the line through the nine rings, tighten and knot it and glue it to the nose of the bowsprit previously installed. Repeat the same process with part S4, but with seven rings on the side and one on the corner. Remove excess string from the bowsprit of both sails. And the same with parts S5 and S6.
Next, more thread, this time, tie it to the point of the bowsprit, pass it through the metal -underneath the mast- and by the ring in the middle of the prow of the hull -the second-. Tie it there. Do the same with a second thread: knot it at the height of the rope of the third sail on the bowsprit, passes it through the upper ring and tie it. In all cases, remove the excess thread once tied. Repeat this process on the other side of the boat, so that the thread also enters through those rings. Finally, a third thread that will go through the lower ring on both sides of the bow.
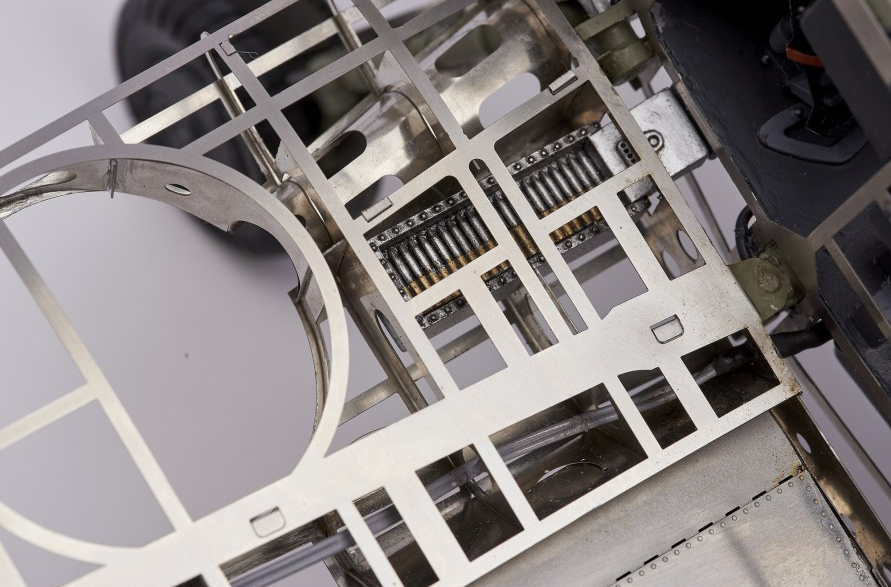
Artesania Latina’s modelers and designers know that any help is good for the construction of any scale model. That is why on this post we are going to show you through different videos how to carry out the assembly of the model Messerschmitt BF109G (20356) at 1/16 scale. A beauty, a jewel of the aircraft modeling made of metal and photo-etched for which we have edited 16 videos in which we show the precise way of its assembly. Join us on this flight! Fasten your seat belts!
So… Let’s go! On this Chapter 1 of our Assembly Diary, we explain the steps between 1 and 9 of the instructions: ‘Intermediate Fuselage Frames and Their Details’. Previously, the modeler must carefully extract the different parts of the plate and identify them for their correct positioning. What tools for modeling we recommend to get this goal?
MESSERSCHMITT BF190G MODEL ASSEMBLY: TAIL AND FUSELAGE
Later, on Chapter 2 of the Assembly Diary for the Messerschmitt BF109G model assembly -steps from 10 to 34-, we talk about how to build ‘The Tail and The Fuselage’ of the German fighter (First Part).
For this phase, the tools that the modeler needs are the same as the previous ones, but these three must be added:
We continue on Chapter 3 of the Assembly Diary for the Messerschmitt BF109G model assembly -steps from 35 to 57- with the Second Part explaining how to build ‘The Tail and Fuselage’ of this faithful miniature replica of the aircraft of World War II. For this moment, the modeling tools that are required are the previous ones, in addition to this one:
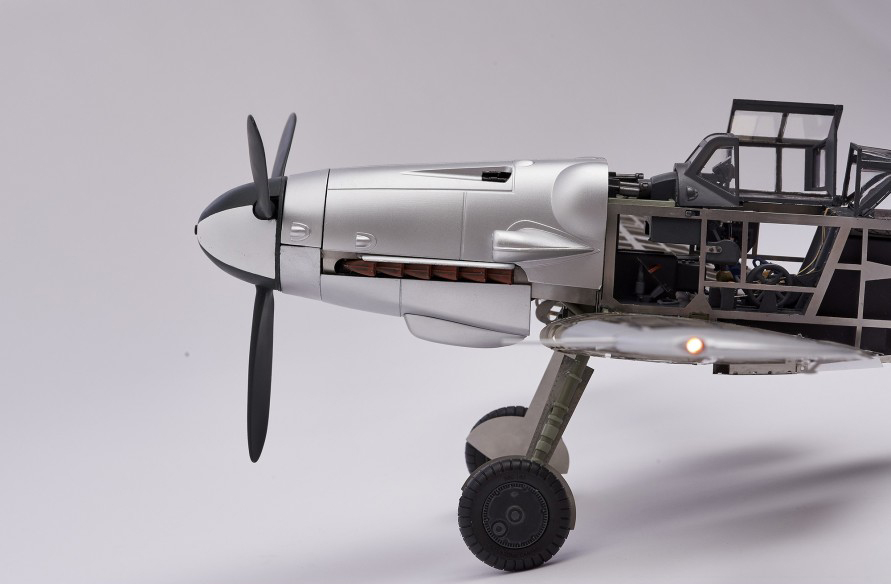
To finish this area, the ‘Landing Gear and Tail’ is the title and the subject shown on Chapter 4 for the assembly of the scale model Messerschmitt BF109G -steps from 58 to 79-. The modeler is not forced to incorporate any new tool here, she/he can continue using the ones already mentioned.
BF109G PRECISION COCKPIT ASSEMBLY
One of the beauties of the 1/16 scale model of the German aircraft called Messerschmitt BF109G is its extremely detailed ‘Cockpit’. The Chapter 5 of Artesania Latina’s Official Assembly Diary -steps from 80 to 101 of the instructions on PDF format- deals with how to build that area of the plane First Part. Our modeling friends don’t have to add any new modeling tools now either.
Next, Chapter 6 reflects the Second Part of the ‘Cockpit’ construction. Specifically, we reveal how to carry out steps 102 to 125 of the assembly guide that contains this fabulous modeling kit made of the highest quality metal and photo-etched parts.
And, finally, the Third Part of the video that speaks about the ‘Cockpit’ is the Chapter 7 for an optimal construction of the Messerschmitt BF109G scale model. Here are the steps between 126 and 147. At this stage, we will also need…
We move on to the correct assembly of the ‘Left Wing’Part One on Chapter 8. Steps 148-173 of this detailed audiovisual guide for the construction of the model Messerschmitt BF109G.
Here, Part Two about the assembly of ‘Left Wing’, Chapter 9, steps 174-197.
Next week we will return to each step that is still missing for the construction of this model. Meanwhile, there is much more information interesting about the BF109G by clicking here.


 by Artesanía Latina.")
 by Artesanía Latina.")


 by Artesanía Latina.")
 by Artesanía Latina.")
 by Artesanía Latina.")
 by Artesanía Latina.")
 by Artesanía Latina.")
 by Artesanía Latina.")
 by Artesanía Latina.")
 by Artesanía Latina.")

 by Artesanía Latina.")
 by Artesanía Latina. Click here for more info.")
 by Artesanía Latina. Click here for more info.")
 by Artesanía Latina. Click here for more info.")
 by Artesanía Latina. Click here for more info.")
 by Artesanía Latina. Click here for more info.")

 by Artesanía Latina. Click here for more info.")
 by Artesanía Latina. Click here for more info.")
 by Artesanía Latina. Click here for more info.")
. Click here for more info about WWII German Fighter.")
. Click here for more info about WWII German Fighter.")
. Click here for more info about WWII German Fighter.")
. Click here for more info about WWII German Fighter.")