Posted in Model Building Tips

Elcano Ship Model Instructions (IV): Finish Building the Spanish Training Ship with Our Latest Video Tutorials!

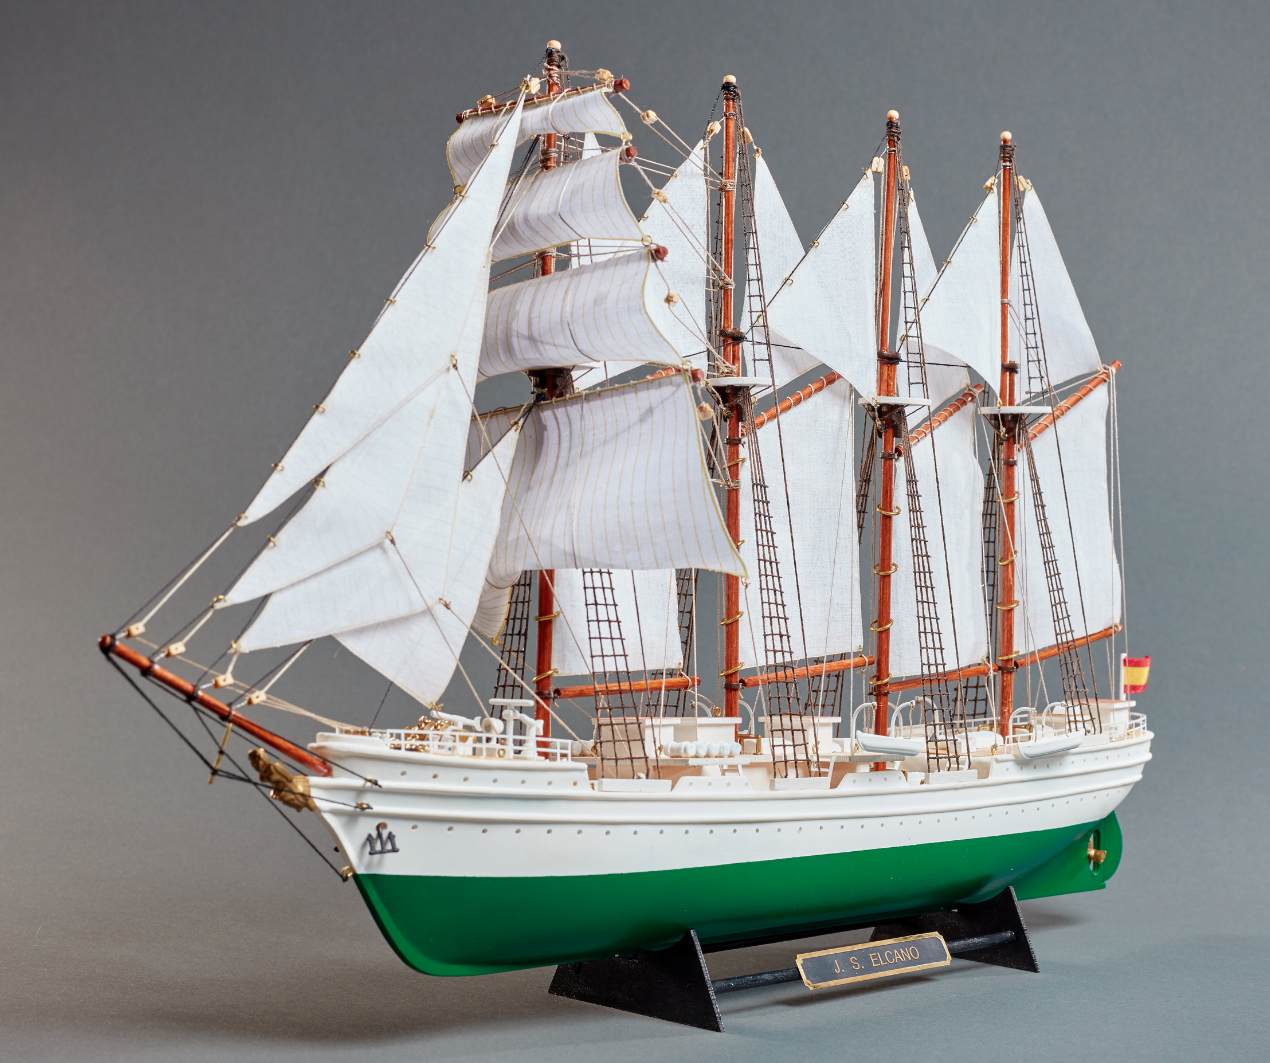
We dive into the last part of the Elcano ship model instructions for its assembly. With these video tutorials made by our modelers, we put the finishing touch to the set up of the Spanish school ship model Juan Sebastián Elcano / Chilean Esmeralda (22260) at 1:250 scale. As we mentioned before, it is a faithful miniature replica excellent for beginners on the hobby of naval modeling.

ELCANO SHIP MODEL INSTRUCTIONS: SAILS (PART III – A)

We continue with ‘Sails – Part III’, which is Step 21 of the instructions for assembling the Elcano ship model (22260).

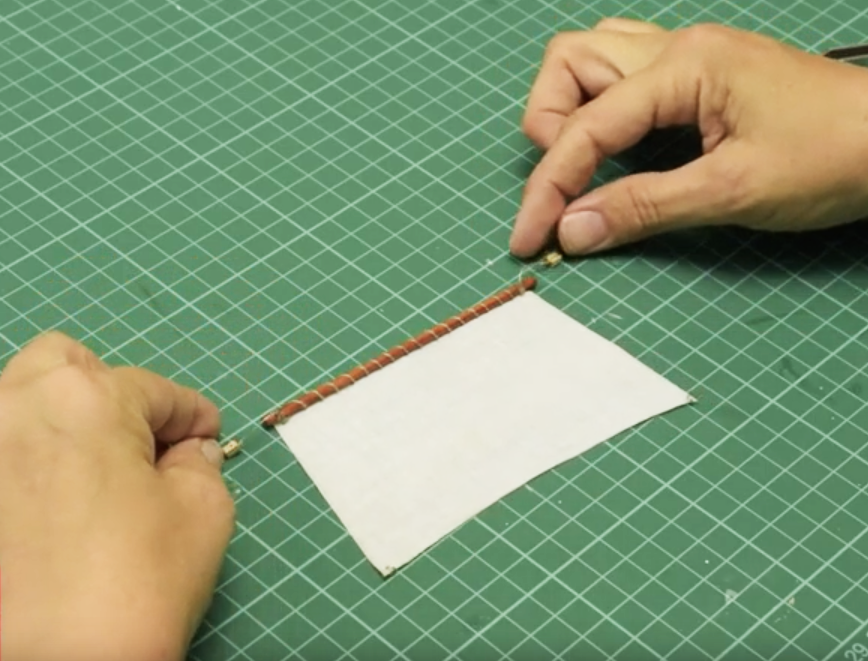
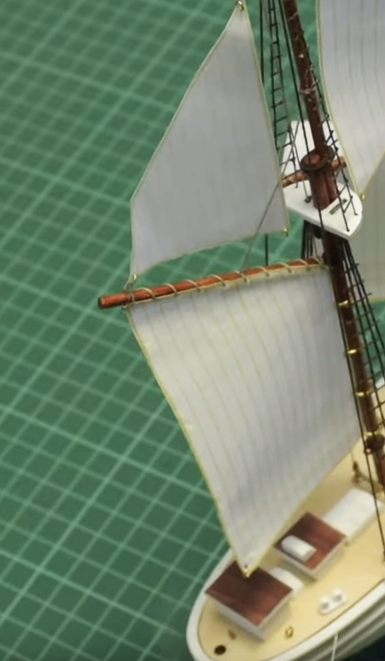
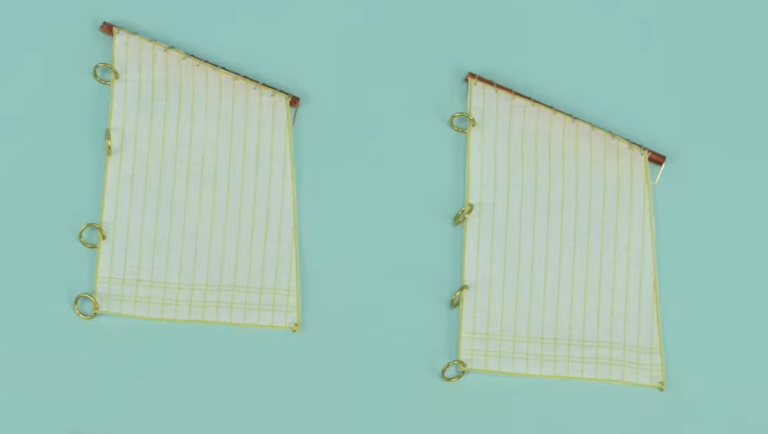
Arrange one unit of parts S7, S8, S9 and S10, that is, more sails. Take part S7, and sew it with a needle cotton threadpart CT1– around the stick part Y1, from top to bottom. When you finish sewing, help yourself with some Straight Fastening Tweezers (27020) to tie the knot on the stick.

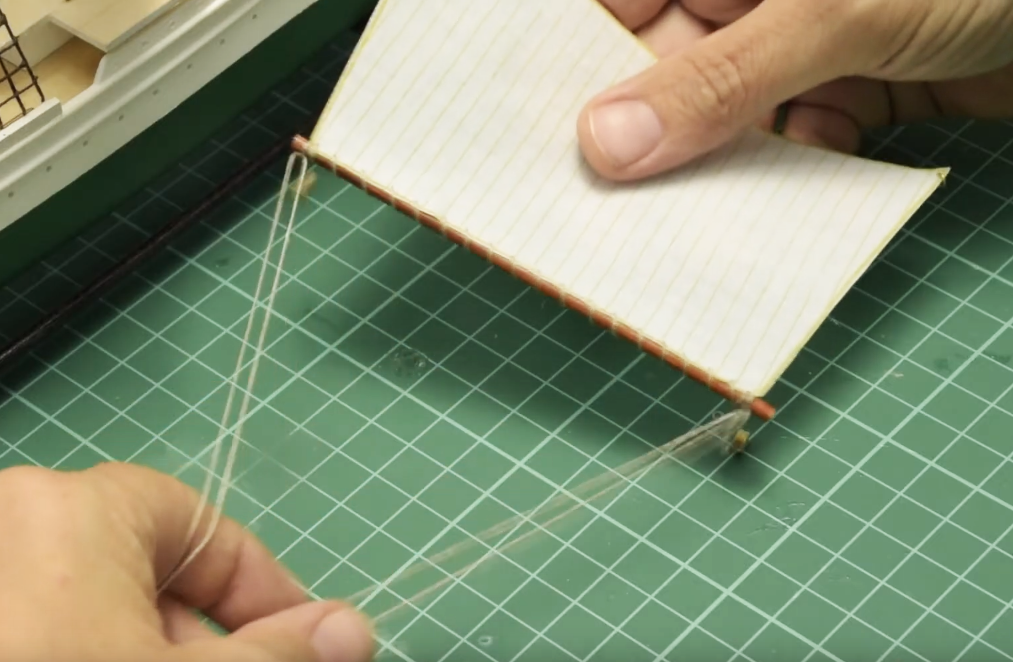
Now, with a cutter, drill two small holes in the two opposite corners of the stick. Insert the two BR1 parts -two rings- into these. Take a part BL and thread -part CT1-. Put the thread through the hole and around part BL. Tie a knot at the end with the help of the aforementioned tweezers. The thread should be fully stretched through the hole and around the part BL. Apply Dense Cyanoacrylate for Porous Materials on the knot and allow to dry.

Next, you will have excess thread on both sides of the knot. First, completely cut one of the threads, while the other leave a few centimeters long. Don’t cut it all the way. Second, also using the tweezers, tie that thread with the BL part to the left side of the stick and tie the knot with cyano. Third, if there is excess thread, remove it with a cutter. Repeat all these actions on the other end of the stick with another BL part.

The result should be this:

Elcano Ship Model Instructions for its Assembly (22260). Artesanía Latina.

ELCANO SHIP MODEL INSTRUCTIONS: SAILS (PART III – B)

Then go through the entire process again with the other SAILS. For the sail part S8, you will need one Y2 part, two BR1 parts and two BL parts. For the part S9, one Y3 part, two BR1 parts and two BL parts. And for the S10, one part Y4, two parts BR1 and four parts BL. Take again the sail part S7 and thread part CT1. At one end of the stick, tie a knot with plenty of thread left over from both sides. Apply cyano and let dry. Repeat the process on the other end of the stick.

Elcano Ship Model Instructions for its Assembly (22260). Artesanía Latina.

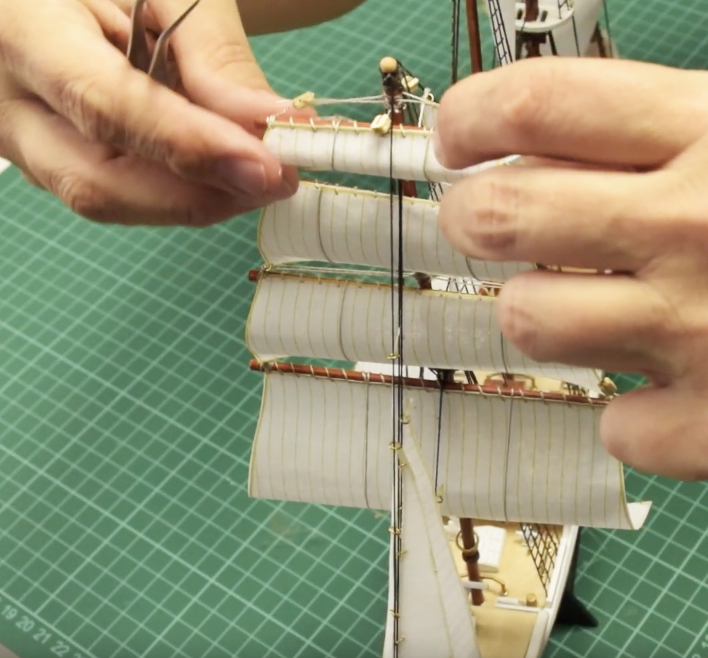
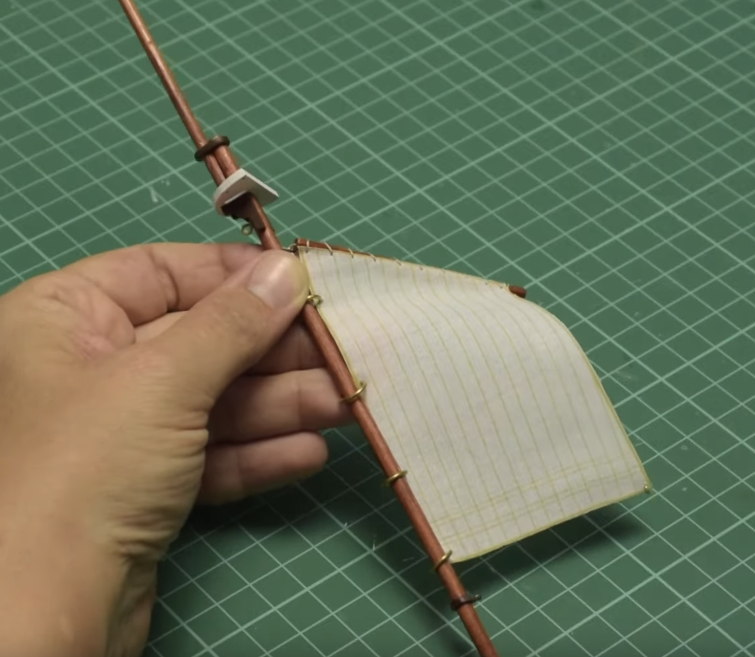
Take the S7 sail. Use a Curved Fastening Tweezers (27021) to pass the thread -part CT1- with a needle above the mast top, as seen on the video. The goal is the sail can be already hanging on its mast. Make the knots as shown, apply a little of cyano and cut the excess thread with the Thread Snips (27060). The sail already stays in place.

Repeat the process with the S8 sail. Once hung, it has to be attached to the S7 sail with thread. Tie them by means of the two BR1 parts that are on the sail. Passing the CT1 thread through the BR1 ring and, right after, tie it to the end of the stick. Repeat the process also for the other end of the pole with the other BR1 ring.

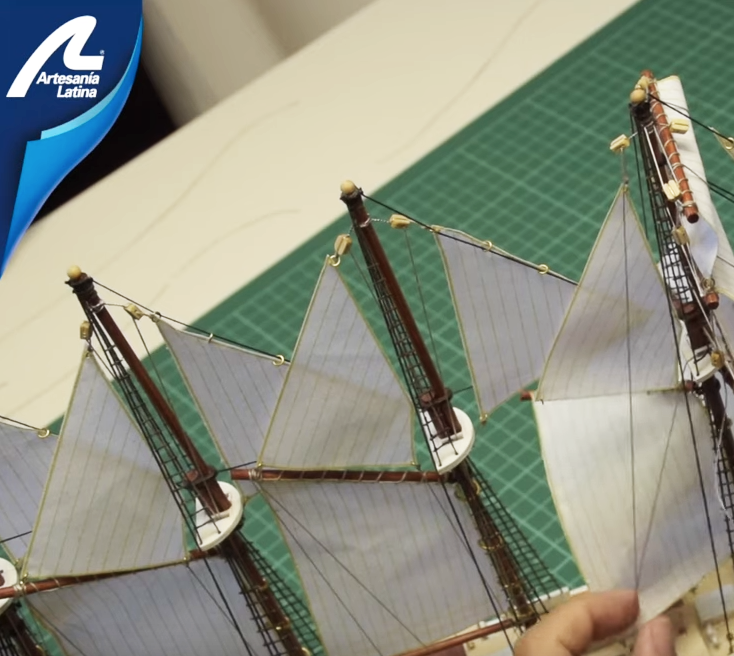
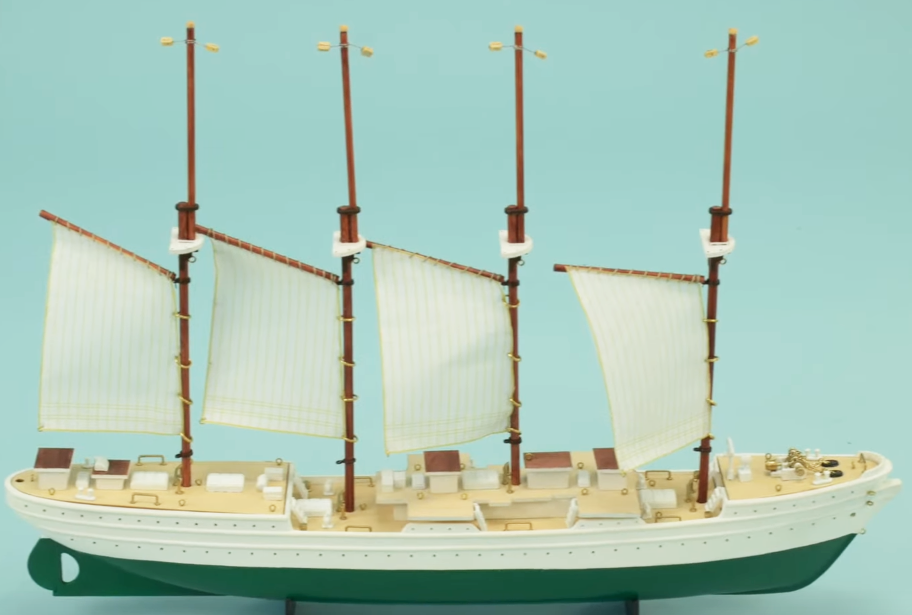
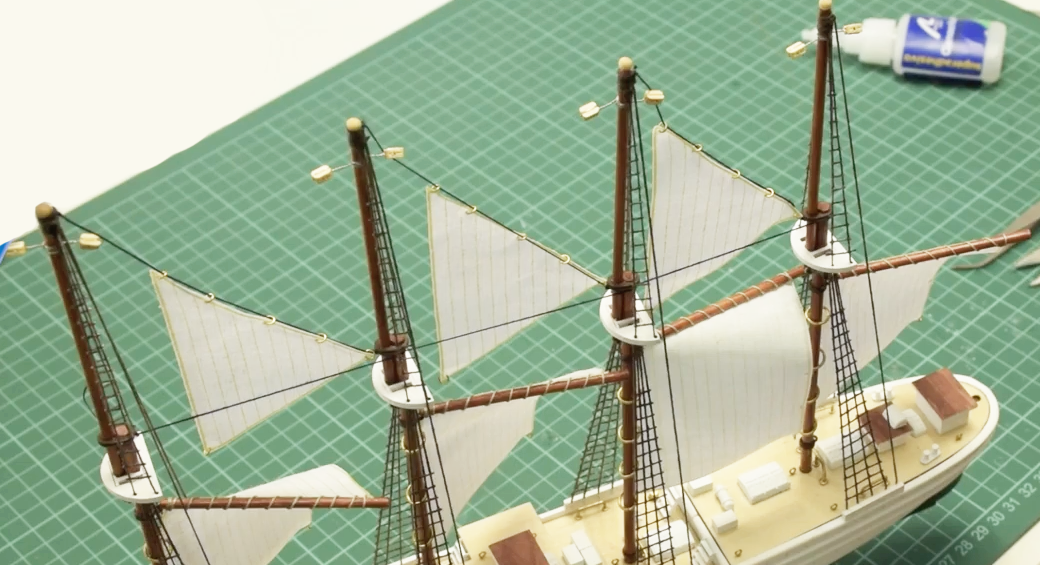
Do the same with the S9 sail, but this time tying it to the S8 sail. And finally, with the S10 sail, knotting it to the S9. This should be the final look with all the sails in place.

Elcano Ship Model Instructions for its Assembly (22260). Artesanía Latina.

ELCANO SHIP MODEL INSTRUCTIONS: SAILS (PART IV – A)

Well, it’s time for the next task. Step 22 of the assembly instructions for the ship model Elcano (22260). This one is about ‘Sails – Part IV’.

Take the four sails parts S11. Now take one and, using a utility knife, drill three holes in each of the three corners of the sail. Then, insert one of the three parts BR1 -rings- into each hole. Open each part BR1 with two Needle Nose Pliers (27213) and insert the ring through the sail. After inserting it, close it again using the aforementioned pliers. As we have discussed, repeat the process with the other three sails.

Again, take a sail part S11. Insert thread through the BR1 ring found on the most pointed part of the sail, at the top and tie a knot. Cut the excess of one of the ends of the thread and pass the other end through the mast. Then bring the thread to the hull, tighten it, tie it off and glue it with cyano. Watch the video for it.

Now, thread CT1 through the outermost ring BR1. Begin to tie a knot and leave a hole to insert it into the bottom sail pole. Insert into the stick and close the knot. Do the same with more thread through the remaining BR1 ring, the third one, the one closest to the mast. In this sense, the sail part S11 will be attached to the lower sail.

Elcano Ship Model Instructions for its Assembly (22260). Artesanía Latina.

ELCANO MODEL SHIP INSTRUCTIONS: SAILS (PART IV – B)

Below that bottom sail, place a PCL part. Bend the wire that has the stick on it and attach it to the mast. Use the pliers to twist the wire around the mast.

Take CT1 thread and pass it through the eye of the BR1 part of that lower sail to make a knot and pass it through the PCL stick. The sail will be attached to the mast. Remember to apply cyano to all the knots you make.

Thread CT1 through the ring on the hull and tie it to the stick so that it is taut. The rest of the thread, pass it through the mast top and tie it to the deck. Take a look at the video to run this process, which you will need to repeat for the other three sails.

Elcano Ship Model Instructions for its Assembly (22260). Artesanía Latina.

ELCANO SHIP MODEL INSTRUCTIONS: SAILS (PART V)

Step 23 of Elcano ship model instructions (22260) for the assembly of Spanish school ship, is about the ‘Sails – Part V’. You need to pay close attention to the video so that you can build the rest of the sails.

JUAN SEBASTIAN ELCANO MODEL SHIP: DECKS (PART III – A)

We continue with Step 24 of the Elcano ship model instructions for its assembly. This is about ‘Decks – Part III’.

Take two M8 parts and glue them parallel to the foredeck as shown on the video. Next, take ten units of the part DM4. With the help of cyano and grip pliers, take five of these and glue each one next to the other on the deck area shown. Then turn the boat 180º and do the same for the other five on the other side of the deck.

Once this task is done, take a Stainless Steel Ruler 150 mm (27069). Use it to mark with a pencil on the edge of the hull two points with an equidistance of 18 mm. From each of these two points, with the ruler, measure and mark two points 6 mm inside the deck. Drill with a small hand drill at the two points marked on the deck.

Take an M6 part. Apply a drop of cyano and insert it with tweezers into one of the two holes made. Repeat the process with another M6 part and insert it into the other deck hole.

JUAN SEBASTIAN ELCANO MODEL SHIP: DECKS (PART III – B)

It is time to use thread part CT2 for the placement of part P2, previously painted with Off-White Acrylic Paint (27702). First, thread the thread through the two holes in part P2. Second, take the other end of the thread and feed it through an M6 part. Do the same with the other end. When you are inserting the two ends of the thread into each M6 part, insert them from the outside to the inside.

Next, make a knot in each of the two inserted ends so that the part P2 does not come loose. Apply a little cyano to each one. Repeat the process on the opposite side of the boat.

Elcano Ship Model Instructions for its Assembly (22260). Artesanía Latina.

JUAN SEBASTIÁN ELCANO ASSEMBLY: HANDRAILS AND PROPELLER

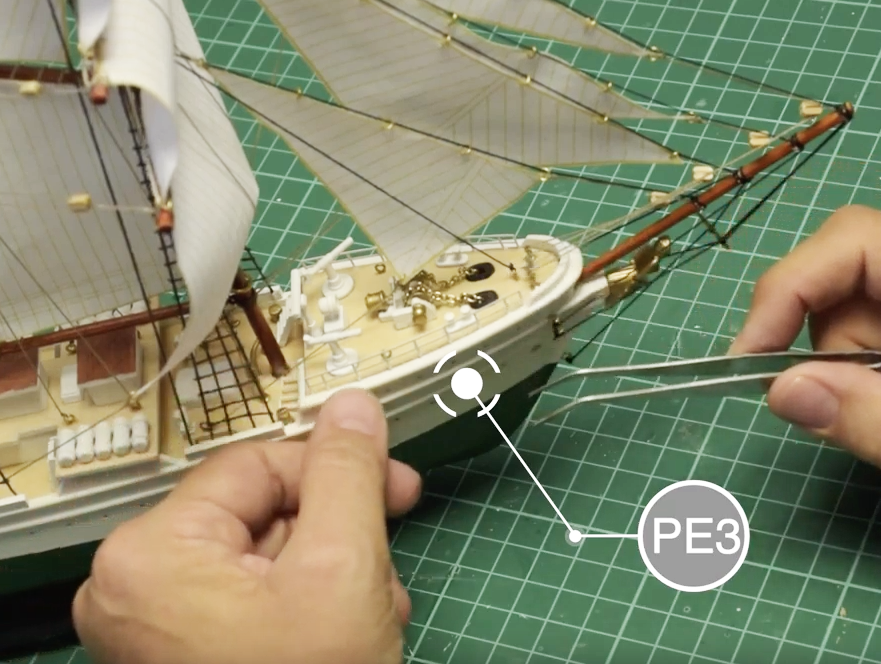
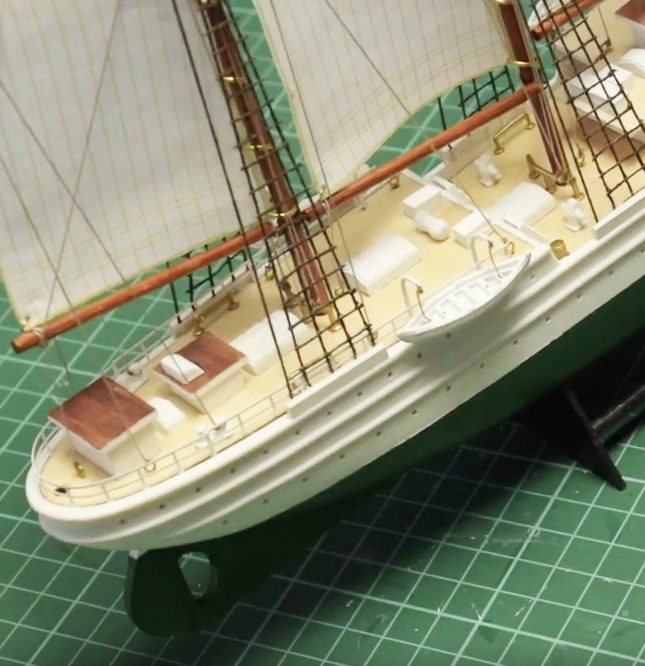
The ‘Handrails and Propeller’ is Step 25 of the video tutorial for building the model of the Elcano ship. Take two PE3 parts, previously painted with off-white paint. Apply cyano to each of the tips of the base that will be inserted. Place each of the two PE3 parts on the edge of the hull and the deck with the help of a Curved Fastening Tweezers (27021). There are two in the bow.

Elcano Ship Model Instructions for its Assembly (22260). Artesanía Latina.

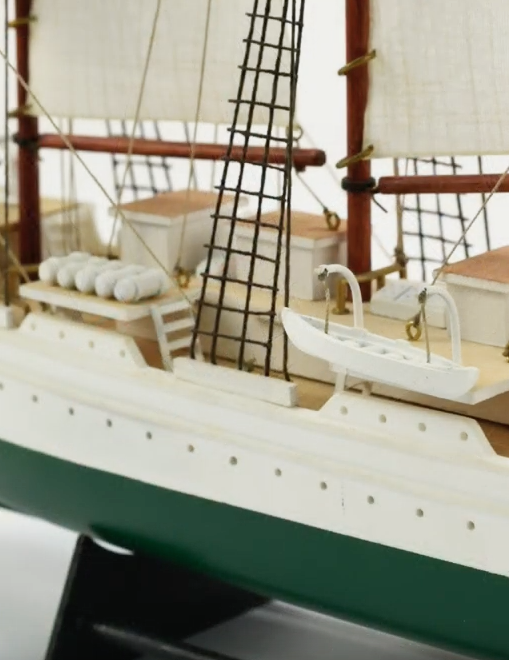
Then, take a PE4 part, also previously painted with off-white colour. Bend it with your hands so that it takes on the curved shape of the stern. Once you have the shape, apply cyano to each of the corners and glue the part with both hands to the edge of the deck. Take another PE4 part and tack it right next to the one you placed earlier. Put it behind the lifeboat. Repeat the process on the other side of the hull.

Elcano Ship Model Instructions for its Assembly (22260). Artesanía Latina.

Finally, the part M11 -propeller- enters the scene. Apply cyano to the tip to be inserted and place it with your hands and a pair of tweezers on the hull.

JUAN SEBASTIÁN ELCANO ASSEMBLY: LAST DETAILS TO FINISH (PART I)

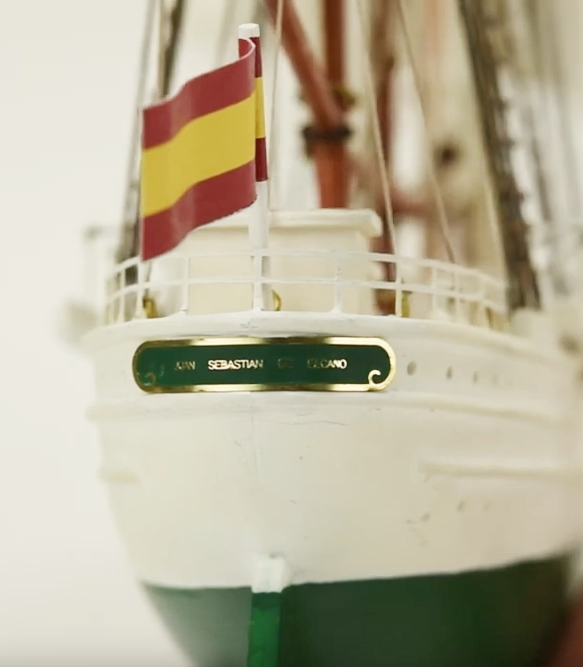
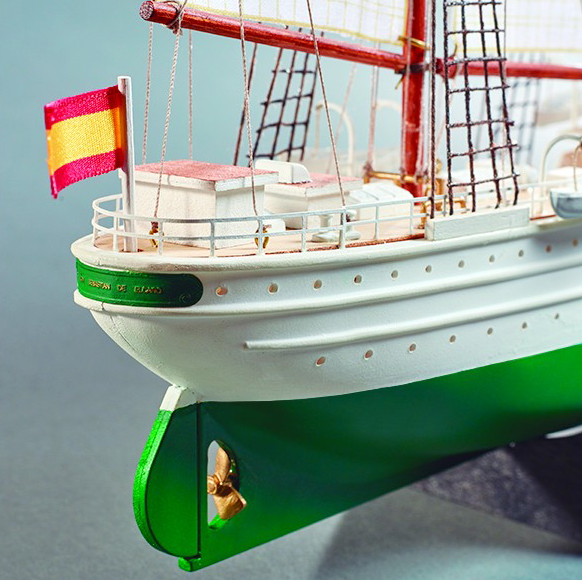
We continue with the final step of the Elcano ship model instructions for its assembly with the ‘Last Details’, which is Step 26. Arrange a unit of the part WD3 with a diameter of 2×35 mm, previously painted off-white. Later, take the part FL1 -Spanish flag- and with the help of a cutter, remove the sticker protector.

Place the center of the sticker -it has a stripe drawn- on the stick and close the sticker with your hands and the handle of a scalpel cutter until both sides of the flag stick together. Stick it in the hole in the aft deck provided for it.

It is the turn of the part PE5 Elcano / PE6 Esmeralda -metal sheet with the name of the ship-. First, paint it with Hull Green Colour (27751). Then, sand the entire edge of the sheet with a utility cutter until you can see the metal of the sheet. Apply cyano and glue it to the stern of the boat, just below the flag.

JUAN SEBASTIÁN ELCANO ASSEMBLY: LAST DETAILS TO FINISH (PART II)

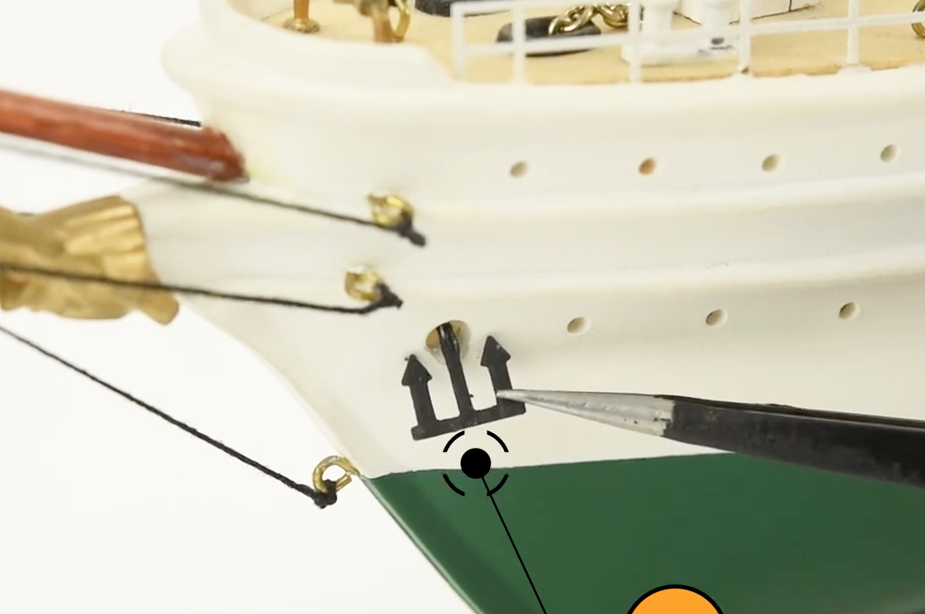
Now, take the two parts M17 -anchors-, previously painted with Off-Black Colour (27703). Place them into the two holes provided for this with the help of tweezers and a few drops of cyano. Finally, there is the part PE7 / PE8 -name of the ship for the base-. Also paint it with off-black colour, sand the edges with a cutter until you see the metal part and, with cyano, glue it to the exhibition base.

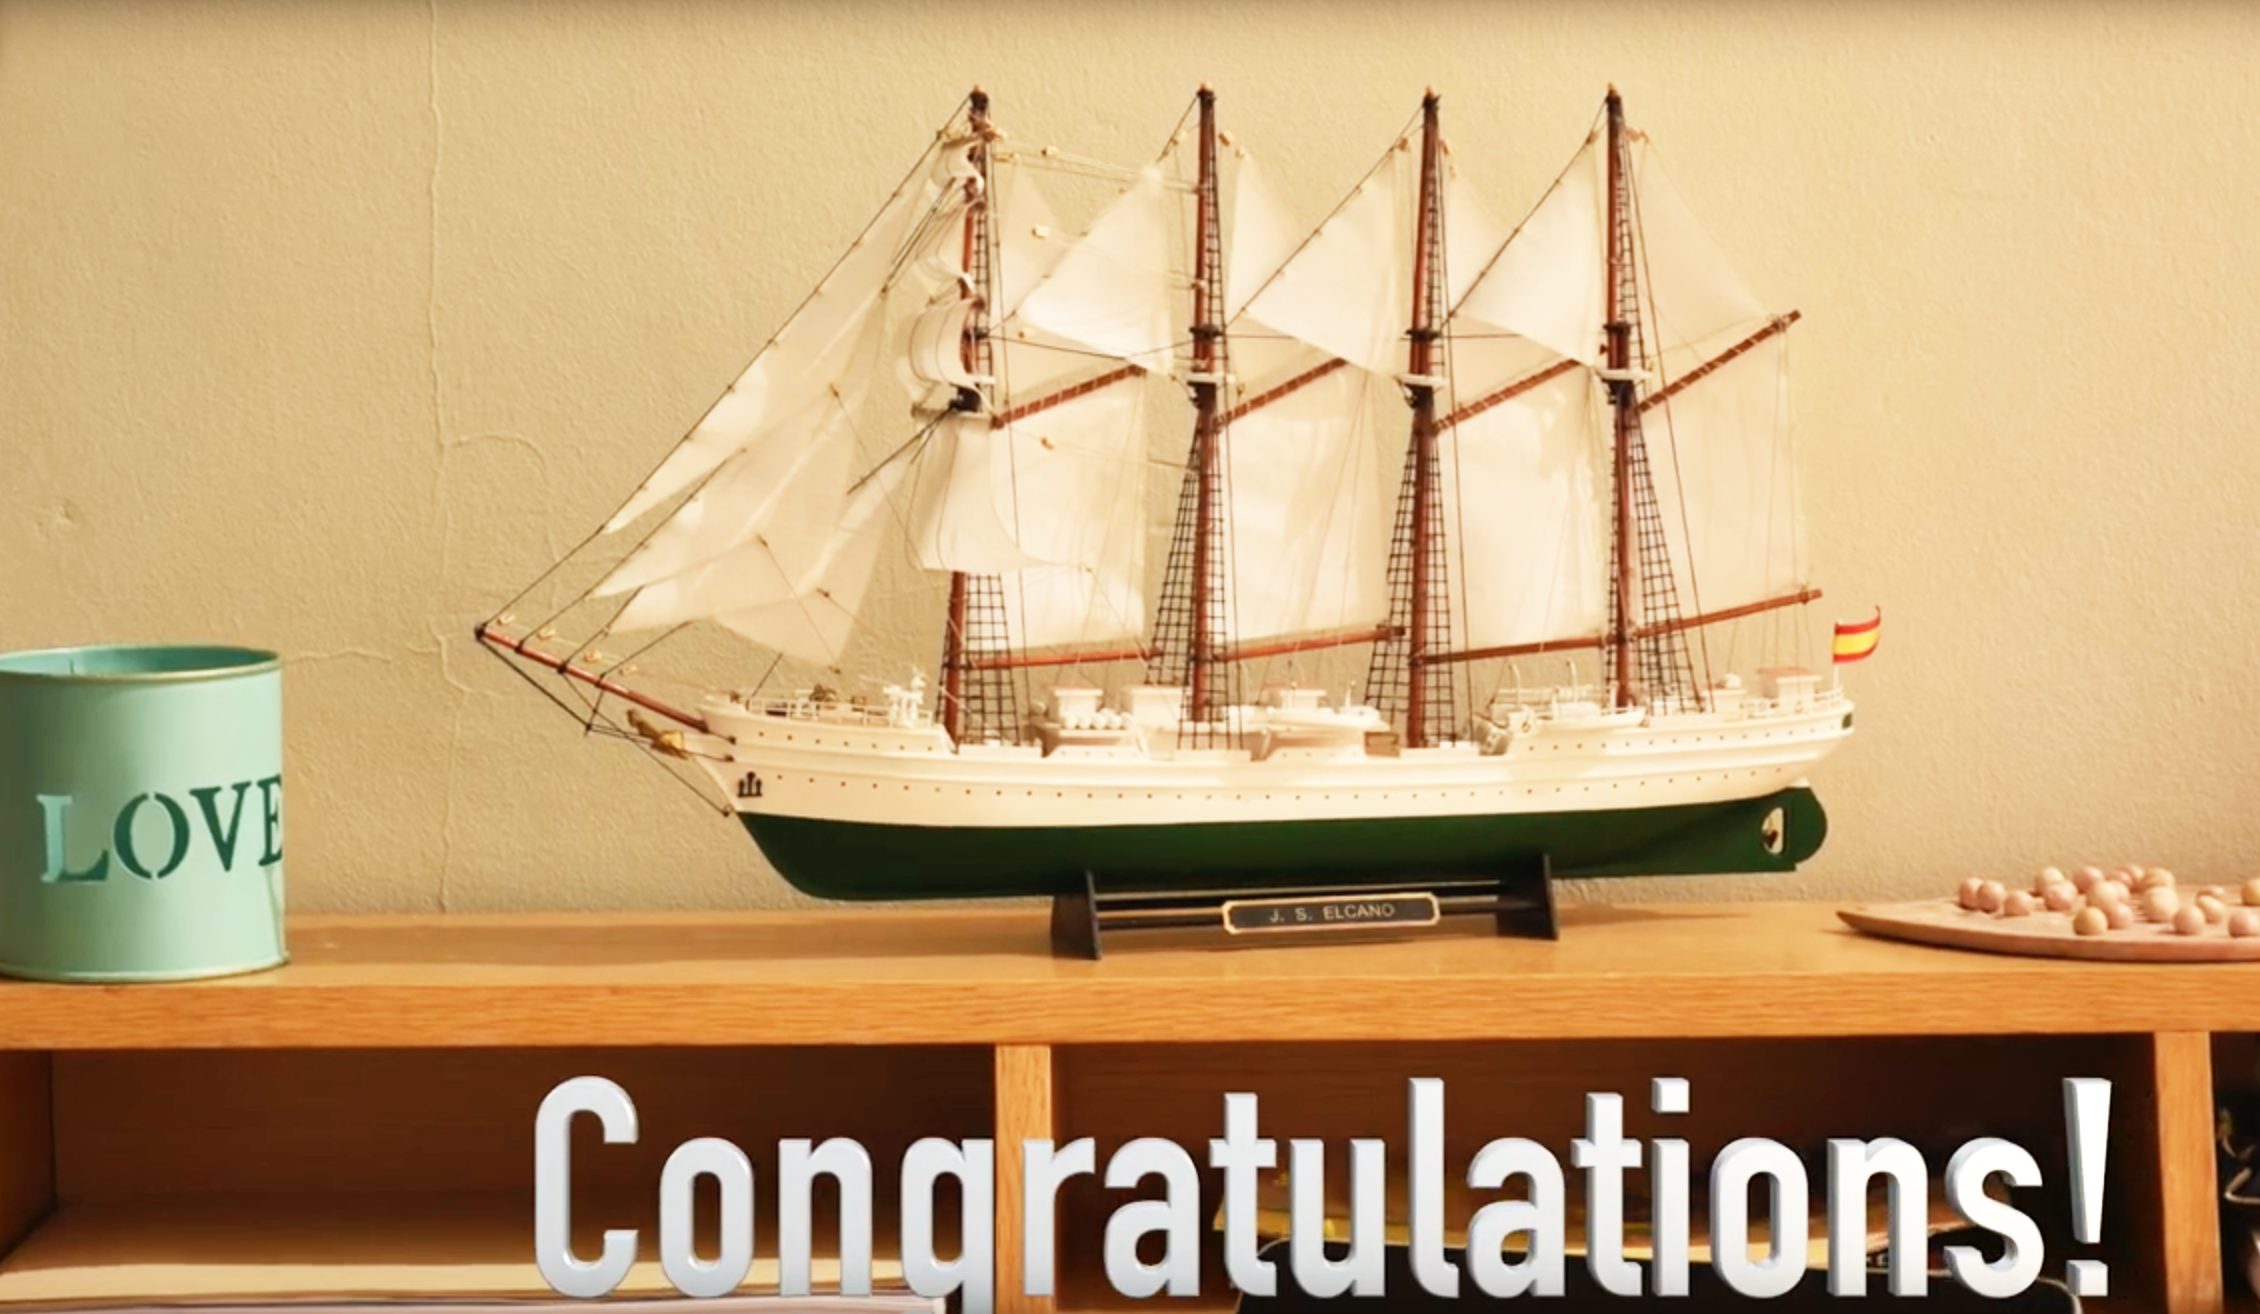
You have just finished building the wonderful model of the training ship Juan Sebastián Elcano / Esmeralda (22260)! Congratulations!
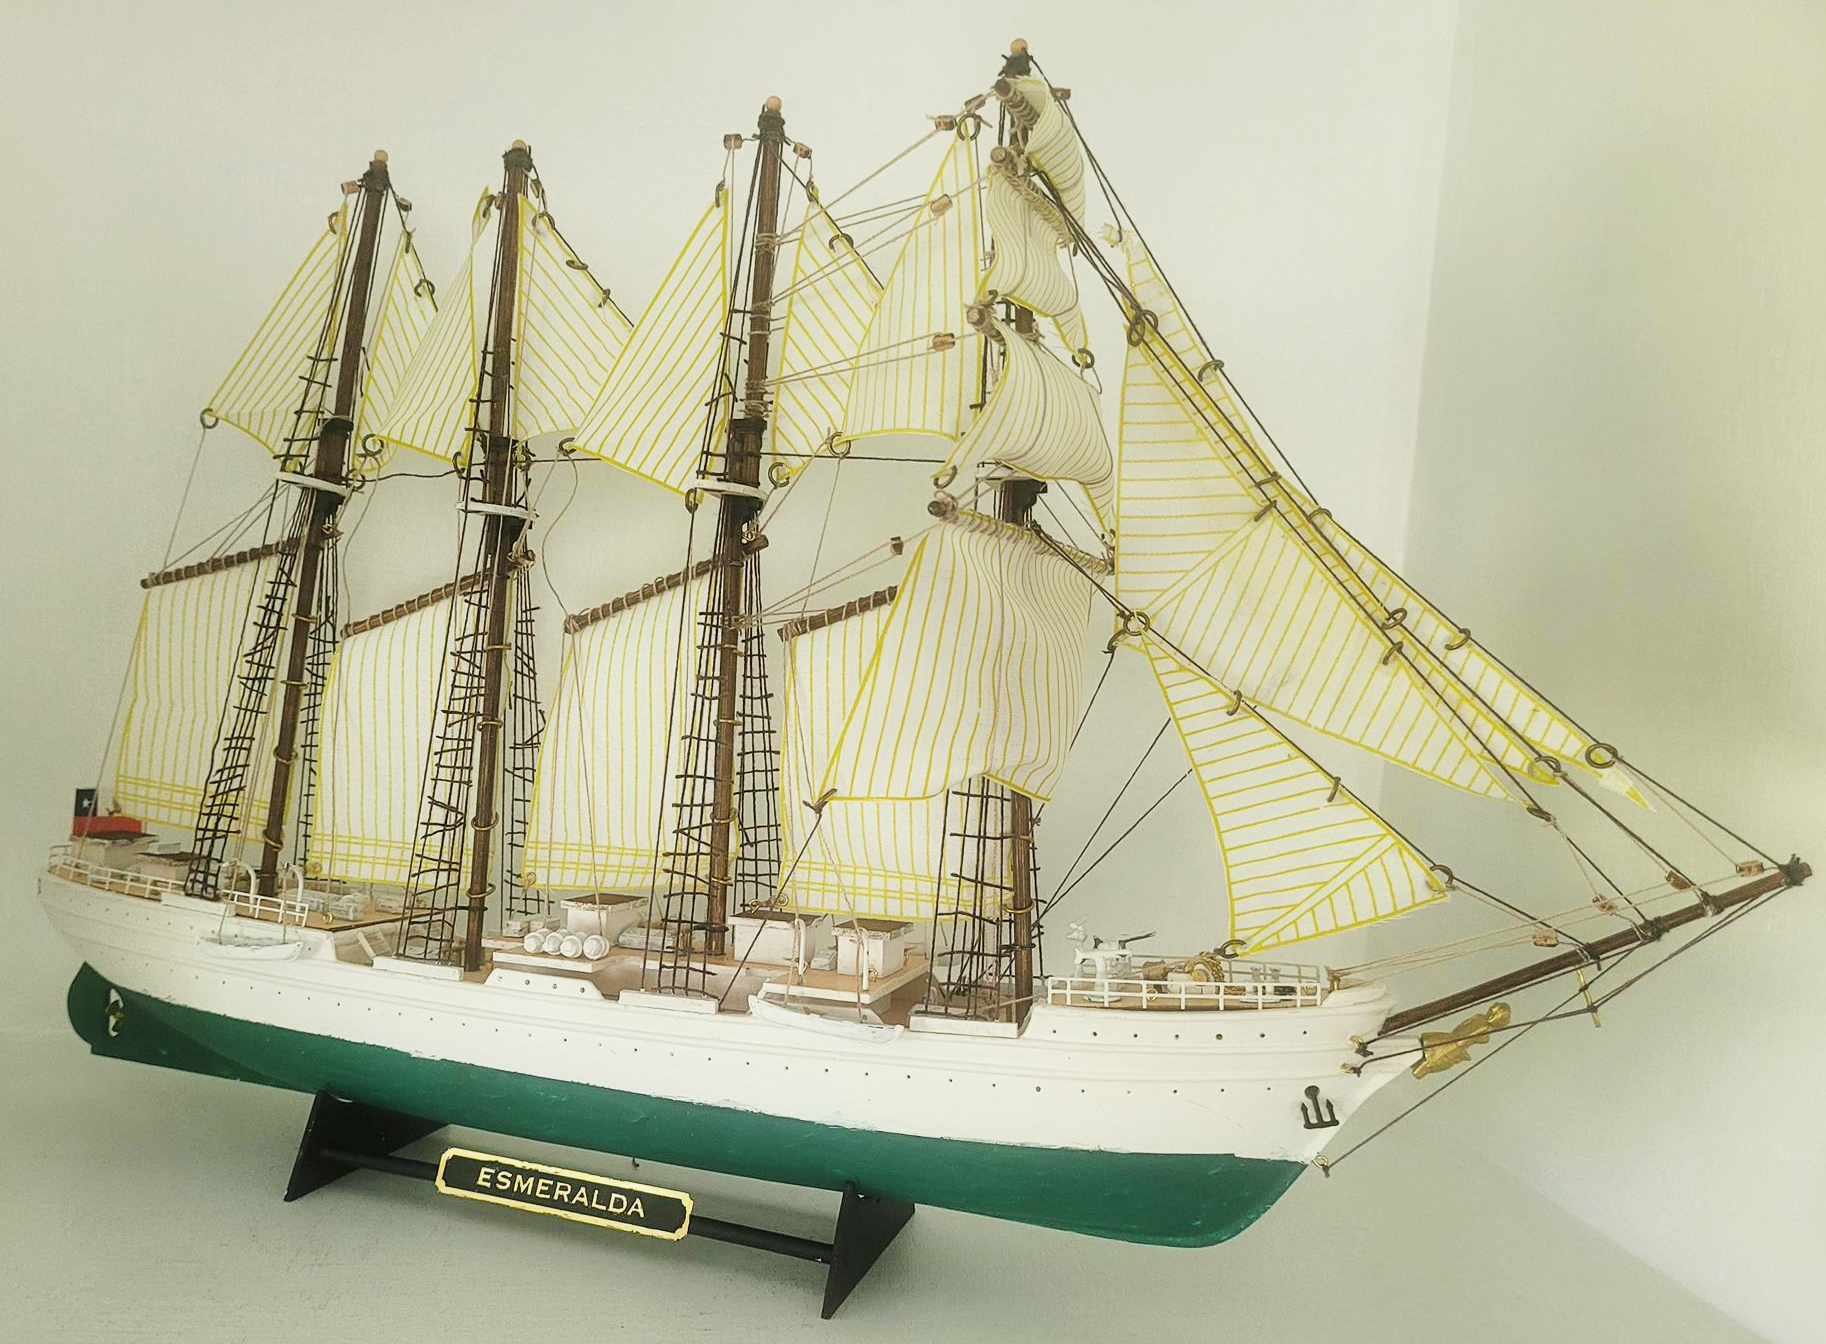
Model Ship Elcano / Esmeralda Built by our modeling friend Girish Khandagale.

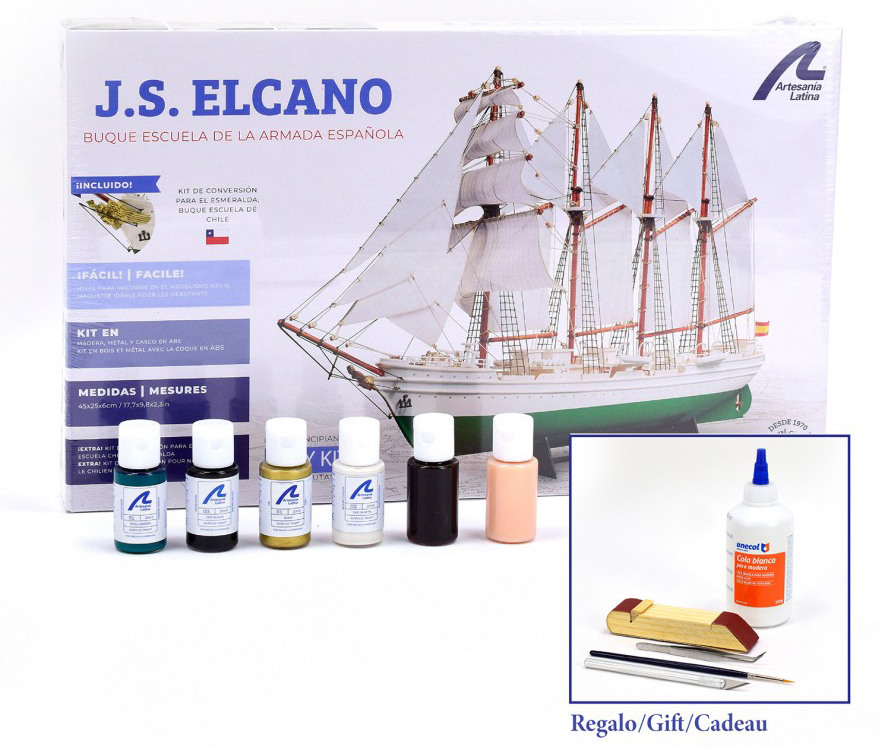
We remind you that you can also purchase the Elcano Gift Pack (22260L), which includes the kit with the schooner sailboat, its paints and some tools. It has a lower price than if the products are purchased separately. Elcano Gift Pack with the Model, its Paints and some Tools (22260L) by Artesanía Latina.
Read the third part of the post…

Posted in Model Building Tips

Build Juan Sebastian Elcano (III): Our Modelers Teach You How to Assemble the Spanish Training Ship

Let’s go with the third part of the post if you want to build Juan Sebastian Elcano model ship with more video tutorials recorded by our modelers during its assembly. The model of the Spanish training ship Juan Sebastian Elcano / Chilean Esmeralda (22260) at 1:250 scale is ideal for your first experience on the naval modeling. Now, we remind you that you can also purchase the Elcano Gift Pack (22260L), which includes the kit with the brigantine schooner sailboat, its paints and some tools. It has a lower price than if the products are purchased separately. That being said… Let’s continue assembling this historic model with a pre-fabricated hull!

Gift Pack with Ship Model, Paints and Tools: Training Ship J.S. Elcano / Esmeralda (22260L) by Artesanía Latina.

BUILD JUAN SEBASTIAN ELCANO: MASTS (PART II – A)

On Step 16, we continue to explain some of the most difficult phases when you are going to build Juan Senastian Elcano model ship: ‘Mats – Part II’. Take the eight PCL parts and one BW1 part -wire- and put them on your work table. Next, cut a small piece of wire (BW1) with a Professional Straight Cutting Pliers (27212). With a hand drill, make a 0.5 mm hole on the upper part of the stick (PCL) and apply our Cyanoacrylate for Porous Materials (27620), for sale separately, where the hole is. Insert the wire into it and bend it 90 degrees. With the help of a Stainless Steel Ruler (27069) and the aforementioned pliers, measure 0.7 mm and cut off the excess as seen on the video. Repeat the process with the remaining PCL parts.

Take the four parts S1 -sails- and arrange them on your workshop. With the help of a sewing needle, use the thread –part CT1– to sew part S1 -sail- to part PCL -mast-. Thread through the corner of the sail and around the stick as well with some Straight Fastening Tweezers (27020) and the previous drill. Continue sewing the sail with the needle and thread along the length of the mast. Knot at the end of the neck, apply cyano and cut the excess thread as shown on the video.

ASSEMBLY ELCANO MODEL SHIP: MASTS (PART II – B)

Well, it’s time for the next task. Look for one BR1 part and four BR2 parts, all rings. With a utility cutter, poke a small hole in the outer corner of the sail. Open part BR1 with two Needle Nose Pliers (27213) and insert the ring through the sail. After inserting it, close it again using the aforementioned pliers. Now, do this whole process again with the four BR2 parts on the opposite horizontal side of the sail -with respect to the placement of the BR1 part-, just as seen on the video. Repeat with the remaining three sails. It should look like this:

Build Juan Sebastian Elcano Model Ship (22260) by Artesanía Latina.

ASSEMBLY ELCANO MODEL SHIP: MASTS (PART II – C)

Once the previous stage to build Juan Sebastian Elcano model ship has been completed, take one of those sails and introduce the mast created on the previous post through the large rings. Then, take the wire of the mast with the sail that you had bent to 90ºand insert it into the hollow part provided for it, below the top. Thus the upper part of the sail remains fixed to the mast. On the lower area of the mast, take an M18 part and insert it. Apply cyano to adhere it and remove excess glue with paper. The final result should be this -repeat the process with the other three sails-:

Build Juan Sebastian Elcano Model Ship (22260) by Artesanía Latina.

Jar of cyano on hand! On the four holes of the deck to place the masts, apply adhesive and insert them. Use the steel rule to calculate the vertical 109 mm and to check the distance between masts. Also, it can help you position the masts while the cyan dries. The end… For now!

Build Juan Sebastian Elcano Model Ship (22260) by Artesanía Latina.

BUILD JUAN SEBASTIAN ELCANO MODEL SHIP: SHROUDS (PART I)

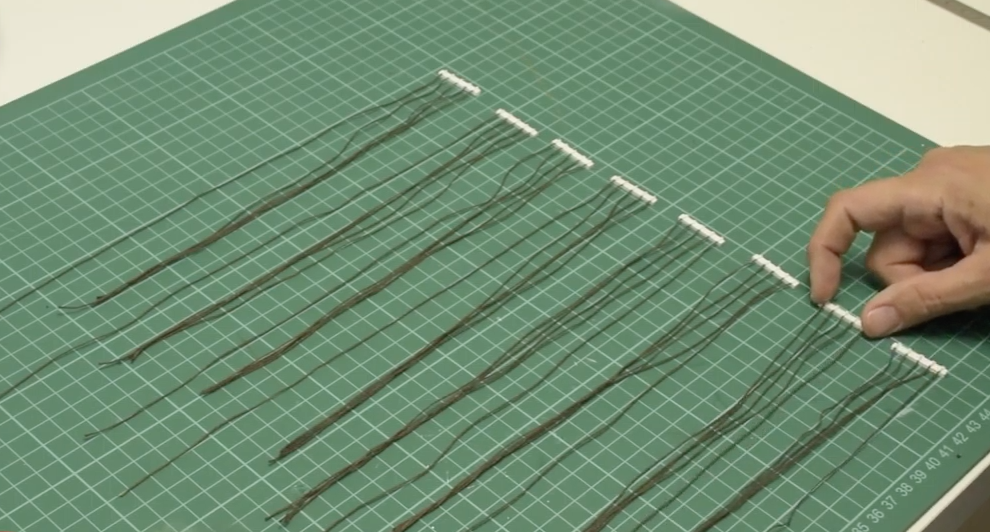
Step 17 when a modeler wants to build Juan Sebastian Elcano Model (22260), the Spanish training ship, talks about the ‘Shrouds’. Extract with a cutter and paint with off-white colour (27702) the eight WS1 parts. Grab one of these. With a pencil and a ruler, mark five equidistant points on the part. Put cyano on the part CT2 of 200 mm and glue it on the first marked point using Straight Fastening Tweezers (27020).

Repeat the process with the other three CT2 parts. On the last position marked with pencil, do the same thing with a 300 mm CT2 part. In total, there should be five threads attached to part WS1. Cut the excess of thread on one side of part WS1 with Thread Snips (27060). and paint off-white the glued part of the five threads with a brush.

Repeat this task again with the other seven WS1 part to get this:

Build Juan Sebastian Elcano Model Ship (22260) by Artesanía Latina.

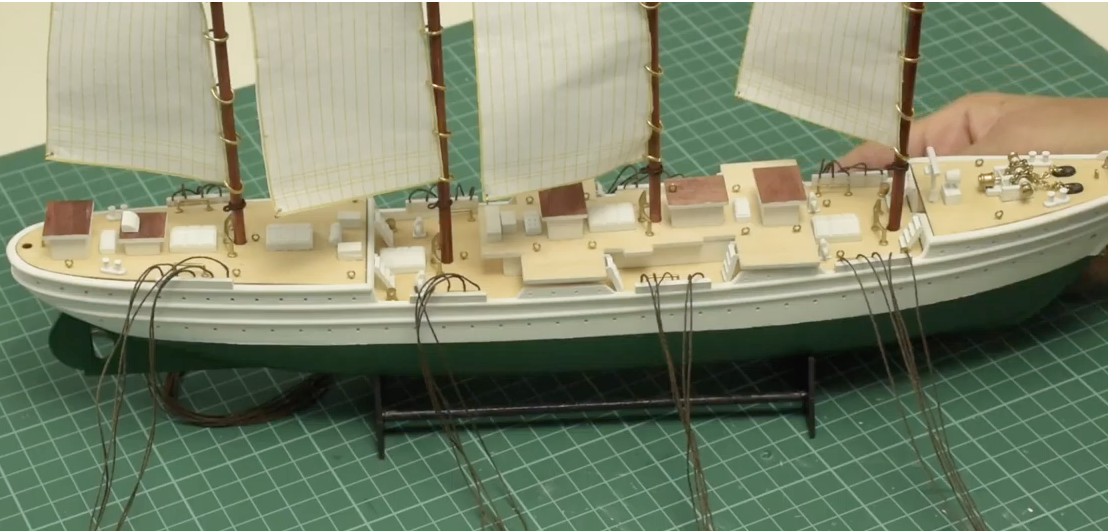
It is time to glue those eight resulting parts. Take one and put cyano on the bottom. Glue the part to the edge of the hull, but be careful. The area where the threads are glued must look at the deck, that is, the part of the threads that are glued must not face the outside of the boat, but the inside. Repeat the process with the other seven parts so that it looks like this:

Build Juan Sebastian Elcano Model Ship (22260) by Artesanía Latina.

BUILD JUAN SEBASTIAN ELCANO MODEL SHIP: SHROUDS (PART II)

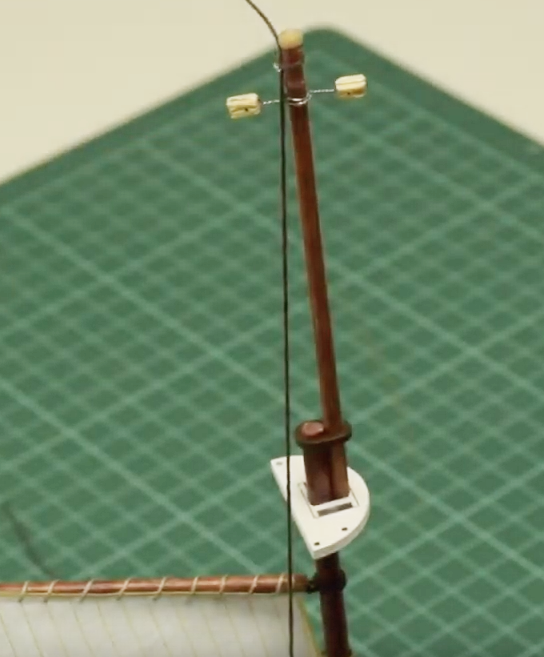
Take the longest thread -300 mm- from each of the parts and tie it around the tip of the nearest mast. Using a flat-grip plier, tie it securely by tying it into a knot and pulling the string so it is tight. Apply ciano to the knot made with the thread at the end of the mast and remove the excess of thread with Thread Snips (27060). Remember to repeat another three times this step on the other three mats.

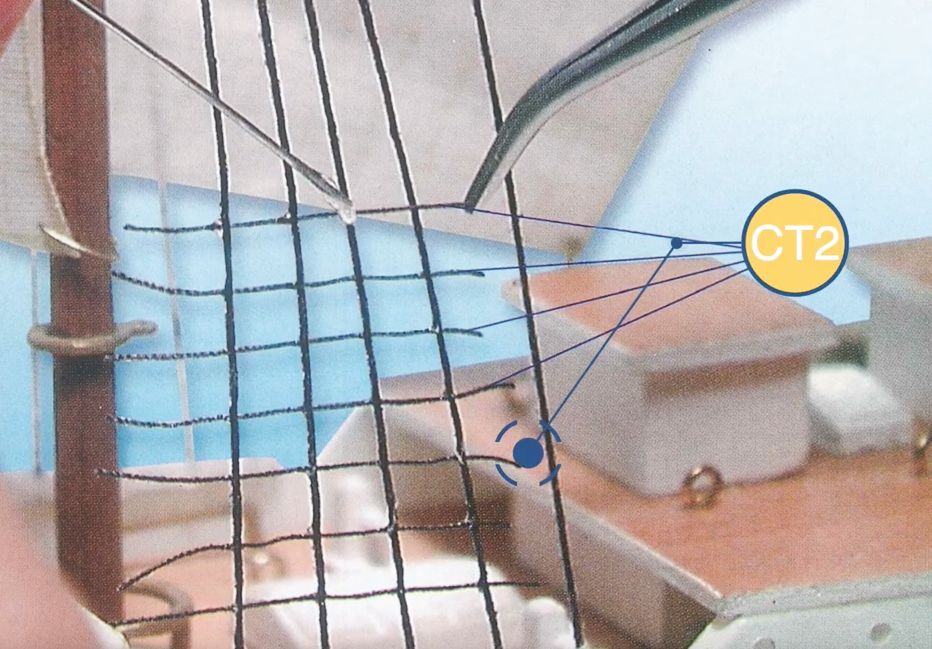
Now do the same with the rest of the short threads -200 mm– but gluing them to the lower/interior part of the four tops. And finally, glue all the CT2 threads perpendicular to the already installed vertical threads. In this way, it will be ongrid mode. To do this, with patience, you must cut the threads with precision according to the height that you adhere them horizontally. And… Wow! Let’s have shrouds.

BUILD JUAN SEBASTIAN ELCANO MODEL SHIP: FIGUREHEAD & BOWSPRIT

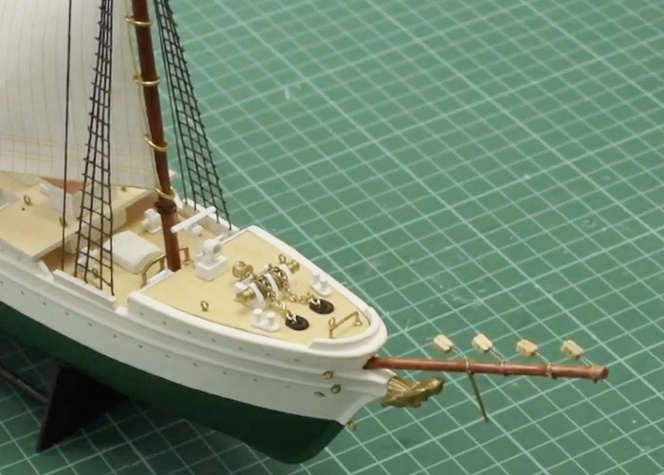
We continue with Step 18 of Build Juan Sebastian Elcano model sailboat (22260). This is about the ‘Figurehead and Bowsprit’. Paint gold colour (27761) the part M19. Apply cyano to the inner bottom of the figurehead and stick it to the tip of the hull’s bow with your hands. Remember that if you want to place the Chilean emblem of the training ship Esmeralda, you must do the same with the part M20.

Then take the BSP part. With a ruler and pencil, mark the half of the part. Mark well with a cutter. With a manual drill and a 1 mm diameter bit, drill on the previously indicated place. Take a BW2 part and cut a 16 mm piece with Professional Straight Cutting Pliers (27212).

Take a BL part and surround the BSP part with your two wires. Help yourself with a Needle Nose Pliers (27213) for turning both ends of the wires around stick, tying the part to it. Get rid of excess wire once knotted to the stick. Repeat this process three more times on the BSP part. From the top point to where the hole is on the center of the stick. It is the turn of the part BW2, apply cyano in the centered hole made before and insert the part BW2.

By hand, fold down all four BL parts, apply cyano to the bottom end of the stick, and glue on the designated area. We already have bowsprit too!

Build Juan Sebastian Elcano Model Ship (22260) by Artesanía Latina.

MINIATURE REPLICA JUAN SEBASTIAN ELCANO SHIP: SAILS (PART I)

The ‘Sails – Part I’ is Step 19 of the video tutorial to build Juan Sebastian Elcano model ship. Take three parts S2, that is, three sails. Repeat the process you did on the ‘Masts – Part II’ section. In this case, the six parts are BR1 -small rings-. Place one part BR1 in one corner of the sail and the other five longitudinally and equidistantly on the other side.

Drill with a 0.75 mm hand drill the 4 masts at the height shown on the video. Pass thread -part CT2– through the five rings of the sail. Tie the sail with its thread to the top of the mast you are working on. Once the knot is done, apply cyano to it. Thread the other end of the sail string through the hole you just made on the next mast. Pull the thread until the thread and the sail is taut. Knot and cyano. Remove the rest of the thread with Thread Snips (27060). Repeat with the other two remaining sails.

Go back to the first sail placed, take more thread -part CT2-. Tie it to the first mast, above the top, at the height of the horizontal peak of the sail. Once tied, take it up to the second mast and knot it at the same height. Now the same thread, bring it closer to the third mast, and lastly to the fourth one. Help yourself to do this with Curved Fastening Tweezers (27021). Finally, put cyano on the fourth neck knot and cut the excess thread with our Thread Snips (27060).

Build Juan Sebastian Elcano Model Ship (22260) by Artesanía Latina.

MINIATURE REPLICA JUAN SEBASTIAN ELCANO SHIP: SAILS (PART II)

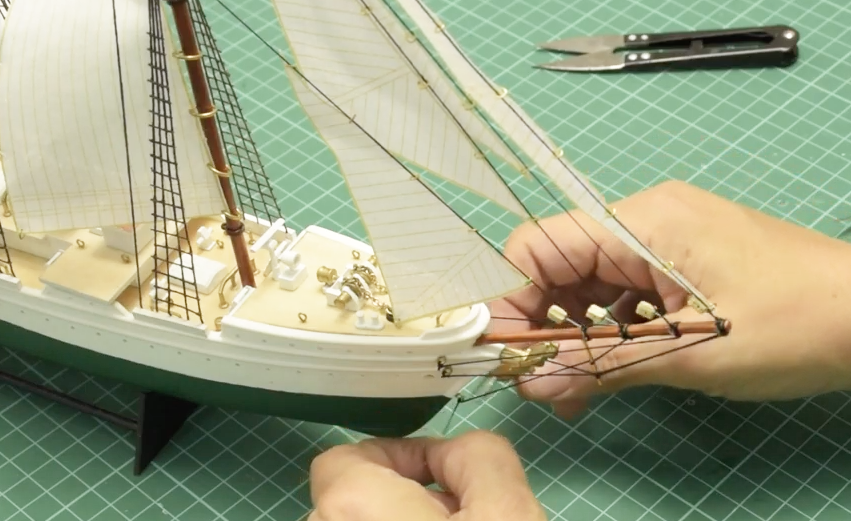
We continue with ‘Sails – Part II’, which is Step 20 of the construction of the model of the famous Spanish school ship (22260). Arrange a unit of parts S3, S4, S5 and S6, that is, sails. Take part S3, put nine rings -part BR1- on the longest side, and one on the corner. Then, take thread -CT2- and tie it at the end of the mast. Pass the line through the nine rings, tighten and knot it and glue it to the nose of the bowsprit previously installed. Repeat the same process with part S4, but with seven rings on the side and one on the corner. Remove excess string from the bowsprit of both sails. And the same with parts S5 and S6.

Next, more thread, this time, tie it to the point of the bowsprit, pass it through the metal -underneath the mast- and by the ring in the middle of the prow of the hull -the second-. Tie it there. Do the same with a second thread: knot it at the height of the rope of the third sail on the bowsprit, passes it through the upper ring and tie it. In all cases, remove the excess thread once tied. Repeat this process on the other side of the boat, so that the thread also enters through those rings. Finally, a third thread that will go through the lower ring on both sides of the bow.

Build Juan Sebastian Elcano Model Ship (22260) by Artesanía Latina.

Read the second part of the post…

Read the fourth and last part of the post…

Posted in Model Building Tips

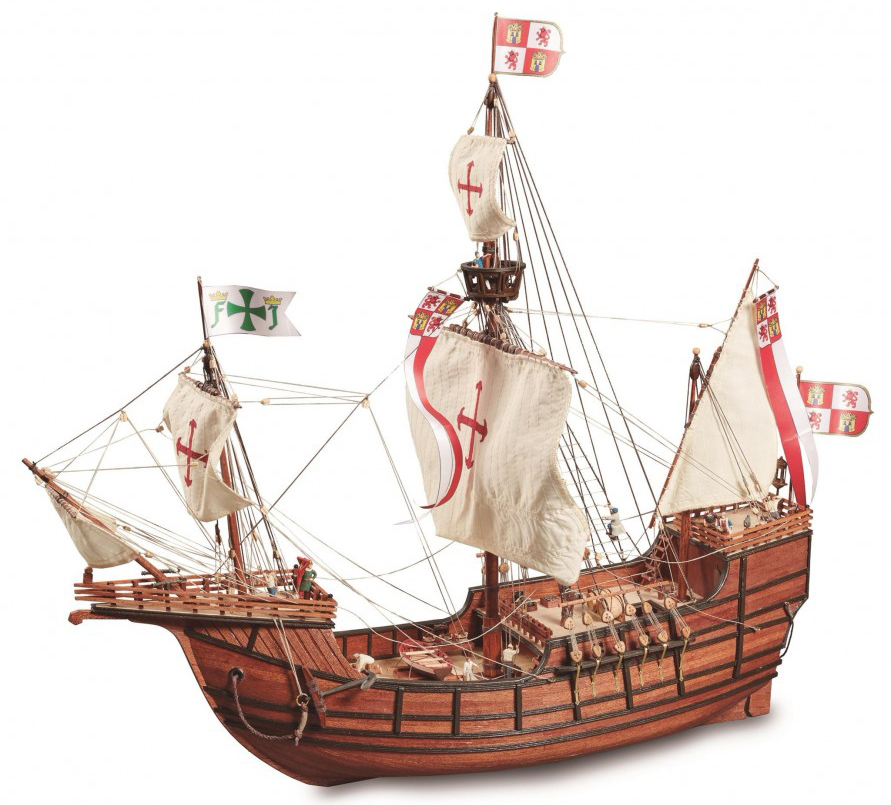
Santa Maria Model Construction (II): Video Tutorials for 1/65 Wooden Caravel Set Up

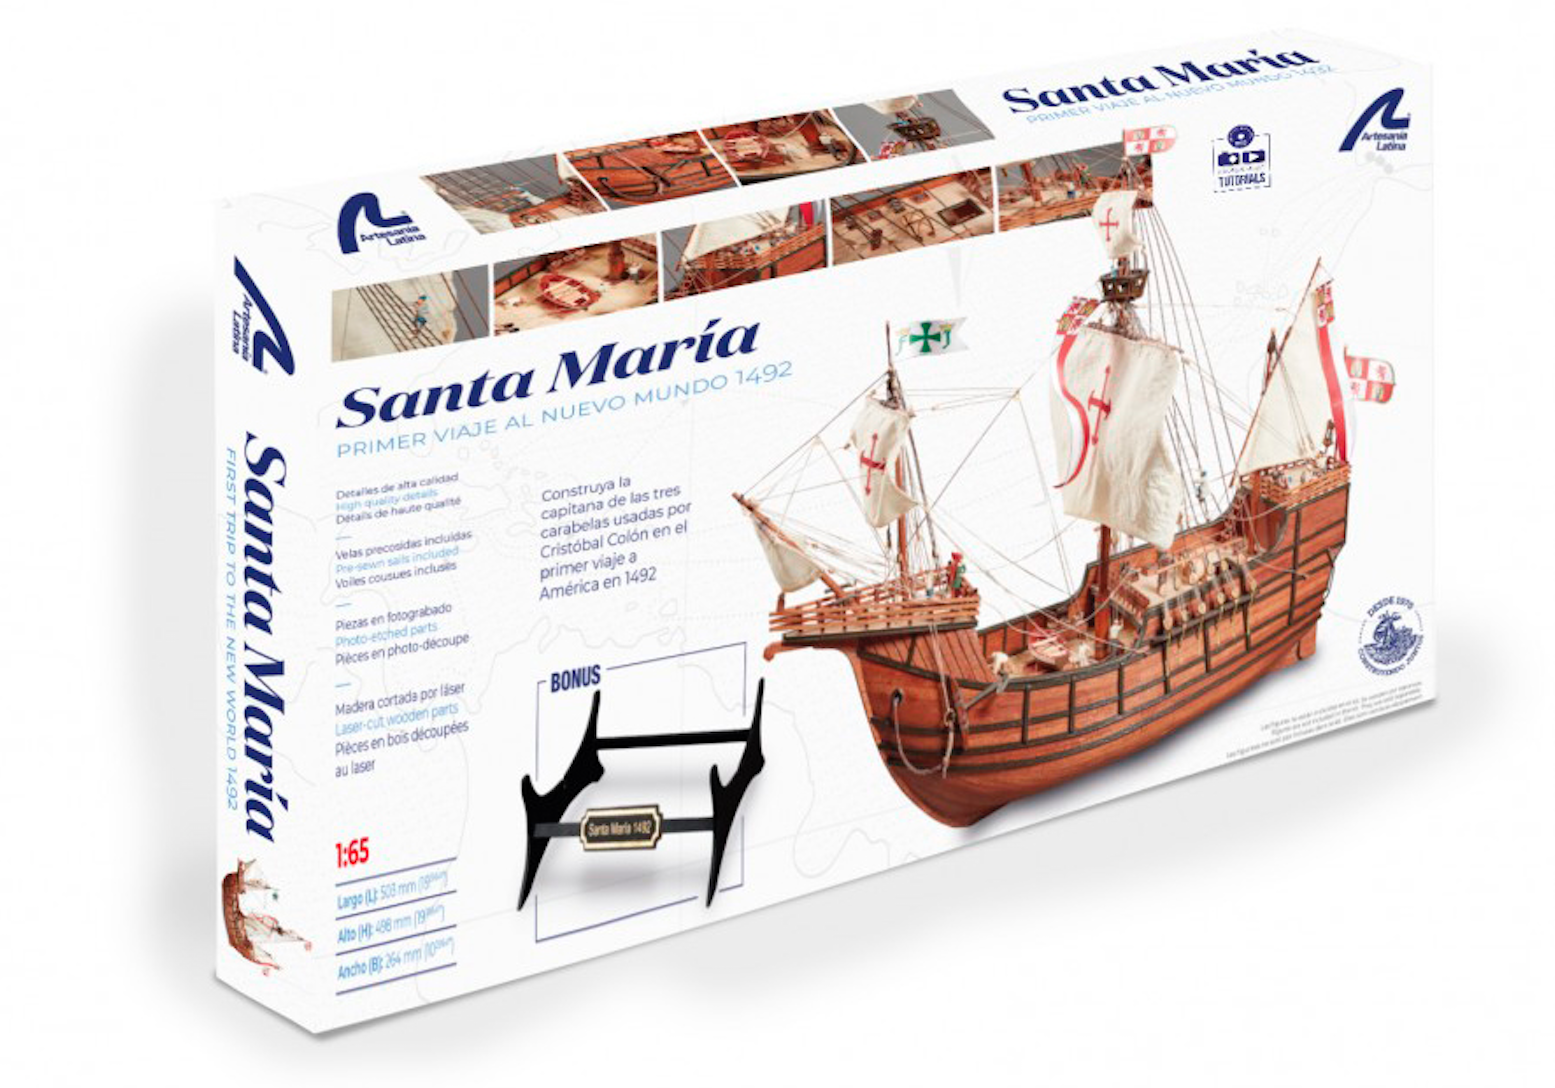
We continue this week with the second post to teach how you can develope the construction of the Santa Maria model (22411-N), the well-known caravel (nao) in wood at 1/65 scale. We specify on video the parts of the assembly that can be more complicated or remarkable due to the level of detail for our modelers friends. Last week we left it explaining the assembly of the rails and barrels. Now we return to this audiovisual guide with the capstans and the cannons.

Santa Maria Model Construction (22411-N). The wooden caravel of America Discovery.

HOW TO BUILD THE CARAVEL CAPSTANS AND CANNONS

On the audiovisual instructions for 1/65 scale Santa Maria wooden model construction, we now present Chapter 9: ‘Assembly of the Capstans’. First, varnish with your brush the outer parts to then apply cyanoacrylate (27650) and glue the three parts that make it up. Second, insert them and… Done!

Chapter 10 deals with the ‘Assembly and Decoration of the Cannons’ on this video guide for the construction of the Santa Maria model. First, use one of our cutters to extract parts of the photo-etched plate and to remove the remains. Once removed, glue the four U-shaped details with cyanoacrylate on each of the four corners of the two sides of the gun carriage part. Second, insert some cyanoacrylate into the four existing holes in the large part, then insert the four eyebolts into these.

Now, place or glue the cannon on top of the gun carriage -your choice-. Take a thread and begin to carefully pass it through the eyebolts so that the barrel fastening is tight and beautiful. If you need it, help yourself in this task with a curved fastening tweezers. Finally, tie the end of the thread and cut off the excess.

SANTA MARÍA MODEL CONSTRUCTION: PAINTING LANTERN, NAMEPLATE AND DOORS

The following demonstrative videos deal with the finishes of the 1/65 scale model of the Santa María caravel, specifically, with the painting of various parts. In Chapter 11 we will see how to ‘Painting the Lantern’. To be able to work comfortably, embed the lantern in a stick or punch. With a flat brush, apply the paint carefully. We remind you that you can use the Set of Paints for Caravels and Galleons (277PACK8), for sale separately, with all the necessary colors to make your model perfect.

We move on to Chapter 12 with the ‘Painting of the Nameplate for Exhibition Base’ on the following video for Santa Maria model construction. Once the modeler has the plate out of the photo-etched plate, take some straight tip precision tweezers to hold it. Using a flat brush, start to apply the paint without excess paint on the brush or plate. Scrape a round wooden stick with a cutter until you get a point like any pencil. Proceed to remove the paint that is on the letters with that tool that has been created. Do the same with the license plate frame. The letters and the frame will be gold while the background will be colored.

In Chapter 13 we will watch the ‘Painting the Doors’. Tape the door to the end of a wood part so it doesn’t move while you paint. Have a small amount of the two paints you are going to use on a small plastic. Soak the flat brush and remove the excess on a paper towel. Apply brown and black with the flat brush to make it look like wood grain.

SANTA MARIA MODEL CONSTRUCTION: MASTS REINFORCEMENTS AND SAILS DECORATION

The last two videos of the audiovisual guide forconstruction details of Santa Maria model demonstrate how to carry out two tasks related to the propulsion of the caravel. The masts and the sails. Chapter 14 teaches the ‘Masts Reinforcements with Thread’. Take the thread and tie it to the mast as shown on the video. Using straight-nose pliers, tighten the thread wherever you see slack. Take the two ends of the thread with your hands and pull. Cut the excess thread with a cutter.

The last one is Chapter 15, here we show the ‘Sails Decoration’ process. Carefully remove the cross from its support. Take a parts of flat cardboard larger than the sail, place the sail on top and stick it to it with masking tape so it doesn’t move. Place the cross on top of the sail and use the new Micro Centering Ruler (27326) to check the measurements and that it is centered. With the cross already centered on the sail, take a pencil and draw the outline of the cross on the sail. Take a small round brush, and fill in the entire silhouette of the cross with the red paint.

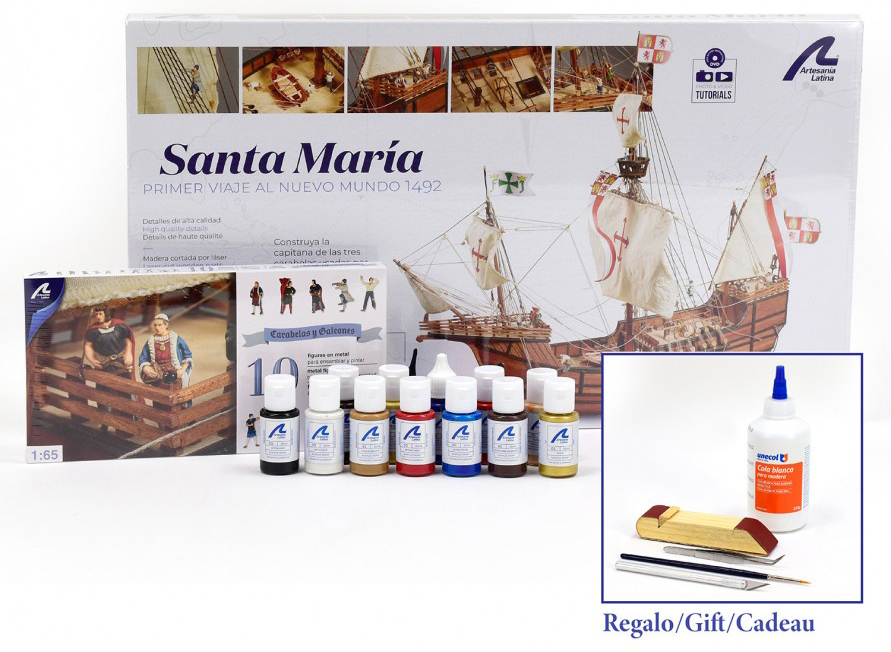
We are done with these video tutorials to help the modeler in the construction of the Santa Maria model kit at 1/65 scale (22411-N). This kit of naval modeling will make you enjoy many moments of joy and satisfaction. Do not forget that, in addition to selling the model alone, we also have the fabulous Santa Maria Model Gift Pack (22411-L). Find out!

Gift Pack Santa Maria Caravel Model at 1/65 Scale (22411-L).

Read the First Part of the Post…

Posted in Modeling Tools & Accessories

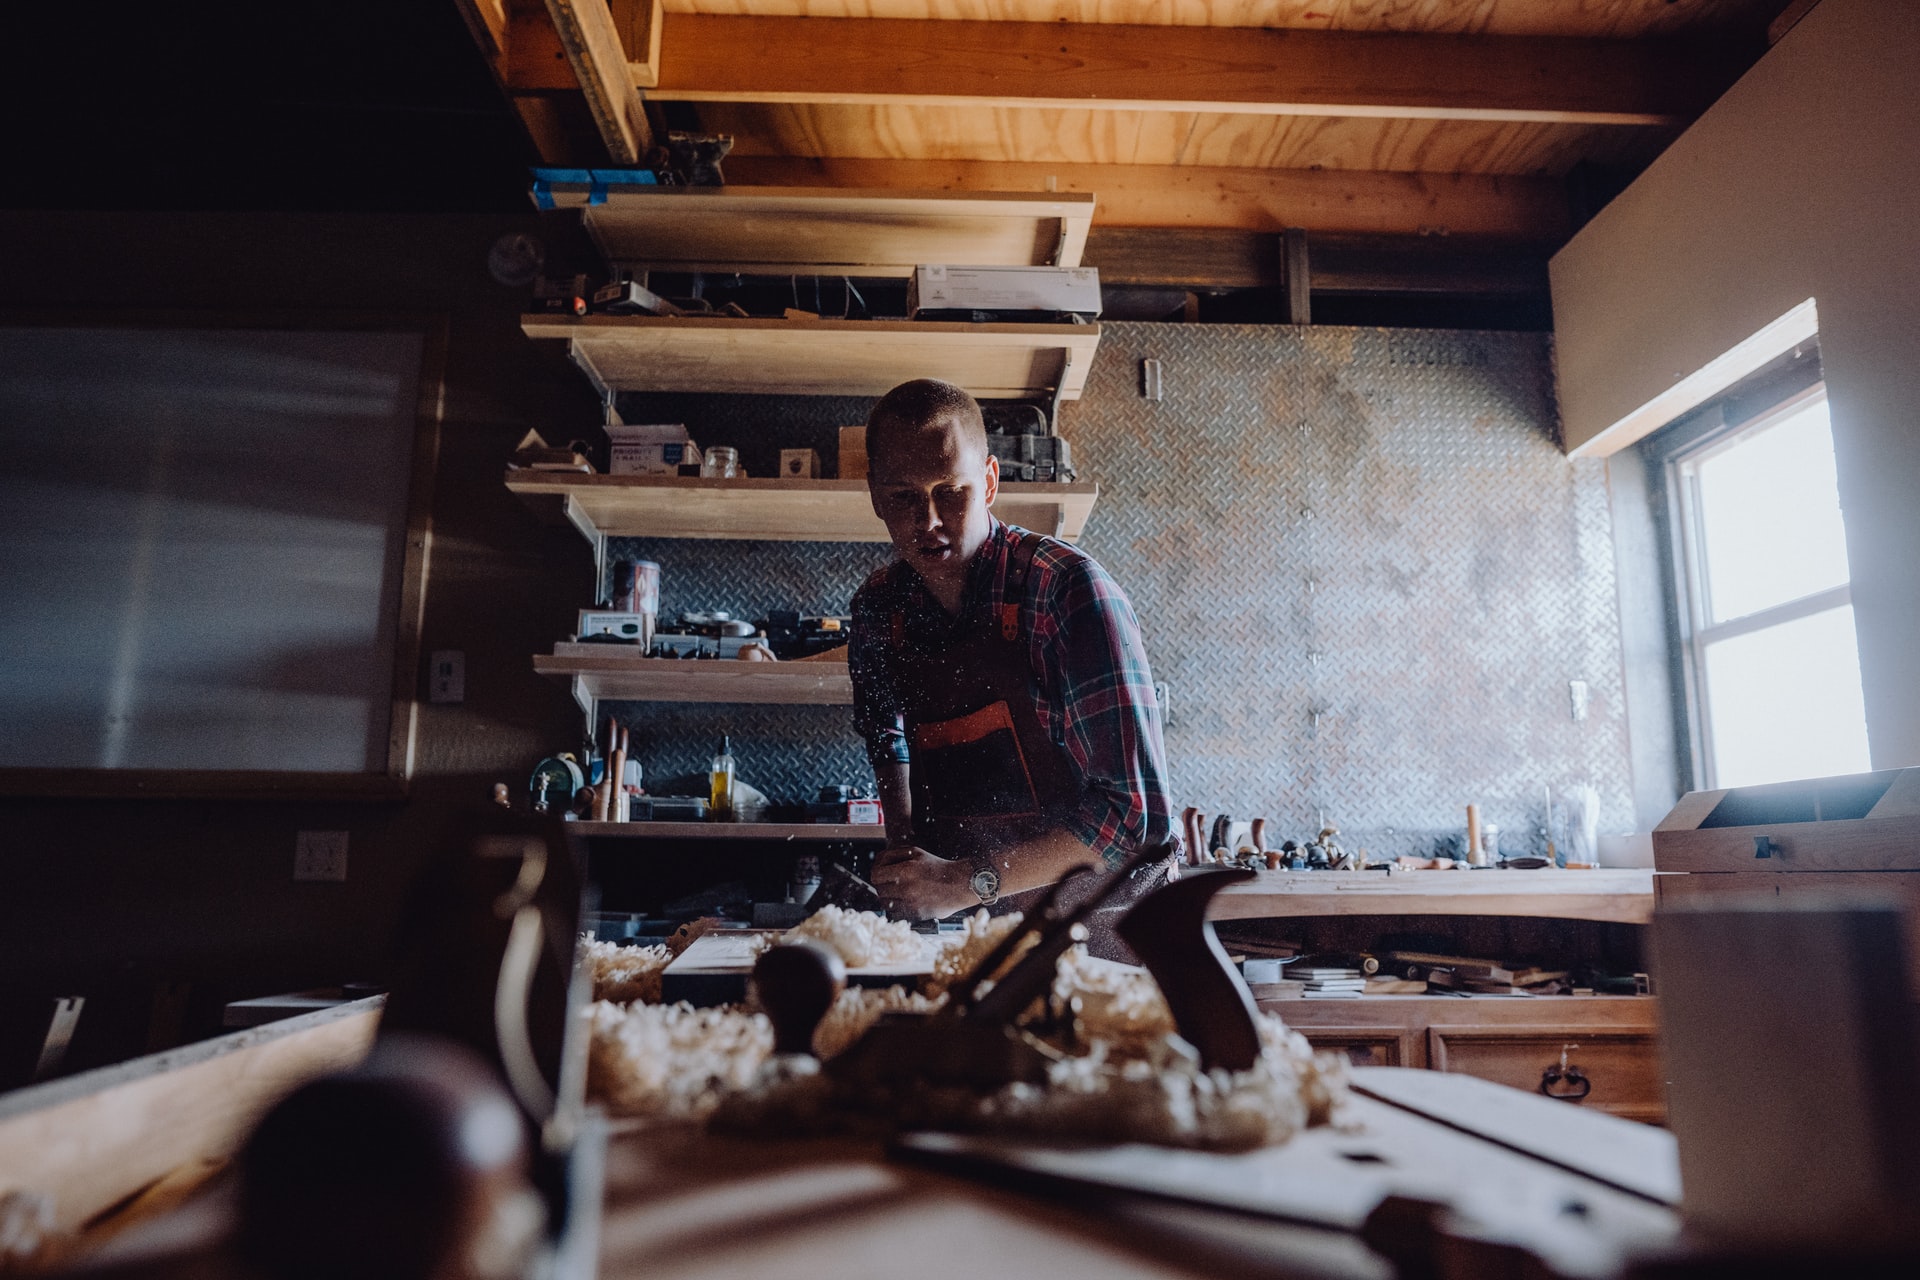
Woods for Model Building and Handcrafts: Make Your Own Parts and Build Your Own Models

Today we present in this post a category of our products highly demanded by modelers of all levels: the ‘Woodsfor model building and other crafts. Here you can find various types and forms of wood, all of them from sustainable crops, both to create parts and to assemble models or complete crafts.

There are modelers who acquire our woods to make spare parts or who have lost them at their workshop -we recommend our modeling workbench-. Others to make parts imagined by themselves. And, finally, other lovers of this beautiful hobby who devise, cut and assemble the entire scale model from scratch… Only with our woods!

Woods for Model Building and Handcrafts.

Artesania Latina has the best wood for naval modeling, other modeling and crafts on the market given its high quality. Most of these are noble woods, last over time and are prepared to be treated and manipulated with ease. Birch, basswood, American walnut, coral (padauk) and sapele make up the materials. Currently, we offer plywoods, boardsveneers, strips, round dowels, mouldings for showcases and exhibition bases. Next, we break down the characteristics of each of these products made of wood for a better understanding of the modeler.

WOODS FOR MODEL BUILDING AND HANDCRAFTS: PLYWOODS

Speaking about woods for model building and handcrafts, the plywood boards are the first to be presented. All the different variants of these have measures 35.43” (900mm) length and 11.81” (300mm) width, yes, with different thicknesses according to need. There are five options to choose from: from 0.059” (1.5mm) to 0.196” (5mm). The plywood boards are made from basswood, with a high quality fine finishes. Basswood -linden wood- has a light and uniform color ranging from white to cream. Its type of grain is straight and with a very fine texture. It is an ultralight material, easy to dry when glued and once dry it is stable.

Woods for Model Building and Handcrafts. Plywoods.

WOODS FOR MODEL BUILDING AND HANDCRAFTS: VENEERS AND BOARDS

Regarding veneers, we find fifteen different alternatives in the catalog from Artesania Latina, all of them presented with a length of 1,000 mm and a thickness of 0.6 mm. Veneers can be used, for example, to give any piece that is not wood the appearance of wood, such as lining parts built with board or the deck of a model ship.

The variations are found in the width, in the units that the package brings -20 or 25- and in the solid wood used. The widths of the sheets range from 0.157” (4mm) to 0.314” (8mm). As for the wooden types, there are basswood or linden -whose characteristics already discussed above-, American walnut and sapele. In Europe, the wood of American walnut is considered one of the best. It is brown but it has details in gray and yellow tones. Great resistance and durability, very difficult to scratch. With high hardness and fine texture. Regarding the sapele, it can be said that it is dark brown with reddish and golden tones in some of its pronounced veins. It is very similar to mahogany wood, of medium hardness and can be easily manipulated.

Woods for Model Building and Handcrafts. Veneers.

The boards made of solid wood are other the fantastic products for modelers and crafts people to make their own spare parts and build their own scale models or other crafts with totally new ones. In this section, you can currently purchase three different planks, all of them 39.37” (1,000mm) length and 2.75” (70mm) width, in sapele and American walnut.

Woods for Model Building and Handcrafts. Boards.

WOODS FOR SHIP MODELING: STRIPS

It is known that with the strips made of solid wood all kinds of parts can also be devised for modeling and other crafts. However, in nship modeling they can be used for more precise uses such as lining the hulls of the model ships or add details such as railings and baseboards.

Woods for Model Building and Handcrafts. Strips.

We have solid birch and coral (red wood) strips. According to references, the packs are made up of 5, 6 or 20 units. All the strips measure 39.37” (1,000mm) length, the thicknesses and widths vary according to the different needs of the client. 89 different possibilities of your choice! Our woods for ship modeling and other crafts are the best!

On the one hand, the wood of birch is usually colored from white to cream. Over time, it darkens a bit. The grain is straight and its texture is very fine. Like the other woods from Artesania Latina, birch has a high-quality finishes. On the other hand, the wood of coral (padauk) is characterized by its deep red color with purple-brown hues in sunlight. It is hard but easy to work with during any handling process at your modeling workshop and other crafts.

ROUND DOWELS FOR MODEL BUILDING AND HANDCRAFTS

The round dowels made of solid wood are presented in packs of 2, 5, 10 or 20 units. We have ribs in birch, coral (padauk), American walnut and sapele. And different measures: you can find long rods of 35.98” (914mm) and 39.37” (1,000mm) in our catalogue. Regarding the diameters, from 0.078” (2mm) to 0.472” (12mm).

Woods for Model Building and Handcrafts. Round Dowels.

In naval modeling, round doweols are perfect for making masts and yards for wooden ship models. In addition to many other details with a cylindrical shape. Coming soon, we will talk about a products highly coveted by our client friends: wooden exhibition bases and mouldings for showcases.

In short, all the woods for model building and other crafts made by Artesania Latina are very useful for modelers and other hobbyists who want to create the parts they need or the new ones they devise. Adapted for carvings, turning and all kinds of handwork. They are easy to treat and behave optimally when glued and finished, quick drying. They last over time given their high quality. What more can you ask of a wood!