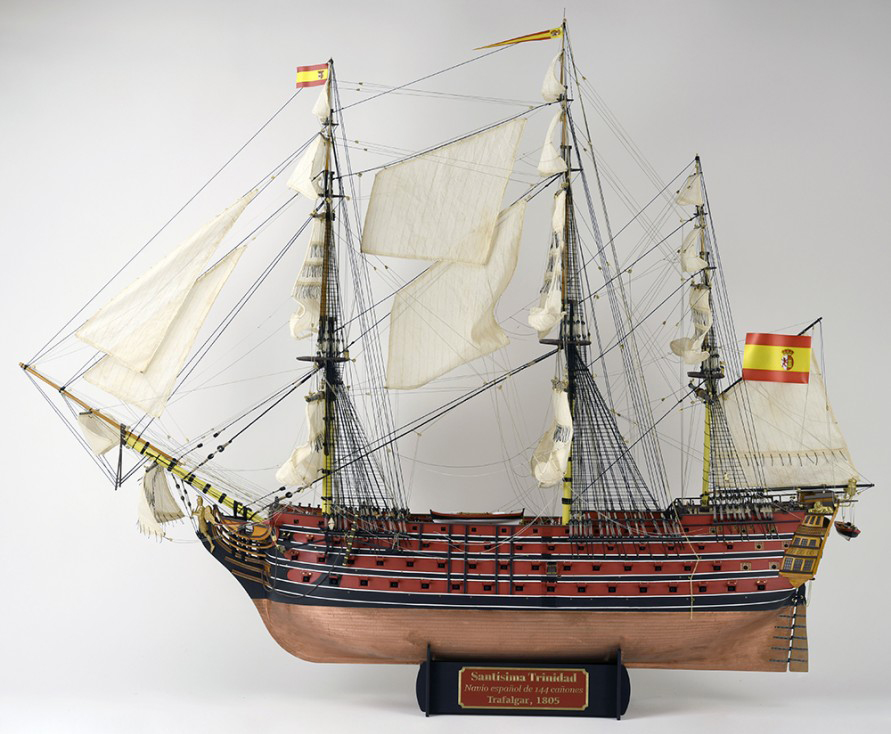
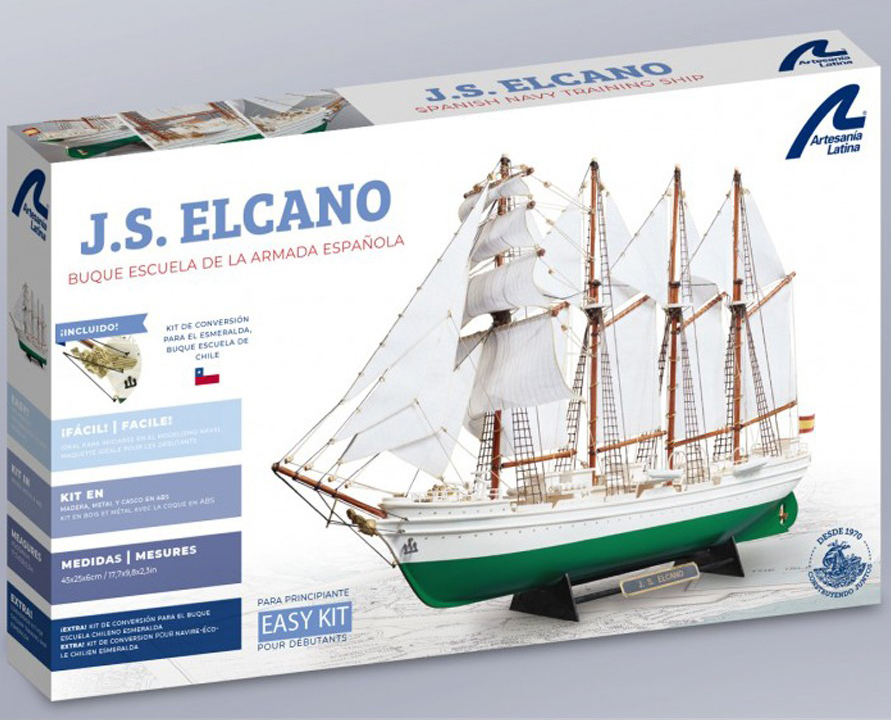
Many emails from our modelers friends requesting it and they convinced us. A naval modeling kit has arrived at our warehouses that will drive you crazy due to its beauty and its historical relevance. The new wooden model ship Santisima Trinidad Trafalgar Edition 1805 (22901), at 1:84 scale. Yes, the modeler can now assemble the flagship of the Spanish Navy.
 by Artesanía Latina.")
A highly desired product made by Artesanía Latina, the 2023 greatest novelty on the naval modeling market! It is a faithful replica – without precedent – in miniature with 100% new design of the Spanish ship of the line with 144 cannons, symbol of Spanish naval power from the late 18th century and early 19th century.
 by Artesanía Latina.")
We have based as a reference on the plan found in Saint Petersburg and on the monograph by Joaquín Rodríguez Crespo. This model accurately represents what the ship looked like at the end of its life, with the correct artillery. It was an essential vessel in the Battle of Trafagar between the British Royal Navy and the Spanish Navy. Of course, now we have refloated it from the bottom of the sea to bring you an exuberant wooden naval modeling kit aimed at elite modelers. We present it to you on this video:
MODEL SHIP SANTÍSIMA TRINIDAD: KIT CONTENTS OF SPANISH SHIP OF THE LINE
The new wooden naval modeling kit of the famous Spanish ship of the line Santisima Trinidad at 1:84 scale was the greatest weapon of its time, it received the nickname ‘El Escorial de los Mares’. The emblem of the feared Spanish Navy. Just below there is a video in which you can watch all the contents of this stunning wooden model ship.
 by Artesanía Latina.")
 by Artesanía Latina.")
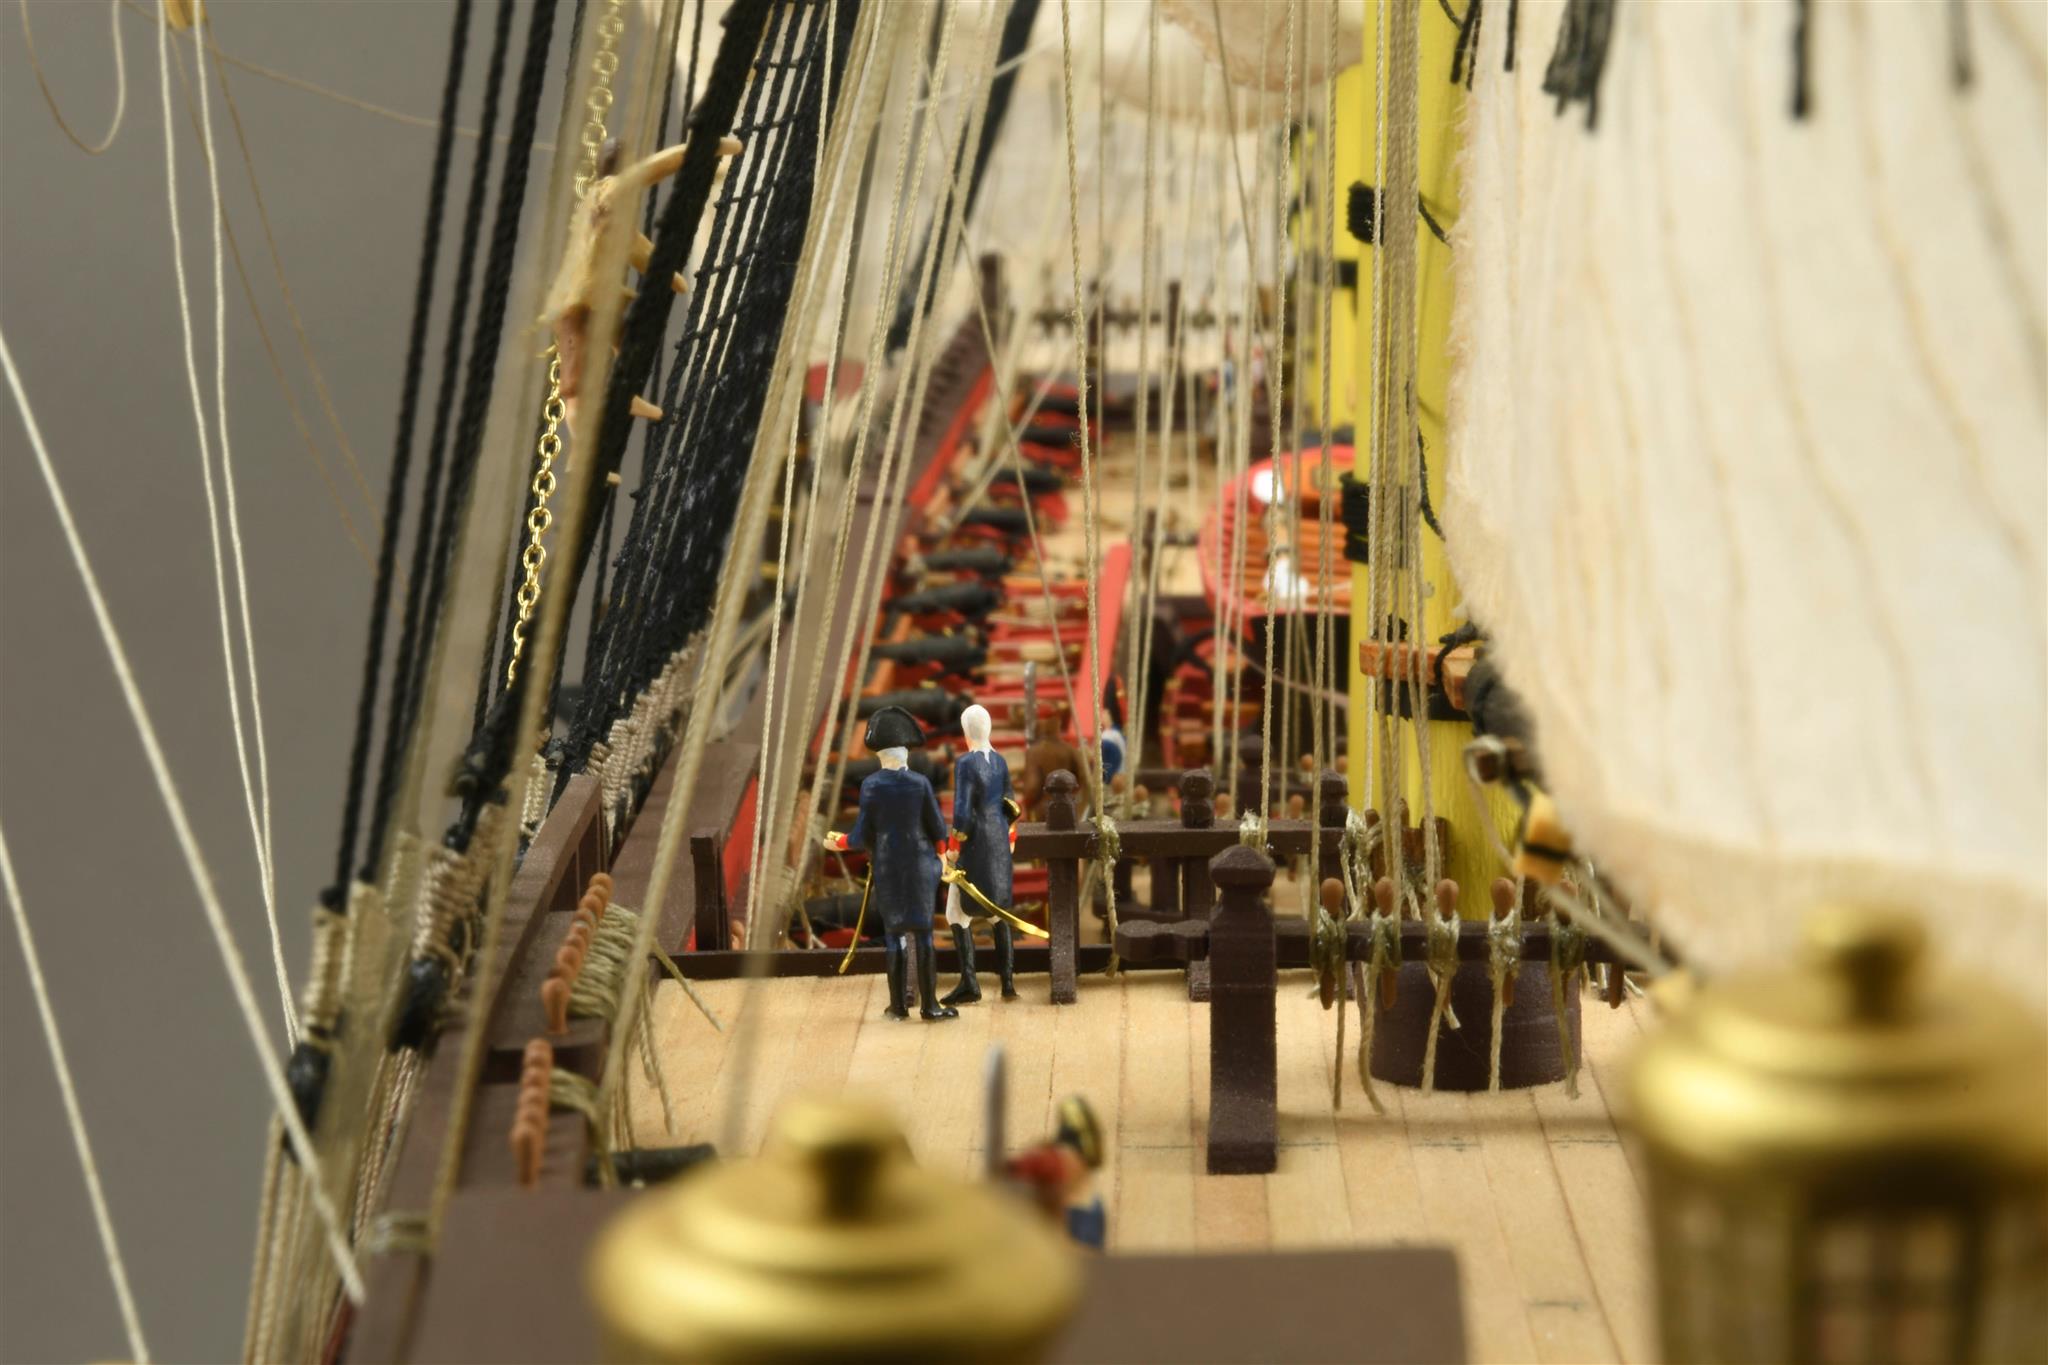
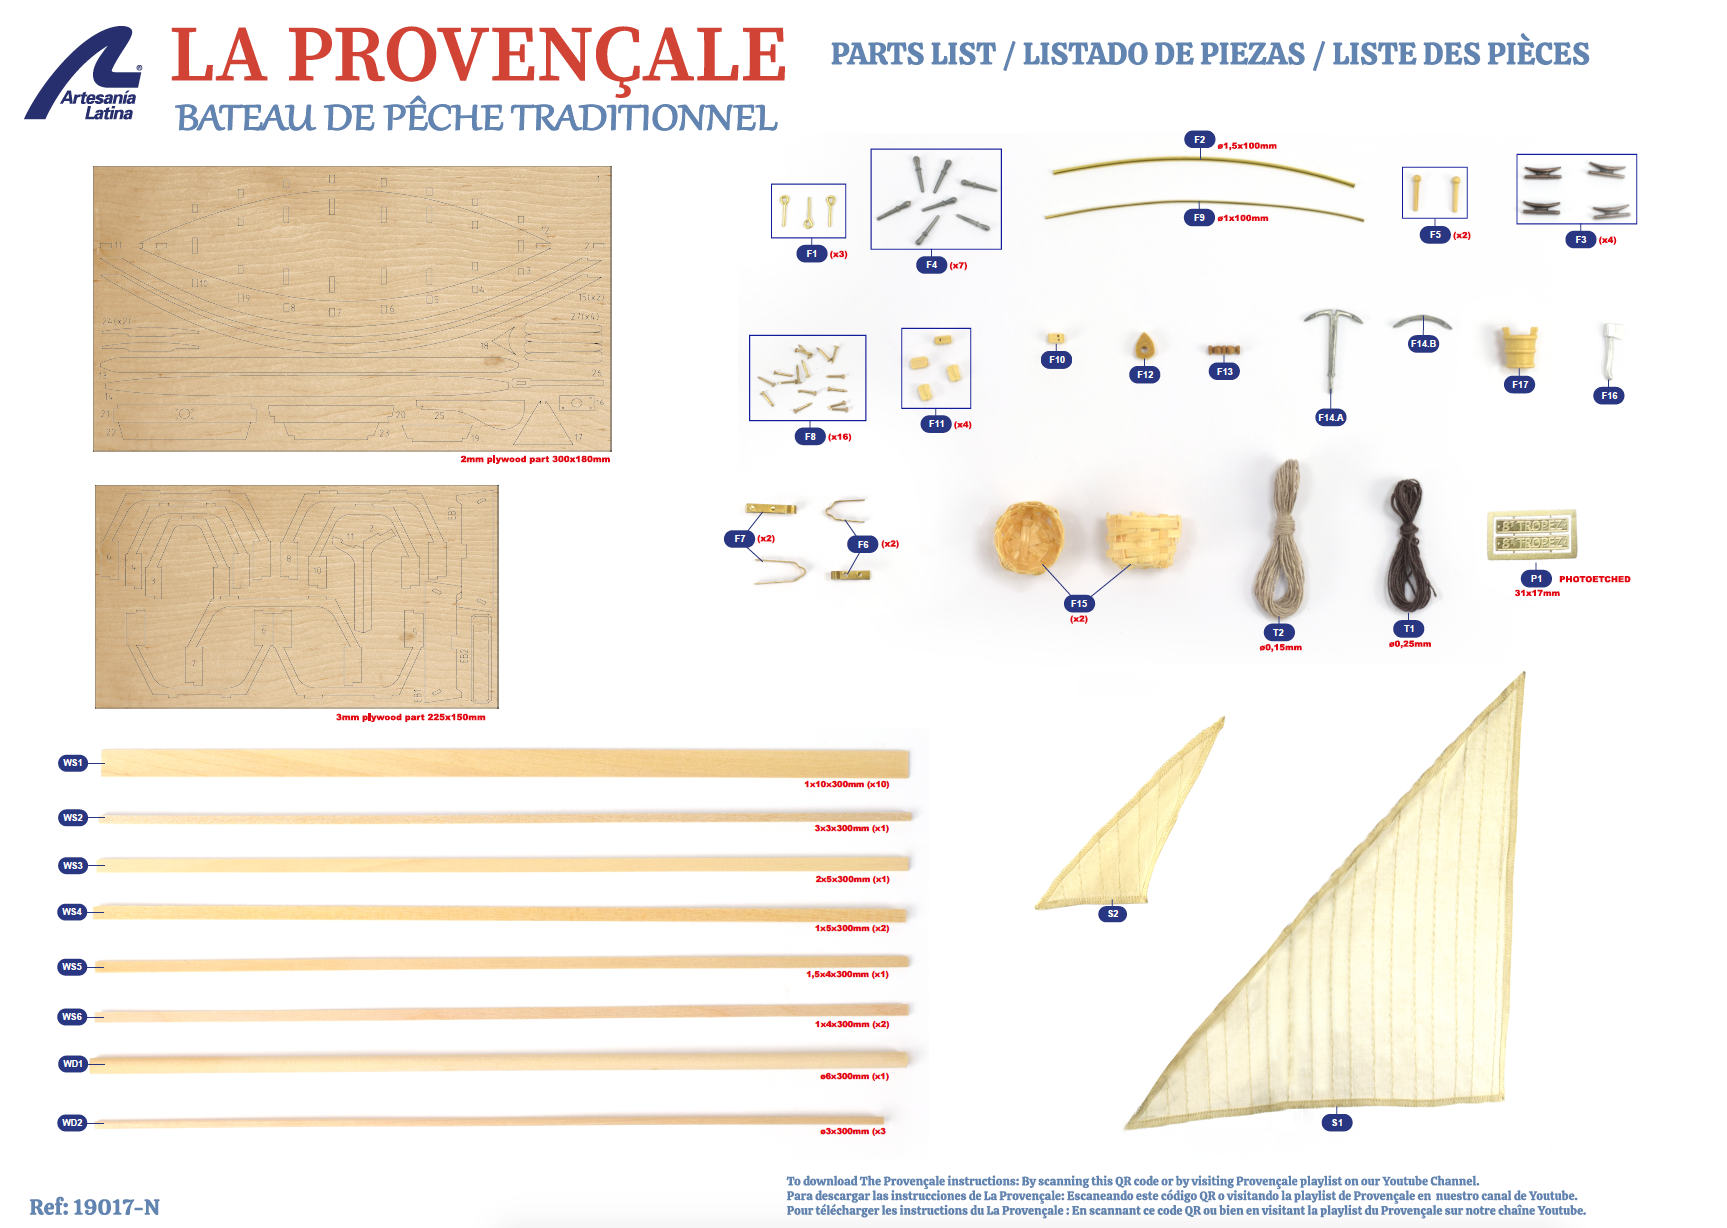
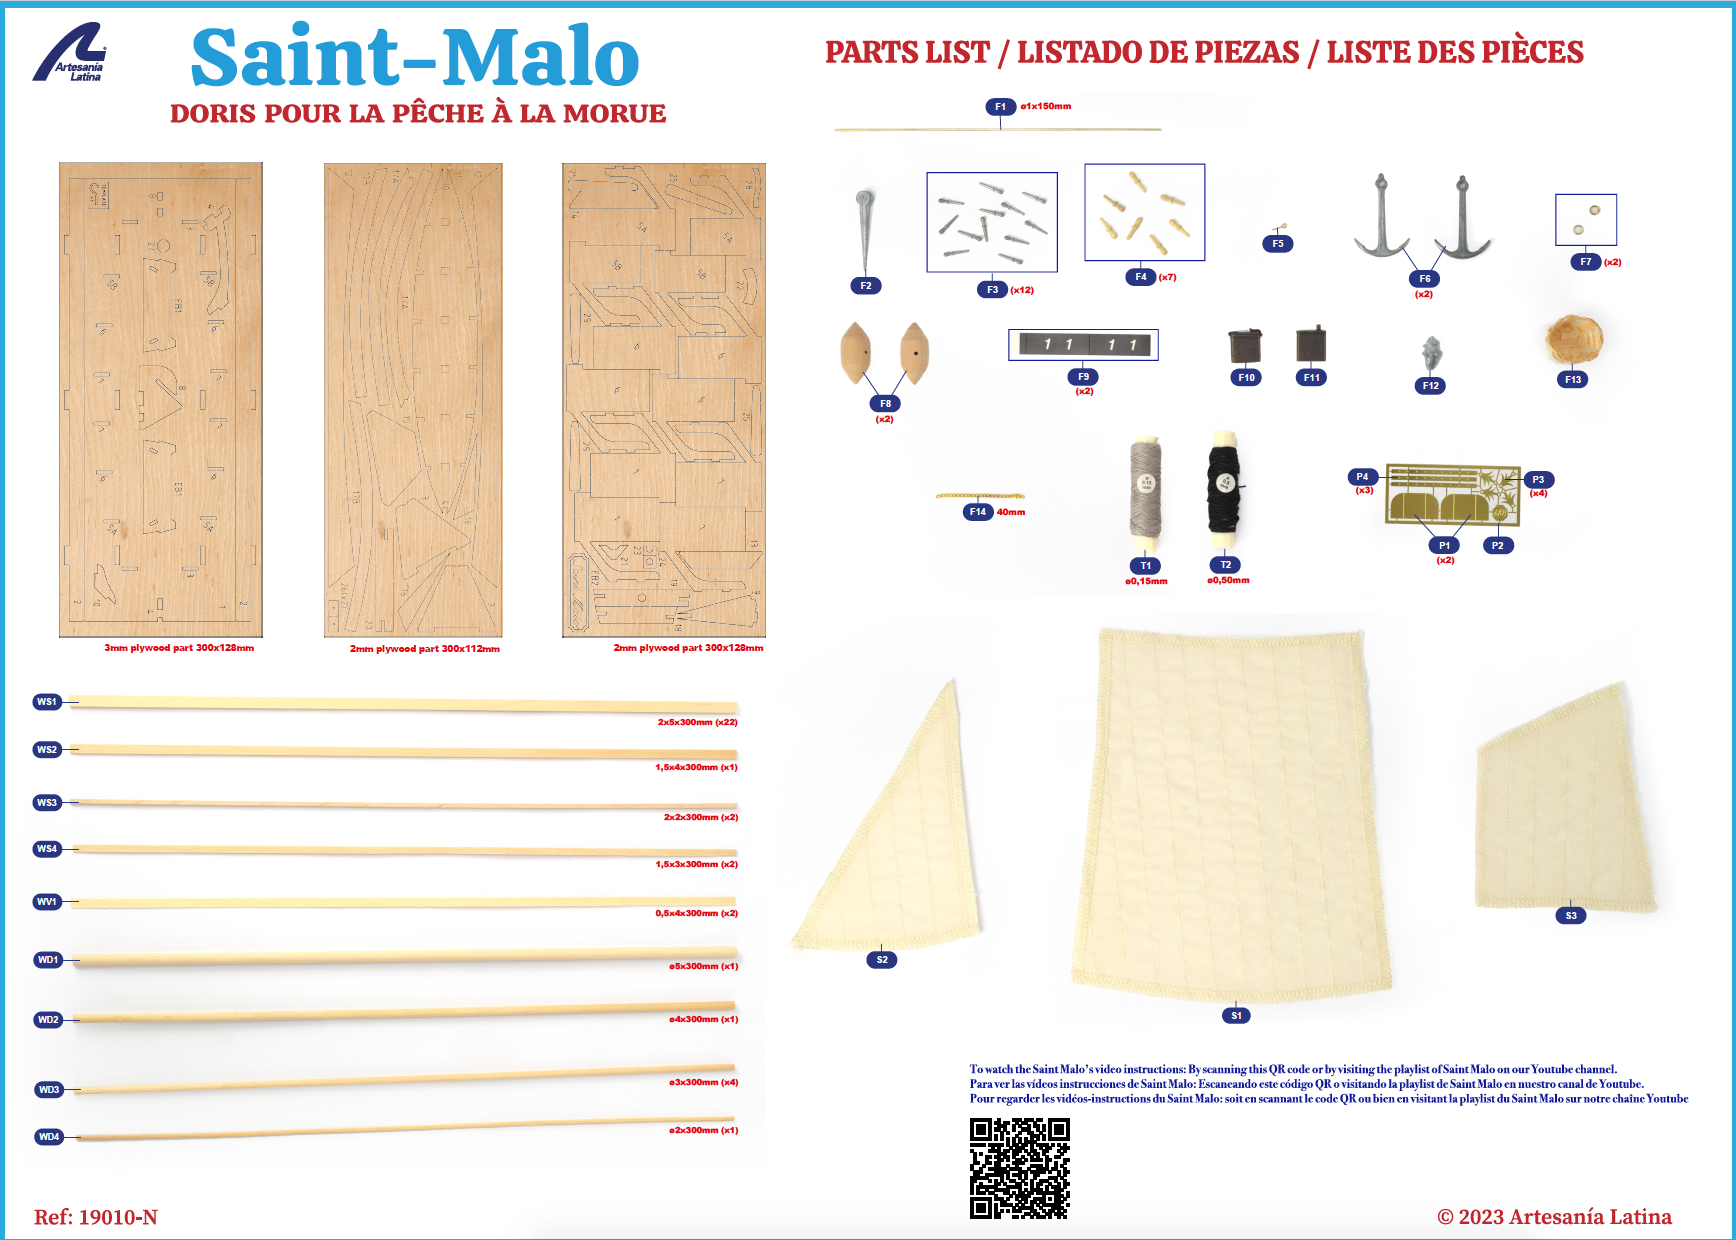
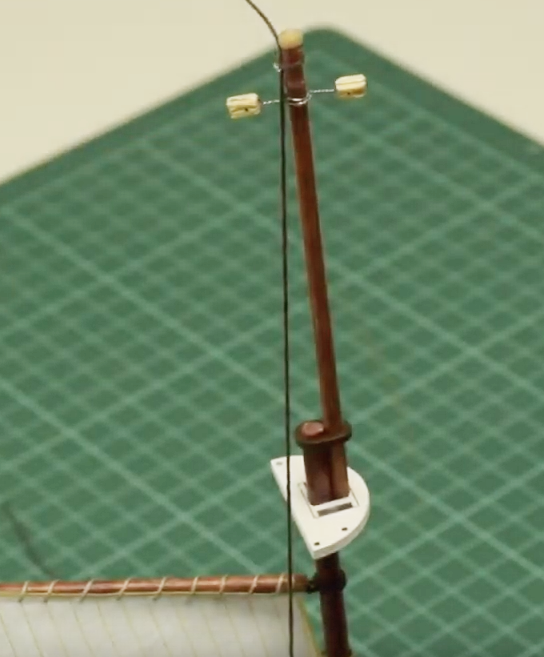
The modeler will find in this new Trafalgar 1805 edition hundreds of high-quality parts: 14 sheets of basswood plywood cut by precision laser and 6 spectacular brass photo-etched sheets with parts such as lanterns, railings or details of the cannons. Also, 10 packs of strips and rods, and American oak veneer. All the blocks and beams for the rigging are prefabricated. Brass round dowels and brass tubes are also included.
 by Artesanía Latina.")
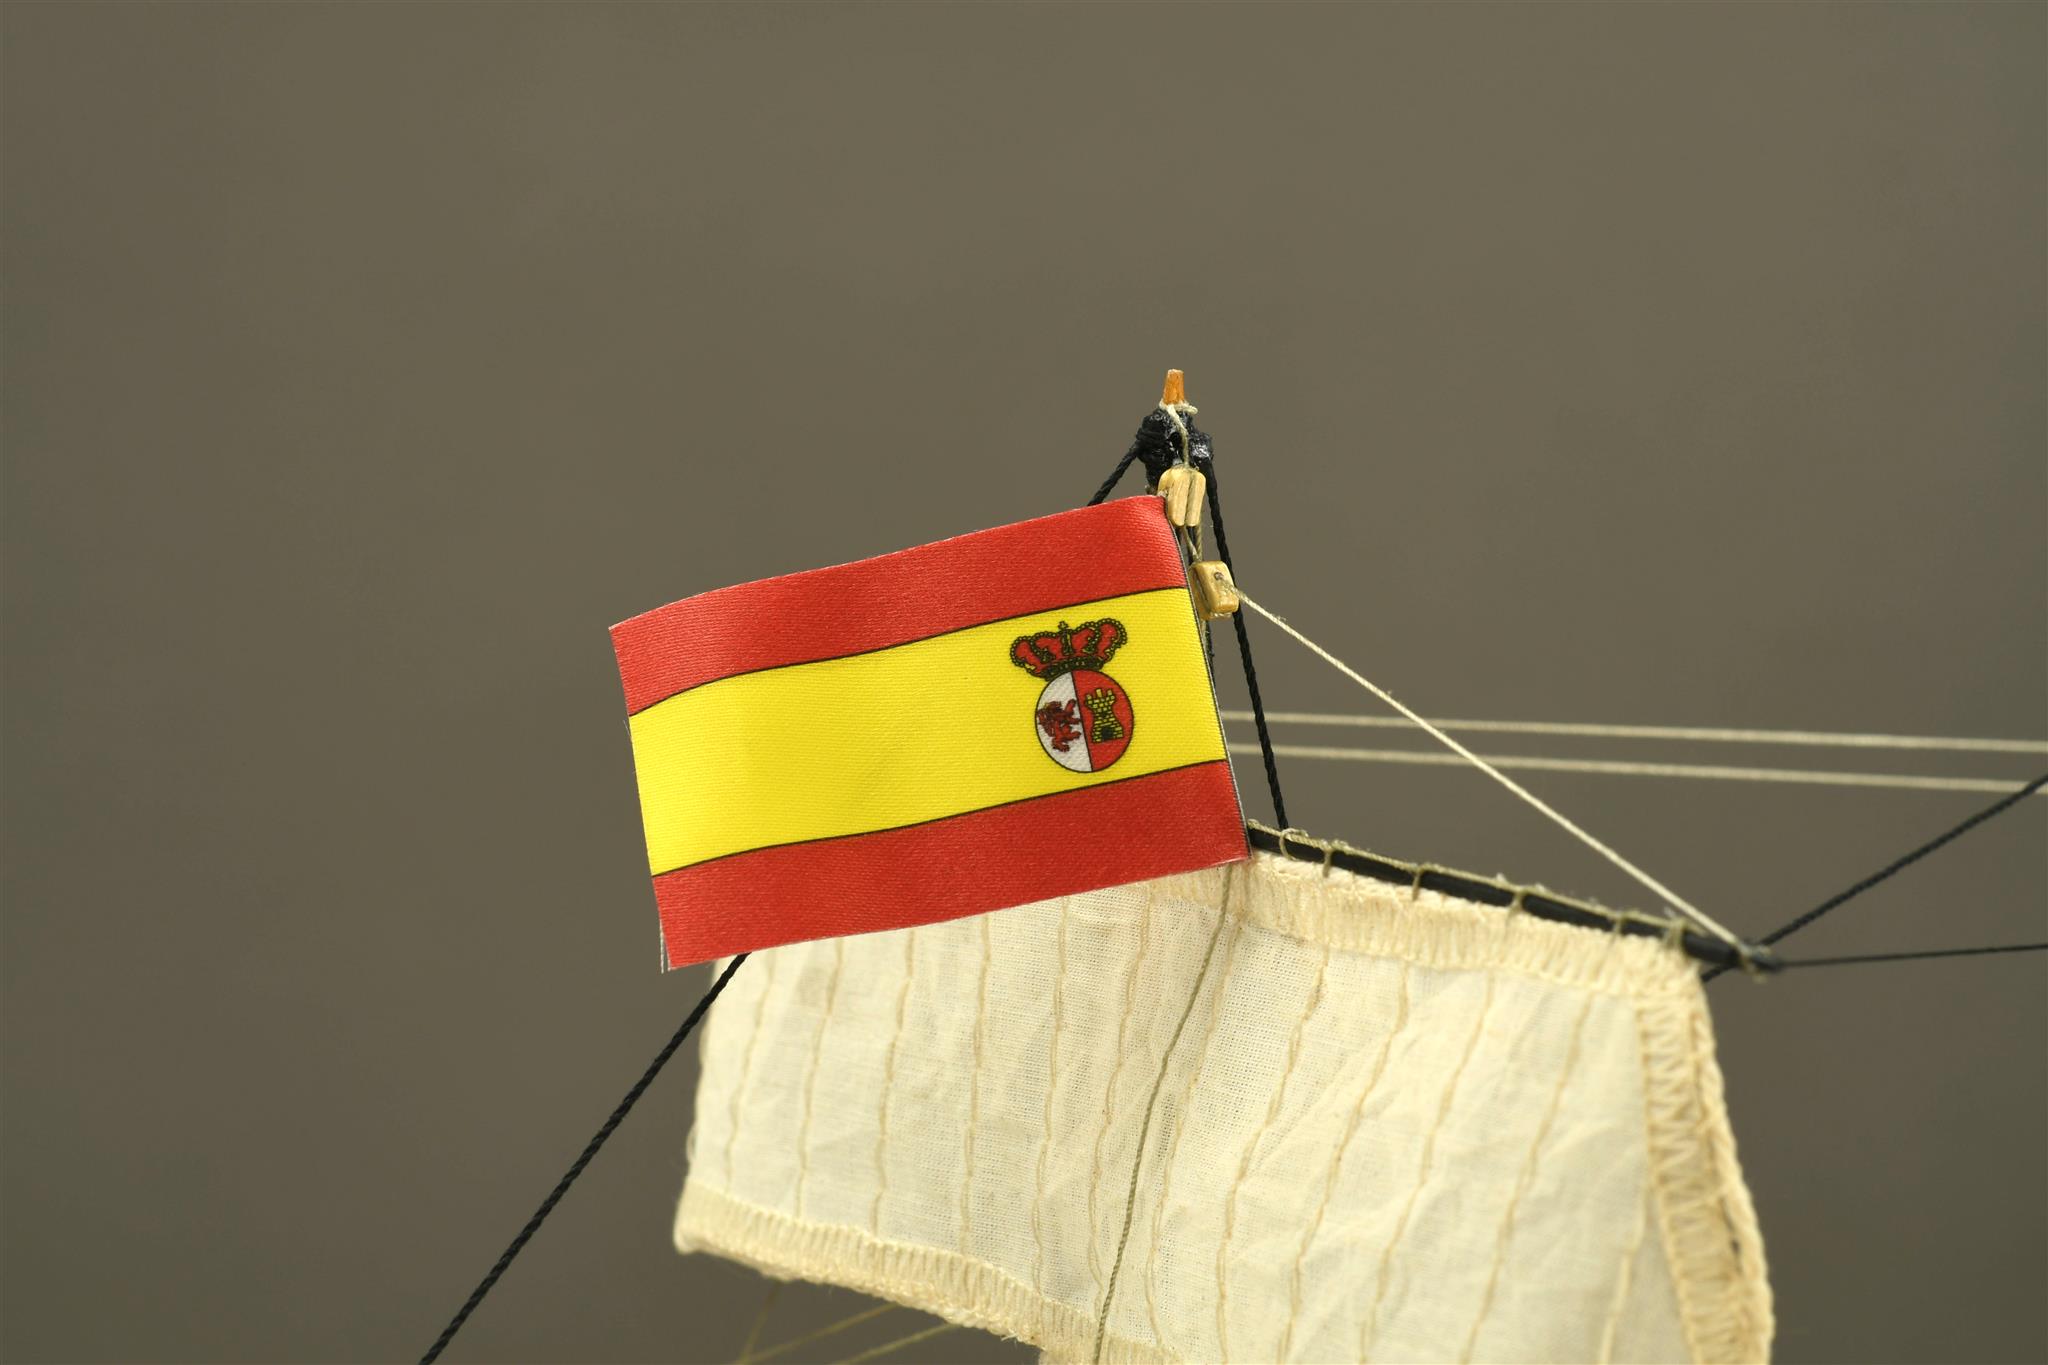
What can we say about its sails! It has a huge amount of 18 pre-sewn sails made of cotton fabric – ready to be placed – and cotton threads of different colors and thicknesses. It comes with translucent acetates, nets and adhesive flags in textured fabric.
 by Artesanía Latina.")
 by Artesanía Latina.")
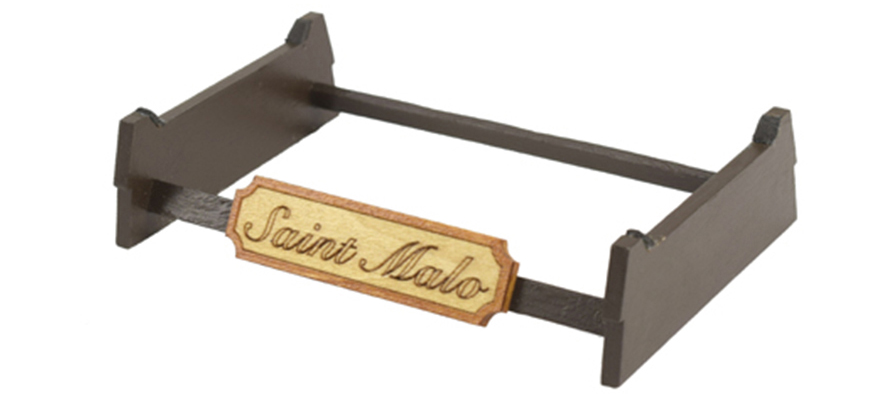
As a gift so that the model is perfectly displayed, wooden exhibition base with metal nominative plate.
 by Artesanía Latina.")
And, even more, another bonus: 5 die-cast figurines!
 by Artesanía Latina.")
Of course, you can also provide an extra realism to the faithful miniature replica, add the Set of 16 Metal Figures and Accessories for Spanish Navy (22901F), sold separately.
 by Artesanía Latina.")
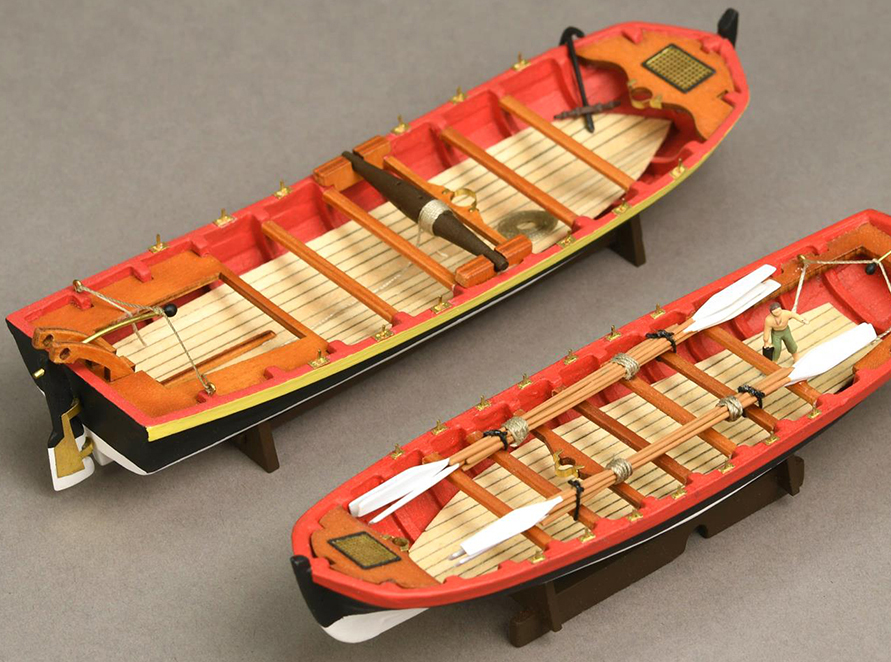
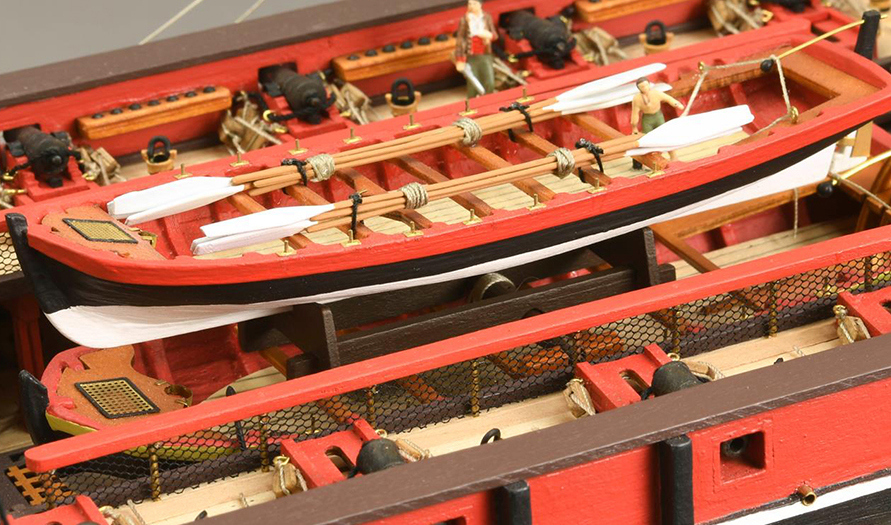
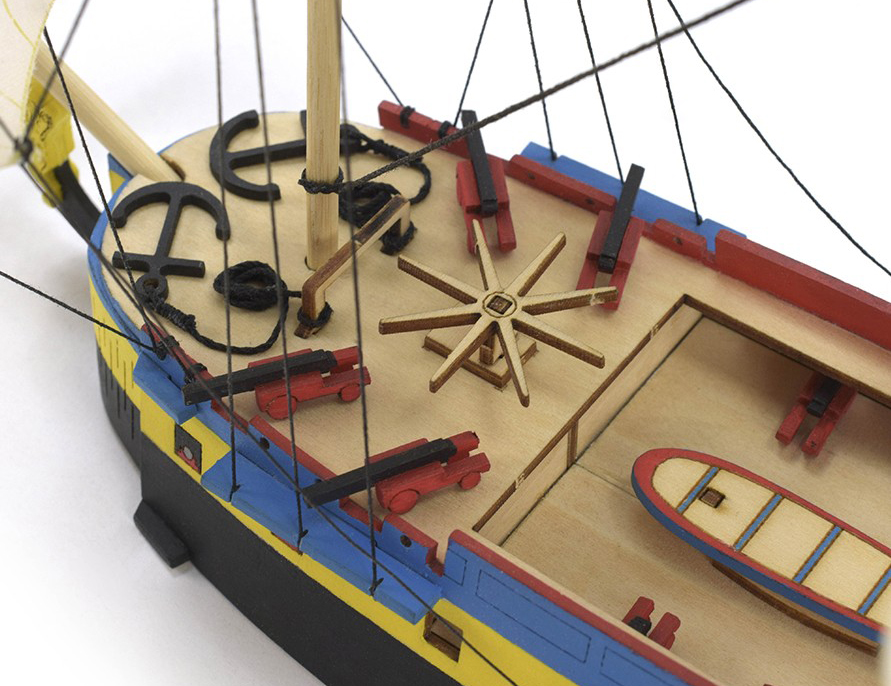
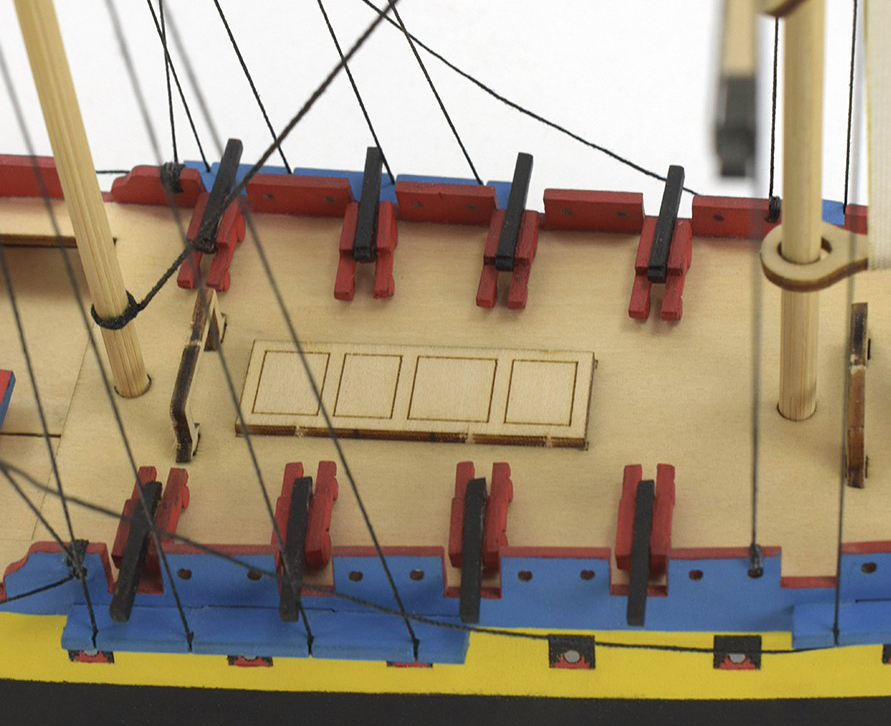
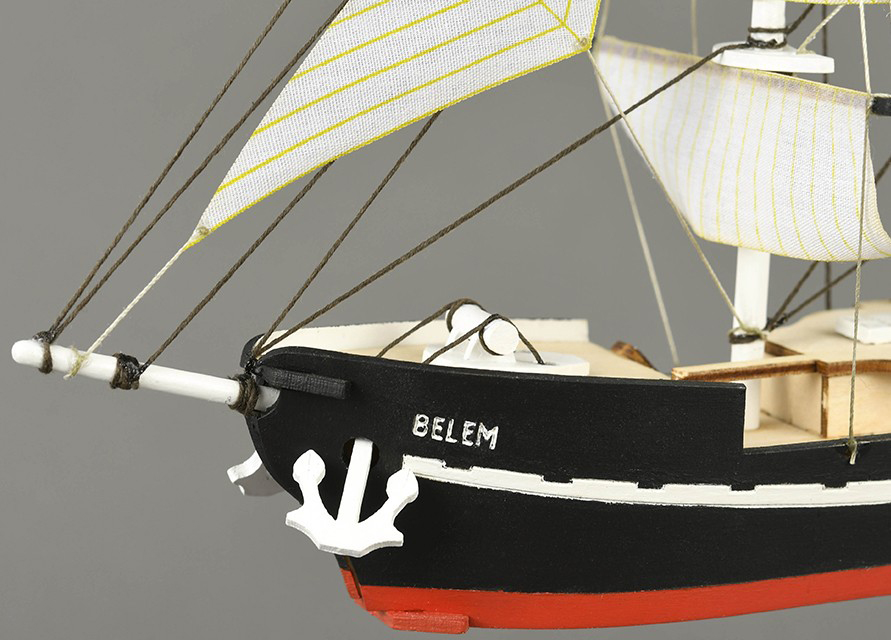
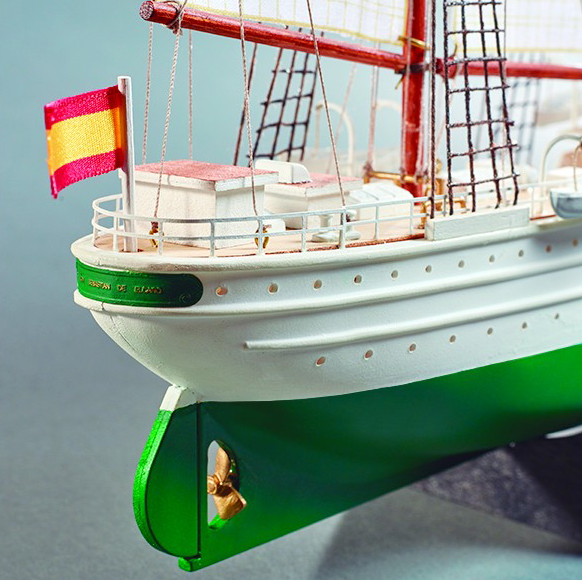
This kit represents its appearance and artillery correctly, the ones of the Battle of Trafalgar. In this sense, the figurehead of the archangel Saint Michael leads the ship. The highly detailed scale artillery includes photo-etched parts and includes the howitzers that the ship carried in Trafalgar. Included the boats to build in wood, very realistic.
 by Artesanía Latina.")
 by Artesanía Latina.")
 by Artesanía Latina.")
MODEL SHIP SANTÍSIMA TRINIDAD: READY TO LIGHT UP
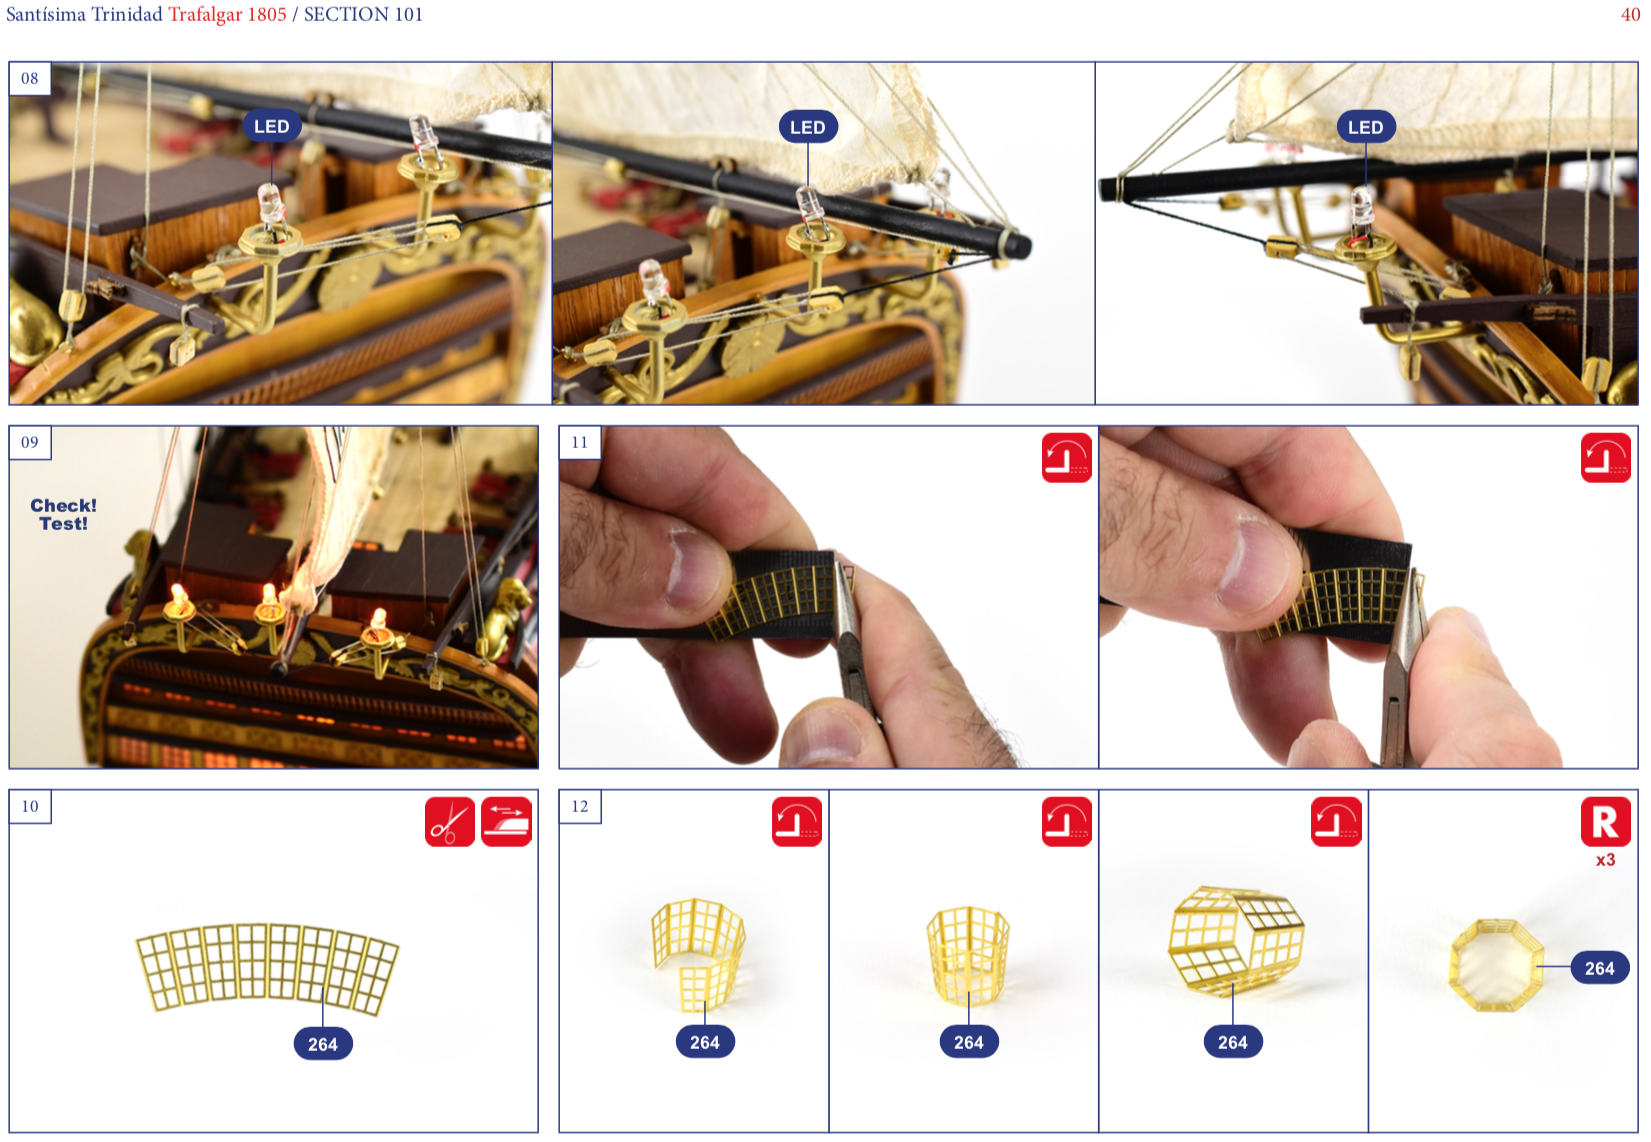
Do you still need to see more to get crazy thanks to the beauty of the new model of the Spanish vessel – ship of the line – Santisima Trinidad Trafalgar Edition 1805? No problem. The new model made by Artesanía Latina is prepared for illuminate, so do not hesitate to purchase -sold separately- our LED Lighting Set (27590). The modeler will be amazed by such beauty!
 by Artesanía Latina.")
 by Artesanía Latina.")
VERY DETAILED ASSEMBLY INSTRUCTIONS AND DEMONSTRATION VIDEOS
Once the model ship Santisima Trinidad (22901) is built, this measures 46.88” -1191 mm- length, 35.62” -905 mm- height and 18.26” -464 mm- width. Its design using a false keel and frames brings its assembly closer to that of the real ship.
 by Artesanía Latina.")
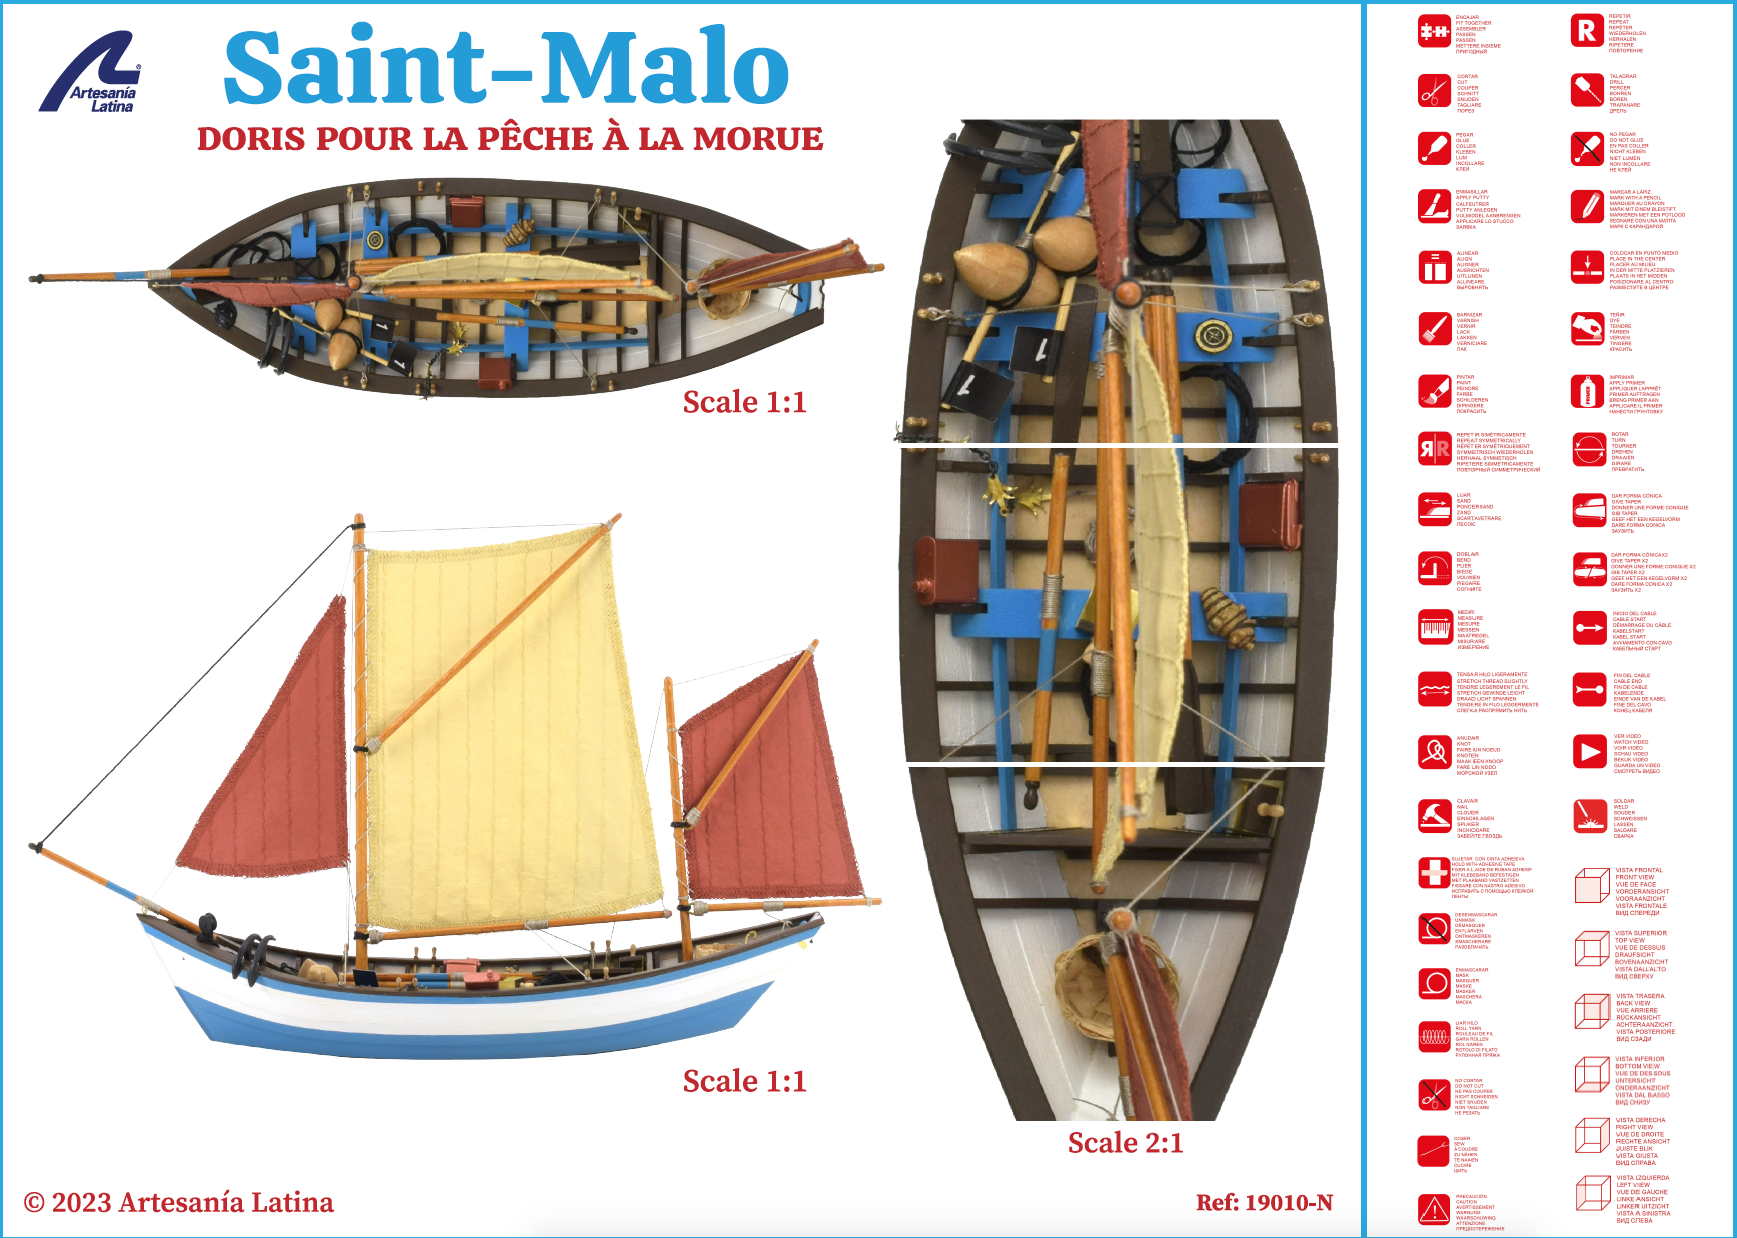
How to assemble it? The 3D modelers and designers at Artesanía Latina have created brand new instructions. You can appreciate the different stages of assembly with total clarity. In Spanish, French, Italian, English, German, Dutch and Russian. In addition, the naval modeling kit of the Spanish ship comes with several paper templates to make the construction process of the model easier. Among other functionalities, they serve to arrange the elements on the decks and to place the embrasures and other objects on the sides of the hull.
 by Artesanía Latina.")
 by Artesanía Latina.")
 by Artesanía Latina.")
The wooden naval modeling kit of the Santisima Trinidad has a QR code in its box which will allow you to download the assembly guide for free with clarifying photographs – more than 800 pages on digital format, not on paper – at product sheet of our website. Does not contain printed instructions. Two printed posters are included: one with the 1:1 scale model – double-sided – and another with the parts list and sails identification.
 by Artesanía Latina.")
 by Artesanía Latina.")
 by Artesanía Latina.")
 by Artesanía Latina.")
Also, on our Youtube channel, you can watch 10 demonstration videos to help you through some of the most important steps.
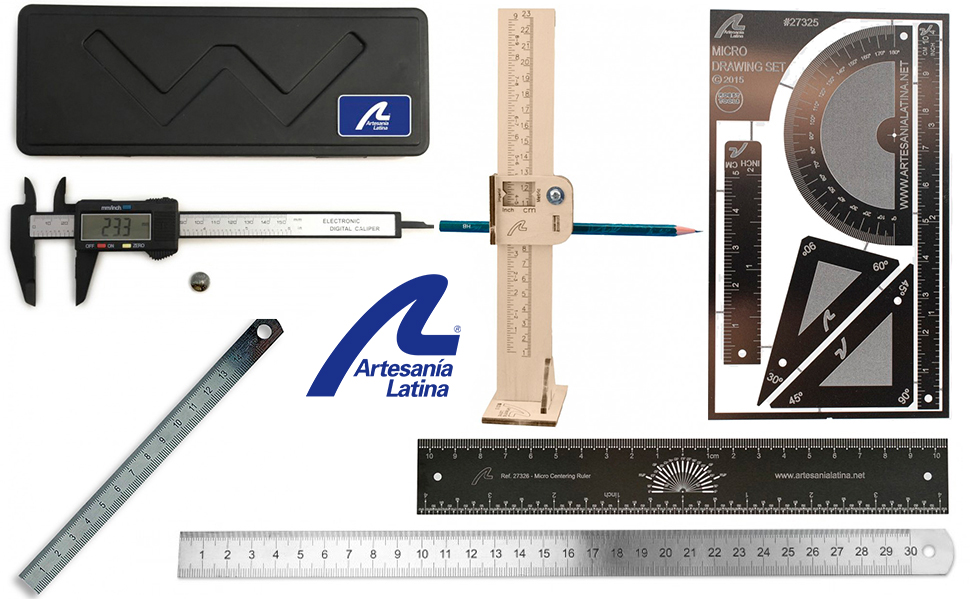
We recommend you watch the video below to learn about some of the tools that can be super useful when you are assembling the model:
ACRYLIC PAINTS SET FOR SANTÍSIMA TRINIDAD
The modeling professionals at Artesanía Latina recommend the painting of the model ship Santisima Trinidad using its Specific Water-Based Acrylic Paints Set (277PACK30), sold separately. In this way, the result of the finished of the Spanish ship of the line will be much more realistic and visual. Quick drying, the paints of twelve different colors come in small 20 ml bottles. Featuring off white (x2), off black (x2), bright red, FS11136 red (x2), ice yellow, buff, cocoa brown, dark red leather and gold, your artwork of naval modeling will leave spechless anyone who sees it.
 by Artesanía Latina.")
 by Artesanía Latina.")
A LITTLE HISTORY OF THE SPANISH SHIP OF THE LINE SANTISIMA TRINIDAD
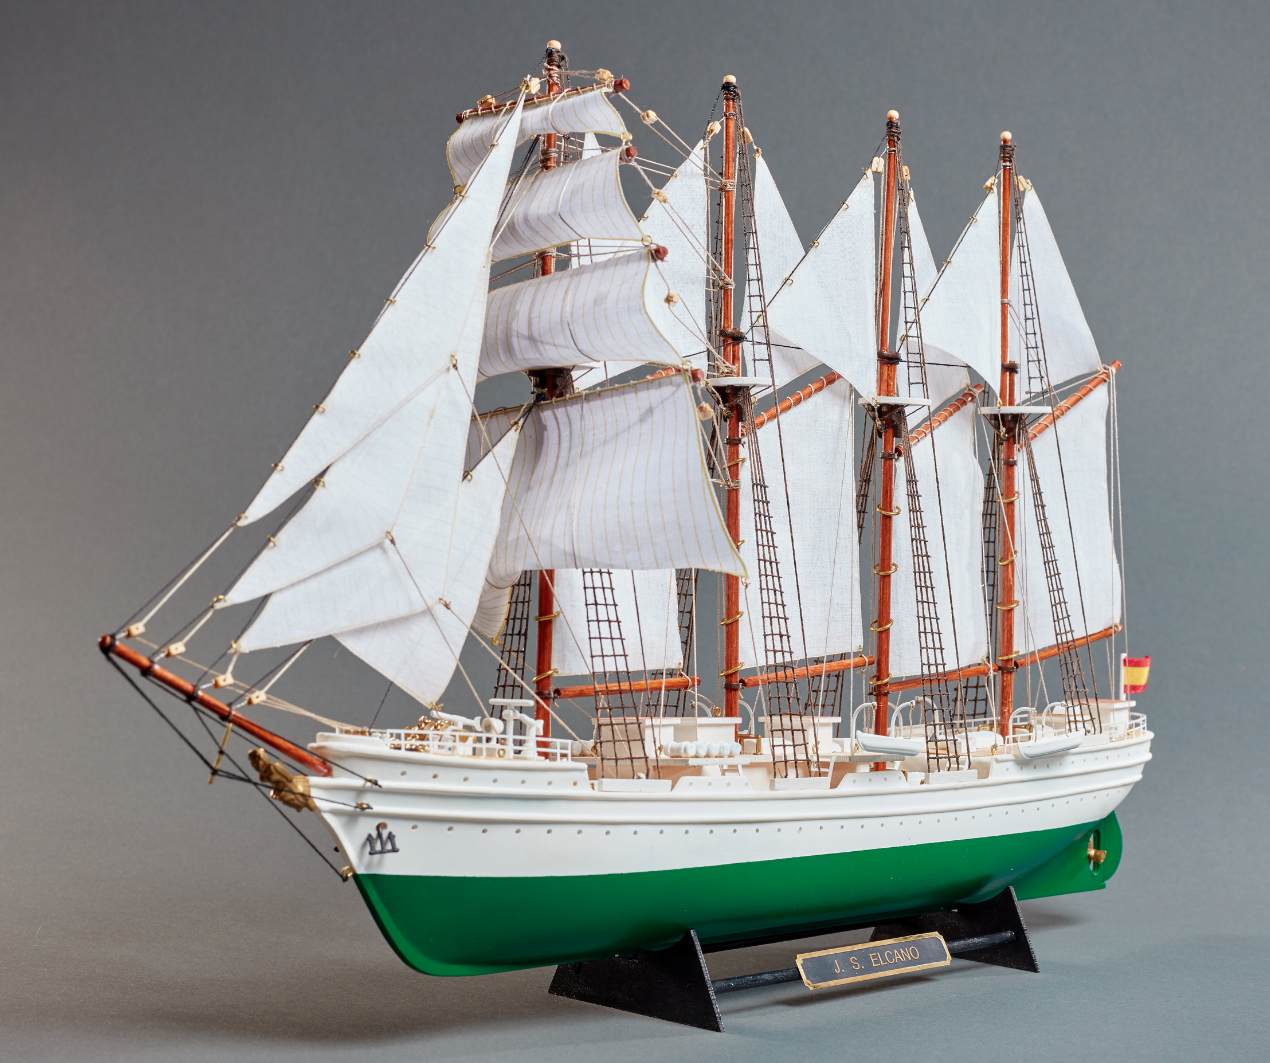
Launched in 1769, the Santisima Trinidad was one of the few four-decker ships of the line that existed. Despite this, it was not very effective due to its clumsy and slow navigation. Above all, its tragic end in the Battle of Trafalgar (October 21st, 1805) is remembered. On that occasion it was under the orders of the squad leader Baltasar Hidalgo de Cisneros, and with Francisco Javier de Uriarte y Borja as flag captain. After a tough fight, it was captured by the English in very bad conditions, with more than 200 dead and 100 wounded. The English put all their efforts into saving it and taking it to the English port of Gibraltar, being towed by the frigates HMS Naiad and HMS Phoebe. However, it would finally sink on October 24th about 25 or 26 miles south of Cádiz.
It now remains at the bottom of the sea. Its artillery parts were extracted and installed at the entrance to the Pantheon of Illustrious Sailors located in the Navy Non-Commissioned Officers School, in San Fernando (Cádiz). Now you have the opportunity, once again, to build a fundamental jewek of world naval history. Assemble this Trafalgar 1805 edition of the model ship Santisima Trinidad (22901).
 by Artesanía Latina.")
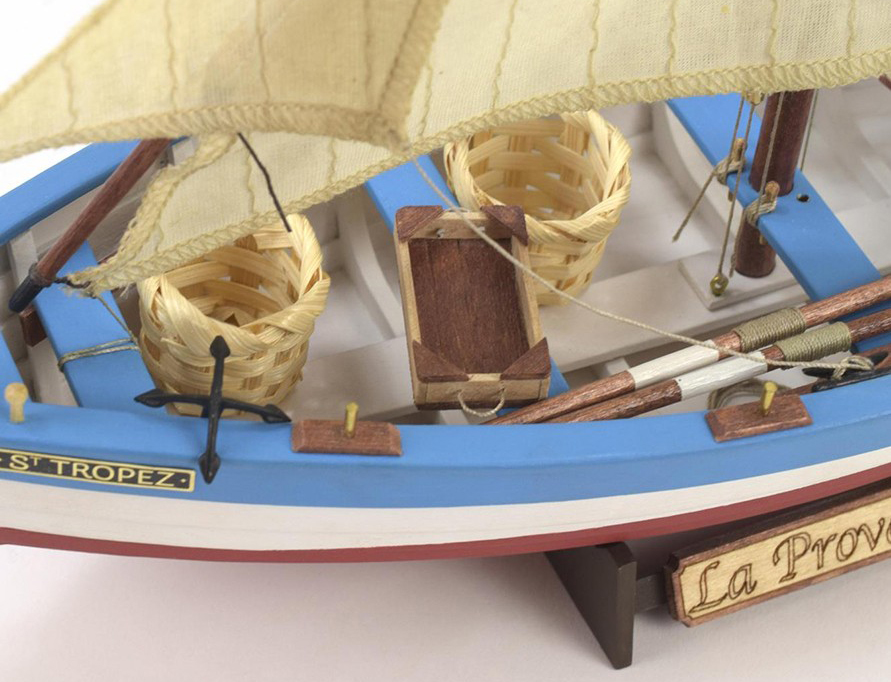
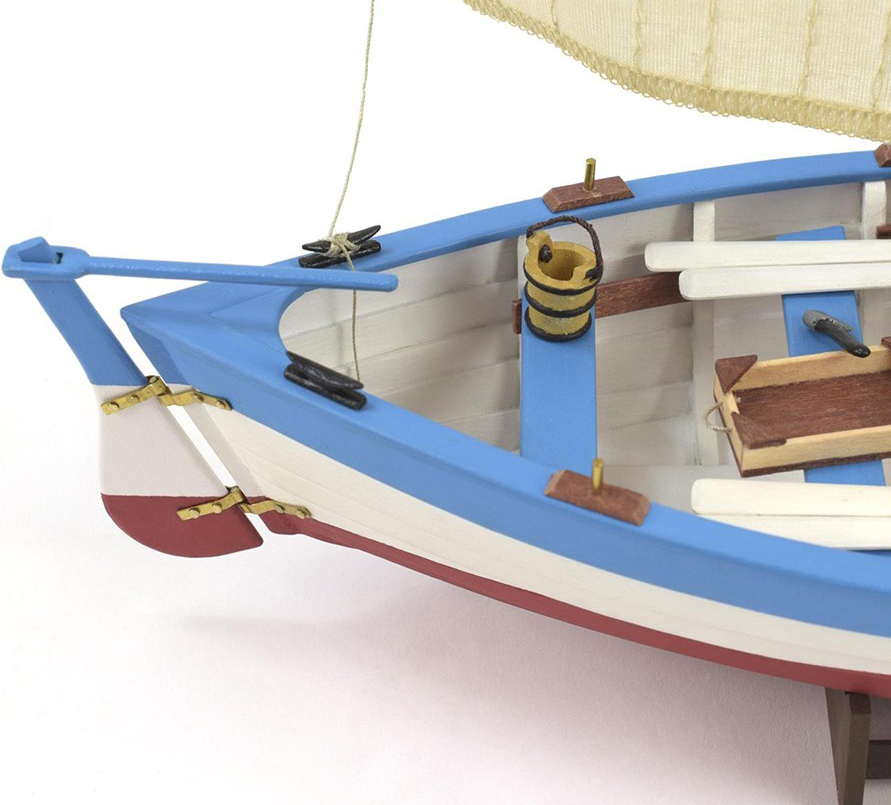
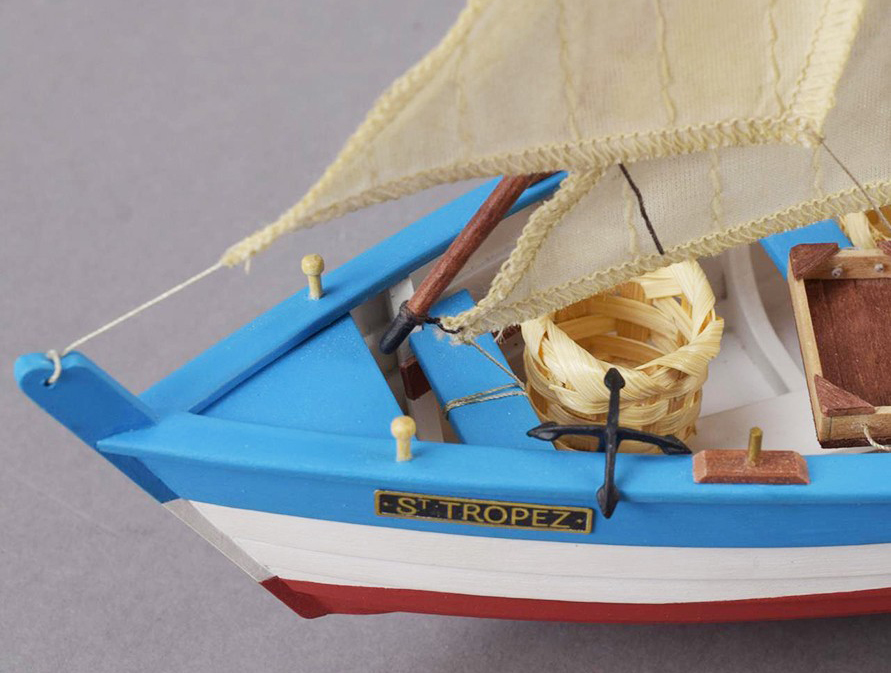
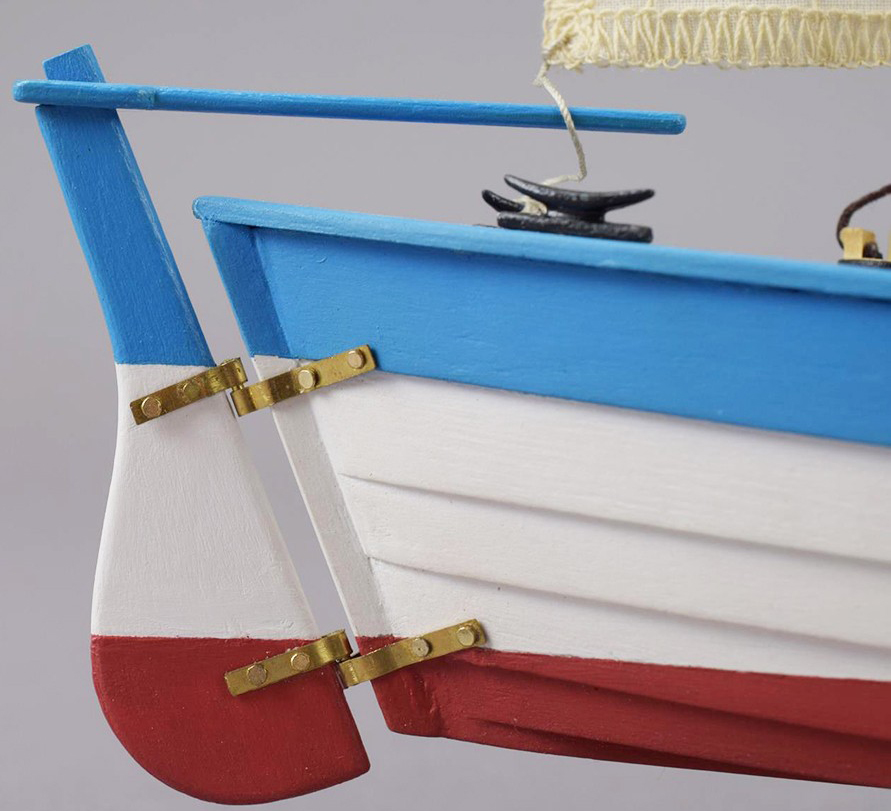
Oh, don’t forget to accompany this impressive Spanish ship with its Captain’s Boat (19014), for sale separately. This way your ship of the line will look even more beautiful.
 by Artesanía Latina.")
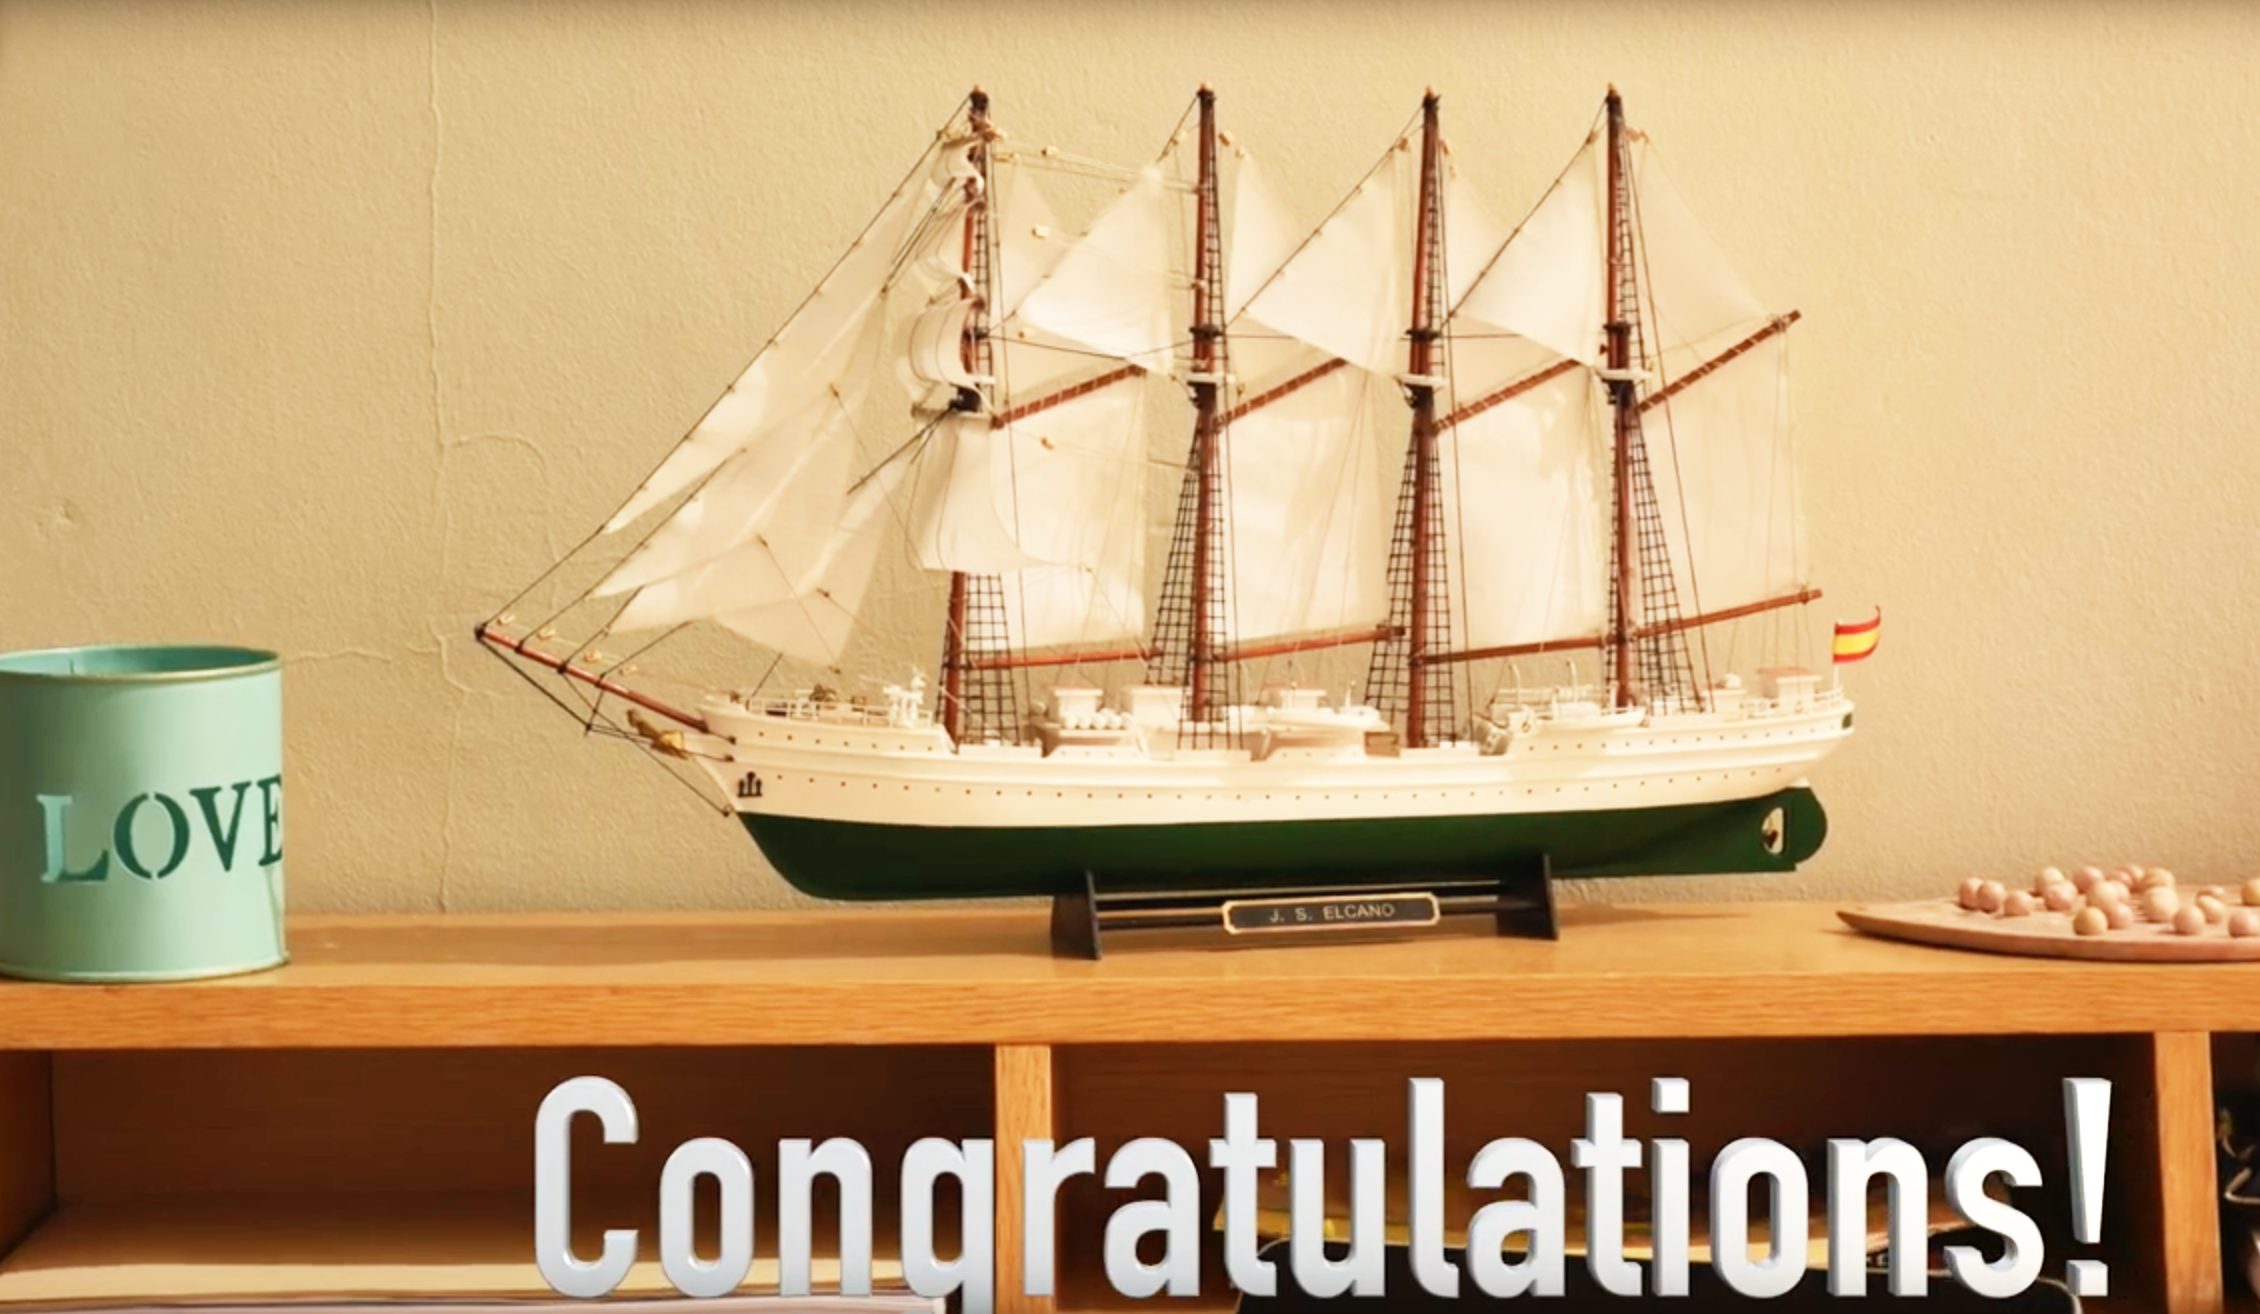
Then… Let’s build them at our modeling workshop!

.")
.")
.")
.")
.")
.")
.")
.")
.")
.")
.")

 and Advanced (22517-N) levels.")
 and Advanced (22519) levels.")
 made by Artesanía Latina.")
 made by Artesanía Latina.")
 made by Artesanía Latina.")
 made by Artesanía Latina.")
 made by Artesanía Latina.")
 made by Artesanía Latina.")
 made by Artesanía Latina.")
 made by Artesanía Latina.")
 de Artesanía Latina.")
 made by Artesanía Latina.")
 made by Artesanía Latina.")
 made by Artesanía Latina.")
 par Artesanía Latina.")
 by Artesanía Latina.")
 by Artesanía Latina.")
 by Artesanía Latina.")
 for Modeling and Crafts by Artesanía Latina.")
 for Modeling and Crafts by Artesanía Latina.")
 by Artesanía Latina.")
 by Artesanía Latina.")
 by Artesanía Latina.")

 made by Artesanía Latina.")
 made by Artesanía Latina.")
 made by Artesanía Latina.")
 made by Artesanía Latina.")
 made by Artesanía Latina.")
 made by Artesanía Latina.")
 by Artesanía Latina.")
 made by Artesanía Latina.")
 made by Artesanía Latina.")
 made by Artesanía Latina.")
 made by Artesanía Latina.")
 made by Artesanía Latina.")
 by Artesanía Latina.")
 by Artesanía Latina.")
 by Artesanía Latina.")
 by Artesanía Latina.")
 by Artesanía Latina.")
 by Artesanía Latina.")
 by Artesanía Latina.")
 by Artesanía Latina.")

 by Artesanía Latina.")
 by Artesanía Latina.")
 by Artesanía Latina.")
 by Artesanía Latina.")
 by Artesanía Latina.")
 by Artesanía Latina.")
 by Artesanía Latina.")
 by Artesanía Latina.")
 by Artesanía Latina.")
 by Artesanía Latina.")
 by Artesanía Latina.")
 by Artesanía Latina.")
 by Artesanía Latina.")
 by Artesanía Latina.")


 by Artesanía Latina.")
 by Artesanía Latina.")
 by Artesanía Latina.")
 by Artesanía Latina.")

 by Artesanía Latina.")
 by Artesanía Latina.")
 by Artesanía Latina. Click here for more info.")
 by Artesanía Latina. Click here for more info.")
 by Artesanía Latina. Click here for more info.")
 by Artesanía Latina. Click here for more info.")
 by Artesanía Latina. Click here for more info.")

 by Artesanía Latina. Click here for more info.")
 by Artesanía Latina. Click here for more info.")
 by Artesanía Latina. Click here for more info.")
.")
.")