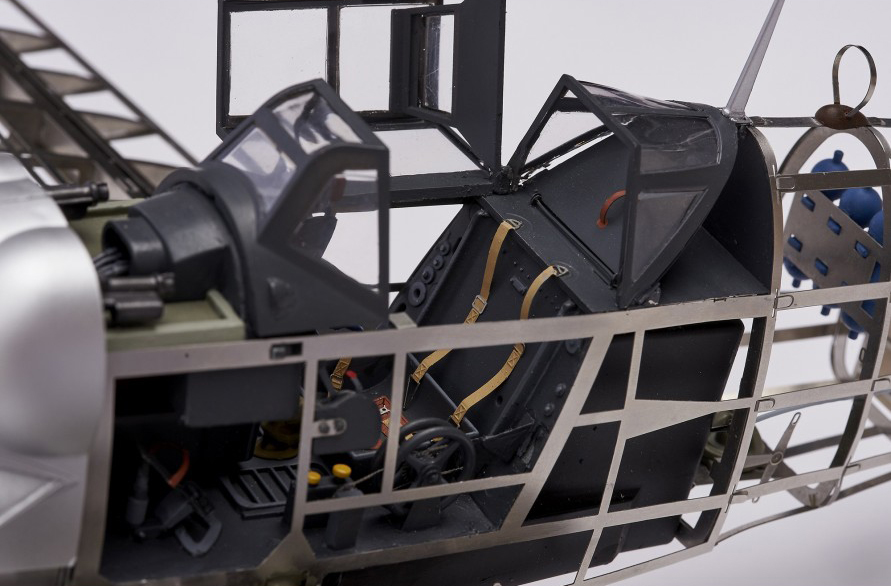
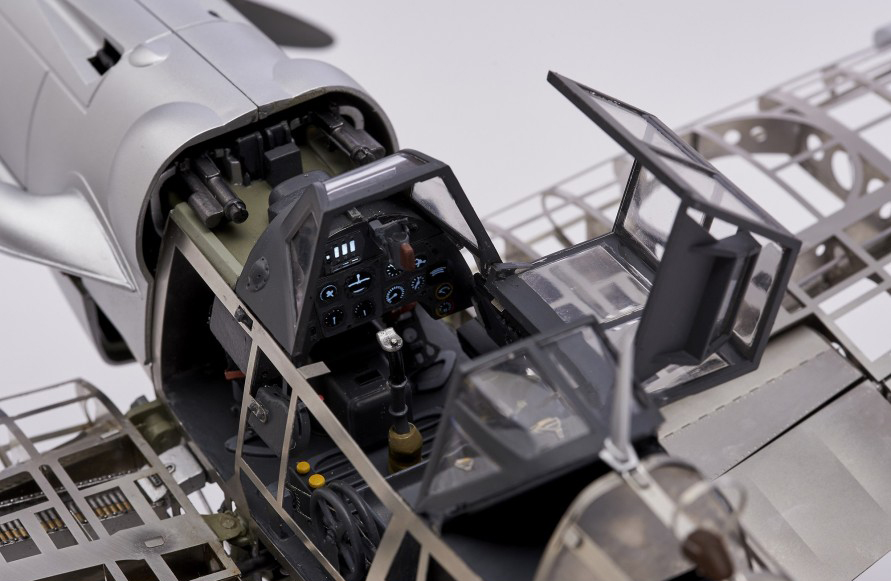
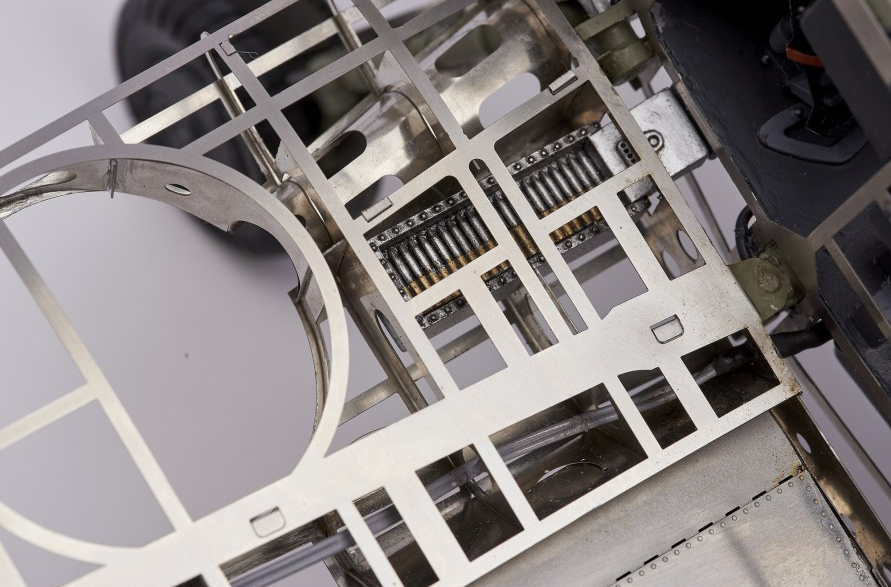
Posted in Model Building Tips

Elcano Ship Model Instructions (IV): Finish Building the Spanish Training Ship with Our Latest Video Tutorials!

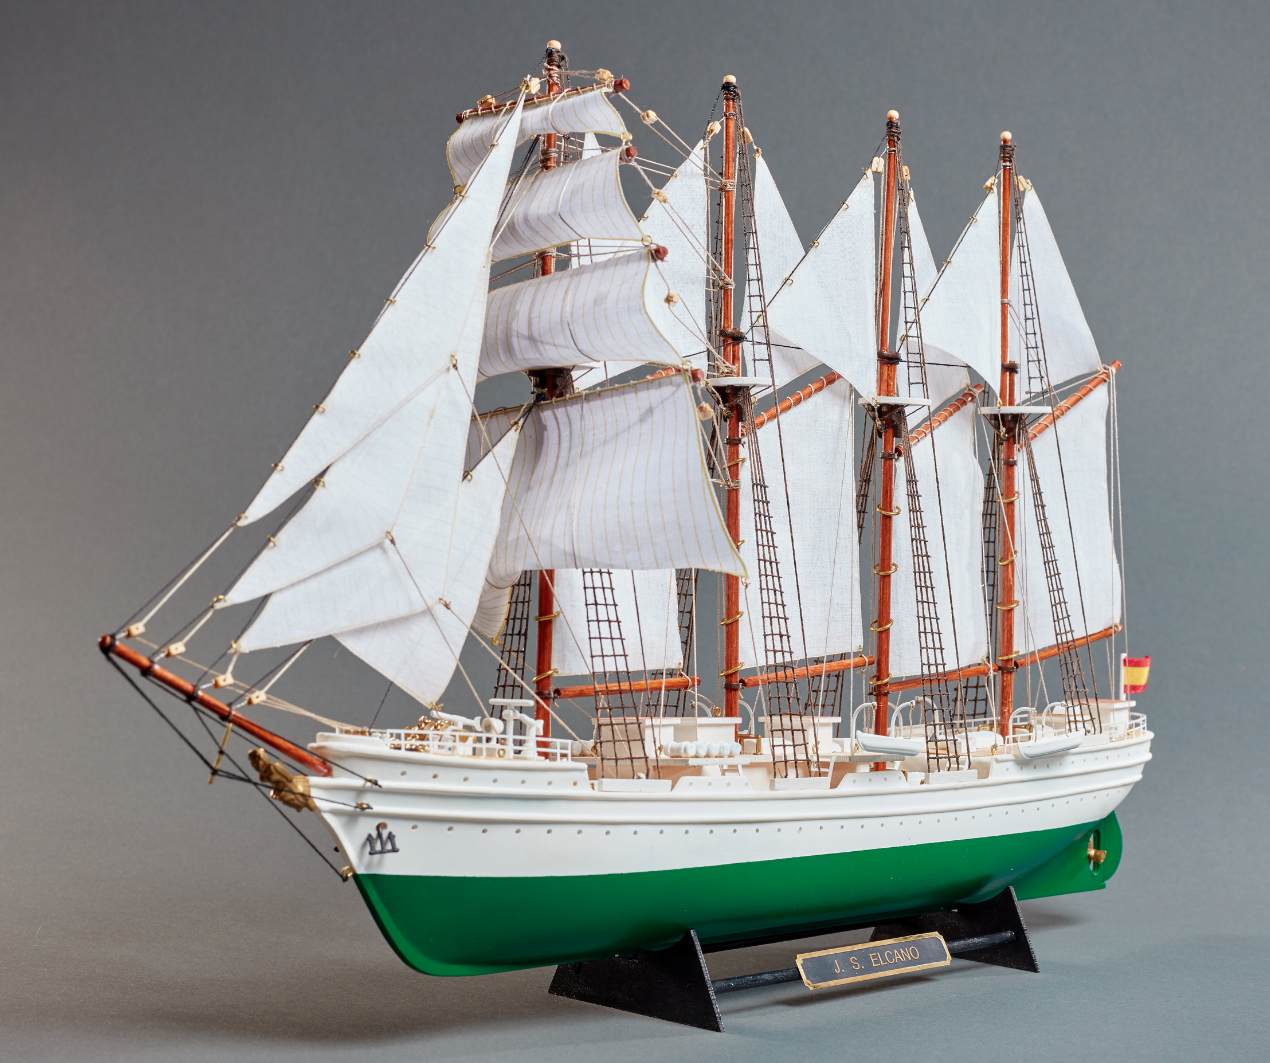
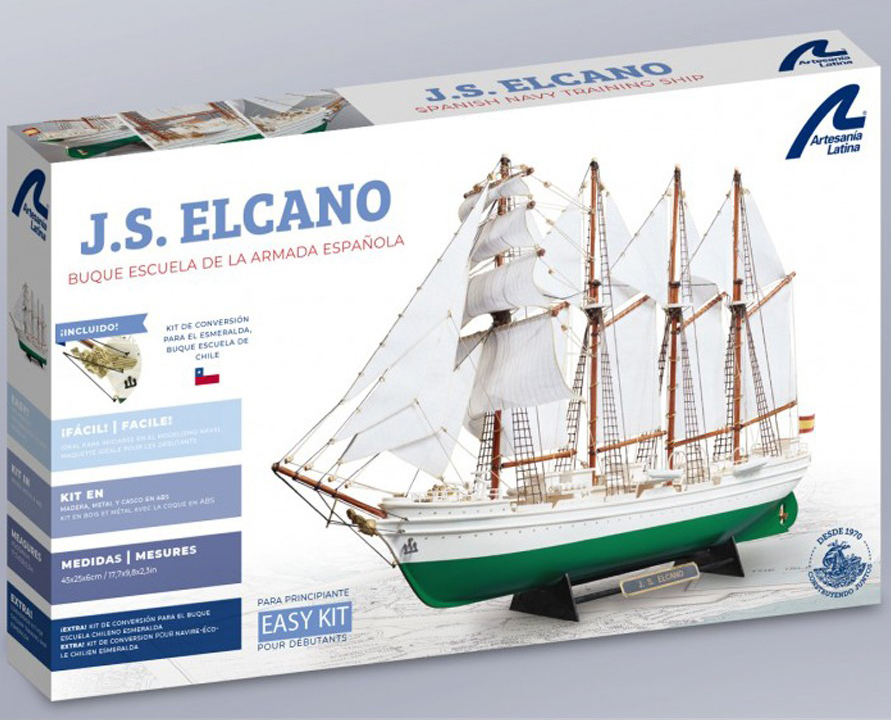
We dive into the last part of the Elcano ship model instructions for its assembly. With these video tutorials made by our modelers, we put the finishing touch to the set up of the Spanish school ship model Juan Sebastián Elcano / Chilean Esmeralda (22260) at 1:250 scale. As we mentioned before, it is a faithful miniature replica excellent for beginners on the hobby of naval modeling.

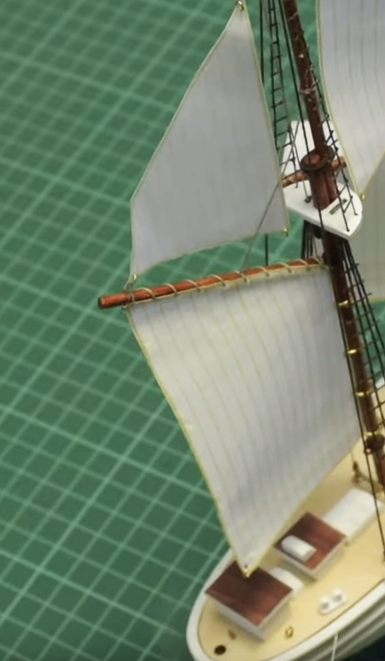
ELCANO SHIP MODEL INSTRUCTIONS: SAILS (PART III – A)

We continue with ‘Sails – Part III’, which is Step 21 of the instructions for assembling the Elcano ship model (22260).

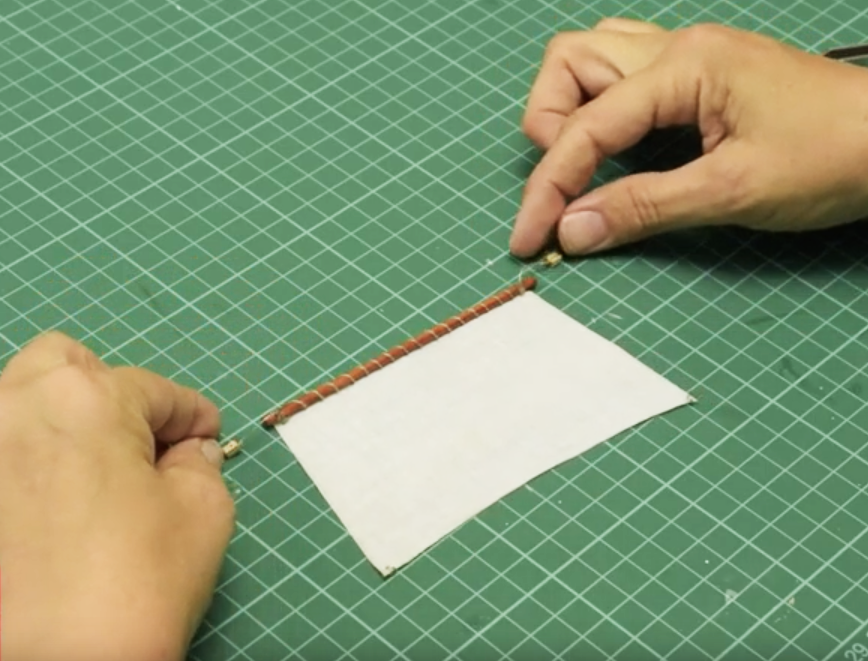
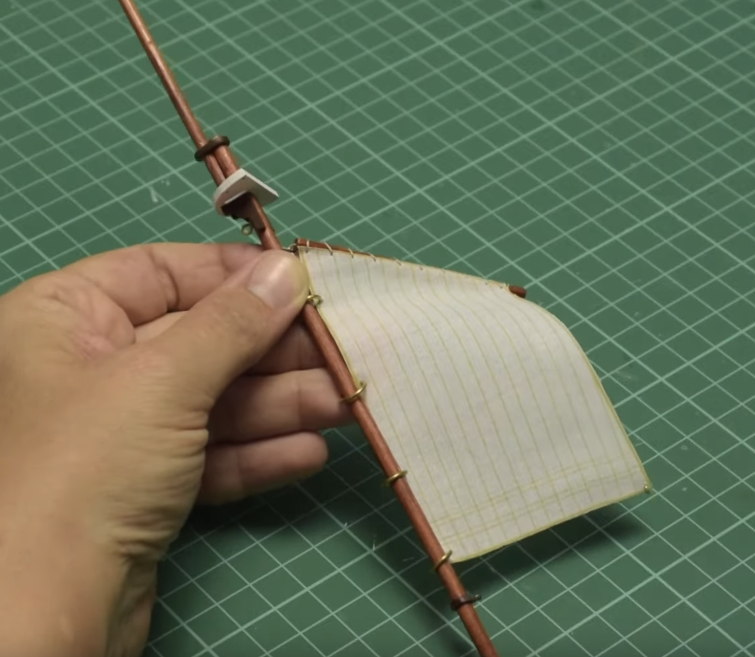
Arrange one unit of parts S7, S8, S9 and S10, that is, more sails. Take part S7, and sew it with a needle cotton threadpart CT1– around the stick part Y1, from top to bottom. When you finish sewing, help yourself with some Straight Fastening Tweezers (27020) to tie the knot on the stick.

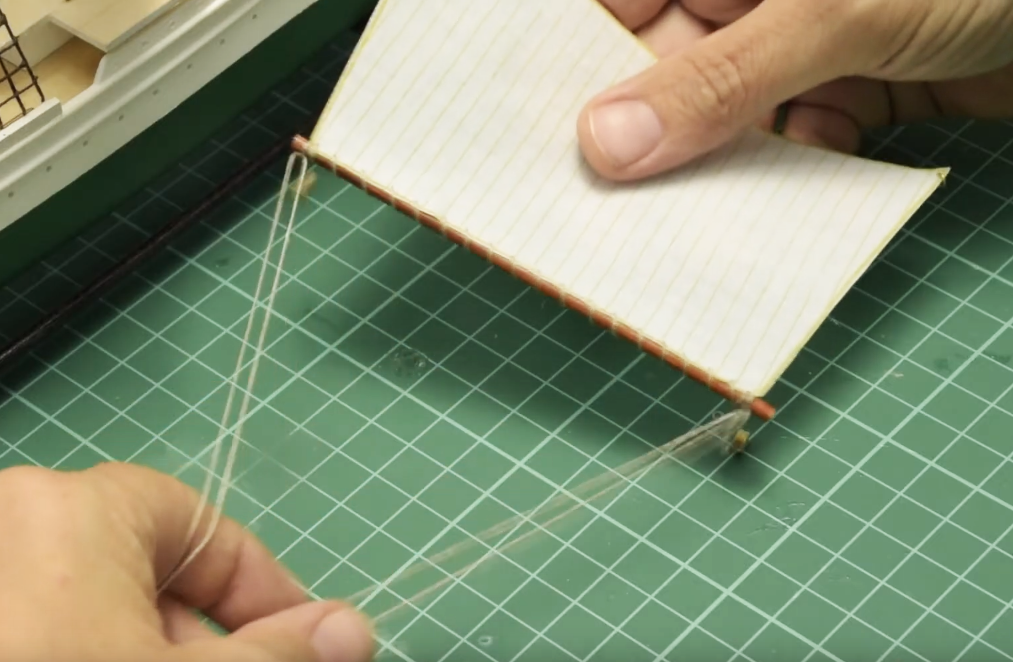
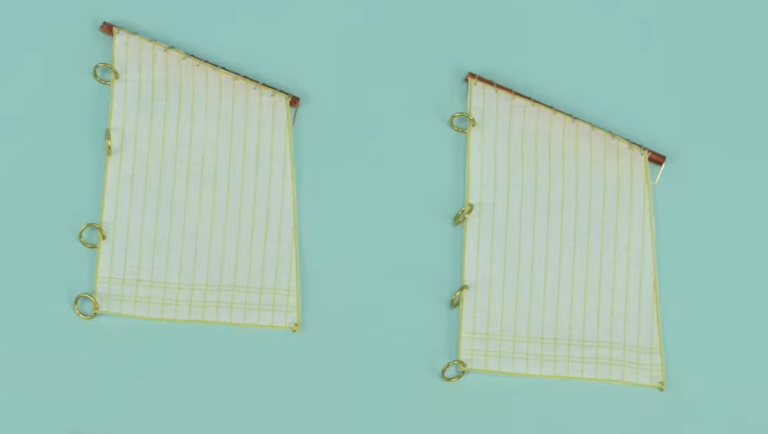
Now, with a cutter, drill two small holes in the two opposite corners of the stick. Insert the two BR1 parts -two rings- into these. Take a part BL and thread -part CT1-. Put the thread through the hole and around part BL. Tie a knot at the end with the help of the aforementioned tweezers. The thread should be fully stretched through the hole and around the part BL. Apply Dense Cyanoacrylate for Porous Materials on the knot and allow to dry.

Next, you will have excess thread on both sides of the knot. First, completely cut one of the threads, while the other leave a few centimeters long. Don’t cut it all the way. Second, also using the tweezers, tie that thread with the BL part to the left side of the stick and tie the knot with cyano. Third, if there is excess thread, remove it with a cutter. Repeat all these actions on the other end of the stick with another BL part.

The result should be this:

Elcano Ship Model Instructions for its Assembly (22260). Artesanía Latina.

ELCANO SHIP MODEL INSTRUCTIONS: SAILS (PART III – B)

Then go through the entire process again with the other SAILS. For the sail part S8, you will need one Y2 part, two BR1 parts and two BL parts. For the part S9, one Y3 part, two BR1 parts and two BL parts. And for the S10, one part Y4, two parts BR1 and four parts BL. Take again the sail part S7 and thread part CT1. At one end of the stick, tie a knot with plenty of thread left over from both sides. Apply cyano and let dry. Repeat the process on the other end of the stick.

Elcano Ship Model Instructions for its Assembly (22260). Artesanía Latina.

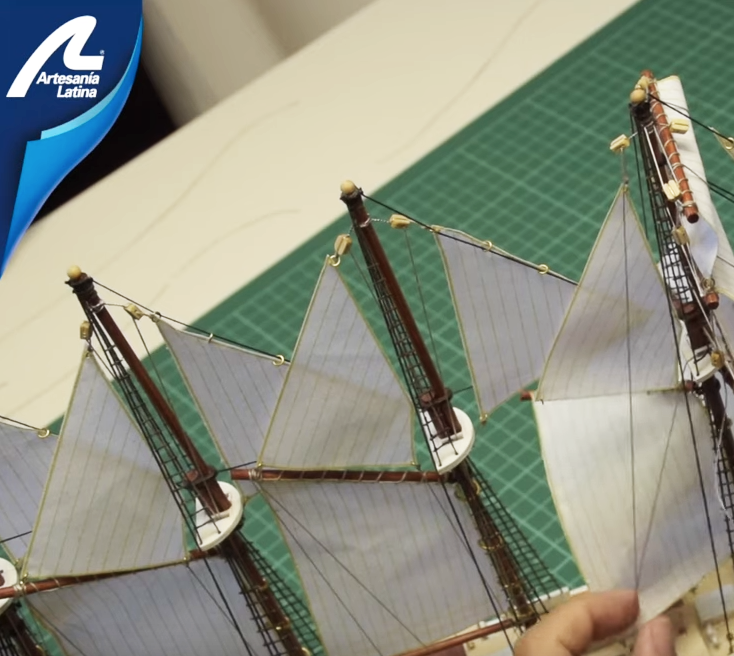
Take the S7 sail. Use a Curved Fastening Tweezers (27021) to pass the thread -part CT1- with a needle above the mast top, as seen on the video. The goal is the sail can be already hanging on its mast. Make the knots as shown, apply a little of cyano and cut the excess thread with the Thread Snips (27060). The sail already stays in place.

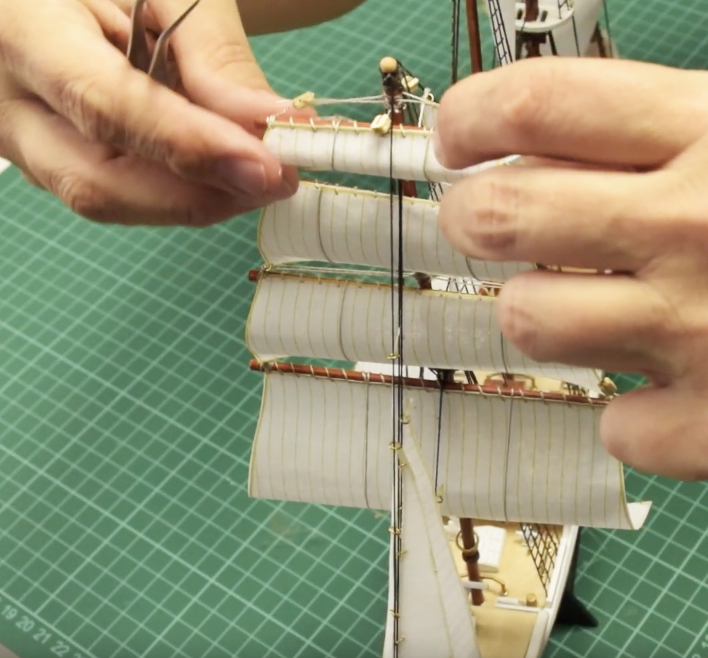
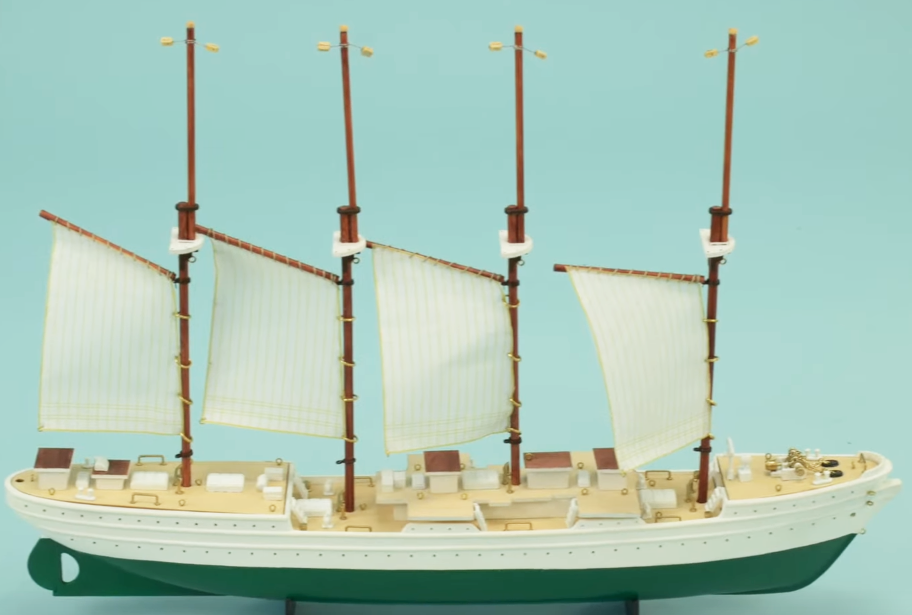
Repeat the process with the S8 sail. Once hung, it has to be attached to the S7 sail with thread. Tie them by means of the two BR1 parts that are on the sail. Passing the CT1 thread through the BR1 ring and, right after, tie it to the end of the stick. Repeat the process also for the other end of the pole with the other BR1 ring.

Do the same with the S9 sail, but this time tying it to the S8 sail. And finally, with the S10 sail, knotting it to the S9. This should be the final look with all the sails in place.

Elcano Ship Model Instructions for its Assembly (22260). Artesanía Latina.

ELCANO SHIP MODEL INSTRUCTIONS: SAILS (PART IV – A)

Well, it’s time for the next task. Step 22 of the assembly instructions for the ship model Elcano (22260). This one is about ‘Sails – Part IV’.

Take the four sails parts S11. Now take one and, using a utility knife, drill three holes in each of the three corners of the sail. Then, insert one of the three parts BR1 -rings- into each hole. Open each part BR1 with two Needle Nose Pliers (27213) and insert the ring through the sail. After inserting it, close it again using the aforementioned pliers. As we have discussed, repeat the process with the other three sails.

Again, take a sail part S11. Insert thread through the BR1 ring found on the most pointed part of the sail, at the top and tie a knot. Cut the excess of one of the ends of the thread and pass the other end through the mast. Then bring the thread to the hull, tighten it, tie it off and glue it with cyano. Watch the video for it.

Now, thread CT1 through the outermost ring BR1. Begin to tie a knot and leave a hole to insert it into the bottom sail pole. Insert into the stick and close the knot. Do the same with more thread through the remaining BR1 ring, the third one, the one closest to the mast. In this sense, the sail part S11 will be attached to the lower sail.

Elcano Ship Model Instructions for its Assembly (22260). Artesanía Latina.

ELCANO MODEL SHIP INSTRUCTIONS: SAILS (PART IV – B)

Below that bottom sail, place a PCL part. Bend the wire that has the stick on it and attach it to the mast. Use the pliers to twist the wire around the mast.

Take CT1 thread and pass it through the eye of the BR1 part of that lower sail to make a knot and pass it through the PCL stick. The sail will be attached to the mast. Remember to apply cyano to all the knots you make.

Thread CT1 through the ring on the hull and tie it to the stick so that it is taut. The rest of the thread, pass it through the mast top and tie it to the deck. Take a look at the video to run this process, which you will need to repeat for the other three sails.

Elcano Ship Model Instructions for its Assembly (22260). Artesanía Latina.

ELCANO SHIP MODEL INSTRUCTIONS: SAILS (PART V)

Step 23 of Elcano ship model instructions (22260) for the assembly of Spanish school ship, is about the ‘Sails – Part V’. You need to pay close attention to the video so that you can build the rest of the sails.

JUAN SEBASTIAN ELCANO MODEL SHIP: DECKS (PART III – A)

We continue with Step 24 of the Elcano ship model instructions for its assembly. This is about ‘Decks – Part III’.

Take two M8 parts and glue them parallel to the foredeck as shown on the video. Next, take ten units of the part DM4. With the help of cyano and grip pliers, take five of these and glue each one next to the other on the deck area shown. Then turn the boat 180º and do the same for the other five on the other side of the deck.

Once this task is done, take a Stainless Steel Ruler 150 mm (27069). Use it to mark with a pencil on the edge of the hull two points with an equidistance of 18 mm. From each of these two points, with the ruler, measure and mark two points 6 mm inside the deck. Drill with a small hand drill at the two points marked on the deck.

Take an M6 part. Apply a drop of cyano and insert it with tweezers into one of the two holes made. Repeat the process with another M6 part and insert it into the other deck hole.

JUAN SEBASTIAN ELCANO MODEL SHIP: DECKS (PART III – B)

It is time to use thread part CT2 for the placement of part P2, previously painted with Off-White Acrylic Paint (27702). First, thread the thread through the two holes in part P2. Second, take the other end of the thread and feed it through an M6 part. Do the same with the other end. When you are inserting the two ends of the thread into each M6 part, insert them from the outside to the inside.

Next, make a knot in each of the two inserted ends so that the part P2 does not come loose. Apply a little cyano to each one. Repeat the process on the opposite side of the boat.

Elcano Ship Model Instructions for its Assembly (22260). Artesanía Latina.

JUAN SEBASTIÁN ELCANO ASSEMBLY: HANDRAILS AND PROPELLER

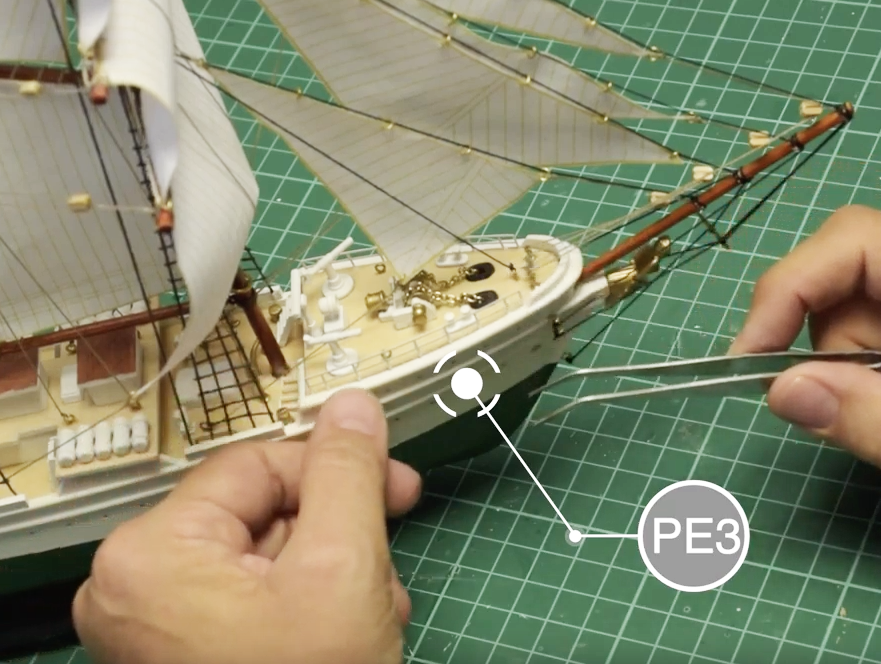
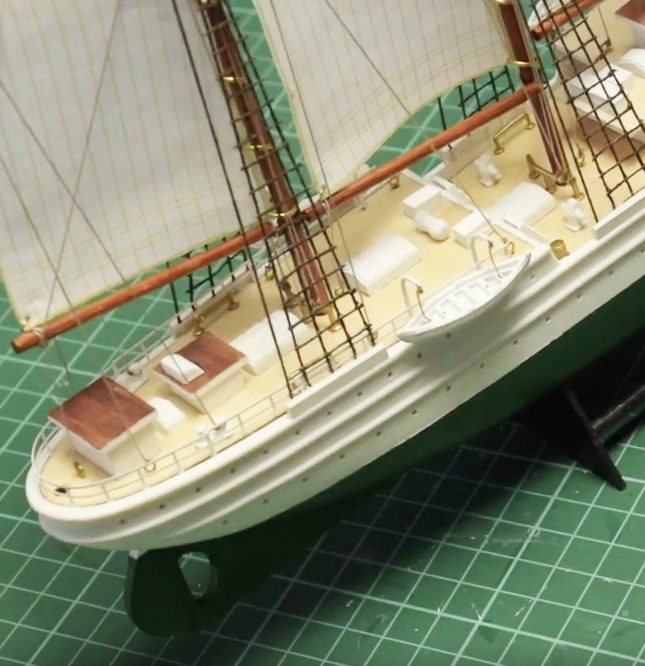
The ‘Handrails and Propeller’ is Step 25 of the video tutorial for building the model of the Elcano ship. Take two PE3 parts, previously painted with off-white paint. Apply cyano to each of the tips of the base that will be inserted. Place each of the two PE3 parts on the edge of the hull and the deck with the help of a Curved Fastening Tweezers (27021). There are two in the bow.

Elcano Ship Model Instructions for its Assembly (22260). Artesanía Latina.

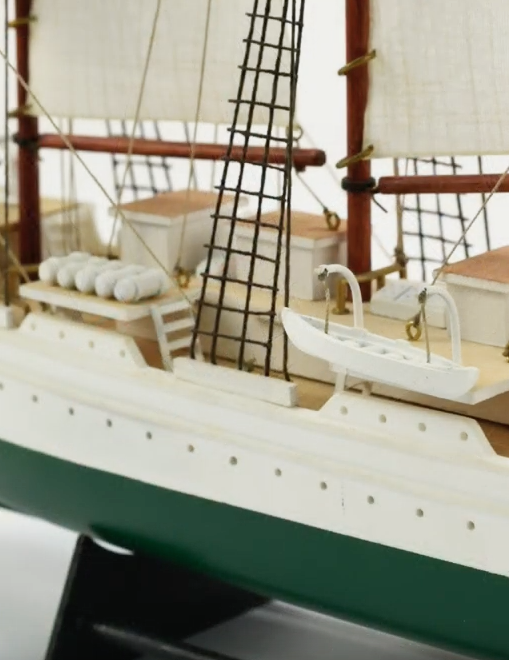
Then, take a PE4 part, also previously painted with off-white colour. Bend it with your hands so that it takes on the curved shape of the stern. Once you have the shape, apply cyano to each of the corners and glue the part with both hands to the edge of the deck. Take another PE4 part and tack it right next to the one you placed earlier. Put it behind the lifeboat. Repeat the process on the other side of the hull.

Elcano Ship Model Instructions for its Assembly (22260). Artesanía Latina.

Finally, the part M11 -propeller- enters the scene. Apply cyano to the tip to be inserted and place it with your hands and a pair of tweezers on the hull.

JUAN SEBASTIÁN ELCANO ASSEMBLY: LAST DETAILS TO FINISH (PART I)

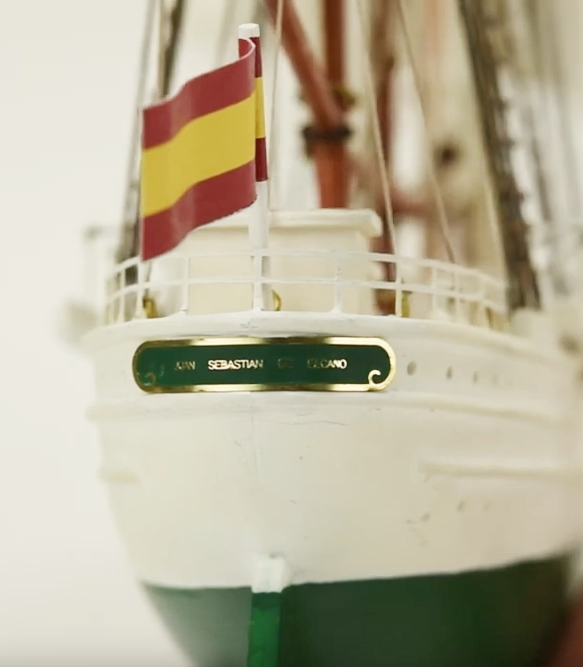
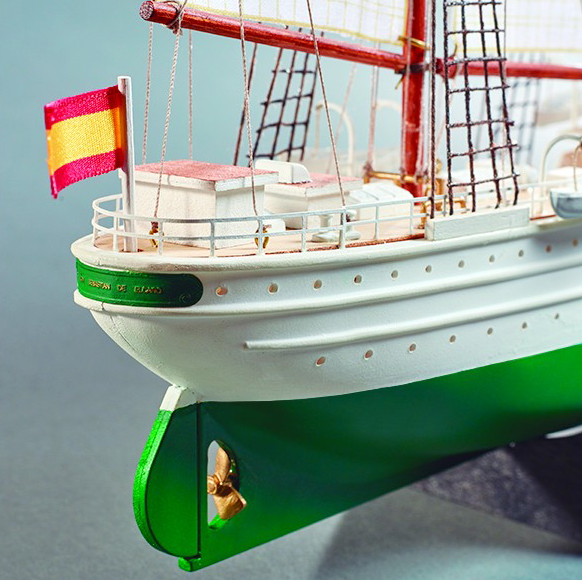
We continue with the final step of the Elcano ship model instructions for its assembly with the ‘Last Details’, which is Step 26. Arrange a unit of the part WD3 with a diameter of 2×35 mm, previously painted off-white. Later, take the part FL1 -Spanish flag- and with the help of a cutter, remove the sticker protector.

Place the center of the sticker -it has a stripe drawn- on the stick and close the sticker with your hands and the handle of a scalpel cutter until both sides of the flag stick together. Stick it in the hole in the aft deck provided for it.

It is the turn of the part PE5 Elcano / PE6 Esmeralda -metal sheet with the name of the ship-. First, paint it with Hull Green Colour (27751). Then, sand the entire edge of the sheet with a utility cutter until you can see the metal of the sheet. Apply cyano and glue it to the stern of the boat, just below the flag.

JUAN SEBASTIÁN ELCANO ASSEMBLY: LAST DETAILS TO FINISH (PART II)

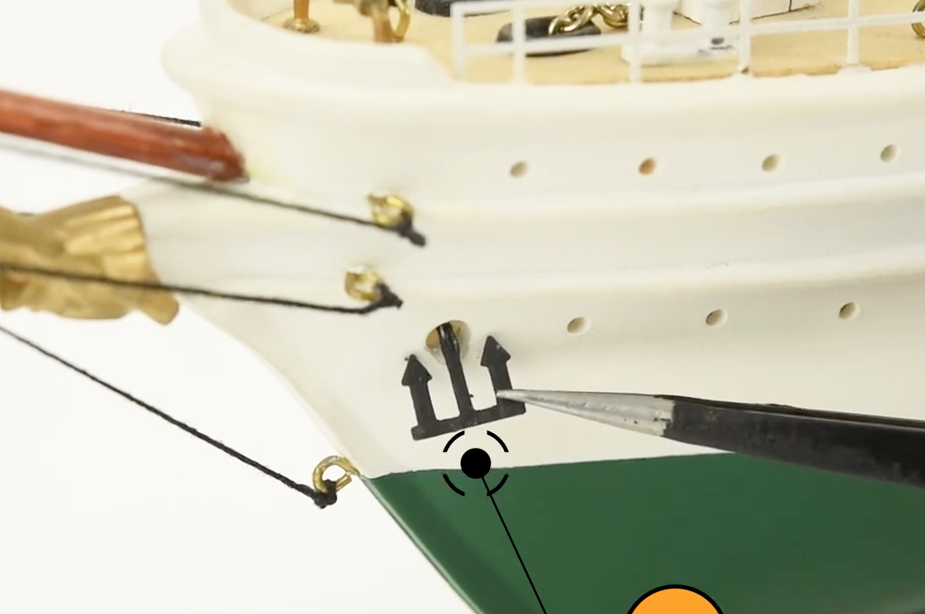
Now, take the two parts M17 -anchors-, previously painted with Off-Black Colour (27703). Place them into the two holes provided for this with the help of tweezers and a few drops of cyano. Finally, there is the part PE7 / PE8 -name of the ship for the base-. Also paint it with off-black colour, sand the edges with a cutter until you see the metal part and, with cyano, glue it to the exhibition base.

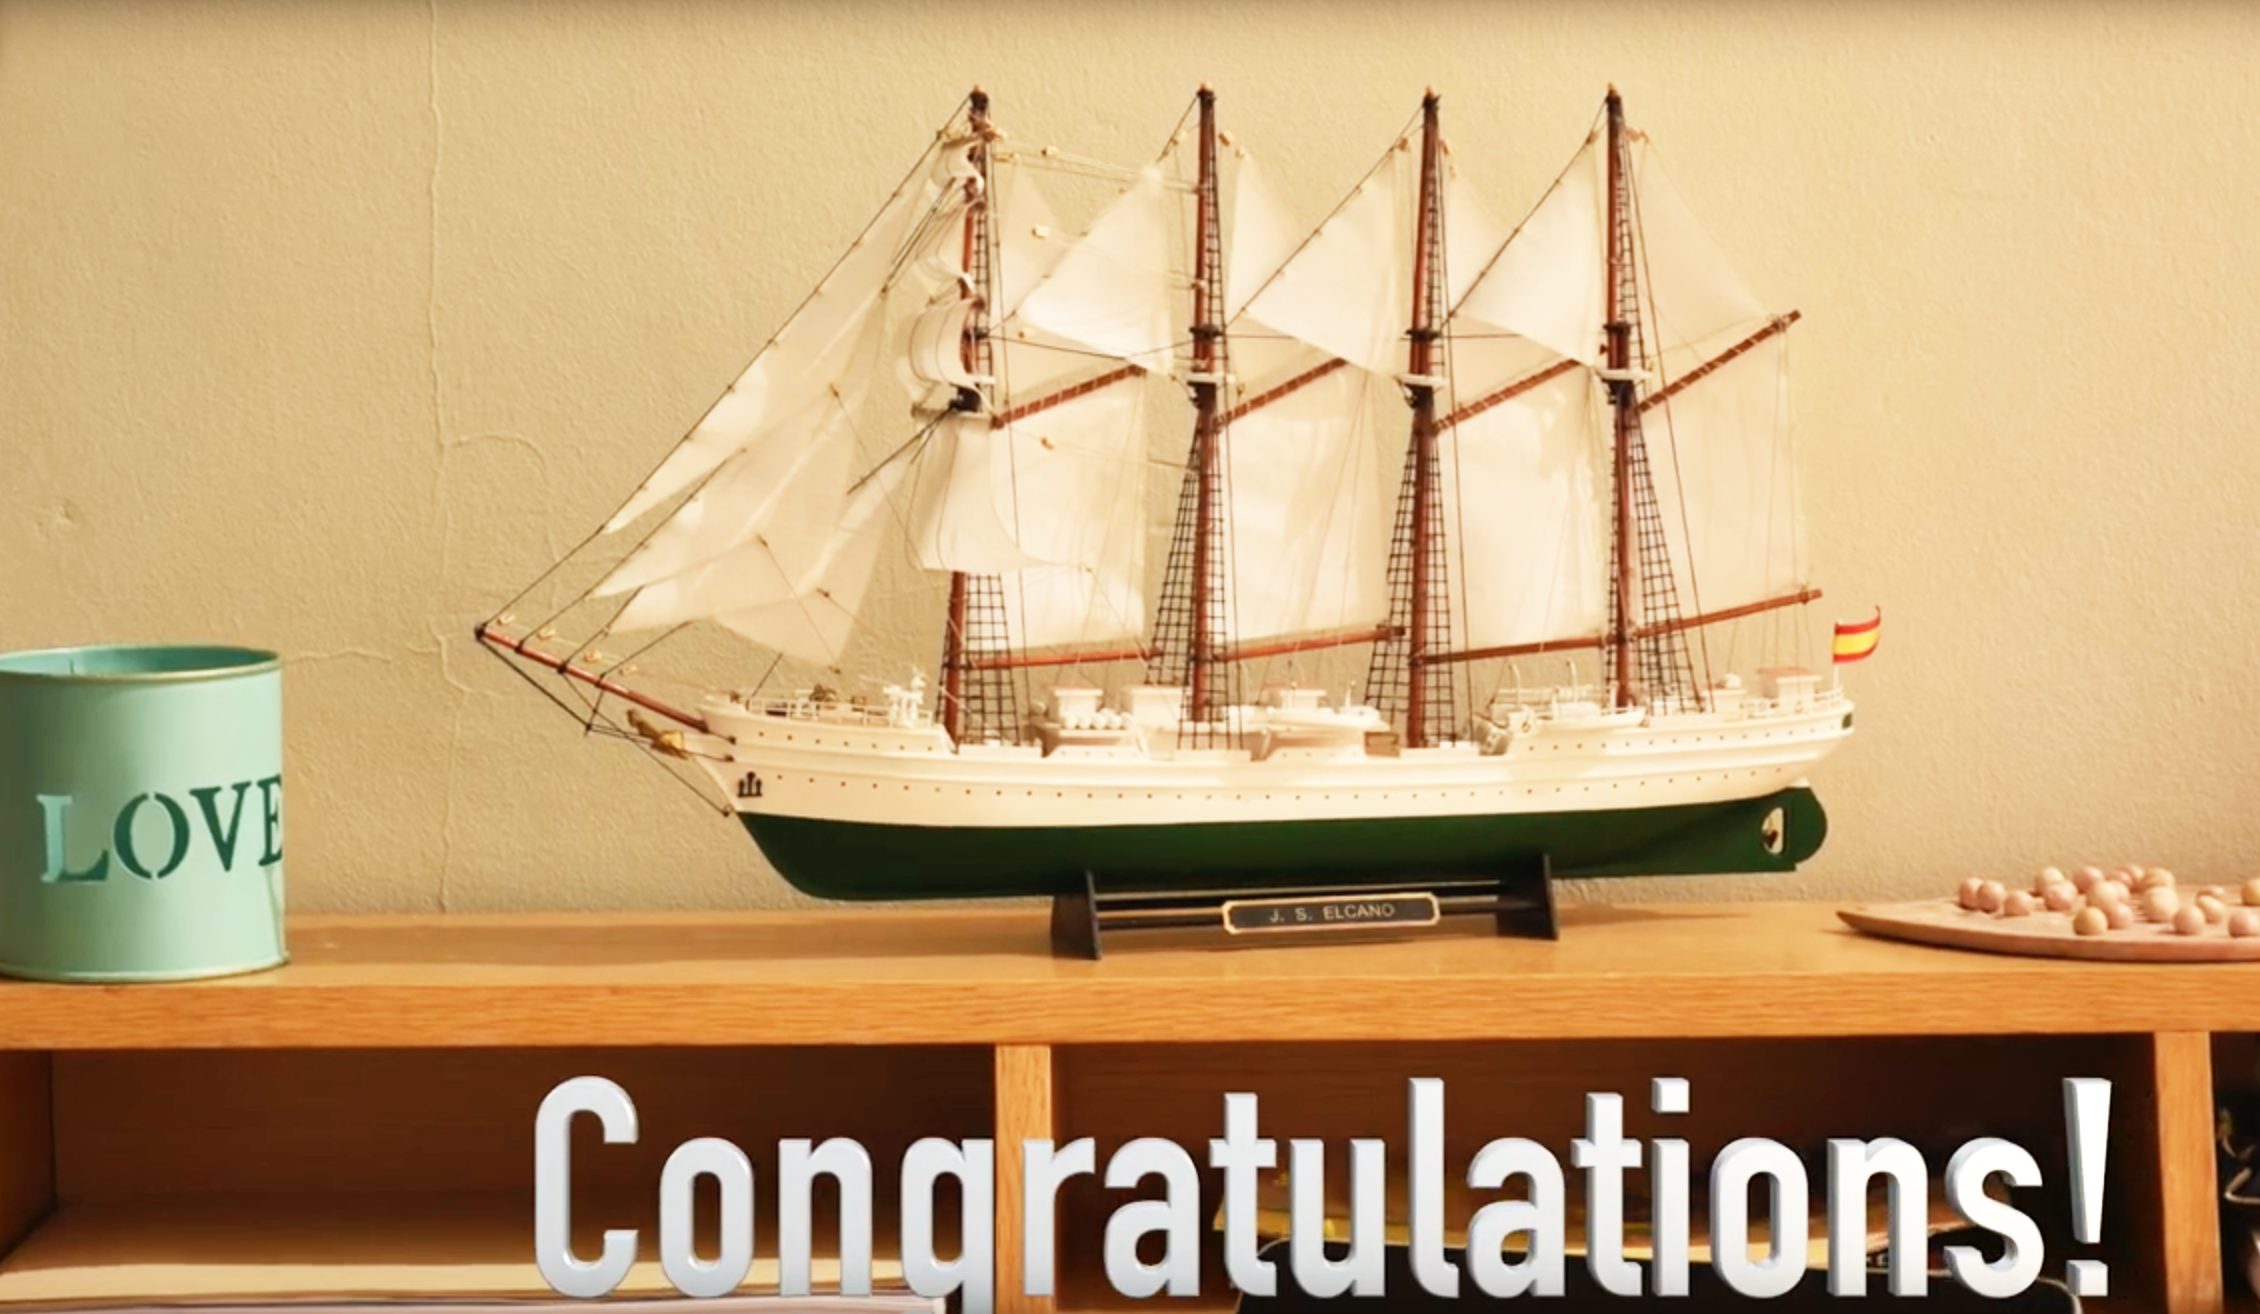
You have just finished building the wonderful model of the training ship Juan Sebastián Elcano / Esmeralda (22260)! Congratulations!
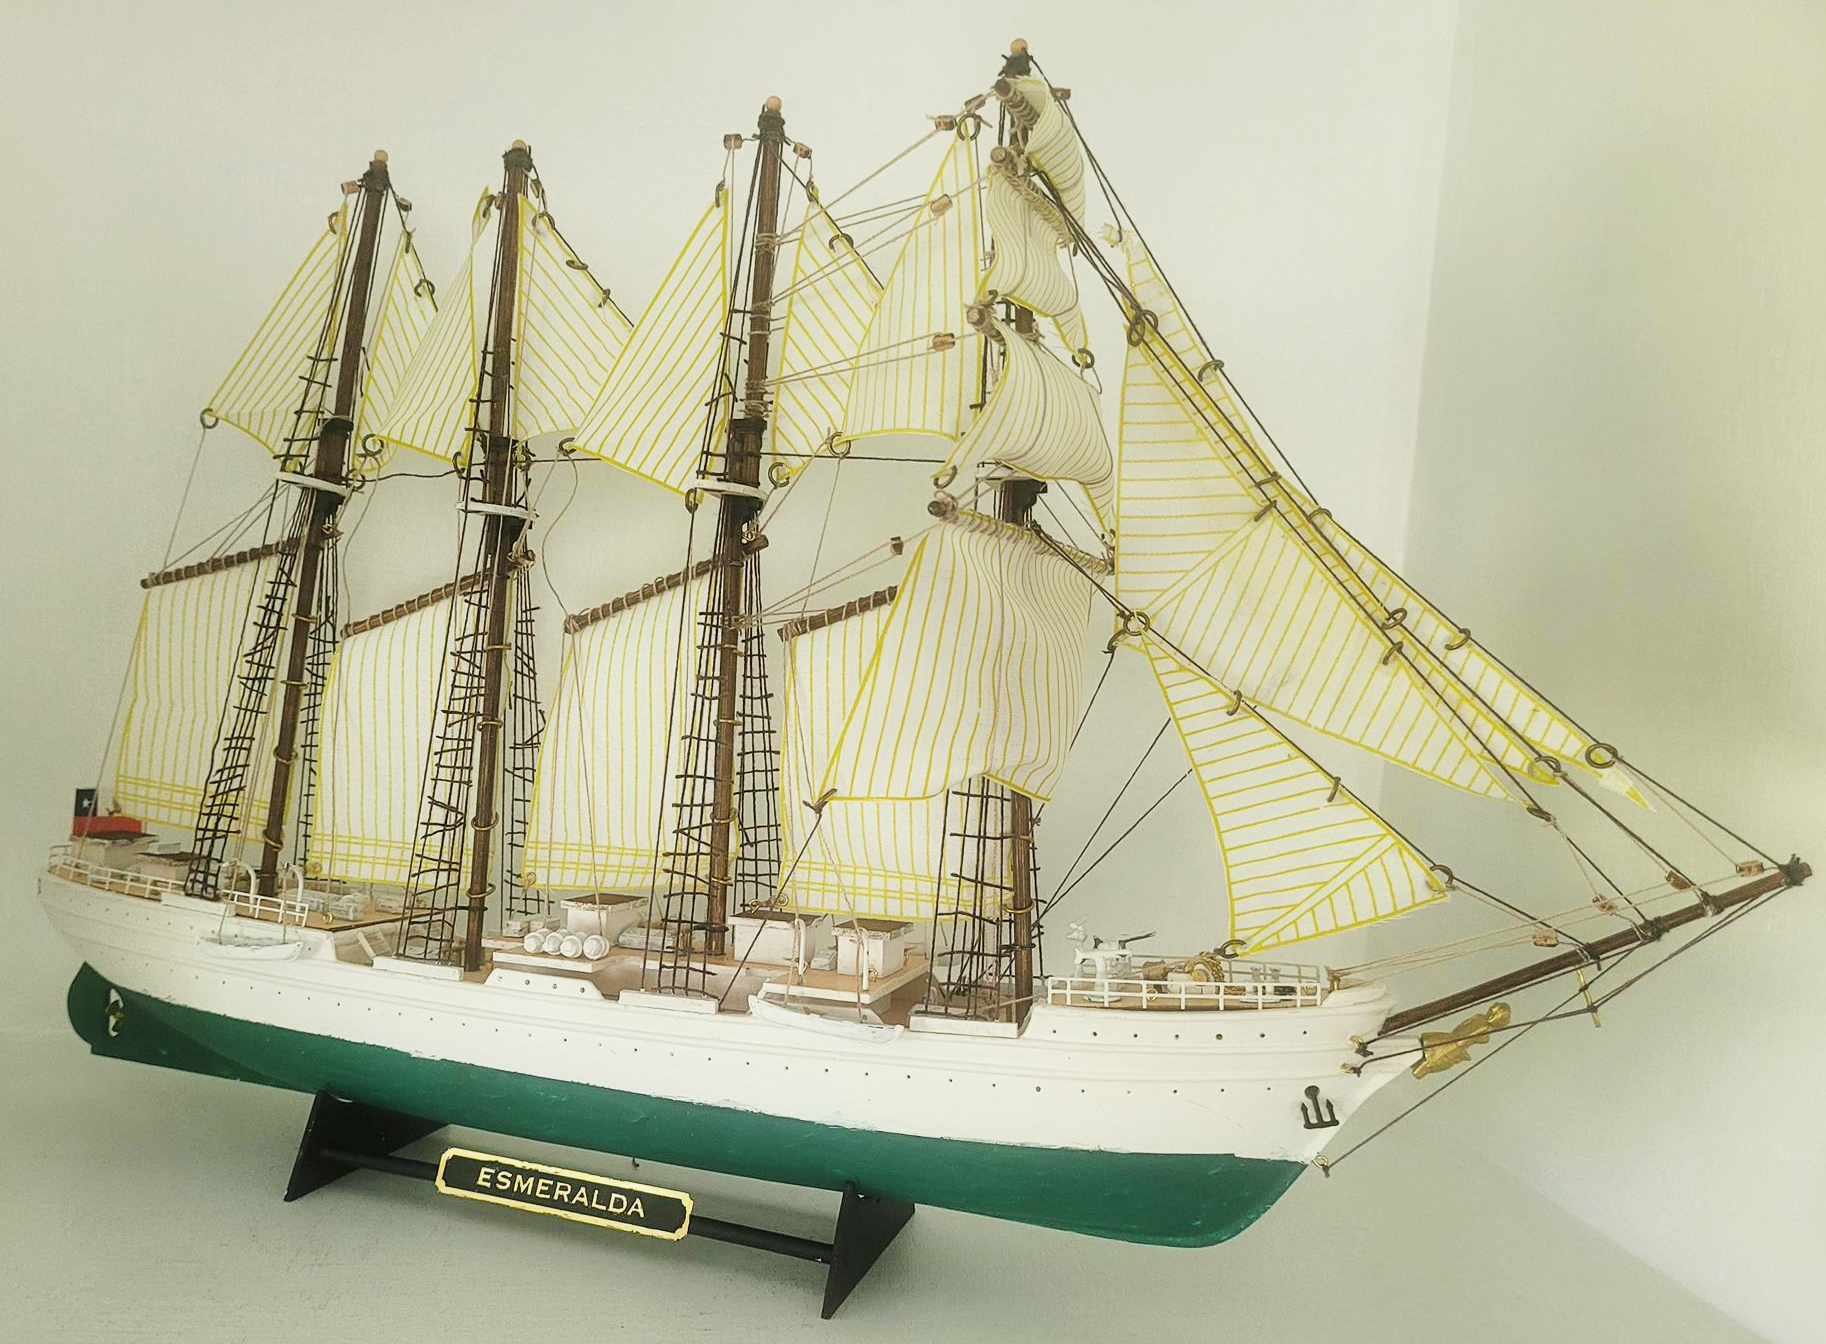
Model Ship Elcano / Esmeralda Built by our modeling friend Girish Khandagale.

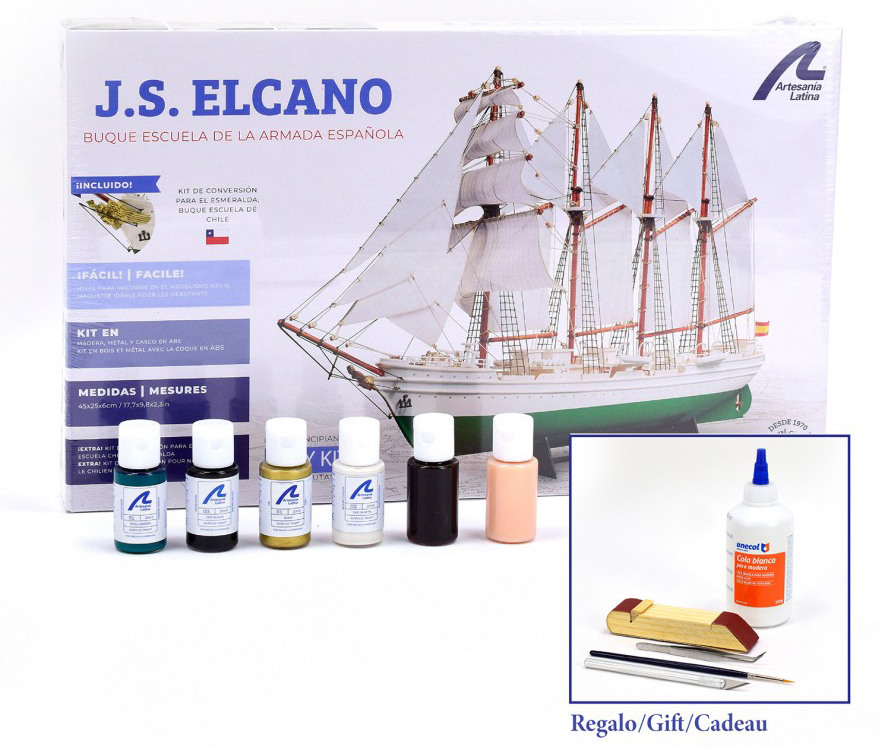
We remind you that you can also purchase the Elcano Gift Pack (22260L), which includes the kit with the schooner sailboat, its paints and some tools. It has a lower price than if the products are purchased separately. Elcano Gift Pack with the Model, its Paints and some Tools (22260L) by Artesanía Latina.
Read the third part of the post…

Posted in Model Building Tips

Build Juan Sebastian Elcano (III): Our Modelers Teach You How to Assemble the Spanish Training Ship

Let’s go with the third part of the post if you want to build Juan Sebastian Elcano model ship with more video tutorials recorded by our modelers during its assembly. The model of the Spanish training ship Juan Sebastian Elcano / Chilean Esmeralda (22260) at 1:250 scale is ideal for your first experience on the naval modeling. Now, we remind you that you can also purchase the Elcano Gift Pack (22260L), which includes the kit with the brigantine schooner sailboat, its paints and some tools. It has a lower price than if the products are purchased separately. That being said… Let’s continue assembling this historic model with a pre-fabricated hull!

Gift Pack with Ship Model, Paints and Tools: Training Ship J.S. Elcano / Esmeralda (22260L) by Artesanía Latina.

BUILD JUAN SEBASTIAN ELCANO: MASTS (PART II – A)

On Step 16, we continue to explain some of the most difficult phases when you are going to build Juan Senastian Elcano model ship: ‘Mats – Part II’. Take the eight PCL parts and one BW1 part -wire- and put them on your work table. Next, cut a small piece of wire (BW1) with a Professional Straight Cutting Pliers (27212). With a hand drill, make a 0.5 mm hole on the upper part of the stick (PCL) and apply our Cyanoacrylate for Porous Materials (27620), for sale separately, where the hole is. Insert the wire into it and bend it 90 degrees. With the help of a Stainless Steel Ruler (27069) and the aforementioned pliers, measure 0.7 mm and cut off the excess as seen on the video. Repeat the process with the remaining PCL parts.

Take the four parts S1 -sails- and arrange them on your workshop. With the help of a sewing needle, use the thread –part CT1– to sew part S1 -sail- to part PCL -mast-. Thread through the corner of the sail and around the stick as well with some Straight Fastening Tweezers (27020) and the previous drill. Continue sewing the sail with the needle and thread along the length of the mast. Knot at the end of the neck, apply cyano and cut the excess thread as shown on the video.

ASSEMBLY ELCANO MODEL SHIP: MASTS (PART II – B)

Well, it’s time for the next task. Look for one BR1 part and four BR2 parts, all rings. With a utility cutter, poke a small hole in the outer corner of the sail. Open part BR1 with two Needle Nose Pliers (27213) and insert the ring through the sail. After inserting it, close it again using the aforementioned pliers. Now, do this whole process again with the four BR2 parts on the opposite horizontal side of the sail -with respect to the placement of the BR1 part-, just as seen on the video. Repeat with the remaining three sails. It should look like this:

Build Juan Sebastian Elcano Model Ship (22260) by Artesanía Latina.

ASSEMBLY ELCANO MODEL SHIP: MASTS (PART II – C)

Once the previous stage to build Juan Sebastian Elcano model ship has been completed, take one of those sails and introduce the mast created on the previous post through the large rings. Then, take the wire of the mast with the sail that you had bent to 90ºand insert it into the hollow part provided for it, below the top. Thus the upper part of the sail remains fixed to the mast. On the lower area of the mast, take an M18 part and insert it. Apply cyano to adhere it and remove excess glue with paper. The final result should be this -repeat the process with the other three sails-:

Build Juan Sebastian Elcano Model Ship (22260) by Artesanía Latina.

Jar of cyano on hand! On the four holes of the deck to place the masts, apply adhesive and insert them. Use the steel rule to calculate the vertical 109 mm and to check the distance between masts. Also, it can help you position the masts while the cyan dries. The end… For now!

Build Juan Sebastian Elcano Model Ship (22260) by Artesanía Latina.

BUILD JUAN SEBASTIAN ELCANO MODEL SHIP: SHROUDS (PART I)

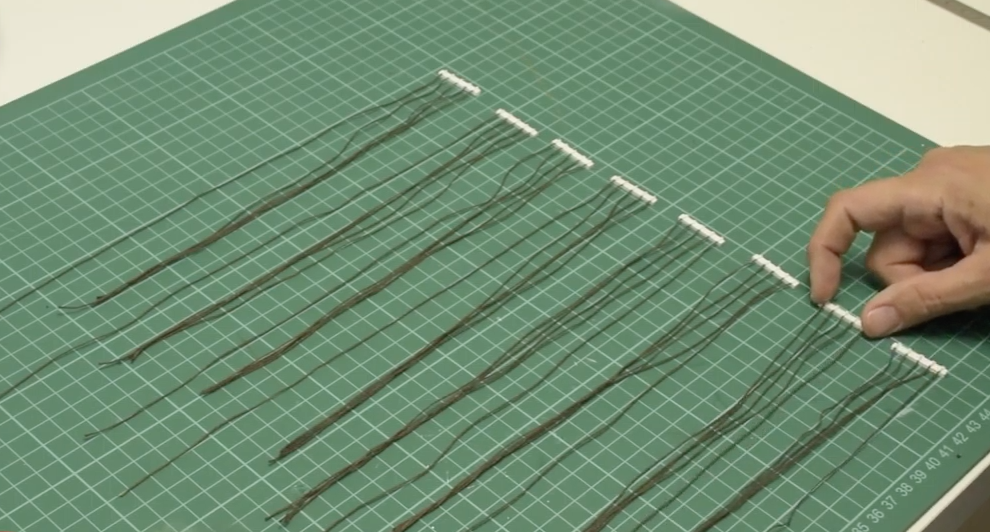
Step 17 when a modeler wants to build Juan Sebastian Elcano Model (22260), the Spanish training ship, talks about the ‘Shrouds’. Extract with a cutter and paint with off-white colour (27702) the eight WS1 parts. Grab one of these. With a pencil and a ruler, mark five equidistant points on the part. Put cyano on the part CT2 of 200 mm and glue it on the first marked point using Straight Fastening Tweezers (27020).

Repeat the process with the other three CT2 parts. On the last position marked with pencil, do the same thing with a 300 mm CT2 part. In total, there should be five threads attached to part WS1. Cut the excess of thread on one side of part WS1 with Thread Snips (27060). and paint off-white the glued part of the five threads with a brush.

Repeat this task again with the other seven WS1 part to get this:

Build Juan Sebastian Elcano Model Ship (22260) by Artesanía Latina.

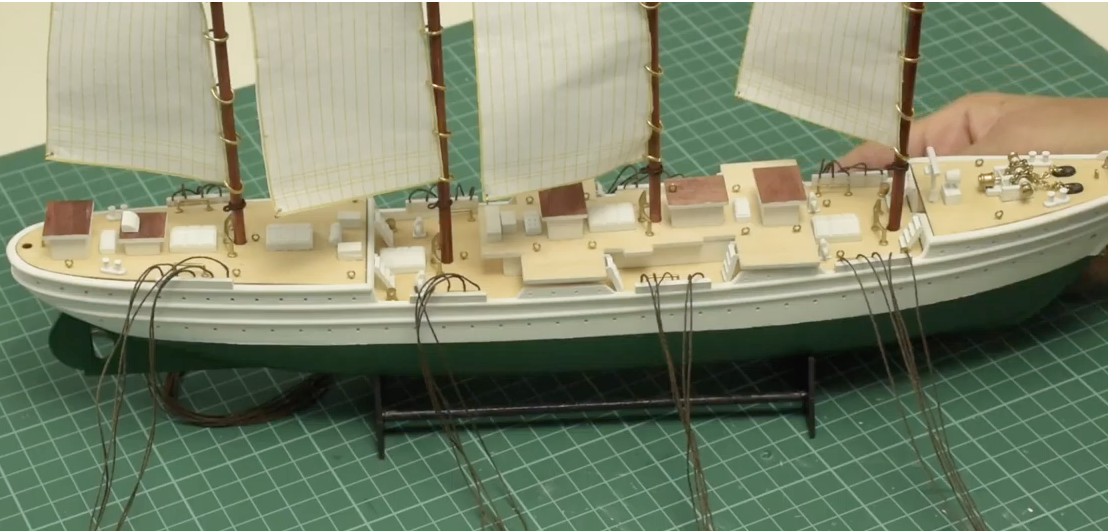
It is time to glue those eight resulting parts. Take one and put cyano on the bottom. Glue the part to the edge of the hull, but be careful. The area where the threads are glued must look at the deck, that is, the part of the threads that are glued must not face the outside of the boat, but the inside. Repeat the process with the other seven parts so that it looks like this:

Build Juan Sebastian Elcano Model Ship (22260) by Artesanía Latina.

BUILD JUAN SEBASTIAN ELCANO MODEL SHIP: SHROUDS (PART II)

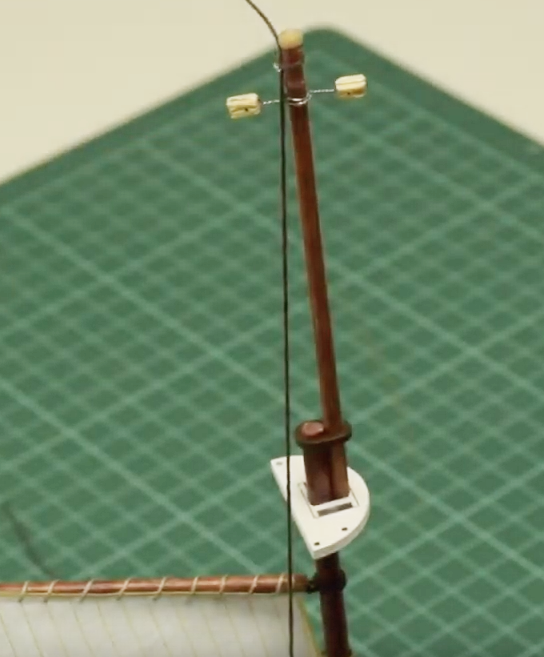
Take the longest thread -300 mm- from each of the parts and tie it around the tip of the nearest mast. Using a flat-grip plier, tie it securely by tying it into a knot and pulling the string so it is tight. Apply ciano to the knot made with the thread at the end of the mast and remove the excess of thread with Thread Snips (27060). Remember to repeat another three times this step on the other three mats.

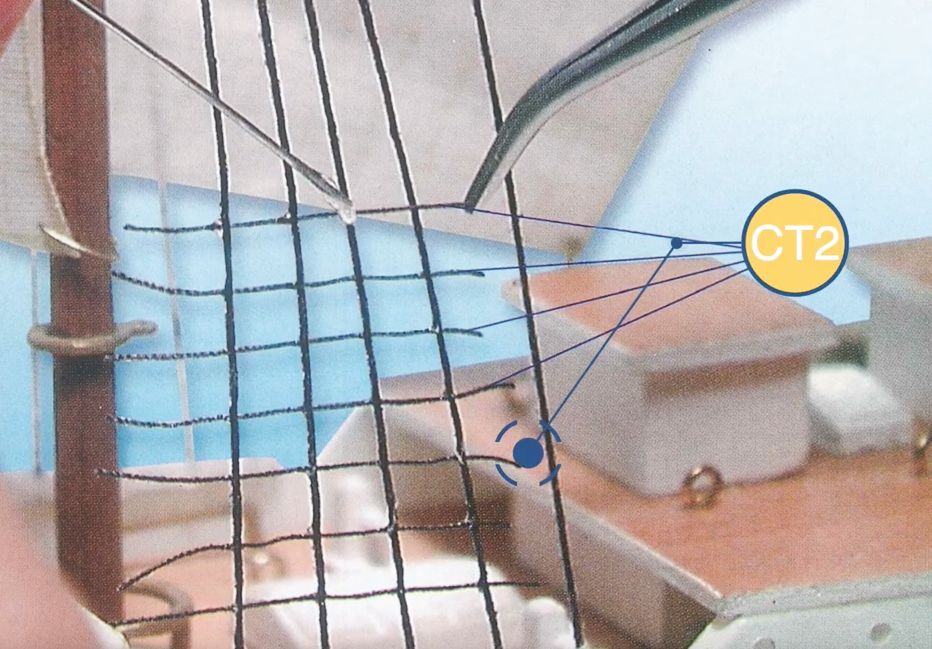
Now do the same with the rest of the short threads -200 mm– but gluing them to the lower/interior part of the four tops. And finally, glue all the CT2 threads perpendicular to the already installed vertical threads. In this way, it will be ongrid mode. To do this, with patience, you must cut the threads with precision according to the height that you adhere them horizontally. And… Wow! Let’s have shrouds.

BUILD JUAN SEBASTIAN ELCANO MODEL SHIP: FIGUREHEAD & BOWSPRIT

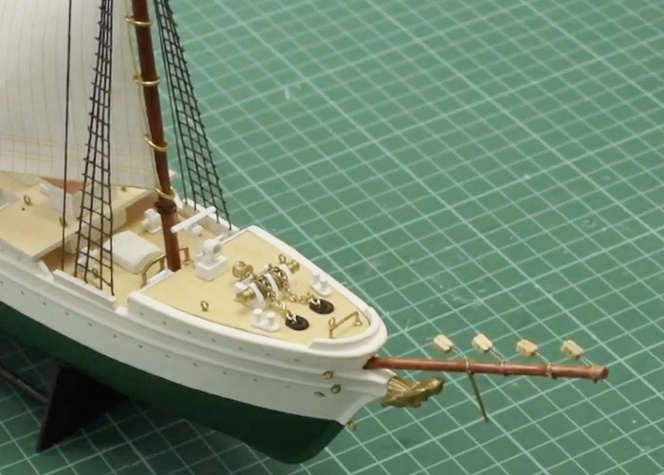
We continue with Step 18 of Build Juan Sebastian Elcano model sailboat (22260). This is about the ‘Figurehead and Bowsprit’. Paint gold colour (27761) the part M19. Apply cyano to the inner bottom of the figurehead and stick it to the tip of the hull’s bow with your hands. Remember that if you want to place the Chilean emblem of the training ship Esmeralda, you must do the same with the part M20.

Then take the BSP part. With a ruler and pencil, mark the half of the part. Mark well with a cutter. With a manual drill and a 1 mm diameter bit, drill on the previously indicated place. Take a BW2 part and cut a 16 mm piece with Professional Straight Cutting Pliers (27212).

Take a BL part and surround the BSP part with your two wires. Help yourself with a Needle Nose Pliers (27213) for turning both ends of the wires around stick, tying the part to it. Get rid of excess wire once knotted to the stick. Repeat this process three more times on the BSP part. From the top point to where the hole is on the center of the stick. It is the turn of the part BW2, apply cyano in the centered hole made before and insert the part BW2.

By hand, fold down all four BL parts, apply cyano to the bottom end of the stick, and glue on the designated area. We already have bowsprit too!

Build Juan Sebastian Elcano Model Ship (22260) by Artesanía Latina.

MINIATURE REPLICA JUAN SEBASTIAN ELCANO SHIP: SAILS (PART I)

The ‘Sails – Part I’ is Step 19 of the video tutorial to build Juan Sebastian Elcano model ship. Take three parts S2, that is, three sails. Repeat the process you did on the ‘Masts – Part II’ section. In this case, the six parts are BR1 -small rings-. Place one part BR1 in one corner of the sail and the other five longitudinally and equidistantly on the other side.

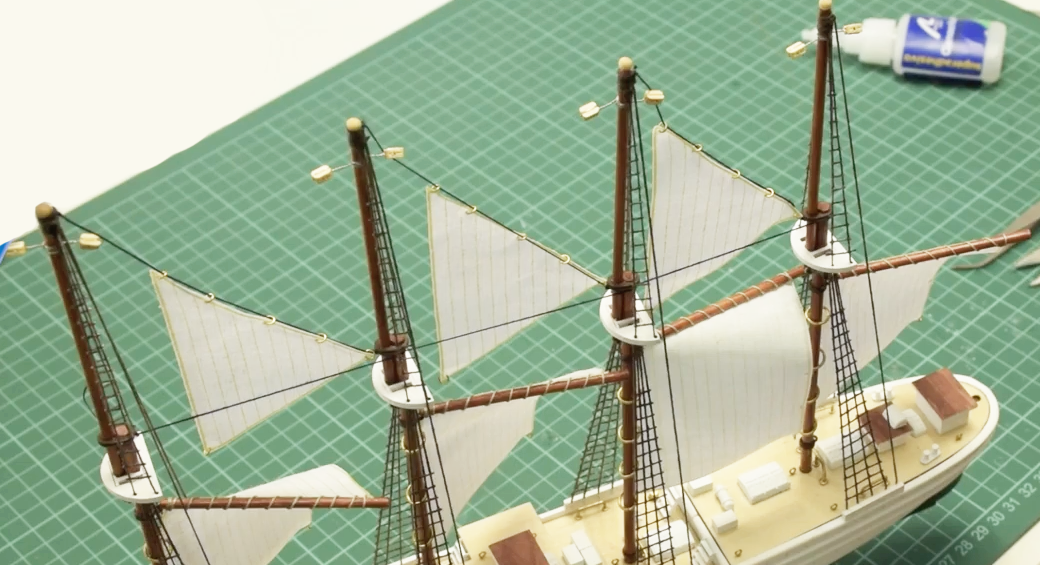
Drill with a 0.75 mm hand drill the 4 masts at the height shown on the video. Pass thread -part CT2– through the five rings of the sail. Tie the sail with its thread to the top of the mast you are working on. Once the knot is done, apply cyano to it. Thread the other end of the sail string through the hole you just made on the next mast. Pull the thread until the thread and the sail is taut. Knot and cyano. Remove the rest of the thread with Thread Snips (27060). Repeat with the other two remaining sails.

Go back to the first sail placed, take more thread -part CT2-. Tie it to the first mast, above the top, at the height of the horizontal peak of the sail. Once tied, take it up to the second mast and knot it at the same height. Now the same thread, bring it closer to the third mast, and lastly to the fourth one. Help yourself to do this with Curved Fastening Tweezers (27021). Finally, put cyano on the fourth neck knot and cut the excess thread with our Thread Snips (27060).

Build Juan Sebastian Elcano Model Ship (22260) by Artesanía Latina.

MINIATURE REPLICA JUAN SEBASTIAN ELCANO SHIP: SAILS (PART II)

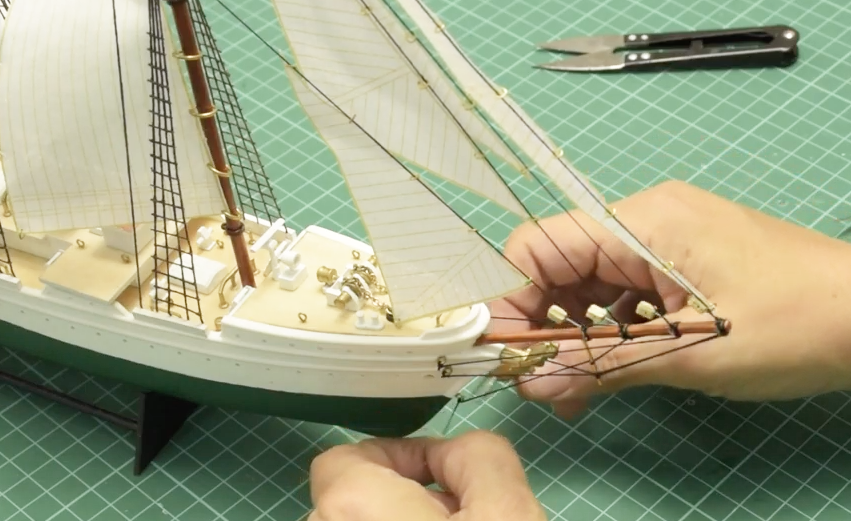
We continue with ‘Sails – Part II’, which is Step 20 of the construction of the model of the famous Spanish school ship (22260). Arrange a unit of parts S3, S4, S5 and S6, that is, sails. Take part S3, put nine rings -part BR1- on the longest side, and one on the corner. Then, take thread -CT2- and tie it at the end of the mast. Pass the line through the nine rings, tighten and knot it and glue it to the nose of the bowsprit previously installed. Repeat the same process with part S4, but with seven rings on the side and one on the corner. Remove excess string from the bowsprit of both sails. And the same with parts S5 and S6.

Next, more thread, this time, tie it to the point of the bowsprit, pass it through the metal -underneath the mast- and by the ring in the middle of the prow of the hull -the second-. Tie it there. Do the same with a second thread: knot it at the height of the rope of the third sail on the bowsprit, passes it through the upper ring and tie it. In all cases, remove the excess thread once tied. Repeat this process on the other side of the boat, so that the thread also enters through those rings. Finally, a third thread that will go through the lower ring on both sides of the bow.

Build Juan Sebastian Elcano Model Ship (22260) by Artesanía Latina.

Read the second part of the post…

Read the fourth and last part of the post…

Posted in Model Building Tips

Elcano Model Set Up (II): Assemble with Our Videos the Faithful Replica in Miniature of the Spanish Training Ship

We are back to show you the second part of Elcano model set up with other video tutorials made by our professional modelers. This faithful 1:250 scale miniature replica of the Spanish training ship Juan Sebastian Elcano / Chilean Esmeralda (22260) is aimed at beginners modelers.

Elcano Model Set Up: Video tutorials. Second part.

ELCANO MODEL SET UP : UPPER DECK

We continue to accompany our modelers friends during Elcano model set up with Step 9, dedicated to the ‘Upper Deck’. Take the parts 5 and MD3 of the deck shown on the image. Next, apply our Cyanoacrylate for Porous Materials (27650), sold separately, around the edge of the top of the part MD3. Take part 5 and paste it on top of the MD3 as shown on the video.

Once the adhesive is dry, take a small flat brush and a jar of White Primer Filler (27701), sold separately. Paint these and carefully, paint the sides of the two joined parts. Drill with a 4 mm hand drill the central area to make a hole.
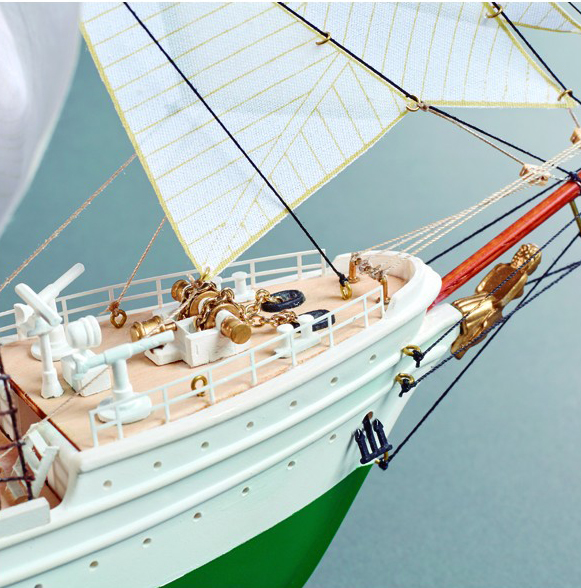
Then, paint all the parts M15 and start cyanoacrylate gluing each of the parts M15 and DM2 with off-white acrylic paint (27702). We remind you that you can purchase the complete Juan Sebastian Elcano Acrylic Paints Set (277PACK17). Once all the parts have been painted, glue them with parts 7, the two previously joined parts as seen on the video. Adhere also, without prior painting, the part M10.

Make eight small holes on the places indicated on the video. Using some Straight Fastening Tweezers (27020), place the eight parts M2. Lastly, cut the lower excess of these parts with a Professional Straight Cutting Pliers (27212). Finally, take another part M2 and put it on the roof of the middle cabin on the upper deck.

ELCANO MODEL SET UP: LIFERAFTS

Step 10 of Elcano model set up, the Spanish brigantine sailing ship, deals with the ‘Liferafts’. Take the part WD1 -4 mm in diameter and 10 mm long- and proceed to sand it down.

Put some cyano on two BR3 parts, which are sort of washers. Insert them into each of the both sides of the part WD1 with the help of a pair of tweezers. Finally, paint the joined part with off-white acrylic paint (27702). The end result is a DM4 part. Repeat the process eleven times.

ELCANO TRAINING SHIP MODEL: DECKS (PART II)

We continue on Step 11 of the Elcano model set up, the Spanish school ship. This is about ‘Decks – Part II -‘. Gather two parts M7, three piarts M2, one part M4, another M5 and one M9. Paint them with color off-white  and stick them with cyan on the places provided for it on the video, specifically, on the foredeck .

Subsequently, take the two parts MBC – 30 mm long – and adhere them as shown. It is time for another collection: the one of two parts M9, two parts M12, two parts M21, one part M3, one part M10, two parts PE2 and two parts M2. Paint them in white and glue them as you have done a few moments ago, but in the consecutive part of the deck.

Again, repeat the process on the central part of the deck with four parts PE2 and two parts M9. Do the same on the fourth part of the deck with two parts M12, two parts M9, one part M2, one M3, another M10, two parts PE2 and two parts M21.

On the stern deck, do it with seven parts M2, two parts M7, another two M9 and two parts 7. To which you must add, two parts M3, another part M2, one M10, one M15, one M16, a part DM1, another DM2 and a last DM4. See on the video the beautiful final result of the placement of all the details.

JUAN SEBASTIAN ELCANO MODEL SHIP ASSEMBLY: BOW

The ‘Bow’ is Step 12 of the video tutorial for the assembly of Elcano trainingship. Take a drill of 0,75 mm and drill it five times on the forward hull, where our professional modeler indicates.

Using pliers, hold the eyebolts (parts M2) to be attached and apply a bit of cyanoacrylate at each one before inserting them into position horizontal in the holes.

ELCANO MODEL SHIP SET UP: TOPS

We continue on ‘Tops’, which is Step 13 of the assembly of the reduced model of the famous Spanish school ship Juan Sebastian Elcano (22260). Lay out one part 13 and one part WD1. With a file, sand the inner center area of part 13 as seen on the video until you can insert part WD1 through it. Take the part WD1 and paint with off-white and a flat brush the part 13 -use a pair of tweezers to hold the part while you do it-.

Next, remove the eight part 12 from your plank of wood. Sand the sides of all the parts before painting them burnt umber colour (27743). Let them dry.

ELCANO MODEL SET UP: BLOCKS

Let’s go with the video tutorial of Step 14, in which we will work on the ‘Blocks’. Using a scalpel cutter, remove all twenty-four parts BL from your wooden plate. Sand them on all sides, emphasizing the central part with relief.

Take a manual drill with a 0.75 mm bit and drill through the part BL from one end to the other. Repeat the process with the remaining twenty-three blocks.

ELCANO MODEL SET UP: MASTS (PART I – A)

Step 15 of the video tutorials in which our modelers teach the assembly of the model of Elcano / Esmeralda boat refers to ‘Masts – Part I’. Take two parts WD1, which have a diameter of 4 mm and five parts WD2, which are 3 mm.

You must cut and take four parts MA1 -diameter 4 mm and length 149 mm-, four parts MA2 -diameter 3 mm and length 91 mm-, eight parts PCL -diameter 3 mm and length 63 mm- and a part BSP -diameter 3 mm and length 90 mm-. Repeat the process with a part Y1 -diameter 3 mm and length 105 mm-, a Y2 -3 and 93 mm-, a Y3 -3 and 72 mm- and a Y4 -3 and 61 mm-. Varnish all the mentioned parts with water-based stain for sapele wood (27690-20), included in the indicated Juan Sebastián Elcano Acrylic Paints Set (277PACK17).

Then, cut a part of wire (SW part) with the Professional Flat-Cutting Pliers (27212), give it a U-shape and insert a block (part BL) into it through the hole made before. Surround the block with the wire through the slit, turn it until it is fixed with a Professional Needle Nose Pliers (27213). Do the same with another three blocks.

JUAN SEBASTIÁN ELCANO MASTS (PART I – B)

Take a part MA1 and a part 13 -before worked- and introduce the 13 through the hole from the middle of the MA1. Apply cyan near the end of the stick, and lay part 13 on top until dry, 15mm from the end of the stick. Use our Stainless Steel Rule 15 cms (27069) for it. Put, again, cyano, but this time on the final part of the mast and join a part 14 to it -previously painted-, put it on the tip of the mast.

After drying, insert a part MA2 through the other hole on part 14. Apply cyano so that it sticks to the part MA1 and to part 13 as seen on the video. Also put adhesive on part 12 and attach it to part 13. Repeat this last step with another part 12. Now, insert the part M18 -previously painted- through the lower part of the mast, calculate with the 15 mm rule, put cyano on the mast and glue it there. Drill a hole with a 0.75 mm hand drill on the mast, glue an M2 part -eyebolt- and insert it into the hole with the help of pliers.

ELCANO MODEL SET UP: MASTS (PART I – C)

Next, take a part BL -block with wire- and wind the wire with your hands and the flat-grip pliers to the top of the mast. Cut the excess wire. Repeat the process with another, placing it at the same height. Put glue on the two wires attached to the pole so that the blocks do not move. It is time for the part WB. Attach it to the top of the mast, above the two blocks. The modeler must do this task again until four masts are finished.

On the next post, we will continue showing our modelers friends how to continue building the model in wood and plastic of the Spanish training ship Juan Sebastian Elcano (22260). In the meantime, start building it now with us!

Elcano Model Set Up. Model Ship Kit Spanish Training Ship (22260).

Read the first part of the post…

Read the third part of the post…

Posted in Model Building Tips

Elcano Model Ship Assembly (I): Build with Us the Spanish Training Ship Model for Beginners

We are going to teach our modelers friends the assembly of the model ship Juan Sebastián Elcano (22260), the Spanish training ship that It is named after the browser that went around the world for the first time. Without forgetting Francisco de Magallanes, of course. We have decided that the best way to help the beginners modelers to assemble this faithful miniature replica is through video tutorials created by us. Thus, we accompany them during the construction process of this 1:250 scale model in wood and plastic, which can also be the Chilean training ship, Esmeralda. Decorate it however you like.

Elcano Model Ship Assembly: Spanish Training Ship Juan Sebastián Elcano 1:250 (22260) by Artesanía Latina.

So, we begin the process of Elcano model ship assembly with the first thing to do when you have any naval modeling kit on your hands. Check its contents using the parts list. Normally, we include a few more parts than stipulated in case the modeler suffers a mishap with one during assembly. A part breaks, it is lost, the dog eats it, it inherits from a relative or, for example, the house floods. There are many reasons that we read from our loyal customers for more than fifty years. Pay attention to the video below.

We recommend that you specify if all the parts are inside the box. In the event that this model is missing something, which we do not believe is the case, do not hesitate to contact us to request it here: Spare Parts Service.

LET’S BUILD TOGETHER THE FIRST THING: EXHIBITION BASE

Now, let’s get down to business with Step 1 of the video tutorial. Let’s build the ‘Exhibition Base’ in wood to display the naval model of Juan Sebastián Elcano once assembled. By the way, when you finish it it will be 17.91” (455 mm) length, 10.03” (255 mm) height and 4.33” (110 mm) width. Take two 150mm length wooden round dowels (WD1) and remove the two base pieces (4) from the wooden plank.

Next, apply our cyanoacrylate for porous materials (27650), sold separately, on one end of the dowel. Insert it into one of the two holes on one of the sides that make up the base. So that everything is balanced, we recommend that you use our Micro Square, present in Micro Rules Set (27325), which is also sold separately. Repeat the process with the other dowel, inserting it into the other hole in the same base piece. All that remains is to apply adhesive to the other two ends of the round dowels and place the other part of the base into the two small holes. Make sure everything is straight and stable.
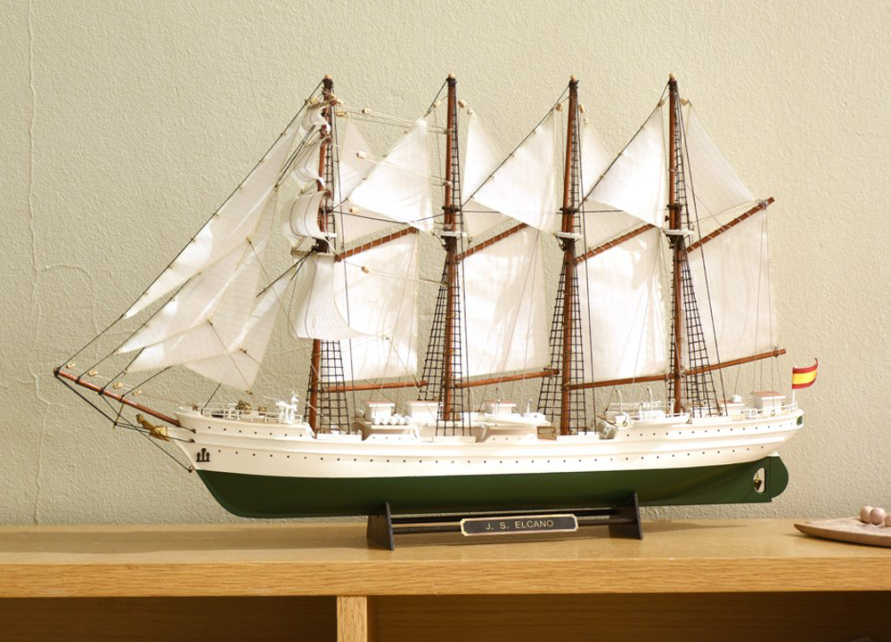
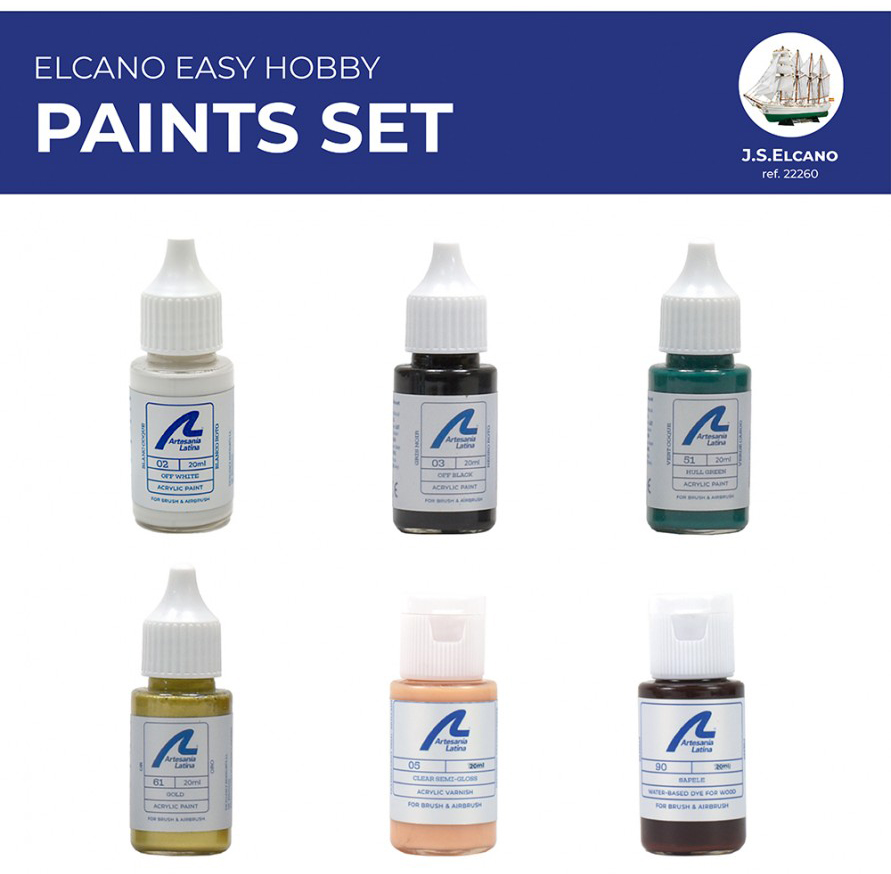
Let it dry for a few minutes to give it… The final touch! Paint it with brush. With what paints? You wonder. No problem. Artesanía Latina has created a Specific Acrylic Paints Pack (277PACK17) for the scale model of Juan Sebastián Elcano / Esmeralda. Add them to your shopping cart!

Elcano Model Ship Assembly: Paints Set for School Boat Model Juan Sebastian Elcano (277PACK17) by Artesanía Latina.

THE HULL OF JUAN SEBASTIÁN ELCANO

Step 2 of assembly of the model ship Elcano passes through its prefabricated ‘Hull’ made of plastic. We intend to make the initiation to this wonderful hobby of any modeler easier. Removed the headaches of building a hull out of wooden parts. For all these reasons, it is ideal for people who wish to assemble their first scale naval reproduction. Take the two parts that make up the hull and put cyanoacrylate on all the edges and lace areas of one of the parts of the helmet, so that none remain without glue. Carefully join them with precision and light pressure so that there is a single piece. The hull is already assembled!

Use a brush to apply a layer of white filler primer (27701) to make everything even, sold separately. The next task is to draw the waterline on the hull. On the video we show an artisan way of drawing it, however… We have another magnificent solution! Our new Waterline Marker (27649), do not hesitate to purchase it for your naval modeling workstation (27648).
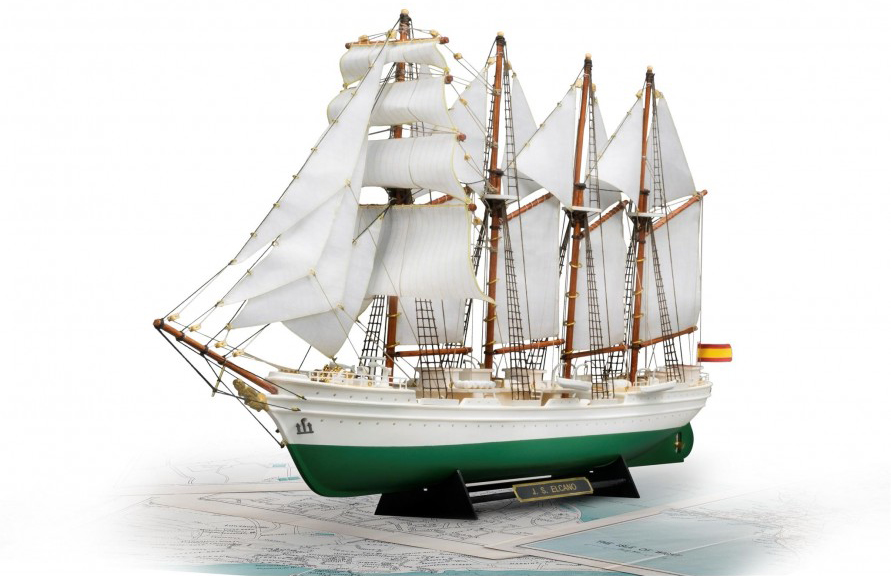
It’s time to finish the hull. Paste japanese masking tape above the waterline drawn in order to paint the lower part of the hull, which remains submerged. Take the little jar of hull green paint and paint it with a brush, as we did, or with airbrush, however you like. Let it dry and after a few hours apply a second layer. Finally, remove the tape carefully and with a cutter remove any excess paint.

ELCANO MODEL SHIP ASSEMBLY: DECKS (FIRST PART)

From now on we are immersed in Step 3 of the assembly of the model of the ship that bears the name of the famous Juan Sebastián Elcano, the beautiful brigantine schooner sailboat. Touch the first part of their ‘Decks’. Take the parts 1, 2 and 3 of the deck that appear in the image. With the help of a pencil and a Micro Center Ruler (27326), mark and make a small hole with a drill 0.75 mm diameter in each of the points indicated on the video. Continue using a brush to paint the three parts with satin varnish, included in the paint pack.

Take part 2 of the deck and paint the two M1 elliptical parts with off black paint. Let dry and with some straight fastening tweezers (27020) apply cyano to each of the ellipticals and carefully adhere around each one of the two large holes. Use a rounded file to enlarge the two holes on which you have glued the parts. Remove the remains of sawdust and dust. Another stage of construction finished together!

ELCANO SHIP MODEL ASSEMBLY: DECK PLACEMENT

In Step 4 of the assembly of the model ship Juan Sebastián Elcano, let’s quickly see the ‘Deck Placement’ with which we have just worked. Take the three parts that make it up. Apply around the contour of part 1 -the one that goes in the center- cyanoacrylate and fix this by pressing it carefully. Then, do the same with part 2, the foredeck to which you have glued the two elliptical pieces, and with part 3, the stern.

Finally, take all the M2 parts from the kit, that is, the golden eyebolts. Put cyanoacrylate in each of these and insert them with a tweezers into each of the small custom-made holes on the deck you made on the previous step.

BUILD THE CABINS OF ELCANO MODEL SHIP

Step 5 of the assembly of the model of the Spanish training ship Juan Sebastián Elcano / Chilean Esmeralda refers to the construction of the ‘Cabins’. Place the part MD1 and the 4 units of the part MD2 on your work table, which by the way you can protect with any of our cutting mats. Paint all these parts with off white paint, leaving one side of each of these unpainted in order to for the adhesive to work. Then, remove from the plate one part 8 and 4 units of part 6. Apply cyano to the unpainted side of each part. Take part 8 and glue it on top of MD1, repeat the process with the 4 units of part 6 over the many others of the MD2.

Once glued, paint with off white the part of the 5 units that has adhered, since it was unpainted. Wait for it to dry. To finish, paint with sapele water-based wood stain the top of each cabin, which you previously glued and painted white. We remind you that all the paints, stains and varnishes that we use can be found in the Juan Sebastián Elcano Acrylic Paints Set (277PACK17), for sale separately.
JUAN SEBASTIÁN ELCANO DECK ELEMENTS

Using a cutter, extract the 10 units of part 7. We are on the video tutorial, Step 6, which deals with the ‘Deck Elements’. For now, easy for any fan who wants to get started in naval modeling, right? Let’s continue… Take two of those parts, and glue them together with cyano. Repeat the process with the rest of parts until, after gluing them, you are left with 5 units of part 7. Now, collect the following parts and arrange them on your work table. 5 units of the part M3, 1 unit of the part M4, 1 unit of the part M5, 8 units of the part M6, 4 units of the part M7, 2 units of the part M8 and 8 units of the part WS1 25 mm, in addition to the 5 units of part 7 that you already had.

Take those parts and glue them with a tiny dot of adhesive to a part of wood -so you don’t stain your work surface- and paint them off white. Proceed in the same way but with gold-colored paint with the 9 units of the part M9, the 4 units of the part M10, the unit of the part M11 and the 6 units of the part M12.

ELCANO MODEL SHIP ASSEMBLY: CAPSTAN

We focus on the ‘Capstan’, Step 7 for the assembly of the Elcano ship model made by Artesanía Latina. Remove from the kit the 2 units of part 9 and parts 10, 11 and PE1. Glue all of them with cyanoacrylate in the way shown on the video, pay attention to it. Use a brush to paint the glued part with off white color. Right after, do the same with gold color to paint the 2 units of the part M12, the unit of the part M13 and the 2 units of the part M14.

Once all the parts are dry, start gluing the metallic gold ones onto the white wooden part with some tweezers, stick to how it is done in the tutorial. Be patient with this step as precision and calm are required.

BUILD THE STAIRS OF ELCANO MODEL SHIP

We momentarily conclude this post for the assembly of the model of the Elcano ship with Step 8, ‘Stairs’. Get the part PE2 (6 units). With a Professional Needle Nose Pliers (27213) proceed to bender perpendicularly and very carefully the internal rungs. Also, bend the handrails -the sides of the part- inwards until there is a noticeable stair shape. Paint the staircase off white. Repeat the process 5 more times.

In the next post we will continue building together this magnificent model for beginners of the Spanish training ship Juan Sebastián Elcano (22260). Meanwhile, you can read more about this model in its specific blog post, watch its presentation on the video below and order it to assemble it now because it cannot be expected before so much desire. Start building it!

Read the second part of this post…

Posted in Model Building Tips

Mississippi Model Set Up (II): Video Tutorials to Assemble the Wooden Paddle Steamer

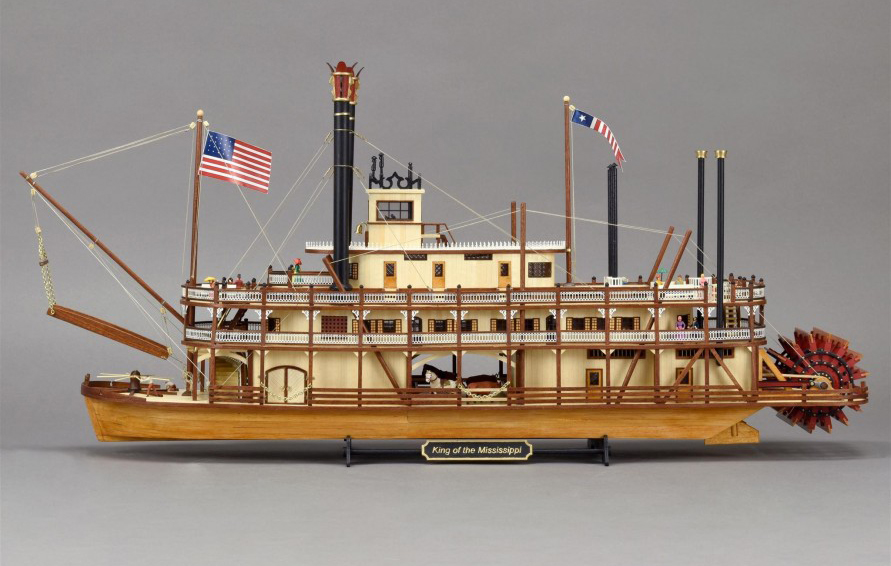
We continue with the ‘Model Building Tips’ section and with the second part of the video tutorials for the set up of the King of the Mississippi model (20515). The wooden naval modeling kit of the paddle steamer at 1:80 scale represents a faithful replica of the original model. The assembly of this classic North American wooden boat from the 19th century is aimed at modelers with an intermediate level of skills on naval modeling.

Mississippi Model Set Up (II) by Artesania Latina (20515). The perfect paddle steamer model kit.

On this post, first, our team of modelers will show you how to assemble the columns and the railings of the second deck. Second, how to work the windows and the doors. Then, how to handle and place the high-quality photo-etched decoration parts. Next, we will show you how to make the capstan base. And finally, our modelers friends will know how to decorate the chimneys of the steamboat. These videos are a great help during the construction of the King of the Mississippi model. Especially the most difficult parts. Go for it!

MISSISSIPPI MODEL SET UP: SECOND DECK COLUMNS AND RAILINGS

We pick up the video where we left off a week ago, when we built the columns and railings of the first deck. On this occasion, we turn to the existing ones on the second deck of the American paddle steamer scale model. This explanation corresponds to Section 14 of the digital instructions. We remind you that you can download them for free in the same product file of the King of the Mississippi.

Apply cyanoacrylate (27650) on one of the wooden columns of the railing. With the help of a reduced size square or bevel (27325), manipulate it until it is completely straight on the second cover, nothing crooked. Repeat the process with the remaining columns -four more- as shown on the video, placing them on the place provided for it. Obviously, before gluing them, they must already be varnished.

Next, we take the curved wooden base of the railing, apply cyanoacrylate to it and adhere it to the front space between the two columns. Help yourself with some straight tweezers (27204) for this whole process. Remember, beforehand, do not varnish the part where you are going to put the glue. Once your photo-etched railing is painted, add a few small drops of cyan to different spots on its underside. Using the same tweezers, carefully place it between the two columns. On top of this, take the wooden upper part, the handrail with the tweezers, paint it with cyan too and fix it to the upper part of the railing. Do the same process with the other curved railing and with the two straight sides. The result should be this:

Mississippi Model Set Up (II) by Artesania Latina (20515). The perfect paddle steamer model kit.

WINDOWS AND DOORS ASSEMBLY SECOND DECK OF KING OF THE MISSISSIPPI

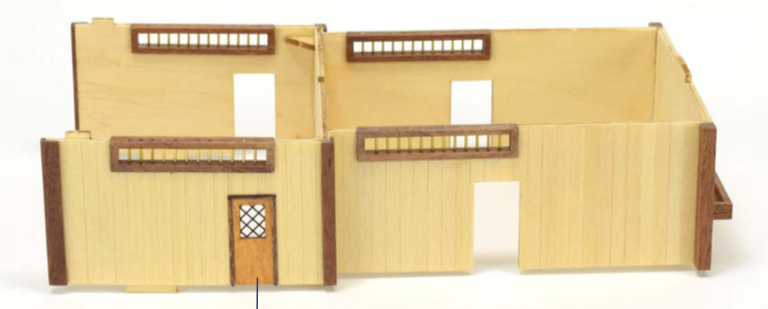
On this seventh video, another of the important processes for King of the Mississippi (20515) model set up. Specifically, the assembly of the windows and doors of all the rooms on the second deck. On the digital instructions, steps between 13 and 24 of Section 15.

Take a pointed needle nose pliers (27213). Fold the tabs of the photo-etched parts of the windows and doors. Paint them with brush and with acrylic water-based paint burnt umber color (27743). Help yourself to grab the part of nails with precision straight pliers (27204). With these, go placing each of the windows and doors. Gently press with your hands to make the lashes fit. Apply cyan to the back of the window and door for a stronger hold.

Work the photo-etched parts from the doors of the windows. Paint them with buff acrylic paint (27740). Use the aforementioned tweezers to make the task easier. With a brush very fine size 000 (17200C), burnt shadow paint, draw the grids on the front. Apply cyan to the back, where you haven’t painted, and using precision straight pliers, glue them to each of the sides of the window. Repeat the process with all the rest. Once they are in place, paint all the interior frames of windows and doors with a brush and burnt umber paint.

Finally, take the different acetate parts -there are six- and check that the size is correct. Put cyan on the wood, on the wall inside of the rooms, and glue the acetates with the tweezers and hands. To put the acetates on the curved parts of the bow and stern, use in this case a curved tweezers (27021).

It should look like this:

Mississippi Model Set Up (II) by Artesania Latina (20515). The perfect paddle steamer model kit.

MISSISSIPPI MODEL SET UP: PHOTO-ETCHED DECORATIONS

We continue with the following video tutorial for the construction of the model King of the Mississippi (20515): photoen-etched decorations of the fourth deck. These steps appear on Section 21 of the digital instructions.

Paint them with a flat brush and off-white water-based acrylic paint (27702). Once dry, glue them with cyan and the help of your own hands on the wooden plank of the fourth deck -where the coffer goes-. Before joining one part to another and adding cyan to adhere them, file with a mini diamond file (27015-3) a little the extremes that will be fixed with the others. Repeat this action. When you have to put the last part, if you have left over because it is too long, mark with a pencil where you should cut it. Cut it with a cutting pliers (27211), file and glue carefully. Put cyano on all the balustrade supports and remove the excess with the point of a scalpel cutter (27019). Now, paint all the joints of the different parts with off-white color.

Apply cyano all over the edge of the deck wood plank where you are going to glue the wooden parts on the lower part of the balustrade. Take that base part in wood, previously painted, and glue it under the already placed photoengraving. Repeat the process with the other parts.

Once it is finished, it should be like this:

CAPSTAN BASE OF KING OF THE MISSISSIPPI MODEL SHIP

The ninth tip that we show you for the set up of the wooden model of the paddle steamer King of the Mississippi (20515) is the building of the capstan base. Steps 1-4 of Section 29 on the digital instructions. Let’s continue with this classic jewel of the ship modeling that It reminds us of literary characters like Tom Sawyer and Huckleberry Finn, by Mark Twain.

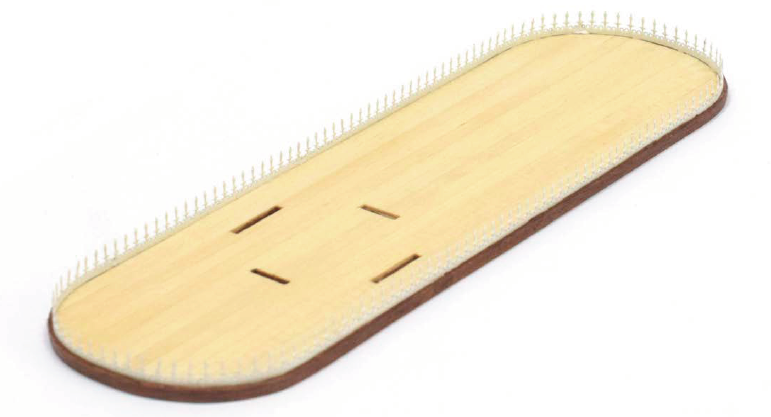
Take the parts and paint them with a flat brush and off-black acrylic paint (27703). Use some precision straight tweezers (27204) to hold parts while painting. Glue a strip -previously painted- completely centered on the cover. Use a small centering ruler (27326) to make sure it sits perfectly straight in position. Next is the small star-shaped base part of the capstain. When it comes to gluing the four ribbons on cross shape and the rest on the shape of a star, also use an tiny square (27325). This way everything will be uniform. Continue repeating the process as seen on the video tutorial. Lastly, paint the edges of the star-shaped base part of the capstan with off-white.

When the modeller have done the task, it should look like this:

Mississippi Model Set Up (II) by Artesania Latina (20515). The perfect paddle steamer model kit.

MISSISSIPPI MODEL SET UP: DECORATION OF CHIMNEYS

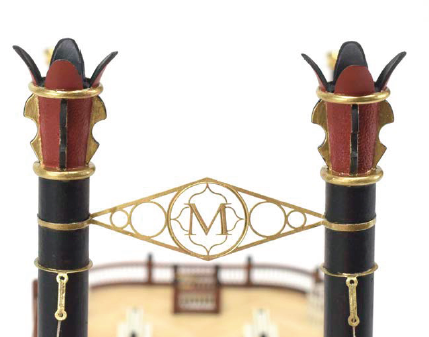
The tenth and last video tutorial refers to the decoration of chimneys. Steps 15 and 16 of Section 33 on the digital instructions for the set up of the magnificent wooden model of the King of the Mississippi, at scale 1/80 (20515).

Fold the photo-etched part look like some poles with the help of a flat-pointed grip pliers (27213). Give it a round shape, for example, using the handle of the scalpel cutter and your own hands. Using some curved fastening tweezers (27021), insert it into each of the two chimneys through the ‘rings’ half-closed you just created. Glue the part with cyanoacrylate so that it is completely fixed by pouring it on the inside of the aforementioned rings.

The end result should be similar to this:

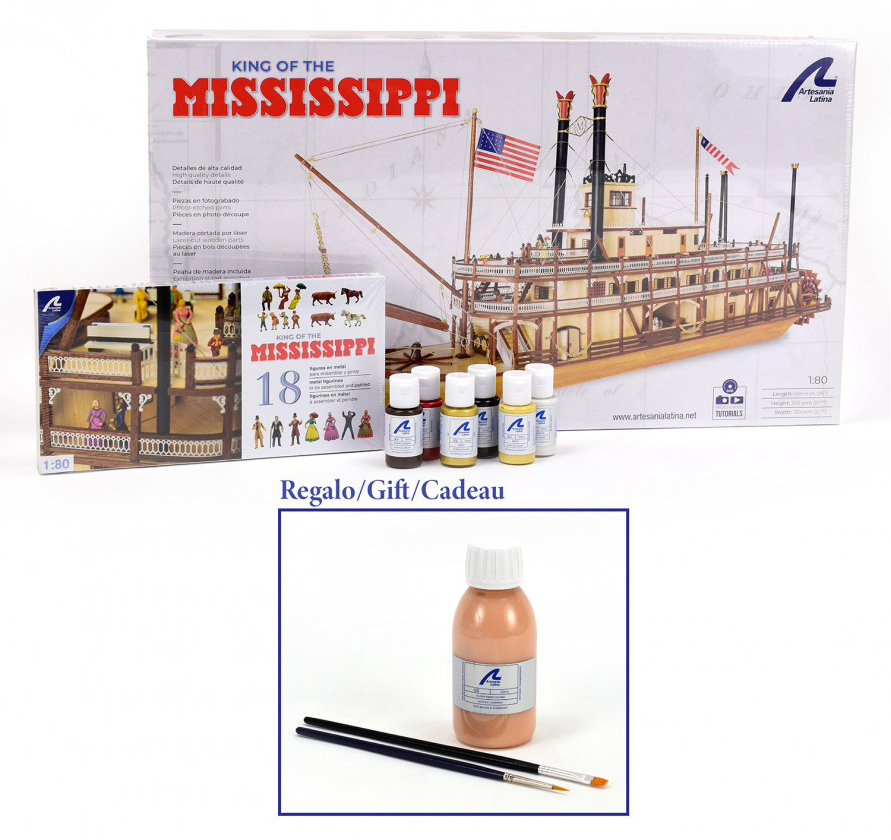
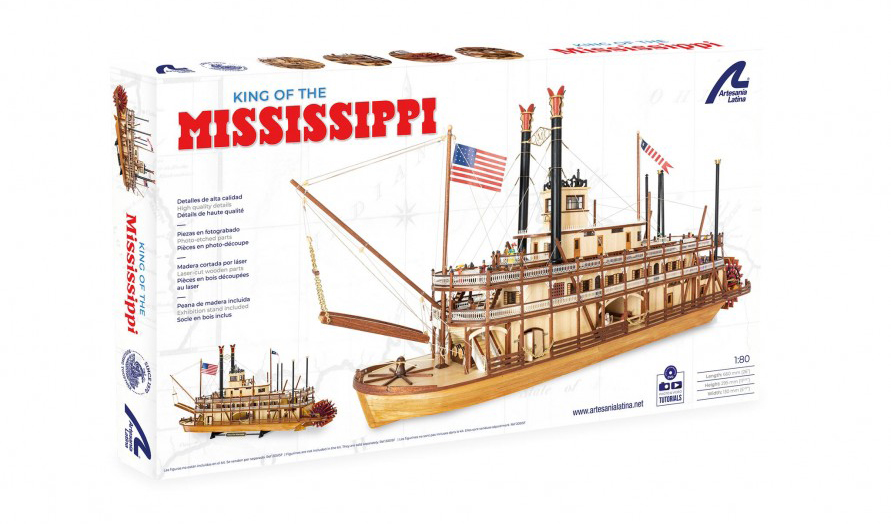
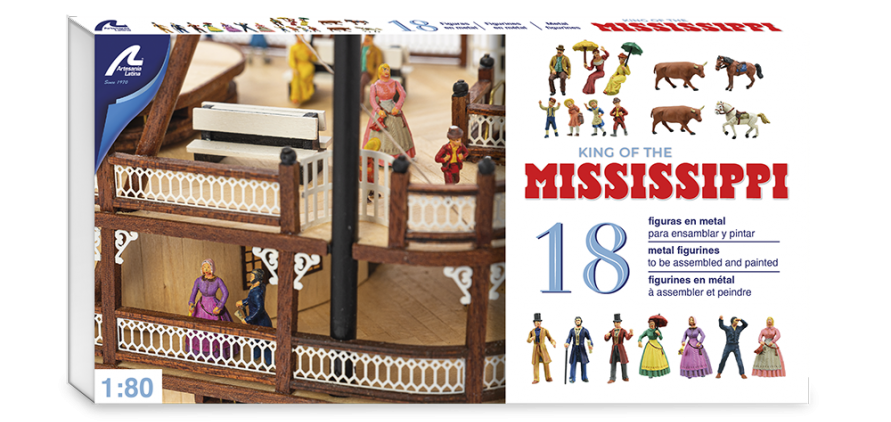
We hope that these video tutorials that guide the modeler through some of the most precise or difficult parts of the assembly will help. Do not forget that you have, for sale separately, a King of the Mississippi Set of 18 Metal Figures (20515F) that will give life to your paddle steamer model. Likewise, you can also acquire the Specific Acrylic Paints Set (277PACK6) for this model, and forget about having to look for them.

Set of 18 Metal Figurines: King of the Mississippi (20515F).

Paints Set for Ship Model: Steamboat King of the Mississippi (277PACK6).

Finally, if you want to have everything your modeling kit needs, treat yourself or surprise a loved one who loves naval modeling with the King of the Mississippi Gift Pack (20515L), which includes the model, the figures, the paints and some tools.

Gift Pack with Ship Model, Figurines, Paints and Tools: King of the Mississippi (20515L).

Read the first part of the post…

Posted in Model Building Tips

Mississippi Ship Model Assembly (I): Audiovisual Guide to Build the Miniature Replica of the Wooden Paddle Steamer

The building process of ship and aircraft models is one of the fundamental actions of modeling in general, and of the naval modeling specifically. That is why, for our scale models, Artesania Latina team of modelers and designers record, create and edit demonstration videos during their construction. The objective? Facilitate our client friends the Mississippi ship model assembly, as is the case that concerns us on this post. Thus, they can clearly see different particular work moments in which expert help never hurts. So today we propose some tricks so that your faithful miniature replica of the King of the Mississippi paddle steamer, at 1/80 scale, is perfectly finished through our video tutorials.

Mississippi Ship Model Assembly by Artesania Latina (20515).

MISSISSIPPI SHIP MODEL ASSEMBLY: BOAT FRAMES AND DOORS

On this first video of the assembly of the Mississippi model, we focus on the frames and doors of the North American steamboat. We teach how to varnish and how to glue these elements. Steps 43 to 47 of section 5 On the digital instructions. Take a look!

Using a flat brush and a vise grip, paint the door with satin oak stain. Next, with a round brush and sapele dye, the door frames. If any of the frame pieces are a bit large, sand them down with our sanding block. Next, apply cyanoacrylate to each of the frame pieces and glue them together using the pliers. Press a little with your hands to fix them better.

Now check that the door fits through the frame. Take the metal trim part from the door window with the pliers, and paint it with a burnt shadow paint. Stick it to the door and then the acetate part -the transparent window- on top. Apply cyan to all three sides of the door and adhere it to the model ship. With this we finish the explanation of the first video of the Mississippi ship model assembly of Artesania Latina. From the most beautiful and highest quality faithful miniature replica of the paddle steamer.

Mississippi Ship Model Assembly by Artesania Latina (20515).

Our modeler has used the following tools and finishing products for modeling:

MISSISSIPPI SHIP MODEL ASSEMBLY: DECK PLANKING

The second video of help for the Mississippi ship model assembly at 1/80 scale refers to the lining of the deck, we mean, deck planking. Steps from section 7 of the instructions.

Take the wooden plank and a ruler. Place the ruler right in the middle of it, and with a pencil mark the center lengthwise. Next, in the center of the sheet, place a protractor and mark where the 45º are on each side of it. Next, use a pencil and a smaller ruler to draw the straight lines of those angles: a kind of elongated ‘M’ will be drawn. Continue with the process as shown on the video until you have drawn all the lines.

Stick with cyanoacrylate the small strips with that M shape along and across the sheet. Make a round hole for the mast with a utility knife in the area where the battens have covered it and sand with a small file to remove burrs. Turn the iron over, holes and internal tabs that have been covered, open them. Cut all the outer excess of the sheet and pass the sanding block along all the sides. Glue with cyanoacrylate all the edges of the cover.

Here, our modeler has used:

KING OF THE MISSISSIPPI PADDLE WHEEL CONSTRUCTION (PART ONE)

Let’s go with the third video of the audiovisual guide for the Mississippi ship model assembly. Construction of the paddle wheel, symbol of this type of steamboat. In the instructions, this video corresponds to sections 9 and 34.

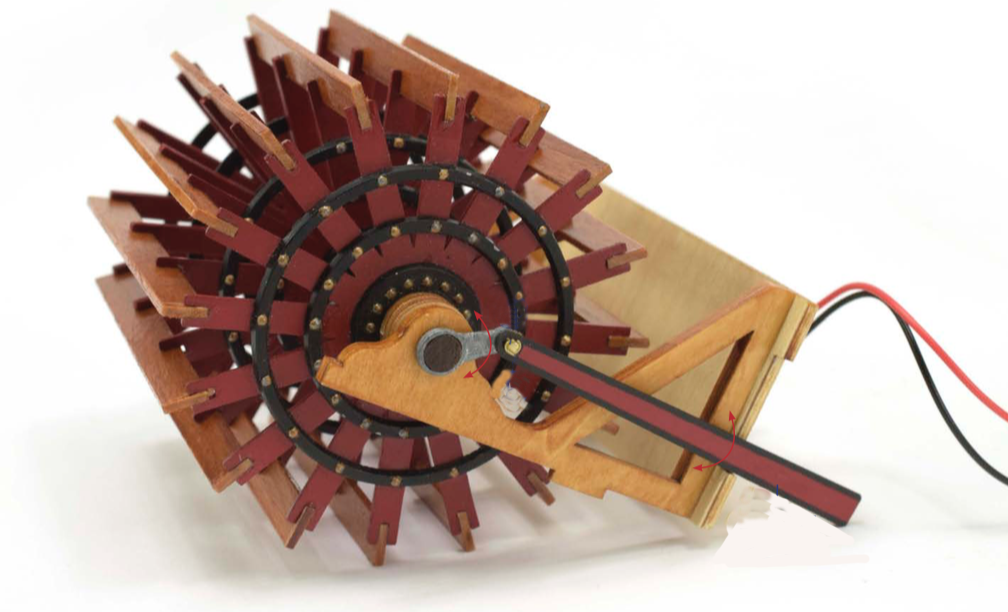
Take the different parts, apply cyanoacrylate where you need to stick them and fit them into the tabs provided for it. Use the sanding block to prepare the surface and glue two small ribbons on the inner sides. With a cutter also remove leftovers. File all the pieces. Subsequently, paint with transparent satin varnish and a flat brush all the pieces already fitted and glued. The sides, meanwhile, with oak-colored satin stain varnish.

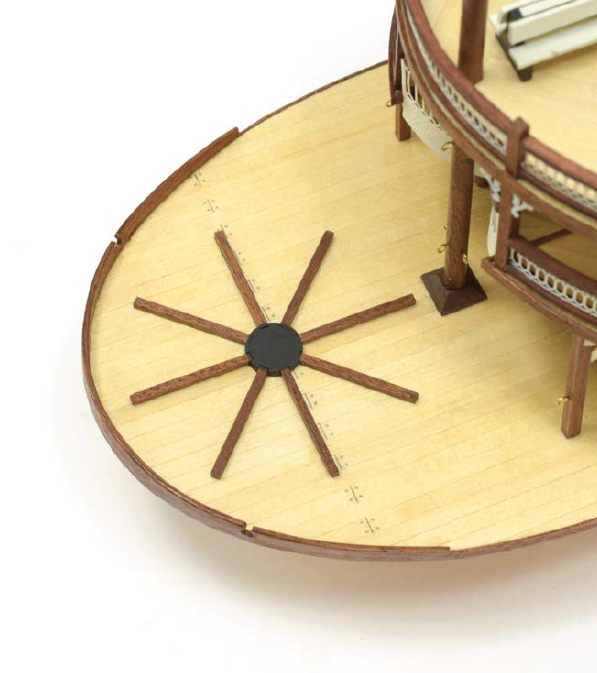
Thread the motor cable through the two wooden grommets. Then place the motor on these. Stick the fixing wedges so that it is totally immovable. Take three small washers and glue them together, the smallest should go in the middle, repeat the process. Help yourself with straight pliers. Insert the stick through the lateral circumference of the base. Before inserting it through the second one, insert the three small circles already attached. Next, each of the parts that will make up the wheel. And, finally, the other three small circumferences adhered, after introduce the stick through the other circumference of the base.

KING OF THE MISSISSIPPI PADDLE WHEEL ASSEMBLY (PART TWO)

Fix the four wheels with the other many pieces created for that reason (without gluing them). Take the two elastic bands and tighten them. Glue with cyanoacrylate the strips that will make the blades of the wheels. Remove both the rubbers and the fixing pieces. Paint the pistons with acrylic paint (off black).

Mississippi Ship Model Assembly by Artesania Latina (20515).

What have we used on this phase?

KING OF THE MISSISSIPPI SHIP MODEL: SPIRAL STAIRCASES

Fourth video, penultimate of this post. How to build the spiral stairs of the marvelous King of the Mississippi wooden paddle steamer model. The steps of this assembly, sections 11 and 12.

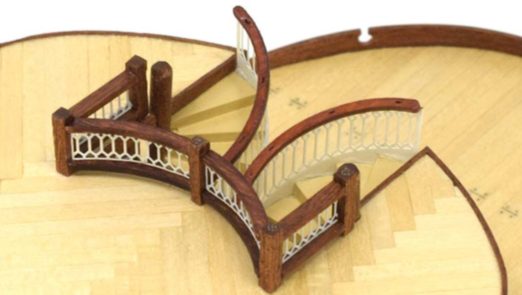
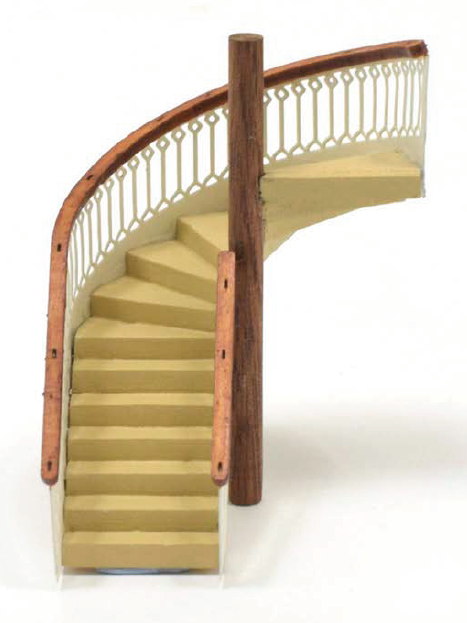
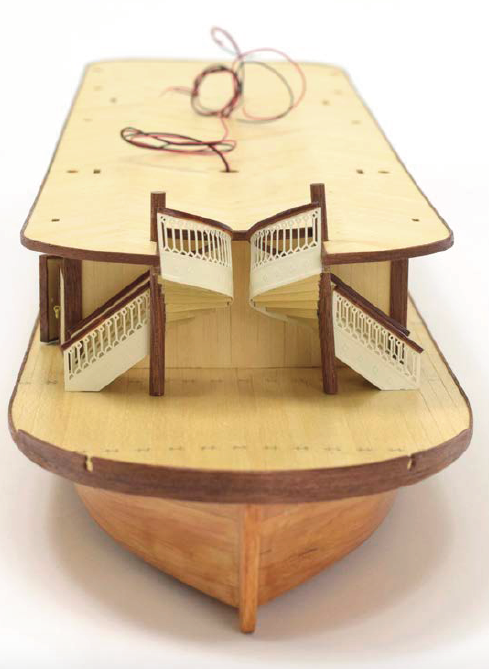
Using tweezers and cyanoacrylate, glue the parts of the rungs as shown in the image. The rectangular rungs belong to the straight part of the ladder, the wedge-shaped rungs to the curved part. Once the rectangular ones and the first wedge have been glued, glue the wooden ‘bar’ on the inner side at the height of the wedge rung. Proceed carefully up the steps. If burrs remain, remove them with a cutter.

Paint them with acrylic water-based paint (buff). Take the two metal pieces of the railing and paint them too with acrylic paint (off white) and a flat brush. Put cyan on all the sides of the steps – first on the straight ones – and glue the railing. Shape the curved part with your own hands. Now apply cyan on the side steps and glue the curved part of the ladder. Repeat the process on the other side of the ladder. Glue the two wooden handrails onto the railing. Paint them with oak-colored varnish.

Mississippi Ship Model Assembly by Artesania Latina (20515). Mississippi Ship Model Assembly by Artesania Latina (20515).

What have we used?

BUILD THE FIRST DECK COLUMNS OF THE KING OF THE MISSISSIPPI

Today’s last video clearly explains how to assemble the columns of the first deck.

With a ruler and a pencil mark the points where you want to put the columns. Take the column and apply cyan to the two ends. Glue it down and attach it to the model. Check that it is straight with a square. Repeat the process with all the columns checking that the distance between them is the same and that they are not crooked.

Here, we have used:

We encourage modelers who still do not have this indispensable 1/80 scale model of the paddle steamer King Of The Mississippi (20515) to assemble it… And now as a novelty you can also acquire the Gift Pack of the King of the Mississippi (20515L)! It brings, in addition to the model, figurines, paints and some very useful tools.

Gift Pack of King of the Mississippi Ship Model at 1:80 scale, Figurines, Paints and Tools (20515L).

Read the second part of the post…

Posted in Ship Models

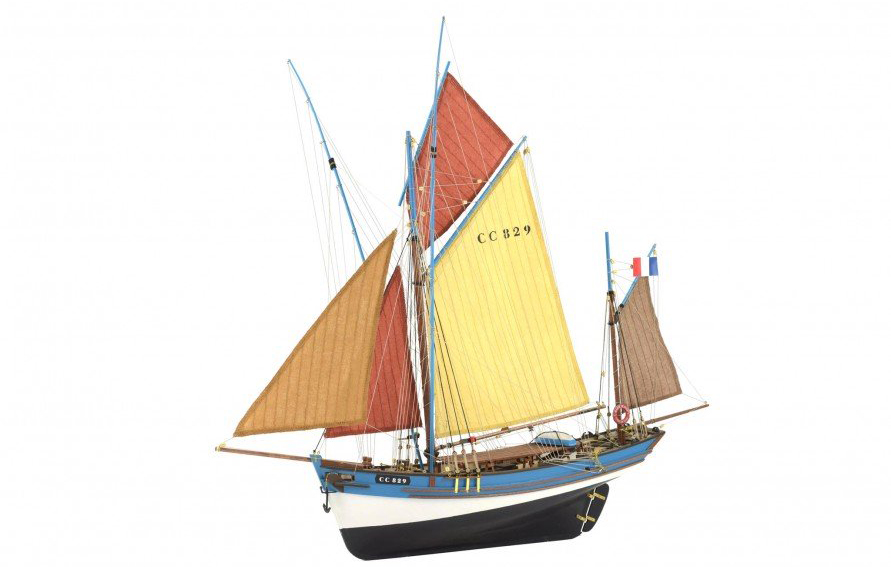
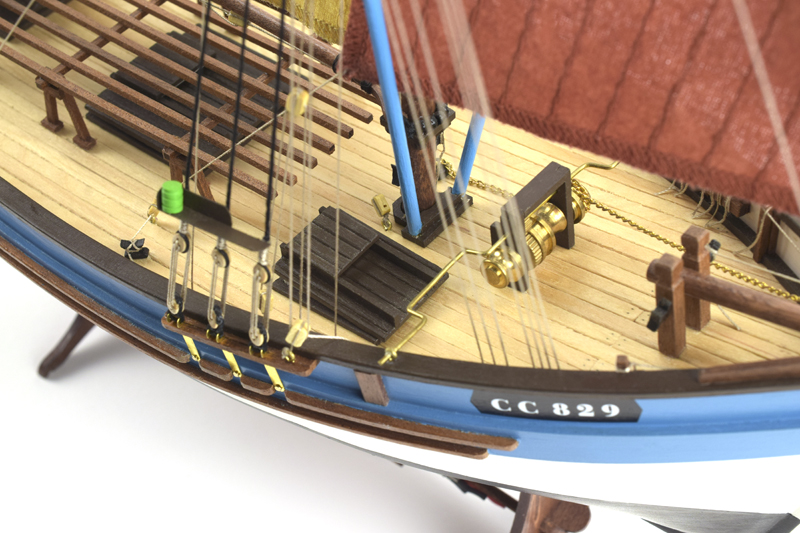
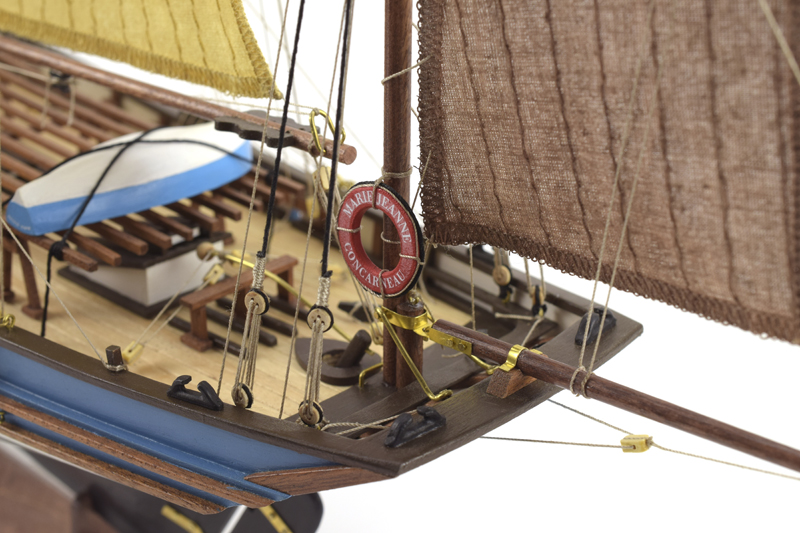
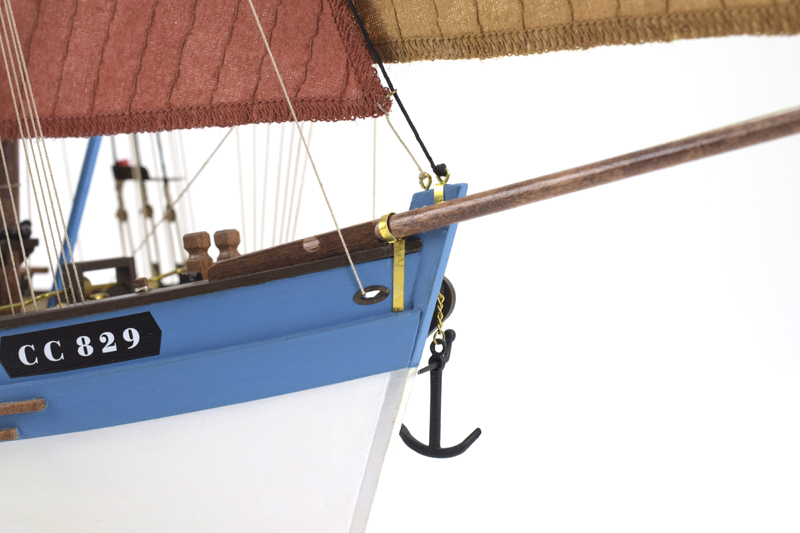
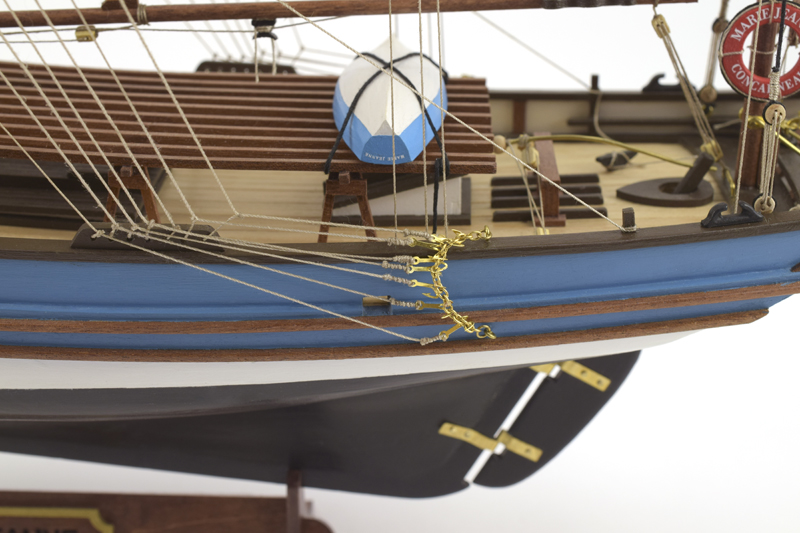
Tuna Boat Model Marie Jeanne: 2022 Renewed Modeling Kit of the French Fishing Ship

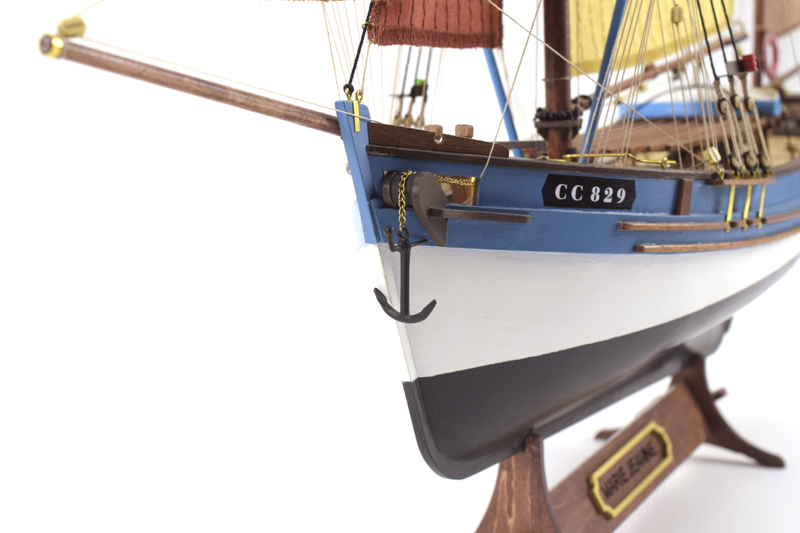
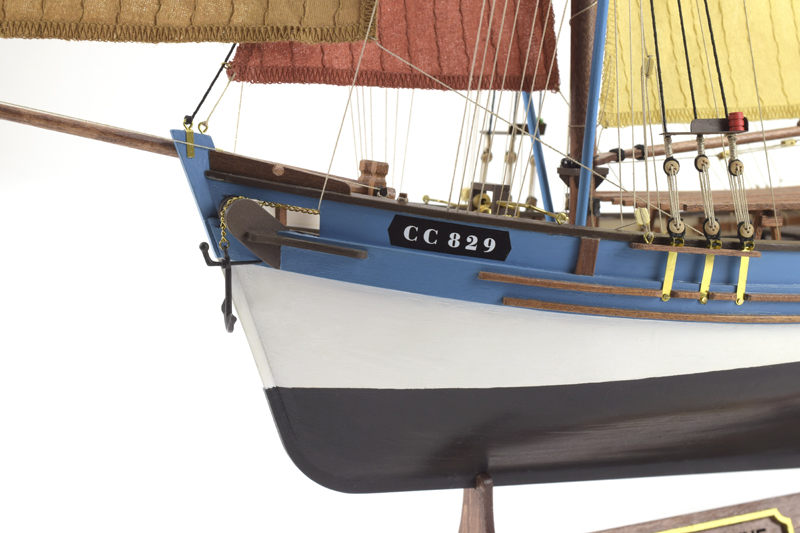
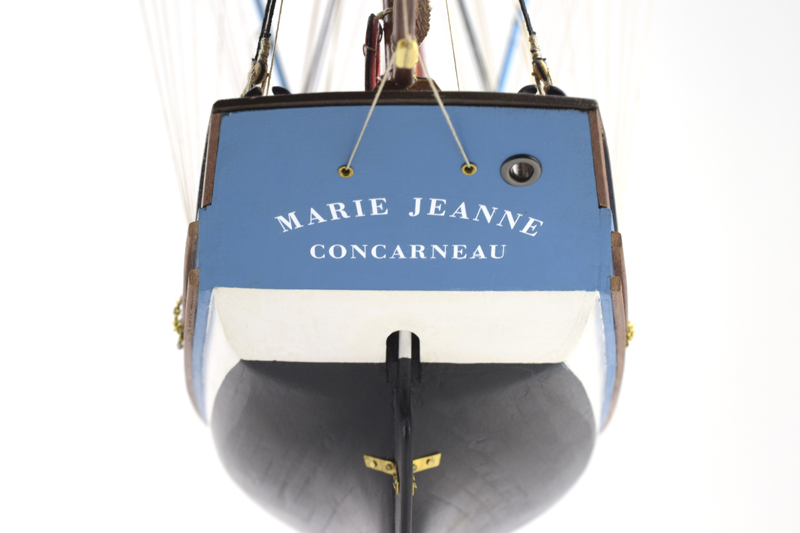
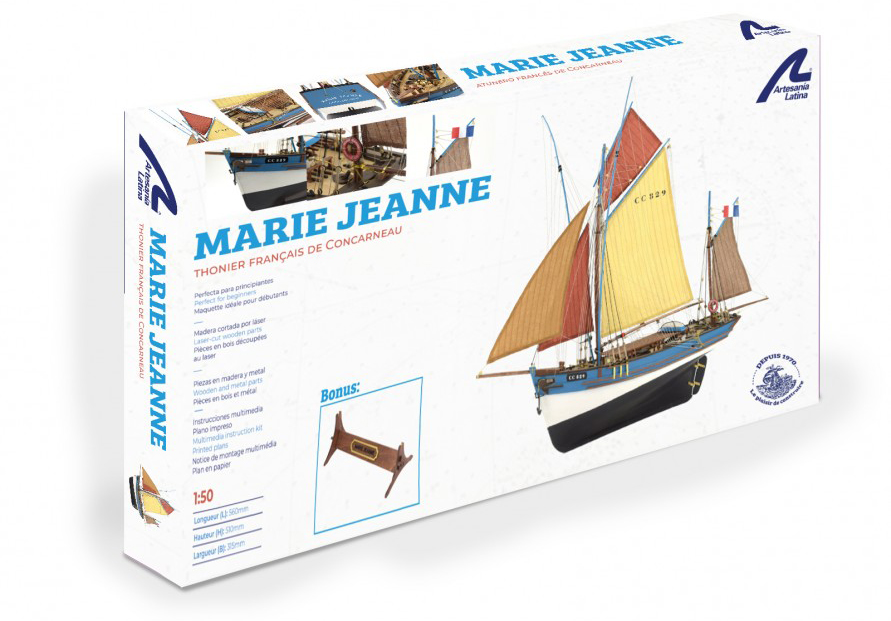
What is promised is debt! Artesania Latina team is pleased to present to all its modelers friends the first of the new scale models for 2022. The tuna boat model Marie Jeanne at 1/50 scale, the renewed wooden modeling kit of the French tuna vessel, aimed at those who own a intermediate level of skills. Without a doubt, our team of 3D designers and modelers set out to improve the assembly experience of this faithful naval replica… And they have succeeded!

Tuna Boat Model Marie Jeanne (22175): 2022 Renewed modeling kit made of wood.

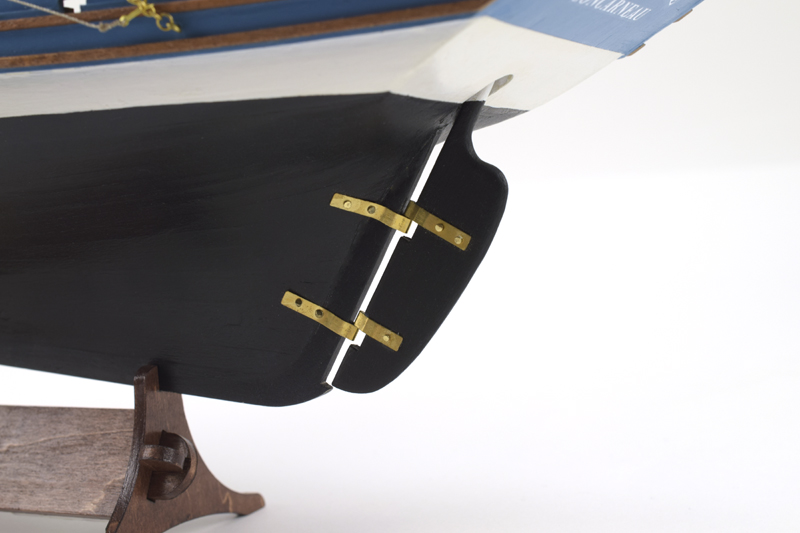
The presentation and high quality of the parts of the model, its instructions, its sails, its photo-etched parts, its wood… Everything has been redesigned so that the modeler is fully satisfied!

Tuna Boat Model Marie Jeanne (22175): 2022 Renewed modeling kit made of wood.

TUNA BOAT MODEL MARIE JEANNE: NEW HIGH QUALITY PARTS

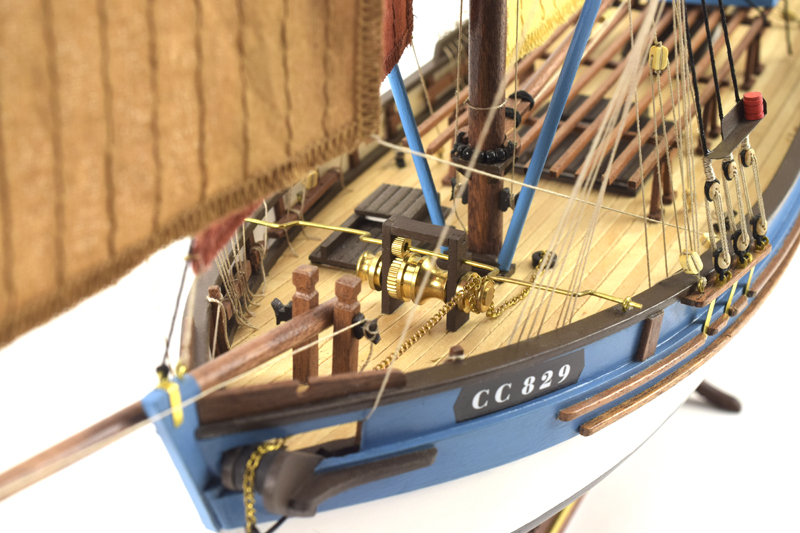
How happy we are to show all the new elements of the tuna boat model Marie Jeanne at 1/50 scale, a true beauty of the naval modeling. We begin to break down all the news with the high quality parts that make up this fabulous wooden modeling kit. Suffice it to say that we ensure that all parts fit together perfectly. Besides that its level of detail is simply… Spectacular!

Tuna Boat Model Marie Jeanne (22175): 2022 Renewed modeling kit made of wood.Tuna Boat Model Marie Jeanne (22175): 2022 Renewed modeling kit made of wood.

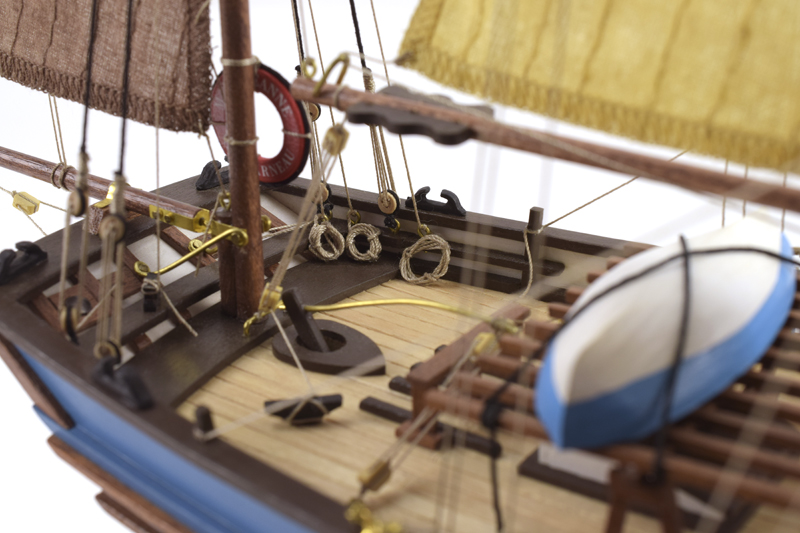
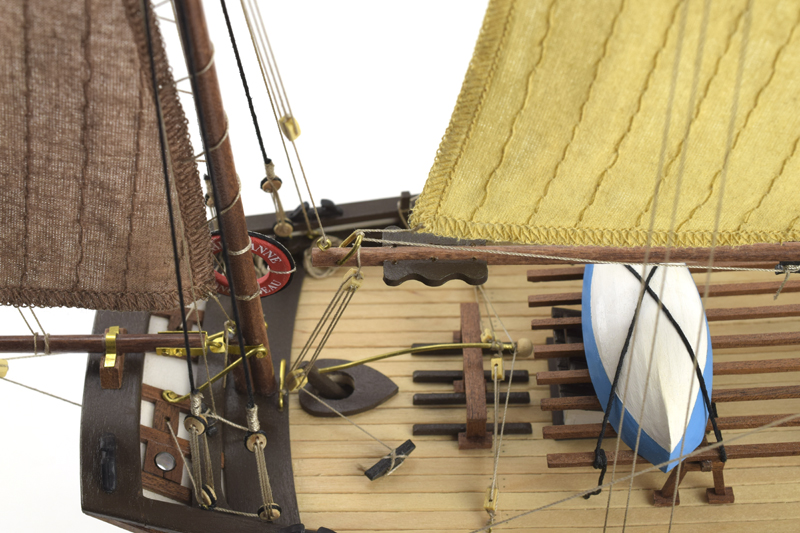
It contains beautiful, high-precision laser pre-cut wooden boards, noble woods such as birch strips and round dowels, and stunning photo-etched, brass, and cast parts. We found in the model of the tuna boat Marie Jeanne everything you need to build this naval miniature at your modeling workshop. And, above all, to take it to the next level with the aforementioned photo-etched parts, how wonderful!

Tuna Boat Model Marie Jeanne (22175): 2022 Renewed modeling kit made of wood.Tuna Boat Model Marie Jeanne (22175): 2022 Renewed modeling kit made of wood.Tuna Boat Model Marie Jeanne (22175): 2022 Renewed modeling kit made of wood.

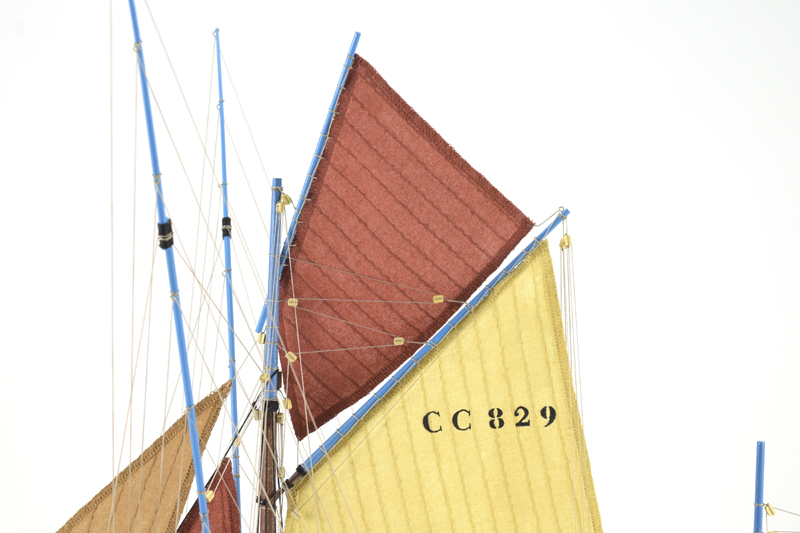
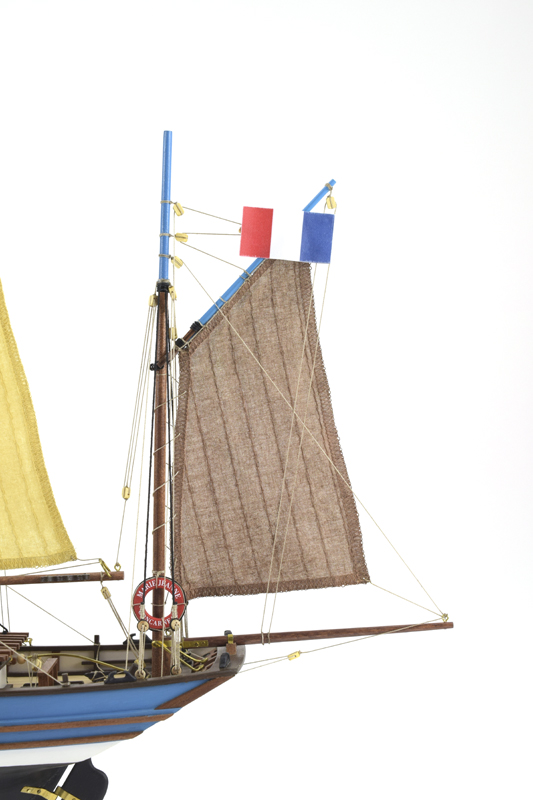
Regarding the sails, speechless too! This wooden modeling kit comes with a set of 5 sails made of cotton, cut and sewn ready to be placed. It also comes with the French flag in sticker format. The Gallic fishing ship model is perfect for beginner modelers who want to take their first steps in the construction of rigging.

Tuna Boat Model Marie Jeanne (22175): 2022 Renewed modeling kit made of wood.

Tuna Boat Model Marie Jeanne (22175): 2022 Renewed modeling kit made of wood.

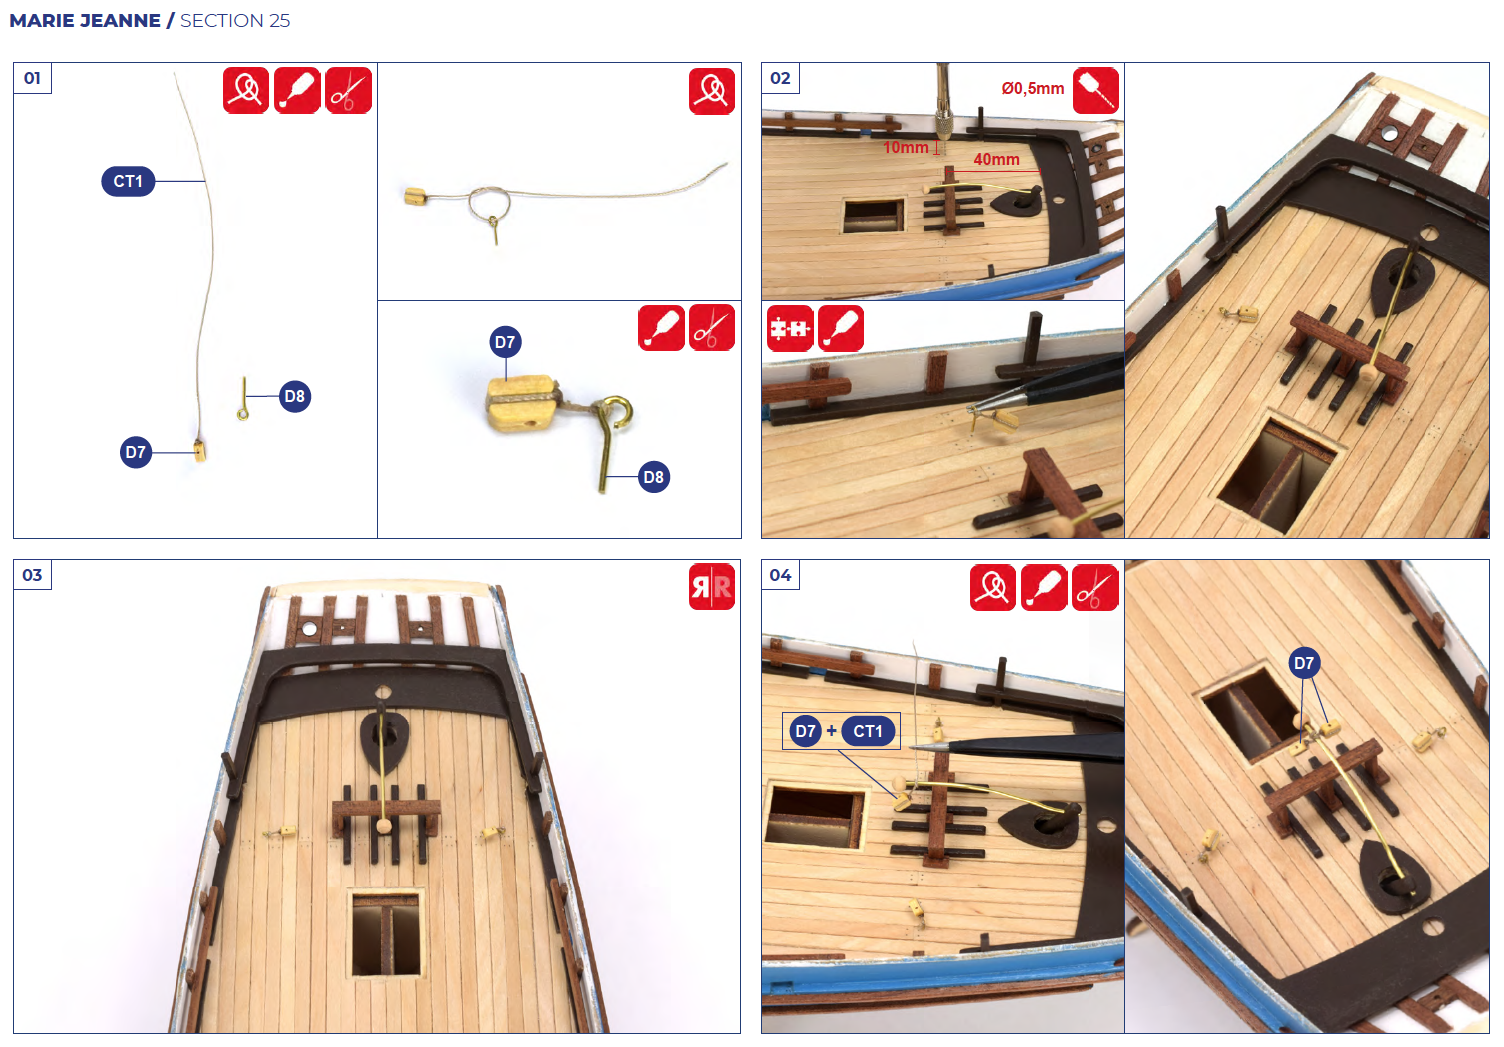
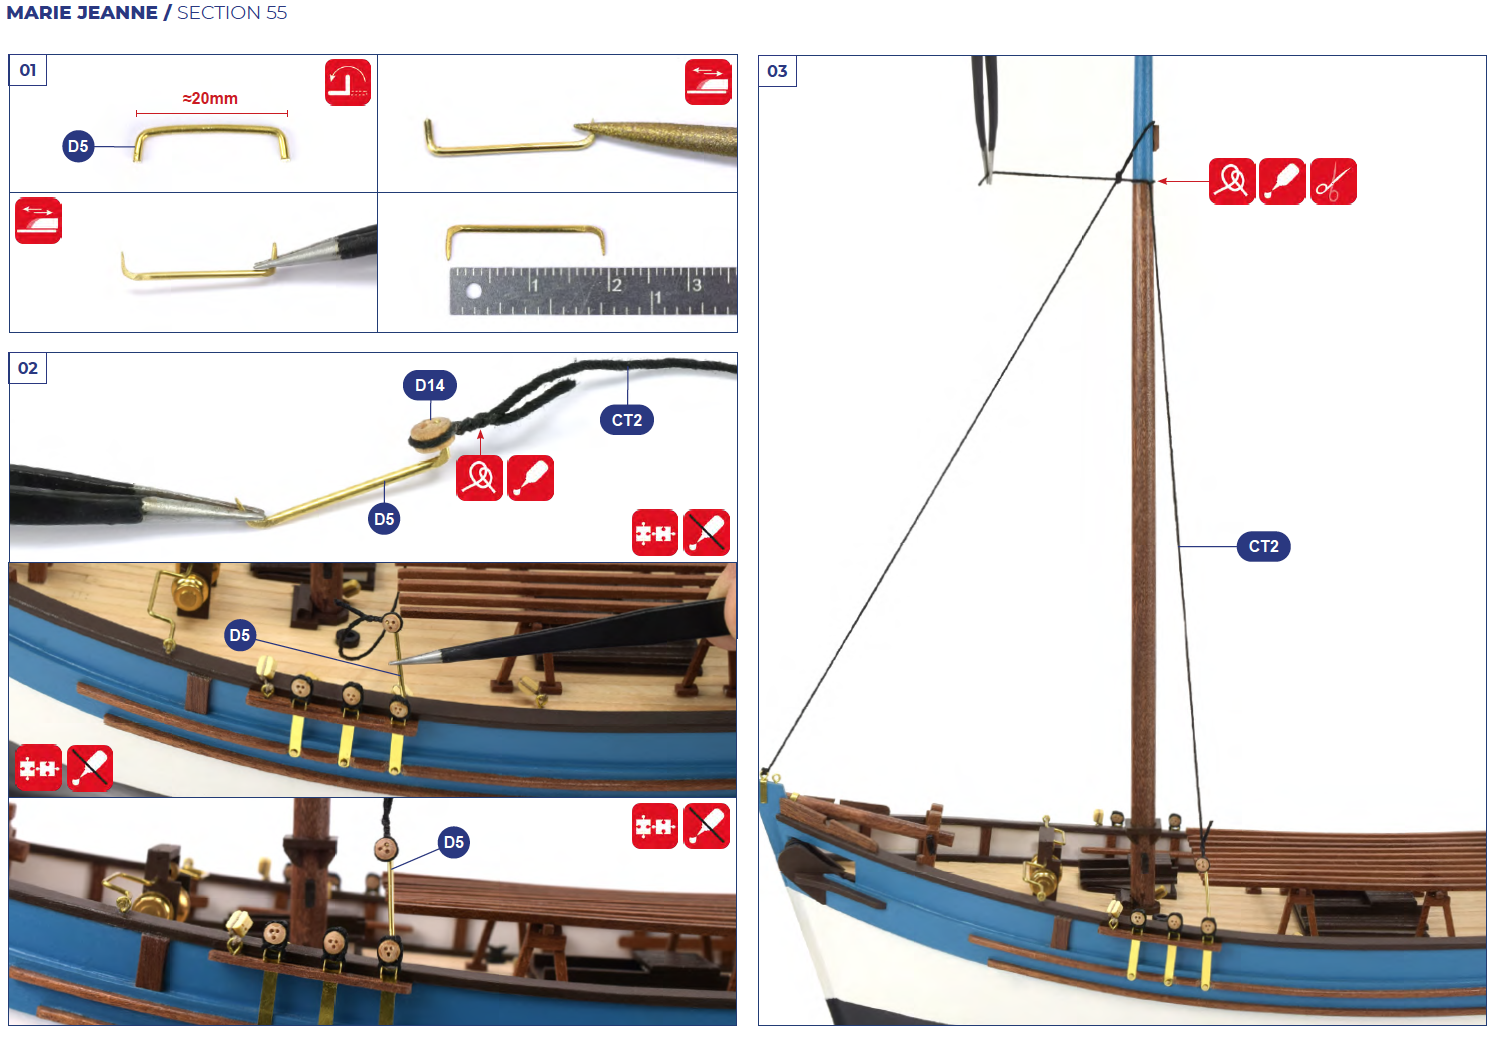
TUNA BOAT MARIE JEANNE: VERY DETAILED INSTRUCTIONS

The instructions for the assembly of the Marie Jeanne tuna boat model (22175) are unbeatable. Renewed and highly detailed, they will help you to perfectly build the scale model of the French fishing ship. They come on DVD multimedia format for computers -Windows and Mac-. Now, we’re including the paper ship plan this time. In addition, you can download the instructions for free at Marie Jeanne product sheet of the web.

About basic modeling tools for the construction of this model, we recommend the following ones.

Once built, the Marie Jeanne wooden model measures 22.24” (565 mm) length, 4.52” (115 mm) width and 19.48” (495 mm) height.

PAINTS FOR MARIE JEANNE AND EXHIBITION BASE LIGHTNING

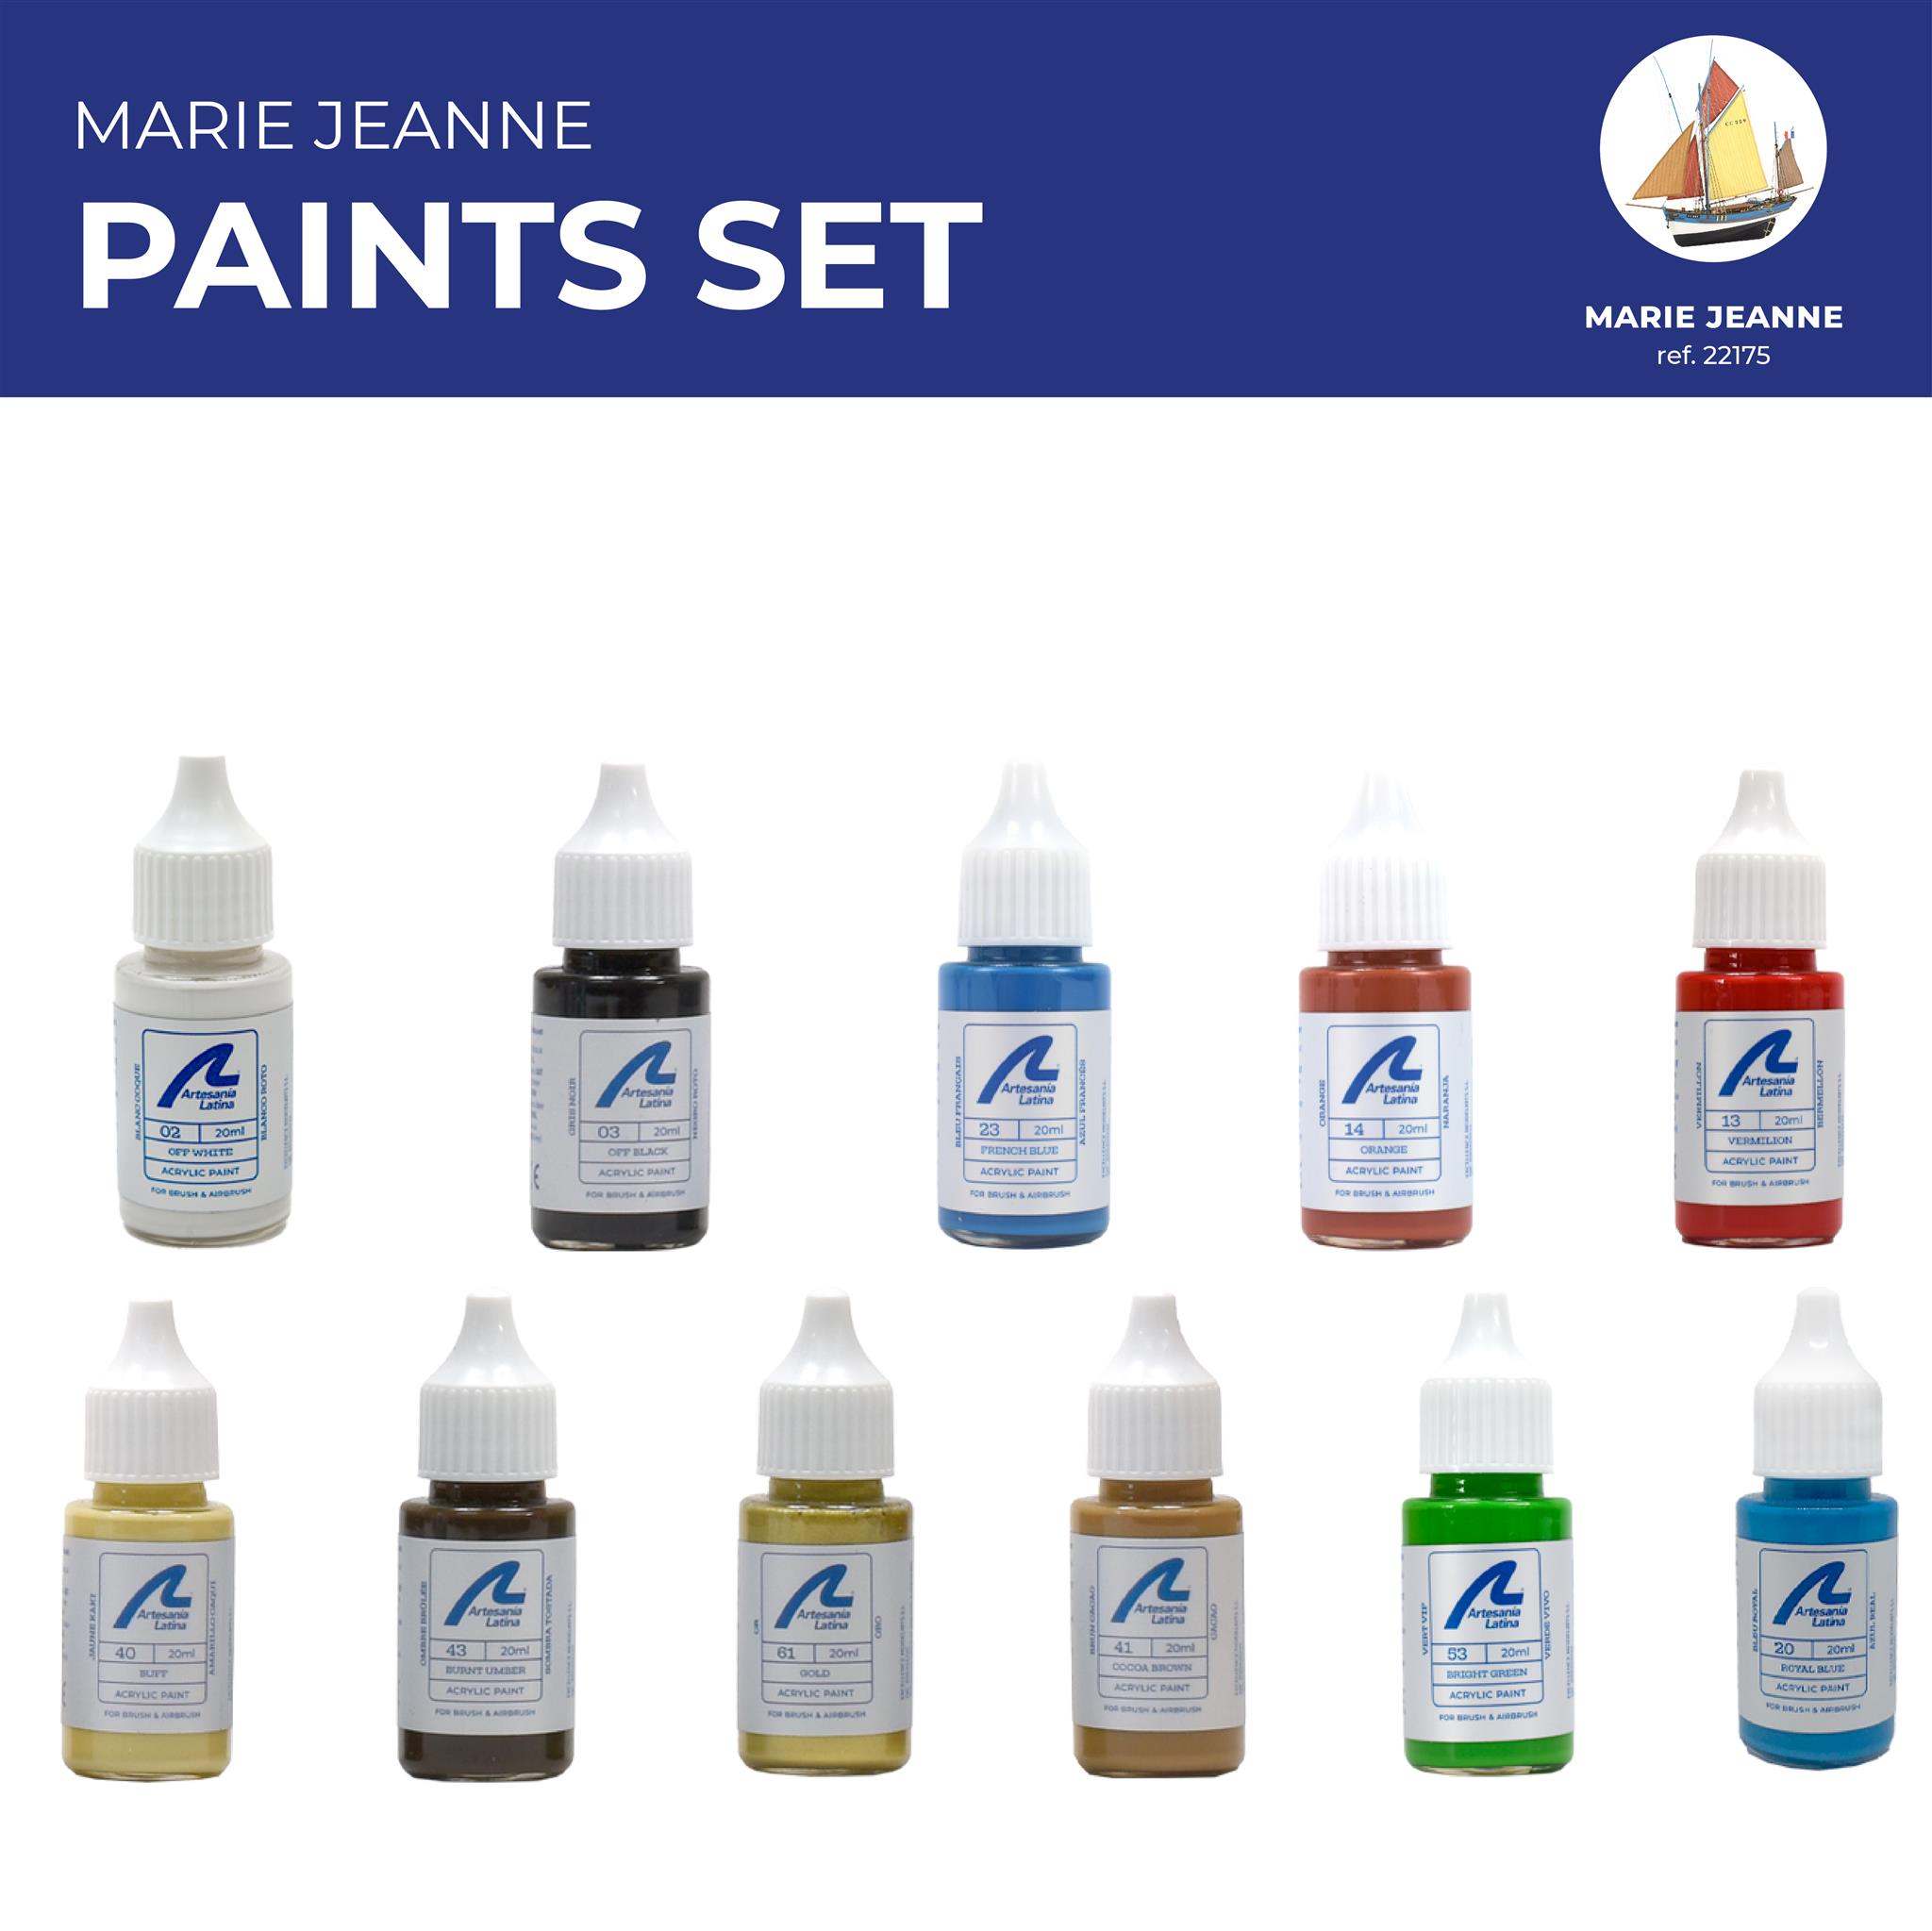
If you want to achieve the best and most reliable finishes, Artesania Latina makes available -for sale separately- to its friends the Set of Paints for Marie Jeanne (277PACK12). It is made up of 11 20 ml jars of quick-drying acrylic water-based paint in as many colours: off-white, off-black, bluff, cocoa brown, burnt umber, gold, vermilion, bright green, French blue, royal blue, and orange. They are perfect for use with airbrush although you can paint with brush. Of course, the kit includes decals to decorate the boat, to the delight of the modelers.

Paints for Model Building. French Fishing Boat Model Marie Jeanne (277PACK12).Tuna Boat Model Marie Jeanne (22175): 2022 Renewed modeling kit made of wood.Tuna Boat Model Marie Jeanne (22175): 2022 Renewed modeling kit made of wood.

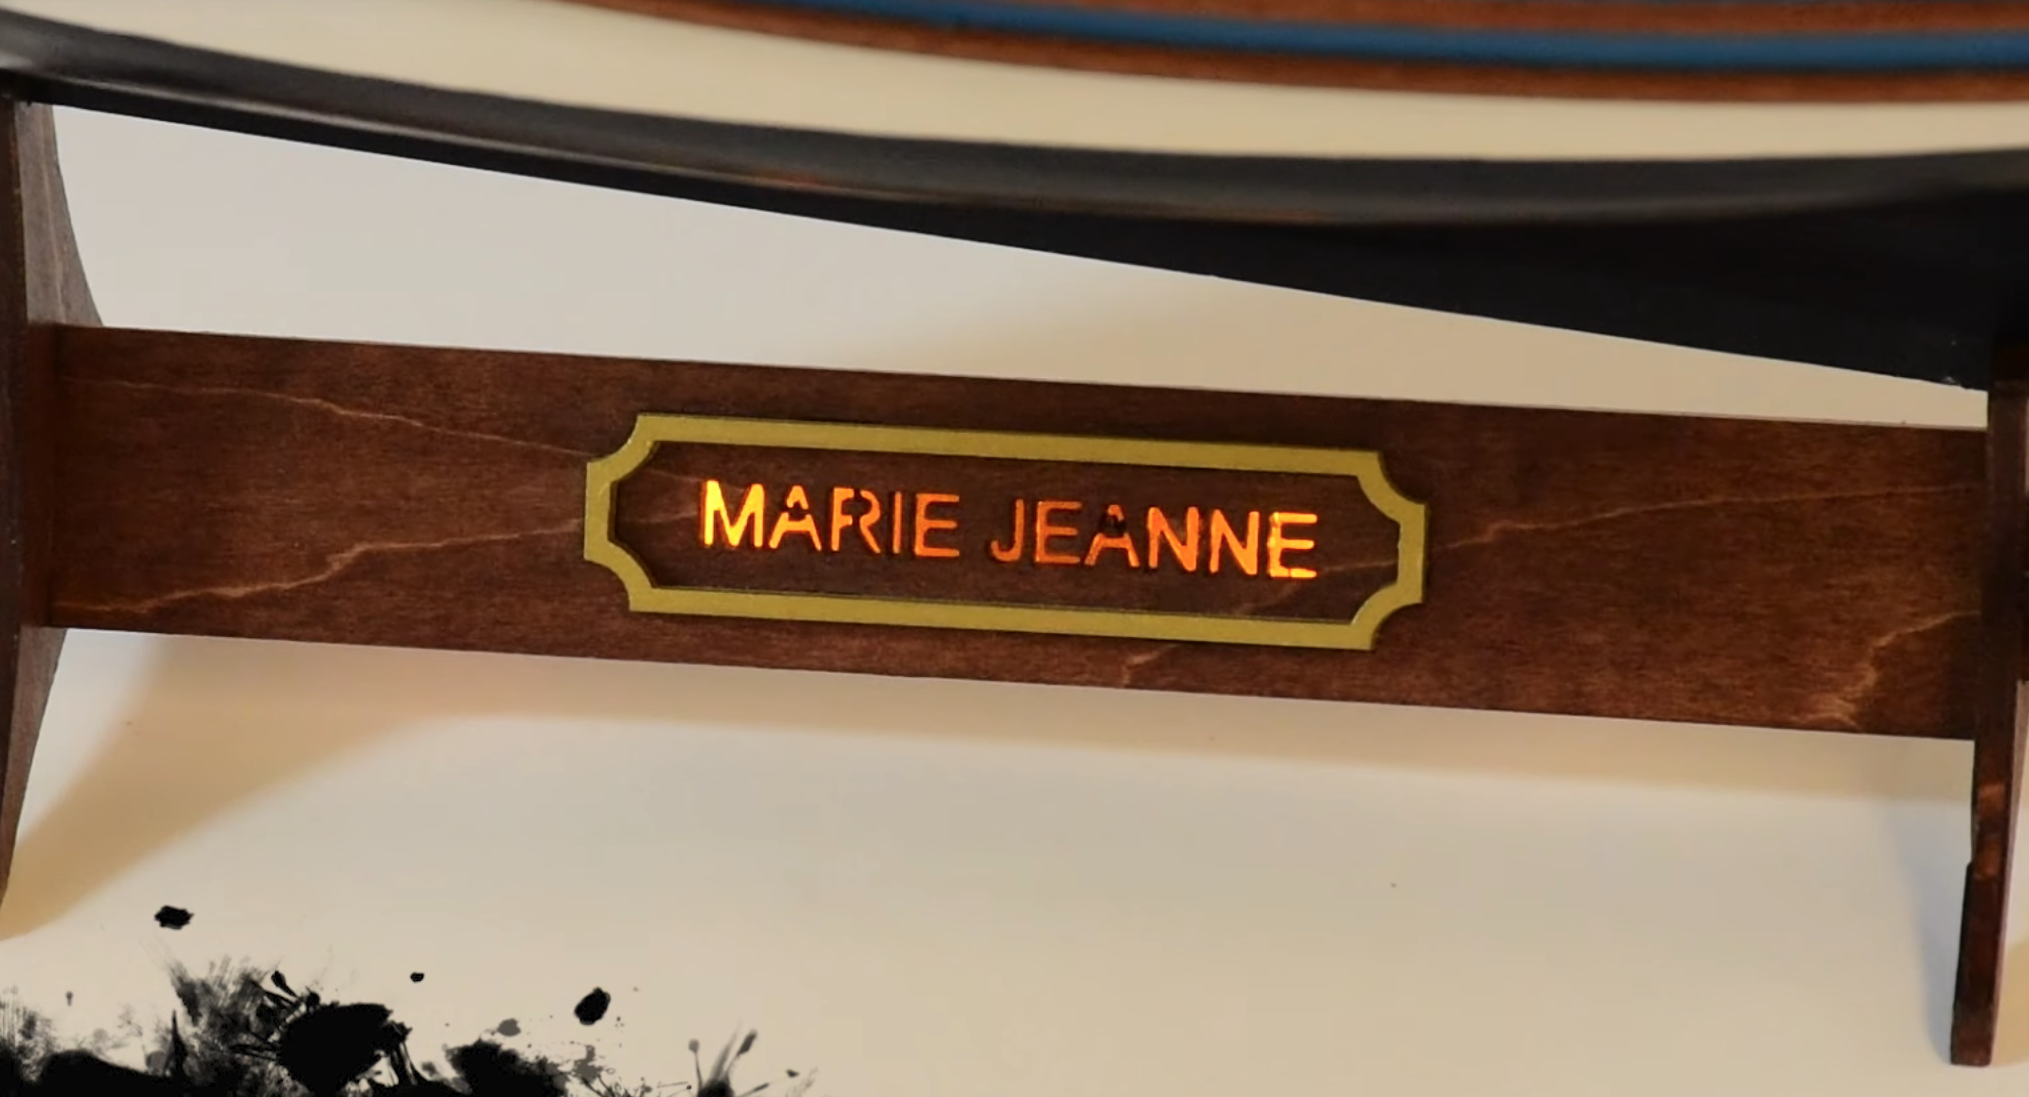
Another new in the modeling kit of the tuna boat model Marie Jeanne (22175) is that its base as a gift it is prepared so that it can be illuminated. How? With our LED Lighting Set for Models and DIY Projects (27590), sold separately.
LED Lighting Set for Models and DIY Projects (27590).

Tuna Boat Model Marie Jeanne (22175): 2022 Renewed modeling kit made of wood.

LED Lighting Set for Models and DIY Projects (27590).

In short, the renewed in 2022 wooden model of the French tuna boat Marie Jeanne at 1/50 scale (22175) has a high quality that meets expectations and demands of the modelers. If you want a new naval modeling challenge or if you want to get started in the knowledge of sail construction, assemble it with us! Another little jewel for your collection that cannot be missed! Discover all the contents of the kit on the video below:

Tuna Boat Model Marie Jeanne (22175): 2022 Renewed modeling kit made of wood.

Posted in Model Building Tips

Santa Maria Model Construction (II): Video Tutorials for 1/65 Wooden Caravel Set Up

We continue this week with the second post to teach how you can develope the construction of the Santa Maria model (22411-N), the well-known caravel (nao) in wood at 1/65 scale. We specify on video the parts of the assembly that can be more complicated or remarkable due to the level of detail for our modelers friends. Last week we left it explaining the assembly of the rails and barrels. Now we return to this audiovisual guide with the capstans and the cannons.

Santa Maria Model Construction (22411-N). The wooden caravel of America Discovery.

HOW TO BUILD THE CARAVEL CAPSTANS AND CANNONS

On the audiovisual instructions for 1/65 scale Santa Maria wooden model construction, we now present Chapter 9: ‘Assembly of the Capstans’. First, varnish with your brush the outer parts to then apply cyanoacrylate (27650) and glue the three parts that make it up. Second, insert them and… Done!

Chapter 10 deals with the ‘Assembly and Decoration of the Cannons’ on this video guide for the construction of the Santa Maria model. First, use one of our cutters to extract parts of the photo-etched plate and to remove the remains. Once removed, glue the four U-shaped details with cyanoacrylate on each of the four corners of the two sides of the gun carriage part. Second, insert some cyanoacrylate into the four existing holes in the large part, then insert the four eyebolts into these.

Now, place or glue the cannon on top of the gun carriage -your choice-. Take a thread and begin to carefully pass it through the eyebolts so that the barrel fastening is tight and beautiful. If you need it, help yourself in this task with a curved fastening tweezers. Finally, tie the end of the thread and cut off the excess.

SANTA MARÍA MODEL CONSTRUCTION: PAINTING LANTERN, NAMEPLATE AND DOORS

The following demonstrative videos deal with the finishes of the 1/65 scale model of the Santa María caravel, specifically, with the painting of various parts. In Chapter 11 we will see how to ‘Painting the Lantern’. To be able to work comfortably, embed the lantern in a stick or punch. With a flat brush, apply the paint carefully. We remind you that you can use the Set of Paints for Caravels and Galleons (277PACK8), for sale separately, with all the necessary colors to make your model perfect.
We move on to Chapter 12 with the ‘Painting of the Nameplate for Exhibition Base’ on the following video for Santa Maria model construction. Once the modeler has the plate out of the photo-etched plate, take some straight tip precision tweezers to hold it. Using a flat brush, start to apply the paint without excess paint on the brush or plate. Scrape a round wooden stick with a cutter until you get a point like any pencil. Proceed to remove the paint that is on the letters with that tool that has been created. Do the same with the license plate frame. The letters and the frame will be gold while the background will be colored.

In Chapter 13 we will watch the ‘Painting the Doors’. Tape the door to the end of a wood part so it doesn’t move while you paint. Have a small amount of the two paints you are going to use on a small plastic. Soak the flat brush and remove the excess on a paper towel. Apply brown and black with the flat brush to make it look like wood grain.

SANTA MARIA MODEL CONSTRUCTION: MASTS REINFORCEMENTS AND SAILS DECORATION

The last two videos of the audiovisual guide forconstruction details of Santa Maria model demonstrate how to carry out two tasks related to the propulsion of the caravel. The masts and the sails. Chapter 14 teaches the ‘Masts Reinforcements with Thread’. Take the thread and tie it to the mast as shown on the video. Using straight-nose pliers, tighten the thread wherever you see slack. Take the two ends of the thread with your hands and pull. Cut the excess thread with a cutter.

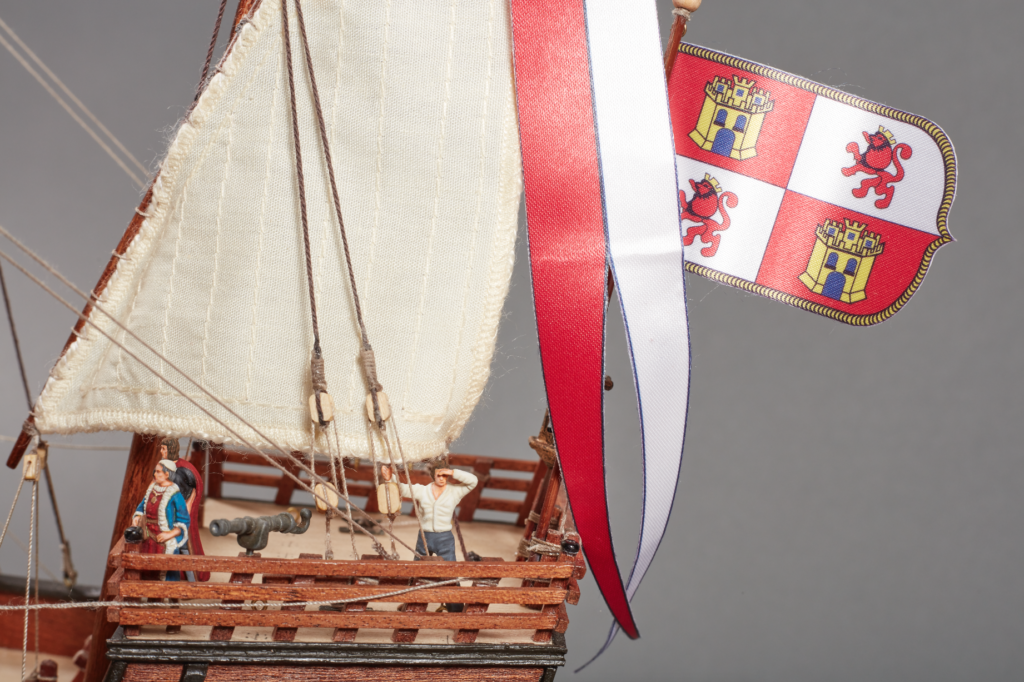
The last one is Chapter 15, here we show the ‘Sails Decoration’ process. Carefully remove the cross from its support. Take a parts of flat cardboard larger than the sail, place the sail on top and stick it to it with masking tape so it doesn’t move. Place the cross on top of the sail and use the new Micro Centering Ruler (27326) to check the measurements and that it is centered. With the cross already centered on the sail, take a pencil and draw the outline of the cross on the sail. Take a small round brush, and fill in the entire silhouette of the cross with the red paint.

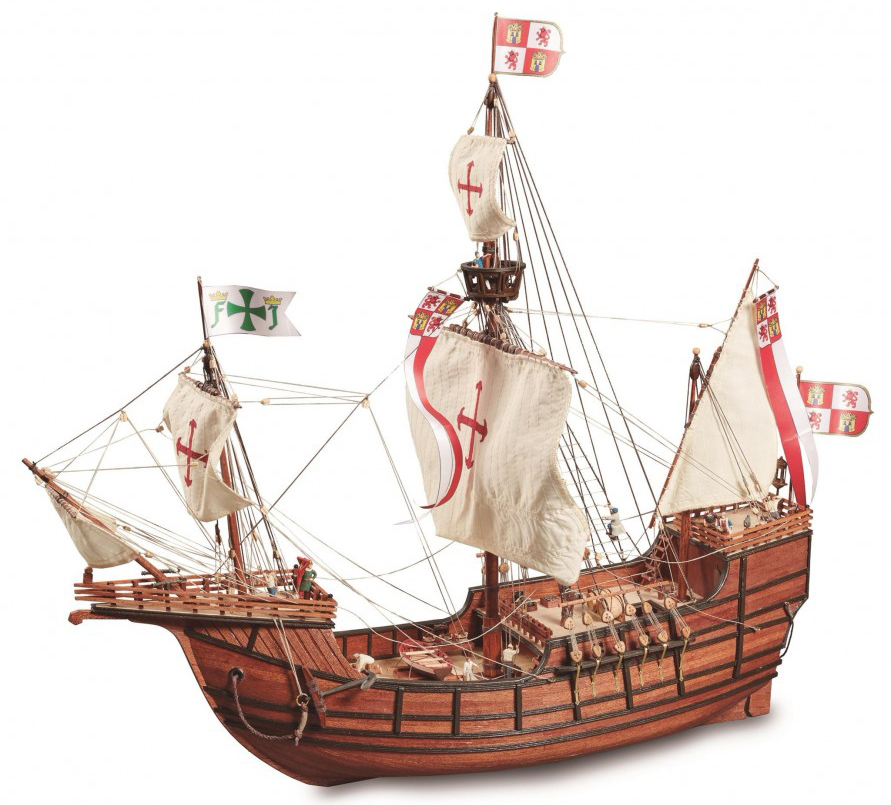
We are done with these video tutorials to help the modeler in the construction of the Santa Maria model kit at 1/65 scale (22411-N). This kit of naval modeling will make you enjoy many moments of joy and satisfaction. Do not forget that, in addition to selling the model alone, we also have the fabulous Santa Maria Model Gift Pack (22411-L). Find out!

Gift Pack Santa Maria Caravel Model at 1/65 Scale (22411-L).

Read the First Part of the Post…

Posted in Model Building Tips

Santa Maria Model Assembly (I): Build the Caravel in Wood with Our Help

Our ‘Model Building Tips’ section of the blog helps our modeling friends know how to build many of our scale models and to manipulate the tools. In this case, we are going to show an audiovisual guide for the Santa Maria model assembly at 1/65 scale (22411-N). The wooden caravel with which Christopher Columbus discovered America. Surely, it is one of the best-selling faithful miniature replicas in the world every year.

Santa Maria Model Assembly at 1/65 scale. Artesania Latina's wooden caravel (22411-N).

So the Artesania Latina‘s modelers team has created a series of video tutorials at our YouTube Playlists. Not only the assembly of the Santa Maria model, but also many others ships and airplanes. We are going to explain to you from now how to work with the most complicated parts to execute during the construction process of the famous caravel -it really is a nao-.

Santa Maria Model Assembly at 1/65 scale. Artesania Latina's wooden caravel (22411-N).

SANTA MARIA MODEL ASSEMBLY: SIDE WALLS AND BOW PARTS

In this Chapter 1 of the fifteen included in this assembly guide of the Santa Maria model (22411-N) we are going to deal with the ‘Placement of the Side Walls’. For this step, the modeler needs quick drying dense cyanoacrylate (27650). The cyano applicator is included in this set (27302). Once applied, you must press the wooden part until it is fully adhered. Start with the central part to later glue the back and the front.

We go to the bow from Chapter 2 with the ‘Forecastle Bulkhead Planking’ of this guide for Santa Maria model assembly at 1/65 scale. The modeler must once again use cyanoacrylate, in addition to any universal cutter (27044) from our catalog of cutting tools for modeling. In this way, you will be able to cut the leftover wooden parts once they are glued.

We continue on the bow assembly of Santa Maria caravel scale model with Chapter 3 and the ‘Bow Deck Outline’. Prior to placing the three parts, modelers must first paint or varnish them with our brushes and airbrushes. After painting them, you must cut the corners diagonally with the cutter so that they fit perfectly when gluing them with cyanoacrylate.

Chapter 4 deals with ‘Bow Deck Assembly’. Before putting the part that you have made in the previous step, place without glue the two wooden cylinders that serve for its proper positioning. Apply cyanoacrylate to the entire frame or edge of the bow deck and insert the piece. Press it without excessive force until you notice that it has adhered. Carefully remove the two cylinders.

SANTA MARIA CARAVEL CONSTRUCTION GUIDE: RUDDER AND DEADEYES

The Santa Maria model assembly, a 1/65 scale model by Artesania Latina, now focuses on the rudder. Specifically, Chapter 5 shows the ‘Rudder Hinges Placement’. Mark with a pencil the places where you want to place the hinges. Take each of these and press it on the place you have marked previously until it takes the shape. Insert a punch through the hinge holes and make a small hole. By that same place and with the help of a professional needle nose pliers (27213) take one of the rivets or nails and insert it by pressing with the pliers. Once inserted, you can fix it better with gentle strokes using our modeler’s hammer (27017).

Continue by cutting three parts of wooden round dowels with a cutter. Use the glue applicator to put cyanoacrylate around these. Finally, insert them into the holes of the hinges with the help of some professional precision tweezers with ultra fine tip (27204).

It is time to watch the ‘Deadeyes Assembly in Chainwales’ in Chapter 6. Take a bolt with its metal part and apply cyanoacrylate on the metal. Place it and mark with a small drill where you want to place the nail. Then insert the nail with the pliers and press. Repeat the process with all the deadeyes.

SANTA MARIA MODEL ASSEMBLY: HANDRAILS AND BARRELS

The Chapter 7 teaches modelers how to set up the ‘Handrails’. Take one of these and mark with a pencil the leftovers that you want to cut so that the ends are diagonal for placement. Proceed to cut with the cutter. Sand these ends with the sanding block (27014) so ​​there are no burrs. Apply cyan to the bases of the upright posts and glue the railing to the foredeck. Varnish it last.

The last video of Santa Maria model assembly that we watch in this post -we continue in the next one- is the one from Chapter 8: ‘Barrels Making’. Using a utility knife, split the barrel support part in two and remove any excess. Apply cyanoacrylate to the curved area of ​​the bracket where the barrel sits. Peg the barrel into the bracket along one of the horizontal lines on the first. Do the same with the other barrel. Do the same process with the other piece of the bracket as well. With the help of precision pliers, take the thread and insert it through all the holes as a grip and decoration.

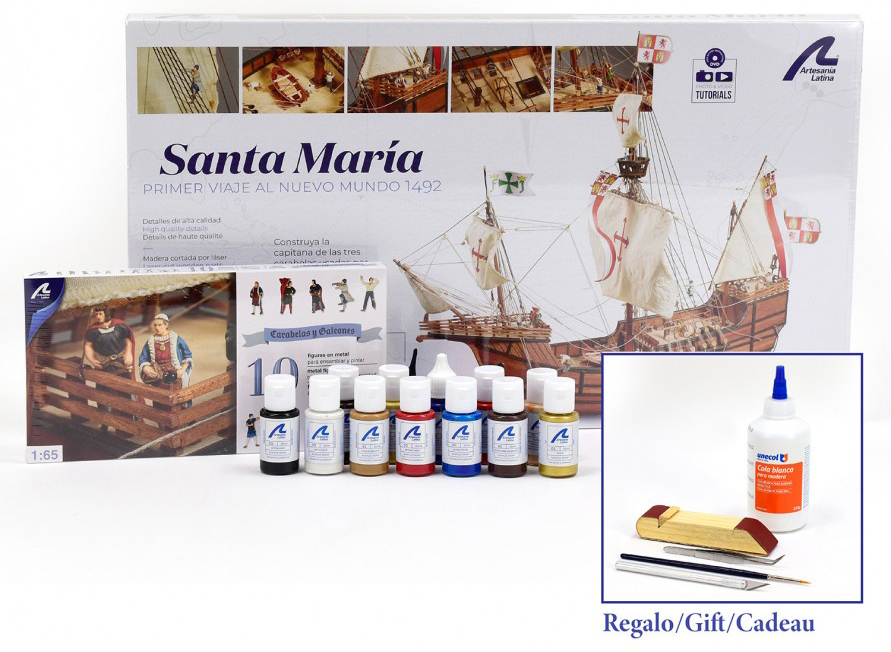
If you can’t wait for the next post of Santa Maria model assembly to start building it, we have a surprise for you. One of the news for 2022 on Artesania Latina catalog are the Gift Packs. In this sense, we present to all our modelers friends the Santa Maria Model Gift Pack (22411-L).

Santa Maria Model Assembly at 1/65 scale. Artesania Latina's Gift Pack of wooden caravel (22411-N).
In addition to the 1/65 scale model of the Santa Maria caravel (22411-N), the pack brings a set of metal figurines (22411-F) and its specific paints set (277PACK8). As gifts, a bottle of white glue, sanding block, brush, tweezers and cutter. An unmissable opportunity!

Read the Second Part of the Post…

Posted in Model Building Tips

Messerschmitt BF109G Model Assembly (I): Build This Spectacular 1/16 Scale Model with Our Help

Artesania Latina’s modelers and designers know that any help is good for the construction of any scale model. That is why on this post we are going to show you through different videos how to carry out the assembly of the model Messerschmitt BF109G (20356) at 1/16 scale. A beauty, a jewel of the aircraft modeling made of metal and photo-etched for which we have edited 16 videos in which we show the precise way of its assembly. Join us on this flight! Fasten your seat belts!
Messerschmitt BF109G Model Assembly (20356).

So… Let’s go! On this Chapter 1 of our Assembly Diary, we explain the steps between 1 and 9 of the instructions: ‘Intermediate Fuselage Frames and Their Details’. Previously, the modeler must carefully extract the different parts of the plate and identify them for their correct positioning. What tools for modeling we recommend to get this goal?

Scissors / Thread Snips (27060).

Mini Diamond Files (27015-3).

Cyano Applicator (27302).

Thick Cyano (27650).

Stainless Steel Ruler (27069).

Needle Nose Pliers (27213).

Cutter N1 (27019).

Acrylic Paints Set for Messerschmitt BF109G (277PACK5).

MESSERSCHMITT BF190G MODEL ASSEMBLY: TAIL AND FUSELAGE

Later, on Chapter 2 of the Assembly Diary for the Messerschmitt BF109G model assembly -steps from 10 to 34-, we talk about how to build ‘The Tail and The Fuselage’ of the German fighter (First Part).

Messerschmitt BF109G Model Assembly (20356).

For this phase, the tools that the modeler needs are the same as the previous ones, but these three must be added:

Straight Cutting Pliers (27212).

Straight Tweezers Ultra Fine Tip (27204).

Angle Conveyor and Squares (27325).

We continue on Chapter 3 of the Assembly Diary for the Messerschmitt BF109G model assembly -steps from 35 to 57- with the Second Part explaining how to build ‘The Tail and Fuselage’ of this faithful miniature replica of the aircraft of World War II. For this moment, the modeling tools that are required are the previous ones, in addition to this one:

Sandpapers 400 Grit (27636).

To finish this area, the ‘Landing Gear and Tail’ is the title and the subject shown on Chapter 4 for the assembly of the scale model Messerschmitt BF109G -steps from 58 to 79-. The modeler is not forced to incorporate any new tool here, she/he can continue using the ones already mentioned.

BF109G PRECISION COCKPIT ASSEMBLY

One of the beauties of the 1/16 scale model of the German aircraft called Messerschmitt BF109G is its extremely detailed ‘Cockpit’. The Chapter 5 of Artesania Latina’s Official Assembly Diary -steps from 80 to 101 of the instructions on DVD format- deals with how to build that area of ​​the plane First Part. Our modeling friends don’t have to add any new modeling tools now either.

Messerschmitt BF109G Model Assembly (20356).

Next, Chapter 6 reflects the Second Part of the ‘Cockpit’ construction. Specifically, we reveal how to carry out steps 102 to 125 of the assembly guide that contains this fabulous modeling kit made of the highest quality metal and photo-etched parts.

And, finally, the Third Part of the video that speaks about the ‘Cockpit’ is the Chapter 7 for an optimal construction of the Messerschmitt BF109G scale model. Here are the steps between 126 and 147. At this stage, we will also need…

Masking Tape (27633).

Messerschmitt BF109G Model Assembly (20356).

MESSERSCHMITT BF109G MODEL ASSEMBLY: LEFT WING

We move on to the correct assembly of the ‘Left Wing’ Part One on Chapter 8. Steps 148-173 of this detailed audiovisual guide for the construction of the model Messerschmitt BF109G.

Here, Part Two about the assembly of ‘Left Wing’, Chapter 9, steps 174-197.

Next week we will return to each step that is still missing for the construction of this model. Meanwhile, there is much more information interesting about the BF109G by clicking here.